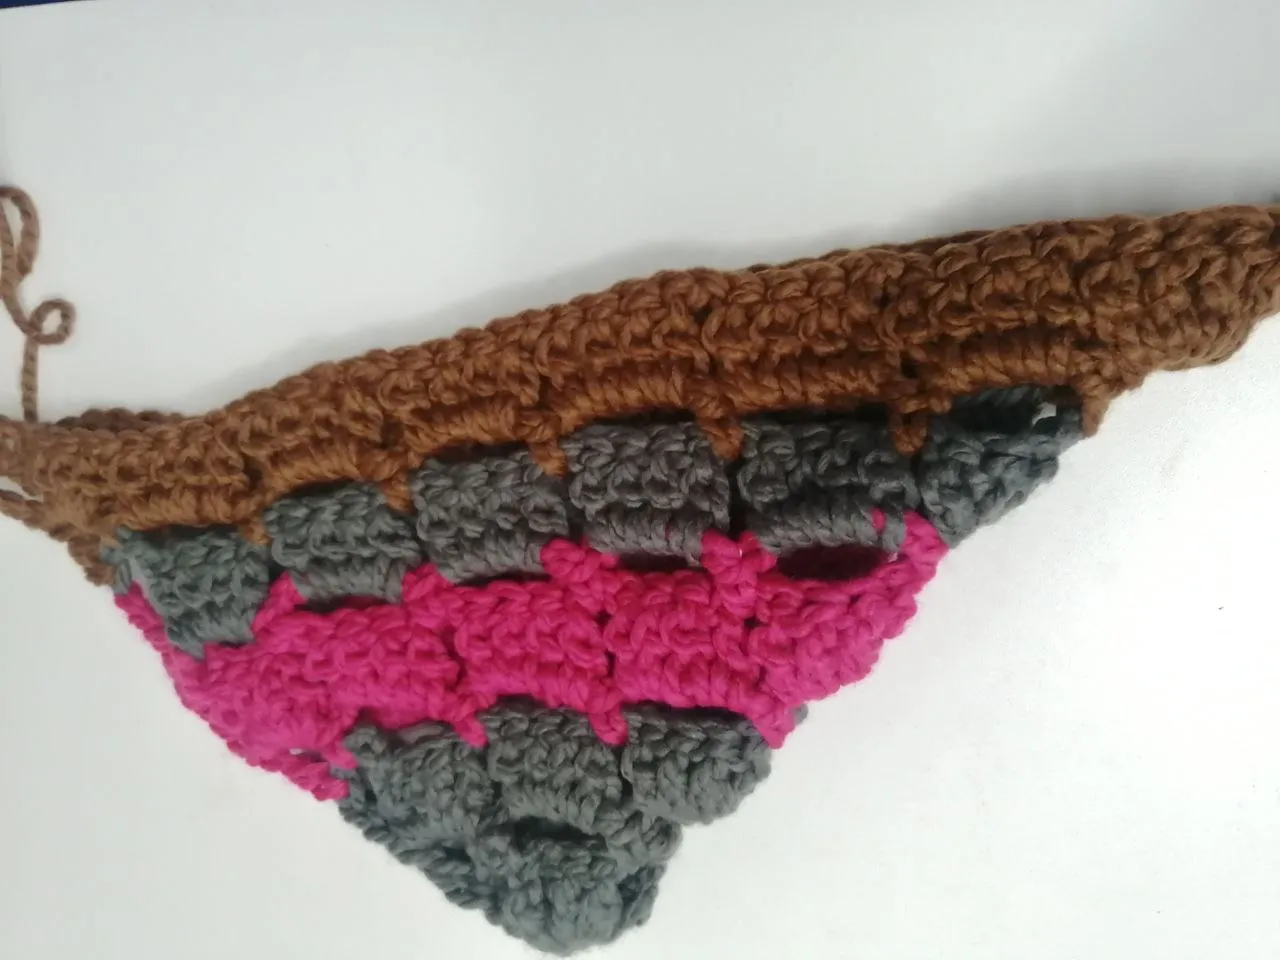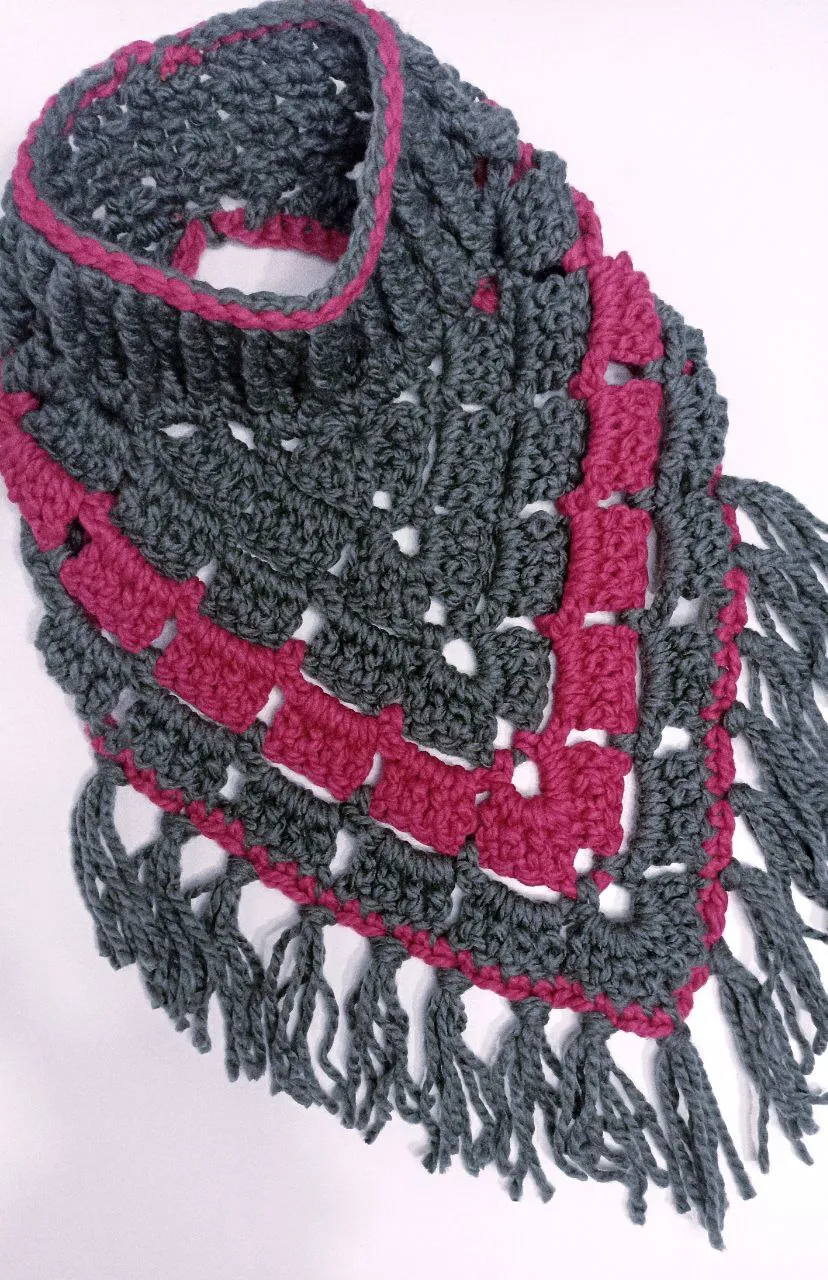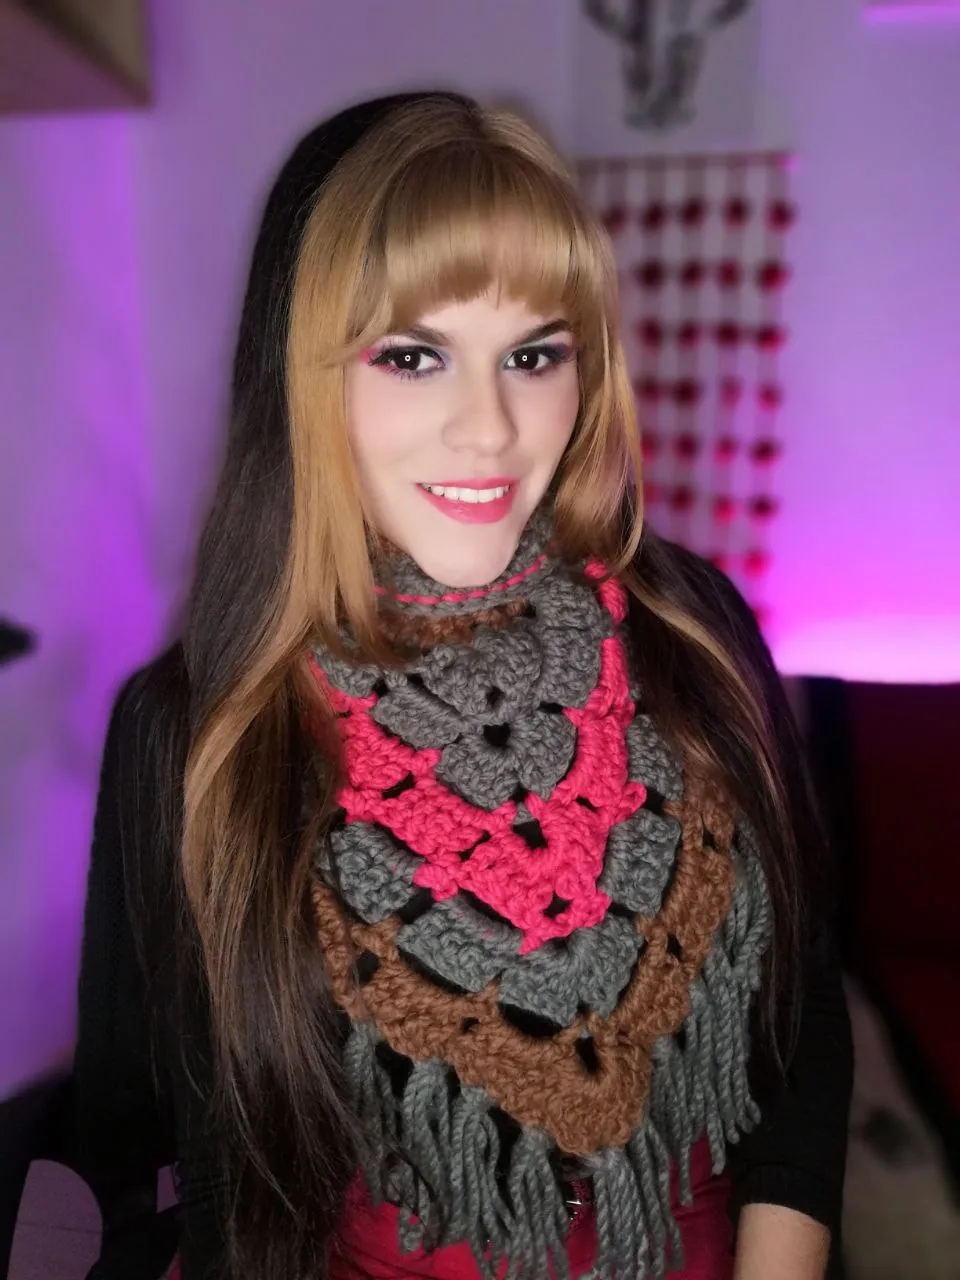
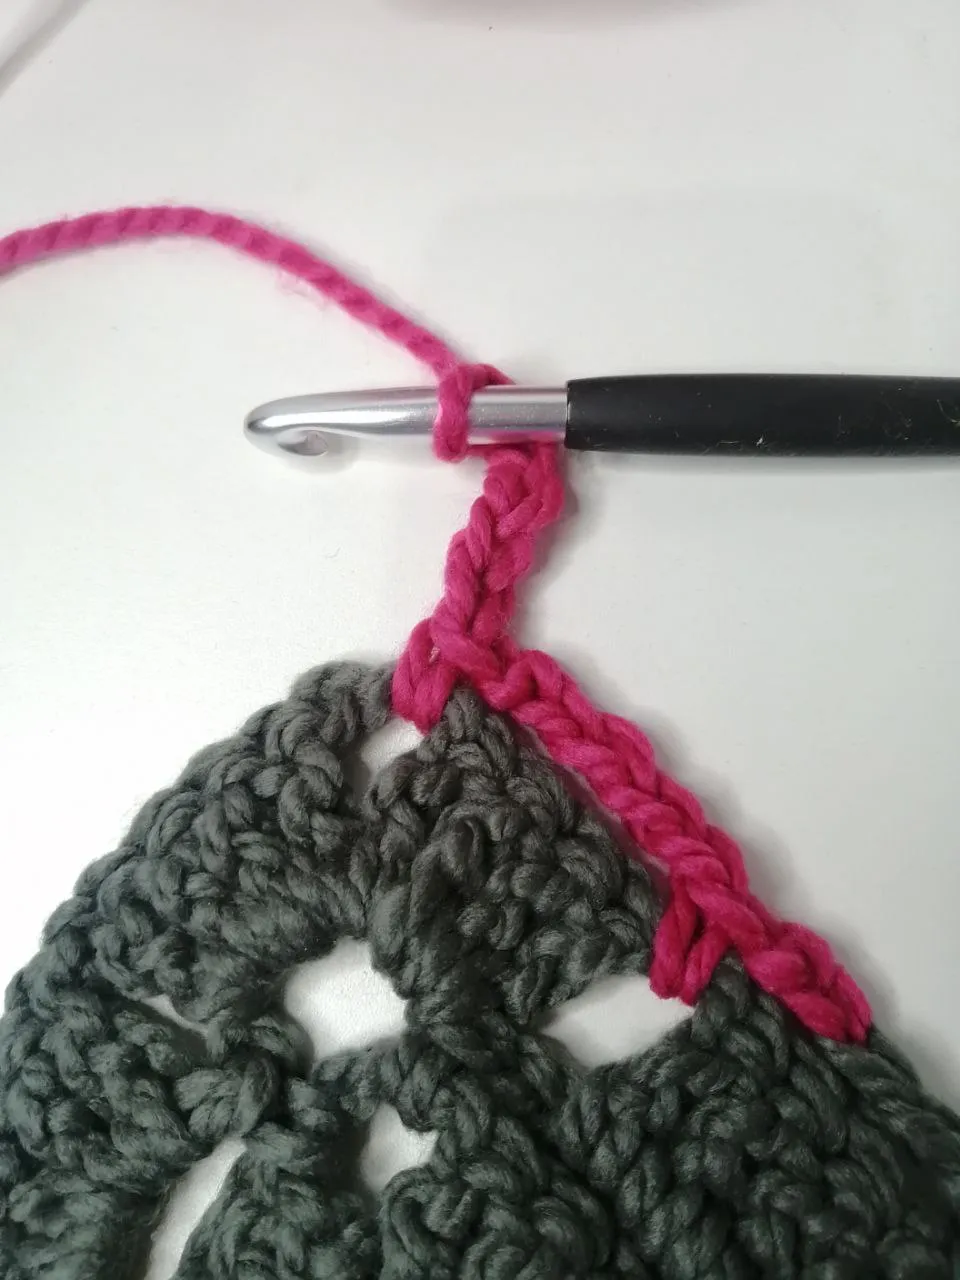
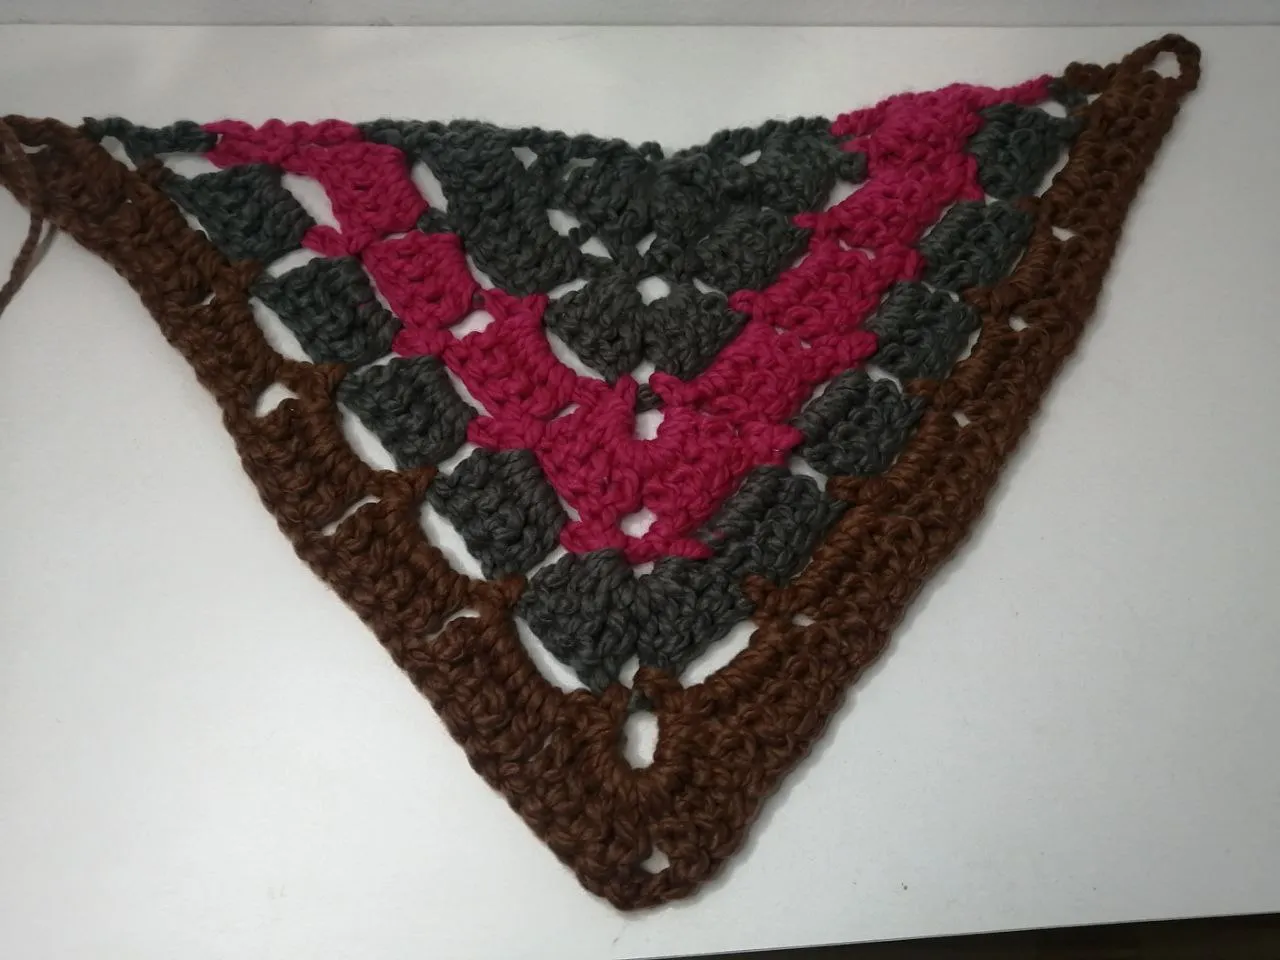
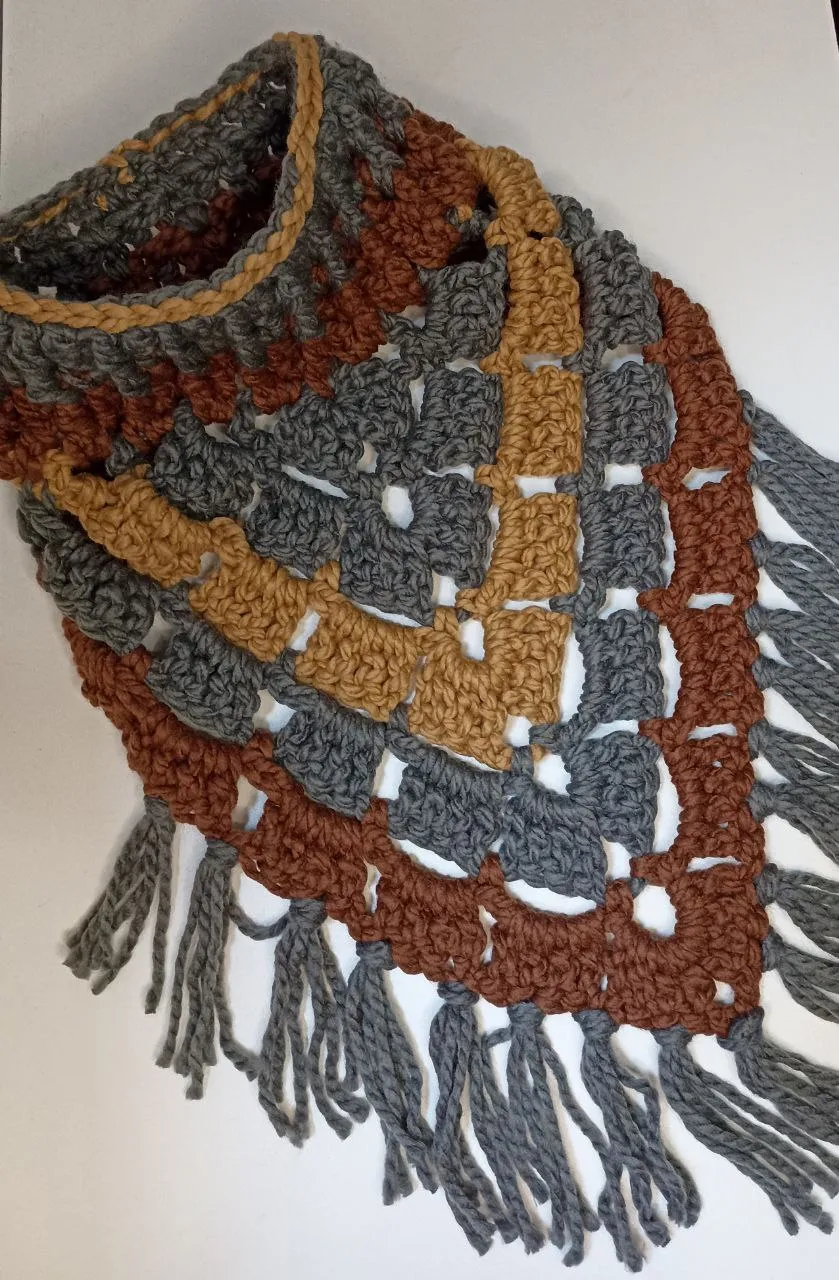
Hola a todos soy Barbie, espero se encuentren muy muy bien, este mes uno de los proyectos que he realizado en mi emprendimiento de tejidos a sido esta hermoso cuello-bufanda triangular, ha gustado mucho, se puede combinar en distintas tonalidades, es muy fácil de elaborar y además lleva poco material, dependiendo de la cantidad de colores que desees agregar, espero disfruten mucho haciéndola así como lo disfrute yo, ya que obviamente tengo una que utilizo mucho aprovechando que aquí estamos en invierno, te hará sentir muy a la moda y abrigada, sin más que agregar vamos con los materiales y el paso a paso.
Materiales:
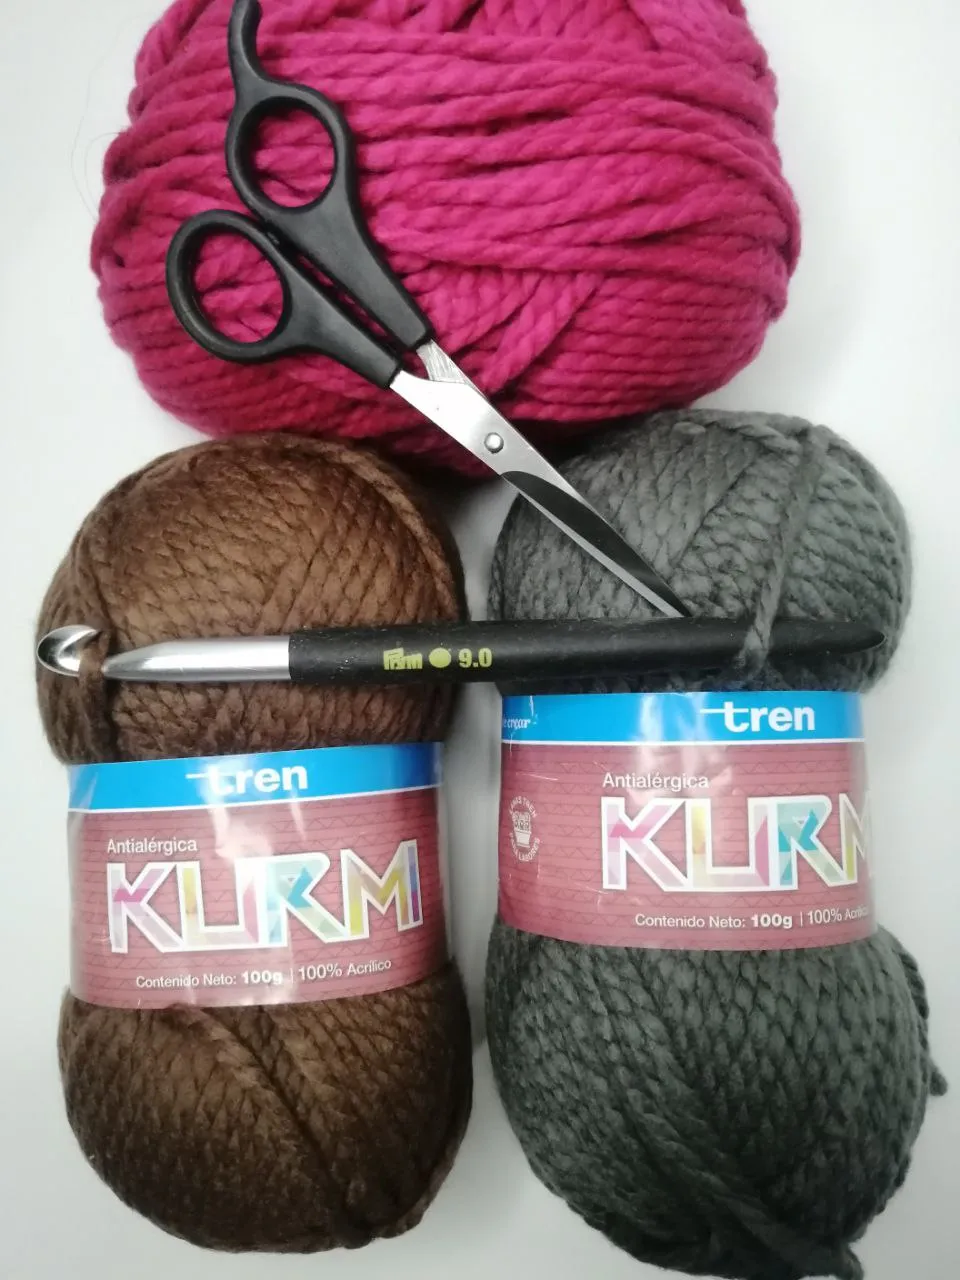
- Lana del grosor que tu desees en mi caso utilice la marca TREN lana KURMI ovillo de 100 gramos 100% acrílico.
- ganchillo número 9.
- Tijera.
- Mucho amor.
ELABORACIÓN.
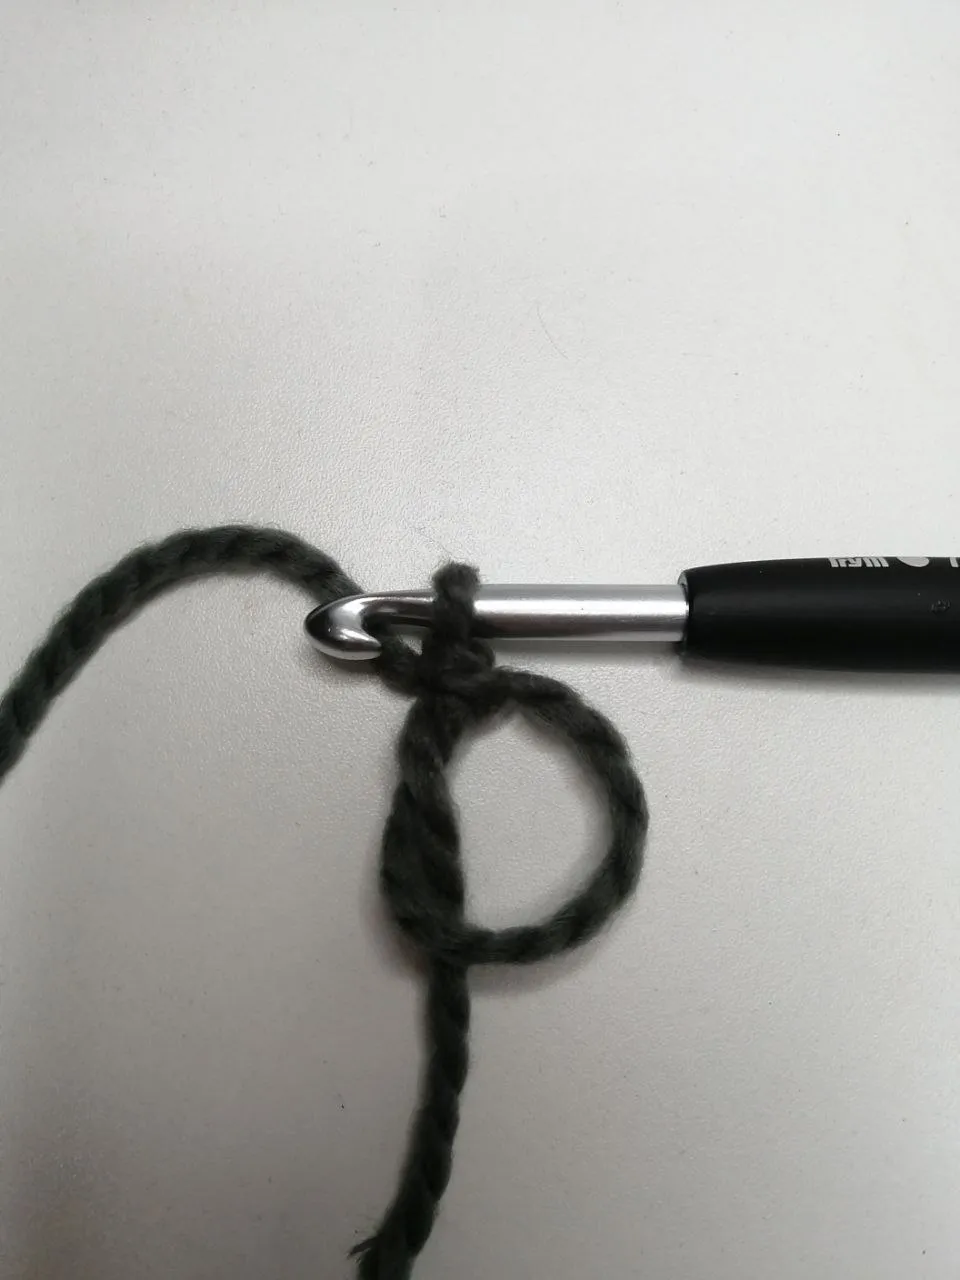
PASO #1: Tomar la lana con la que deseas iniciar, en este caso yo utilicé aproximadamente unos 50 gramos de cada color, inicio con la lana gris realizando un anillo mágico.
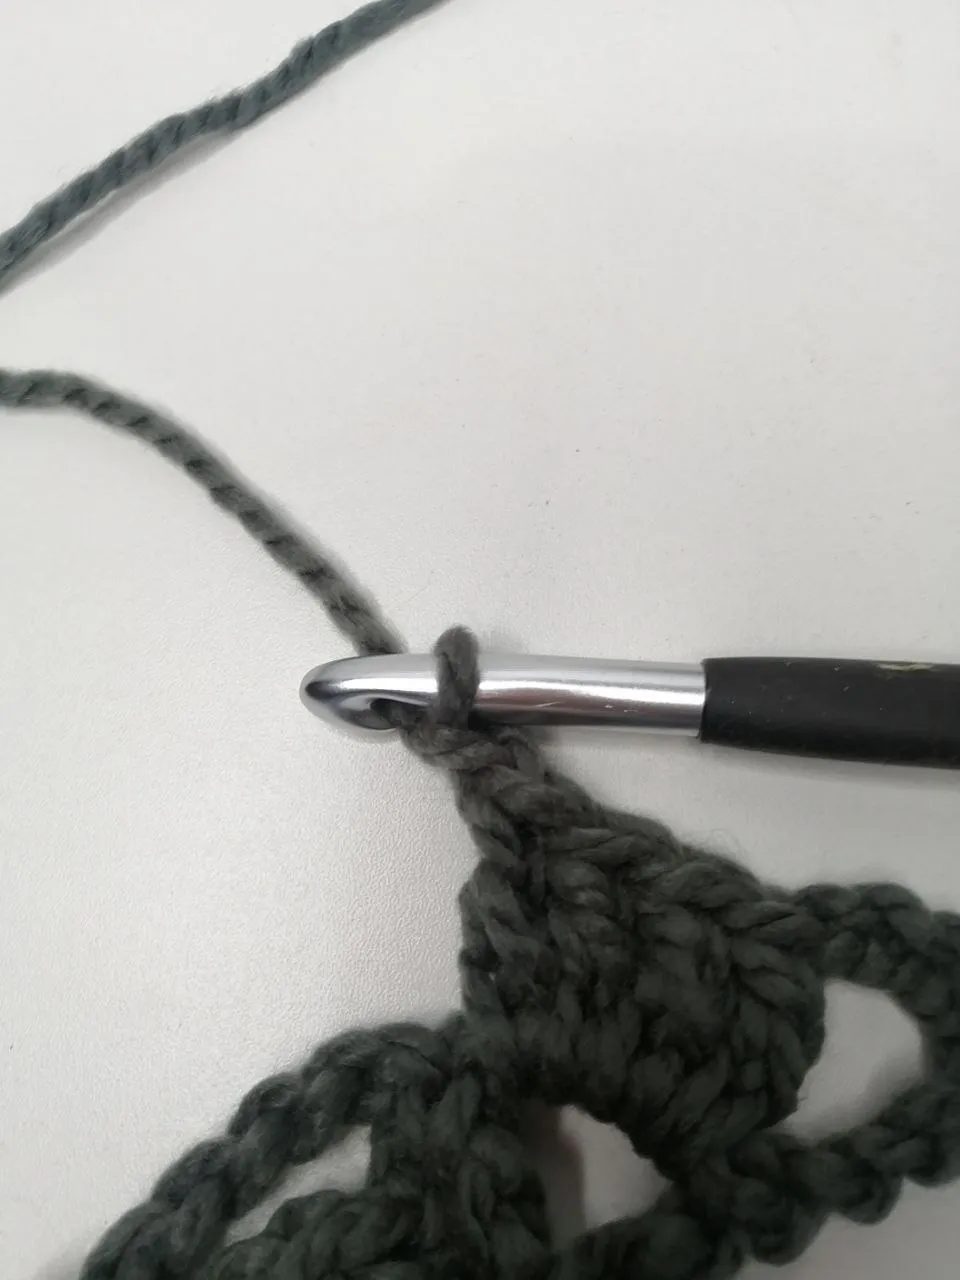
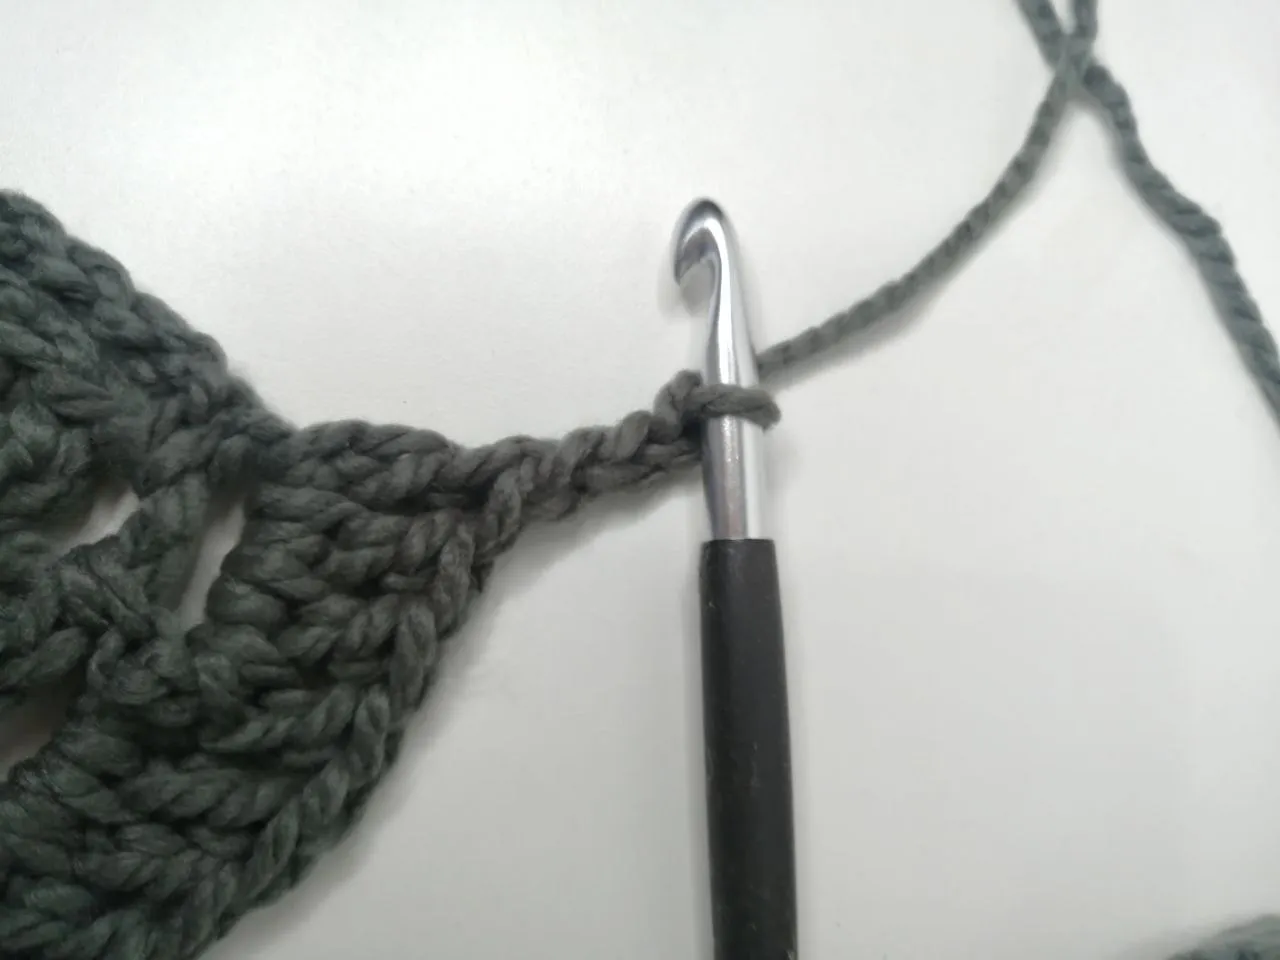
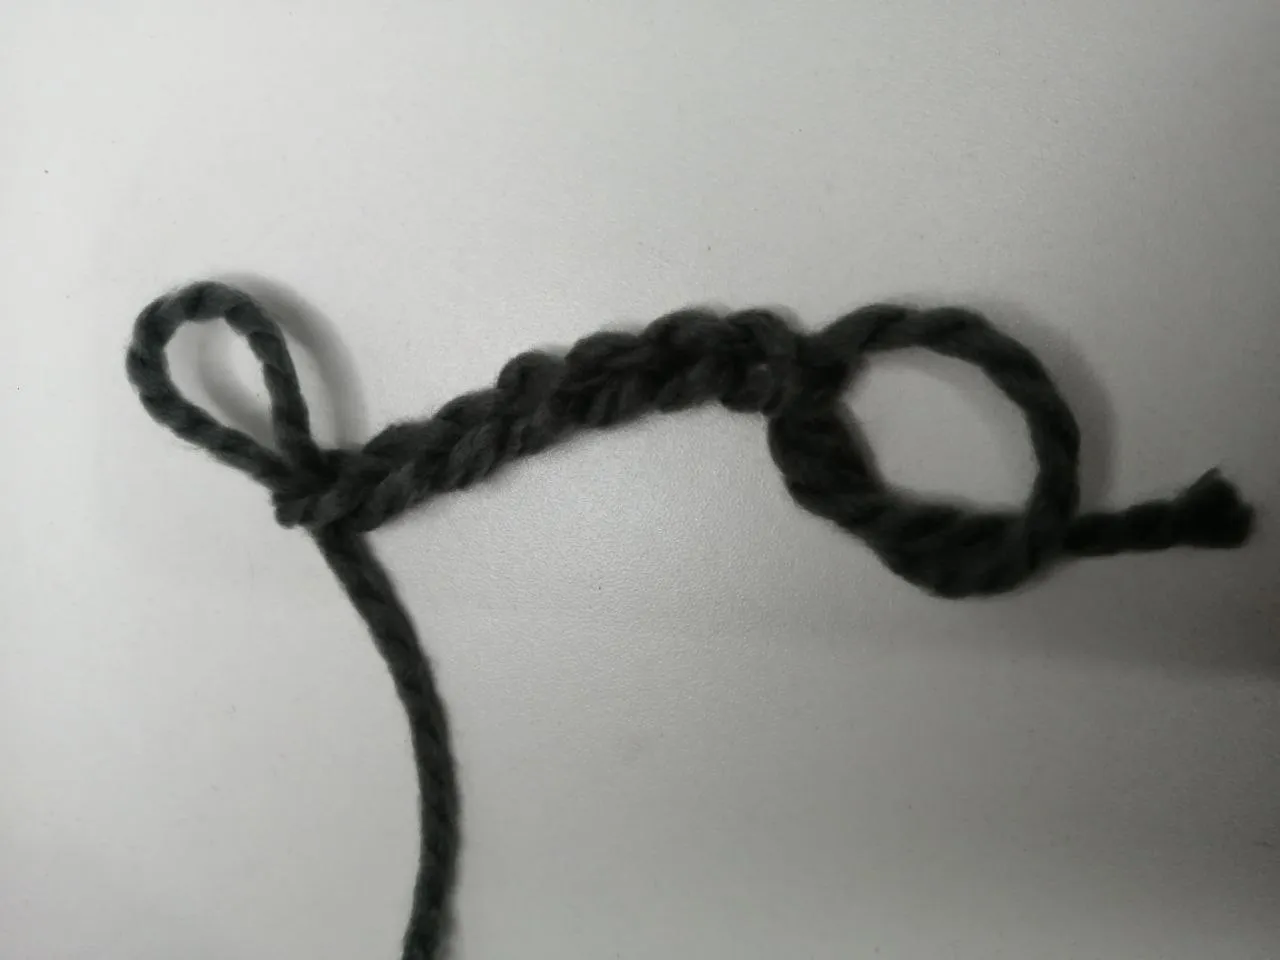
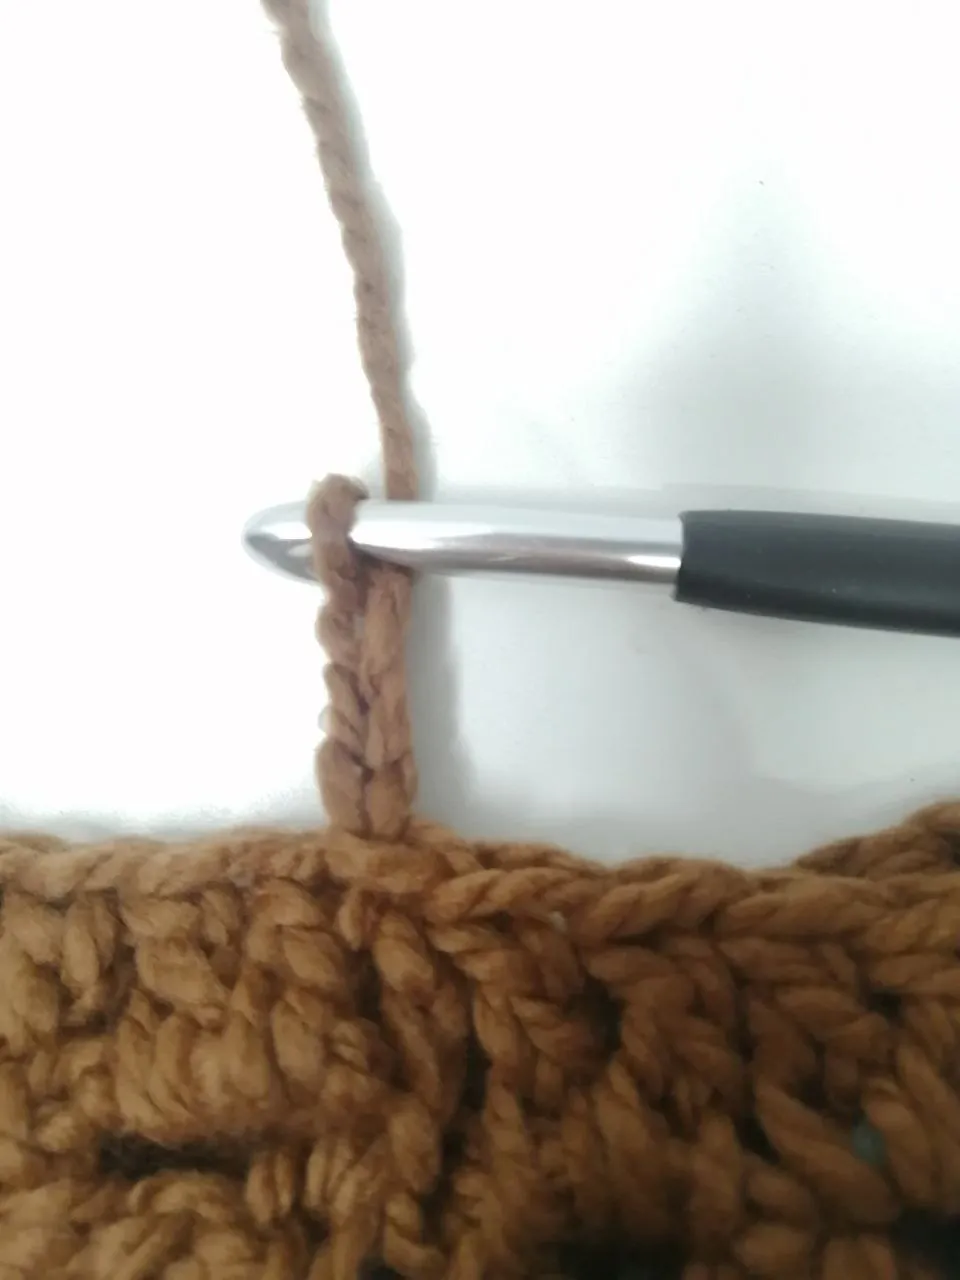
PASO #2: Luego de tener el anillo mágico procedo a subir realizando (7) siete cadenas.
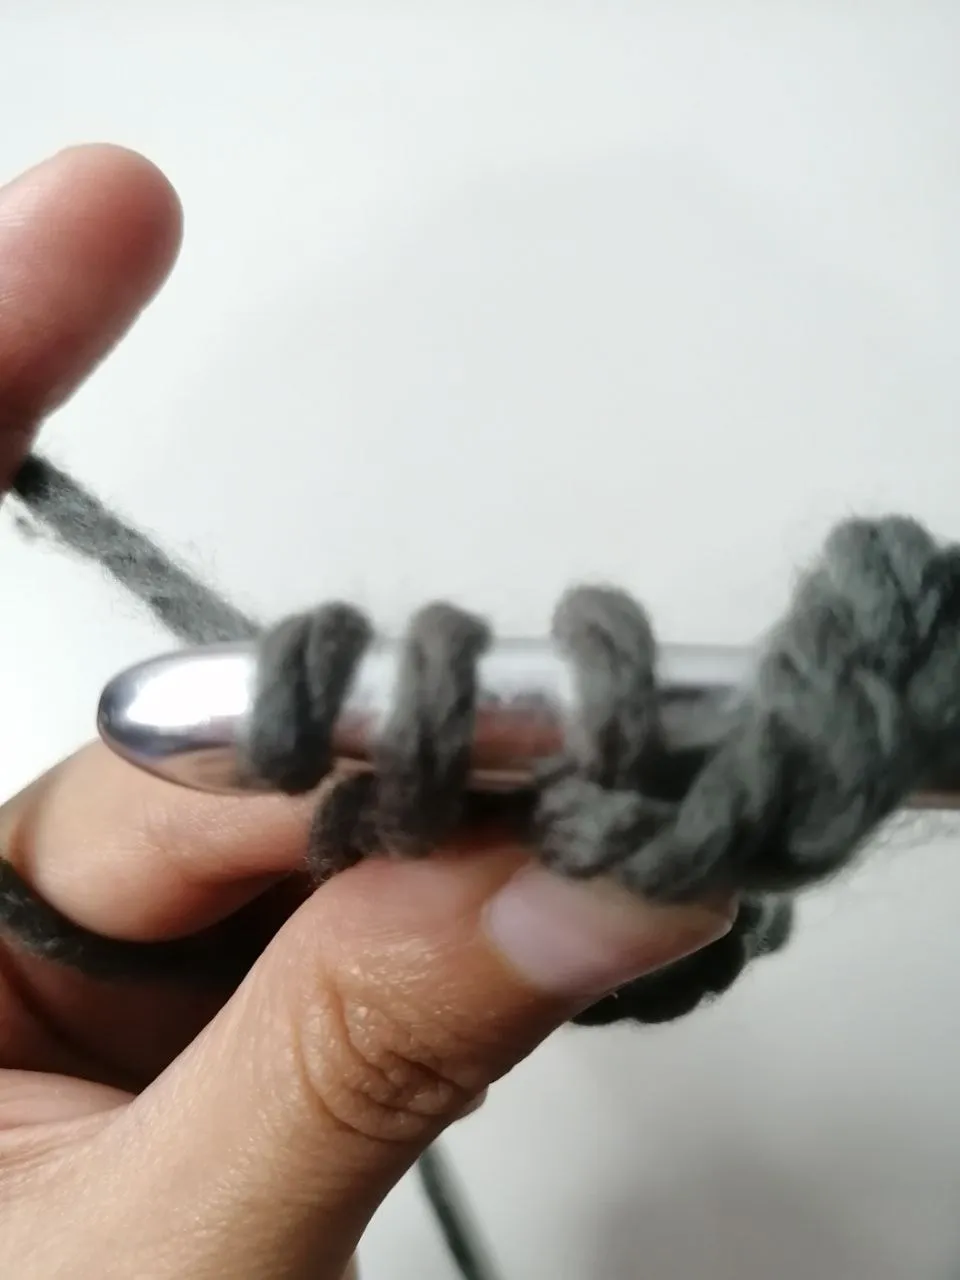
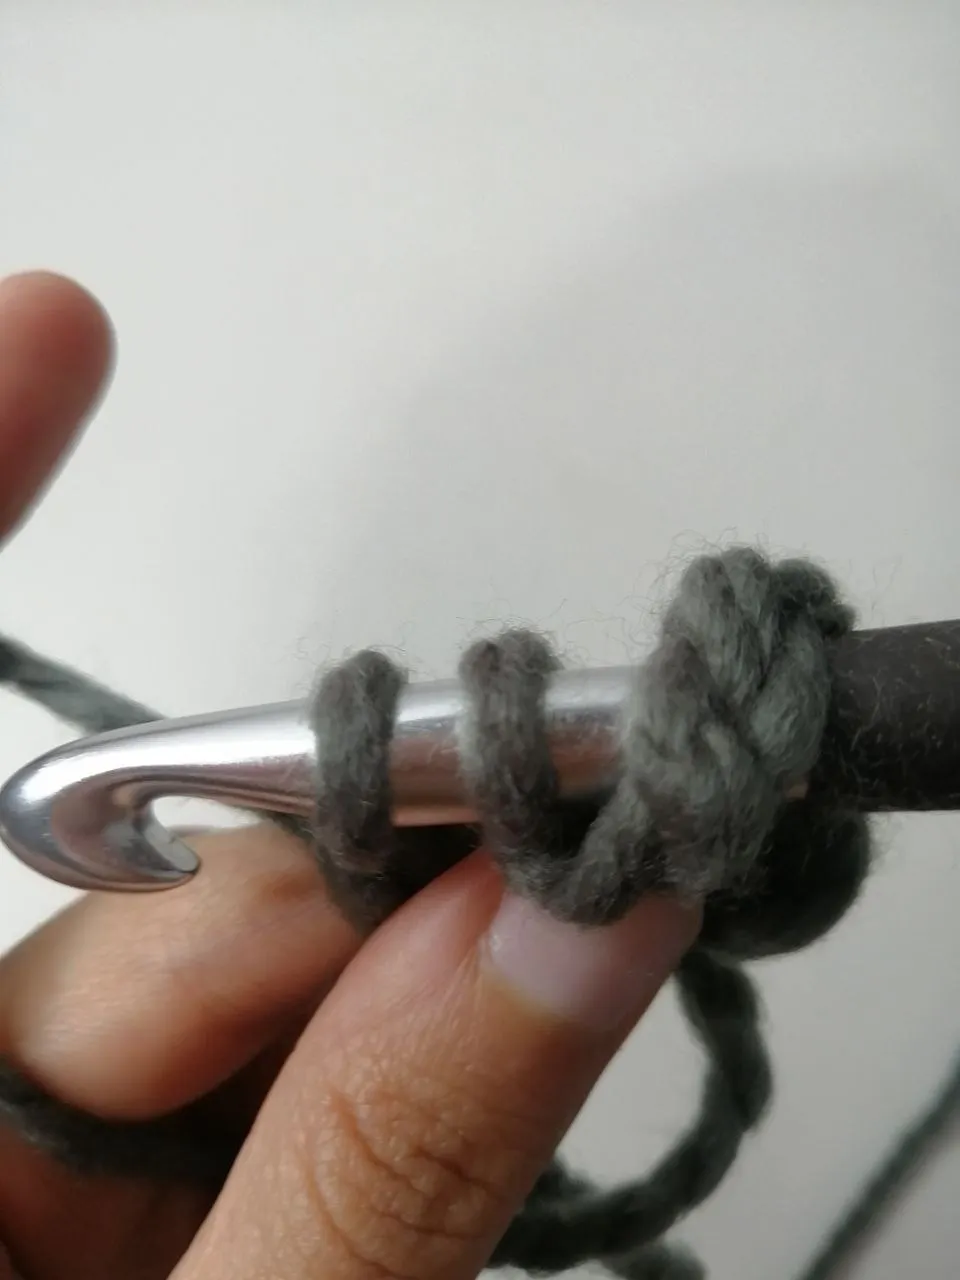
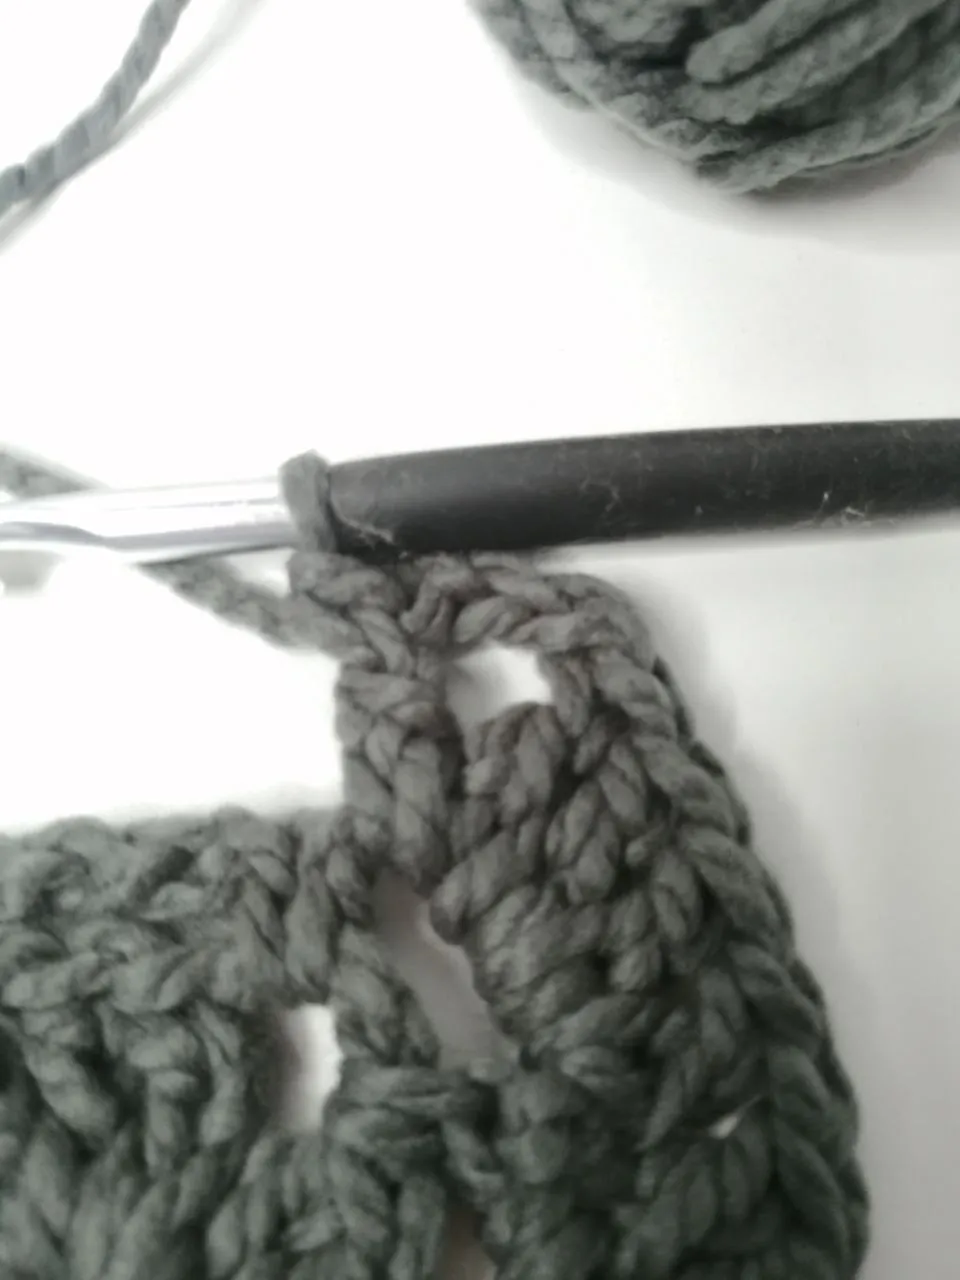
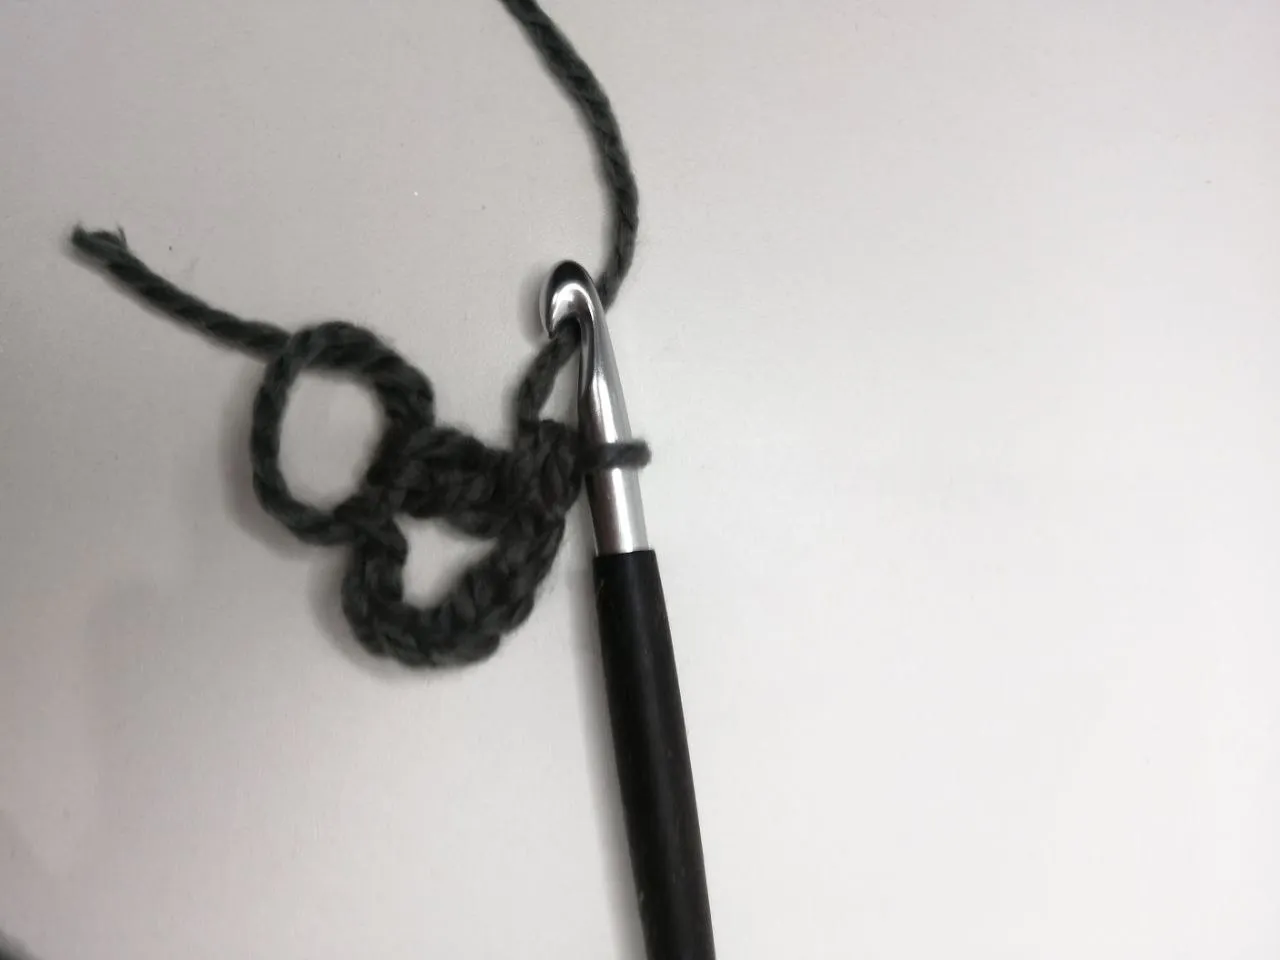
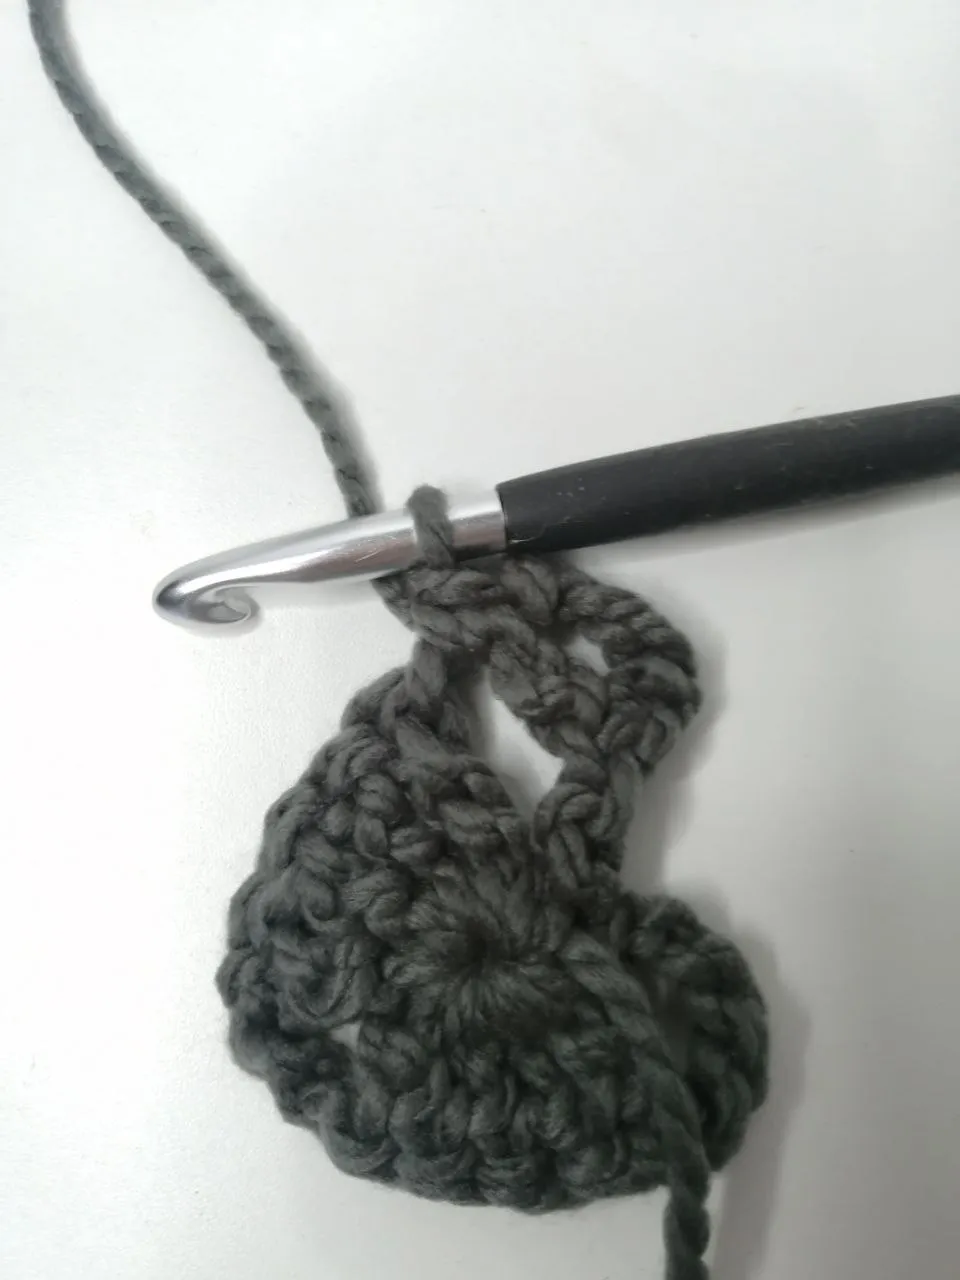
PASO #3: La punta del estambre o lana que queda en ese anillo de abajo lo podemos halar un poco para que cierre ligeramente ya que ahora vamos a trabajar dentro de ese círculo, vamos a comenzar a tejer puntos altos extendidos dentro del círculo antes mencionado, para realizar ese punto tomamos estambre y vamos a pasar a través del anillo mágico, tomamos lazada y traemos nuevamente hasta que nos queden tres lazadas en nuestro ganchillo, vamos a sacar en tres tiempos, tomas nuevamente lazada y vas a pasar por el primer anillo que quedo en tu gancho, luego vuelves a tomar lazada pasas por dos de los hilos, en el tercer tiempo tomas lazada nuevamente y pasas por los dos anillos restantes, ya tenemos un punto alto extendido, en total vamos a elaborar 4 puntos altos extendidos dentro de este anillo mágico
 |  |
|---|
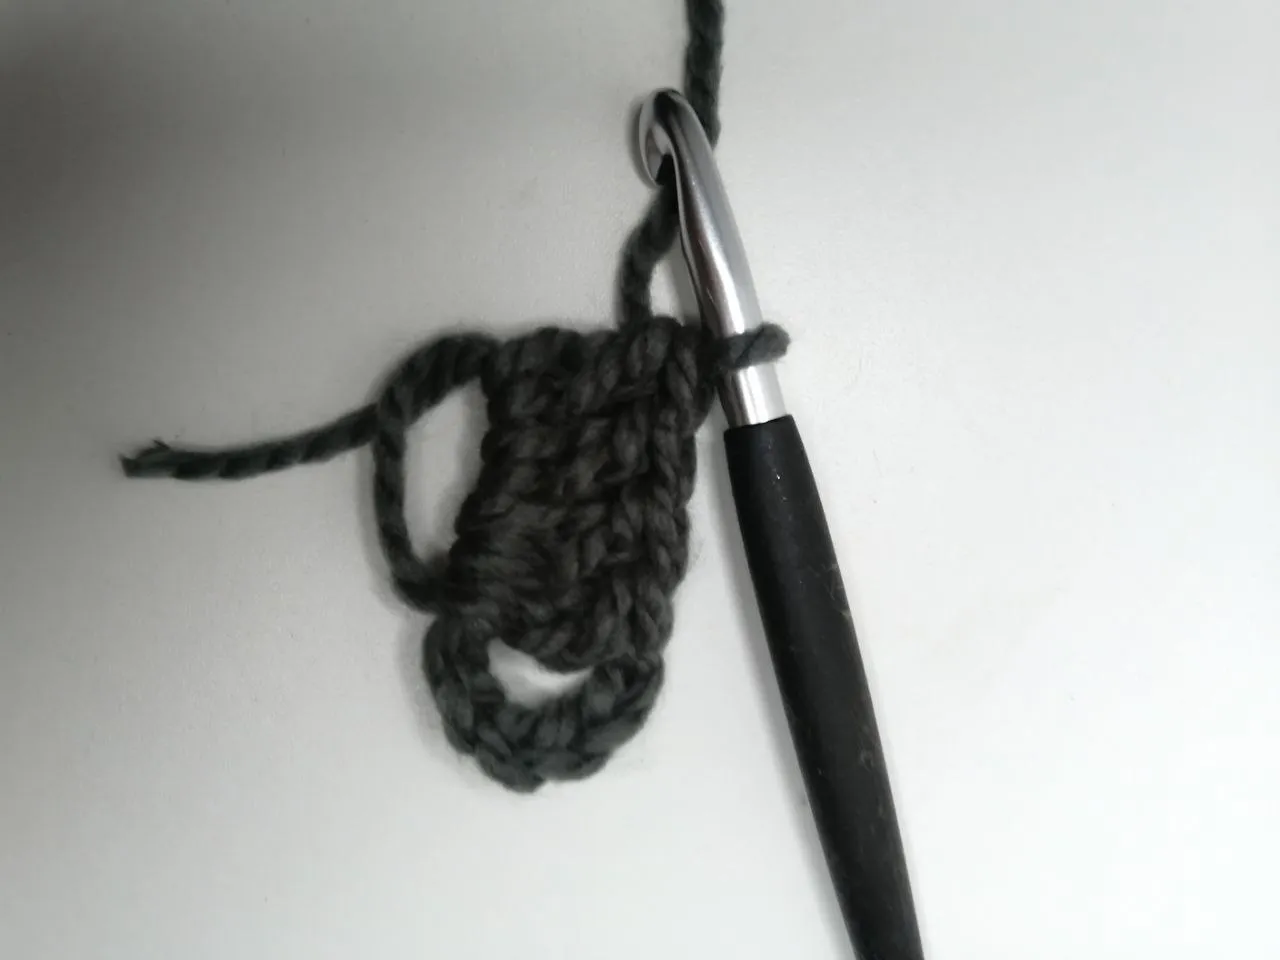
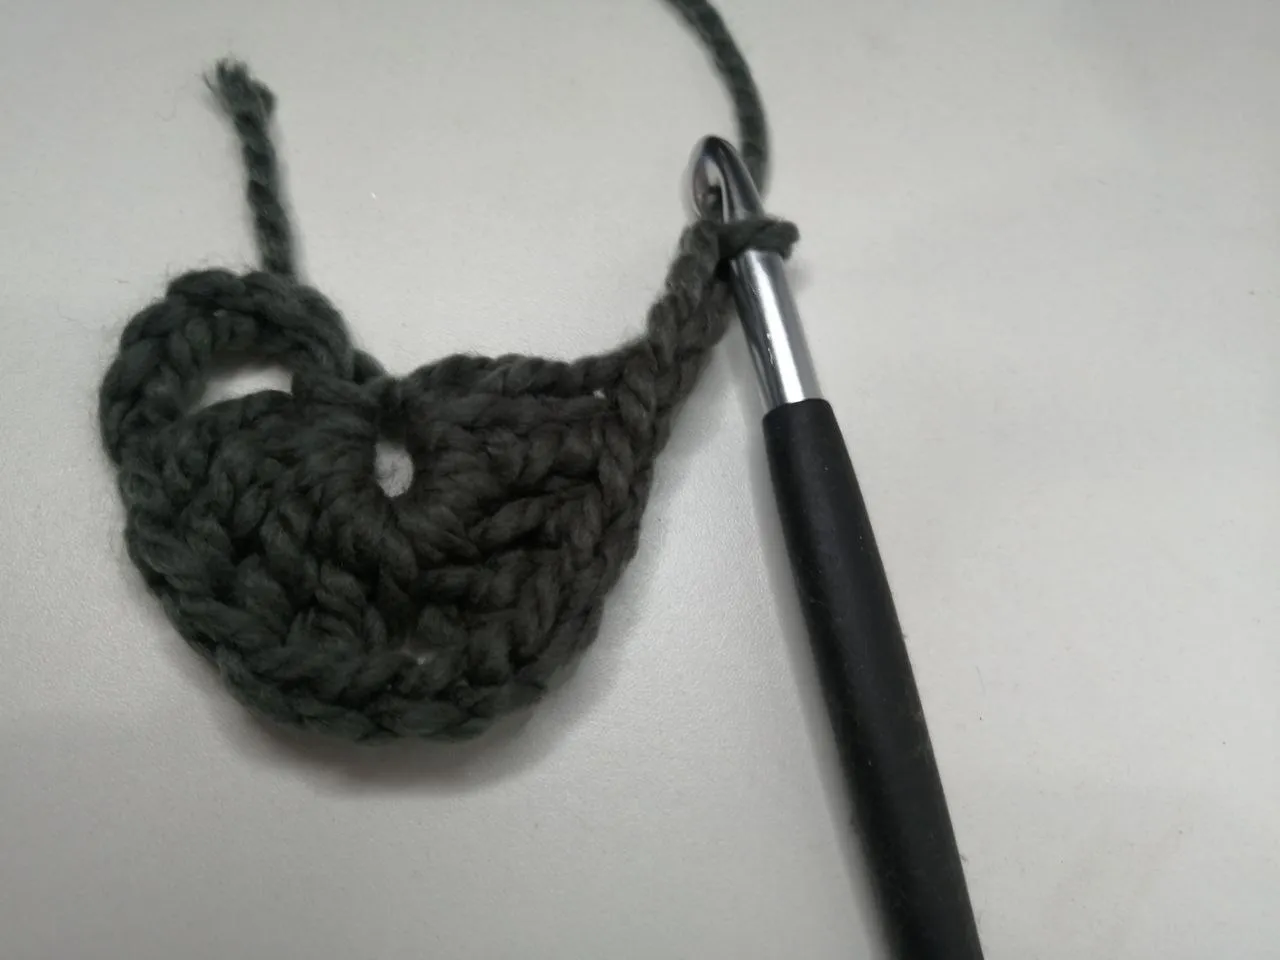
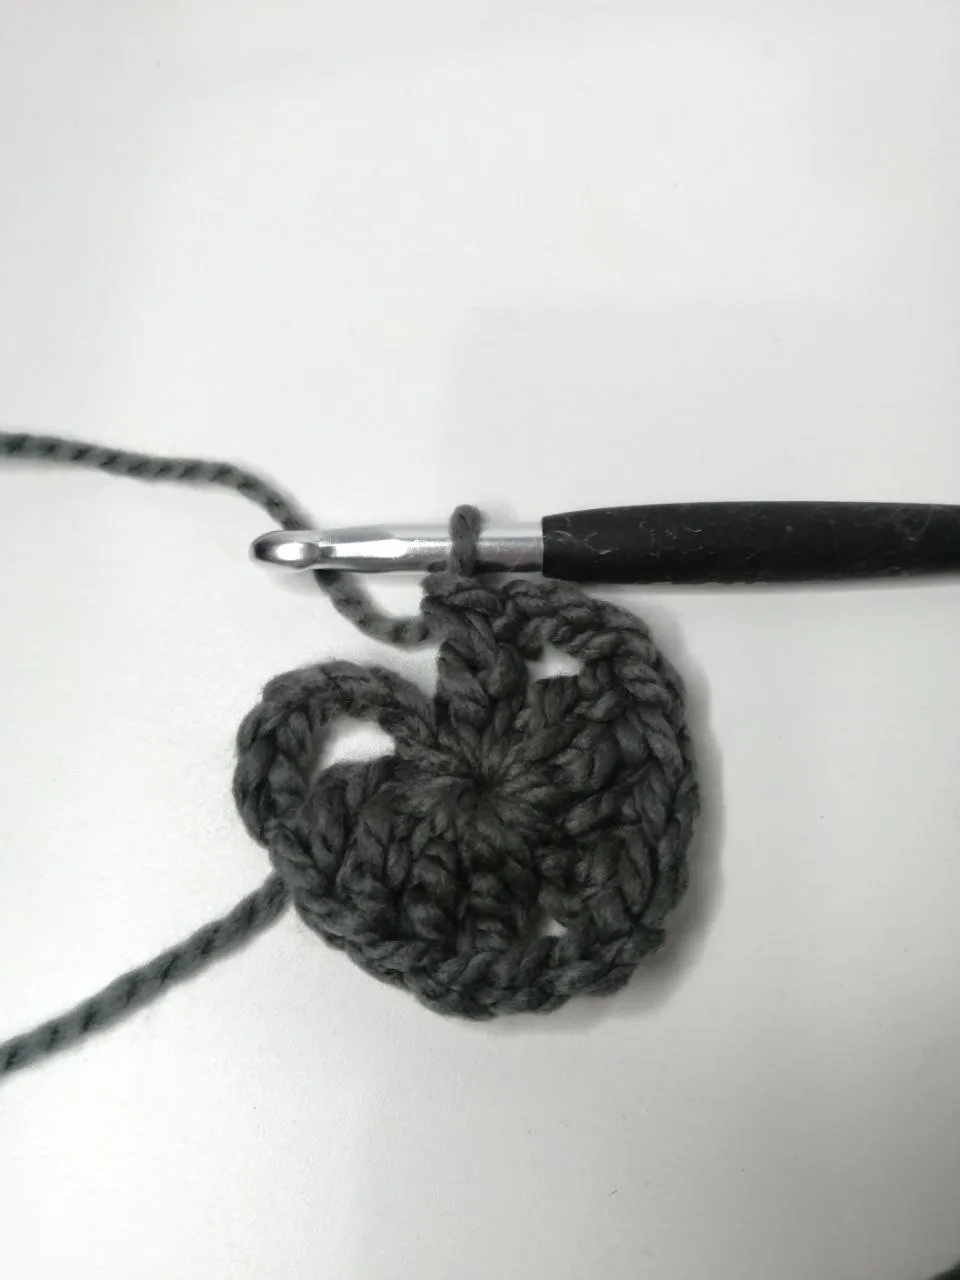
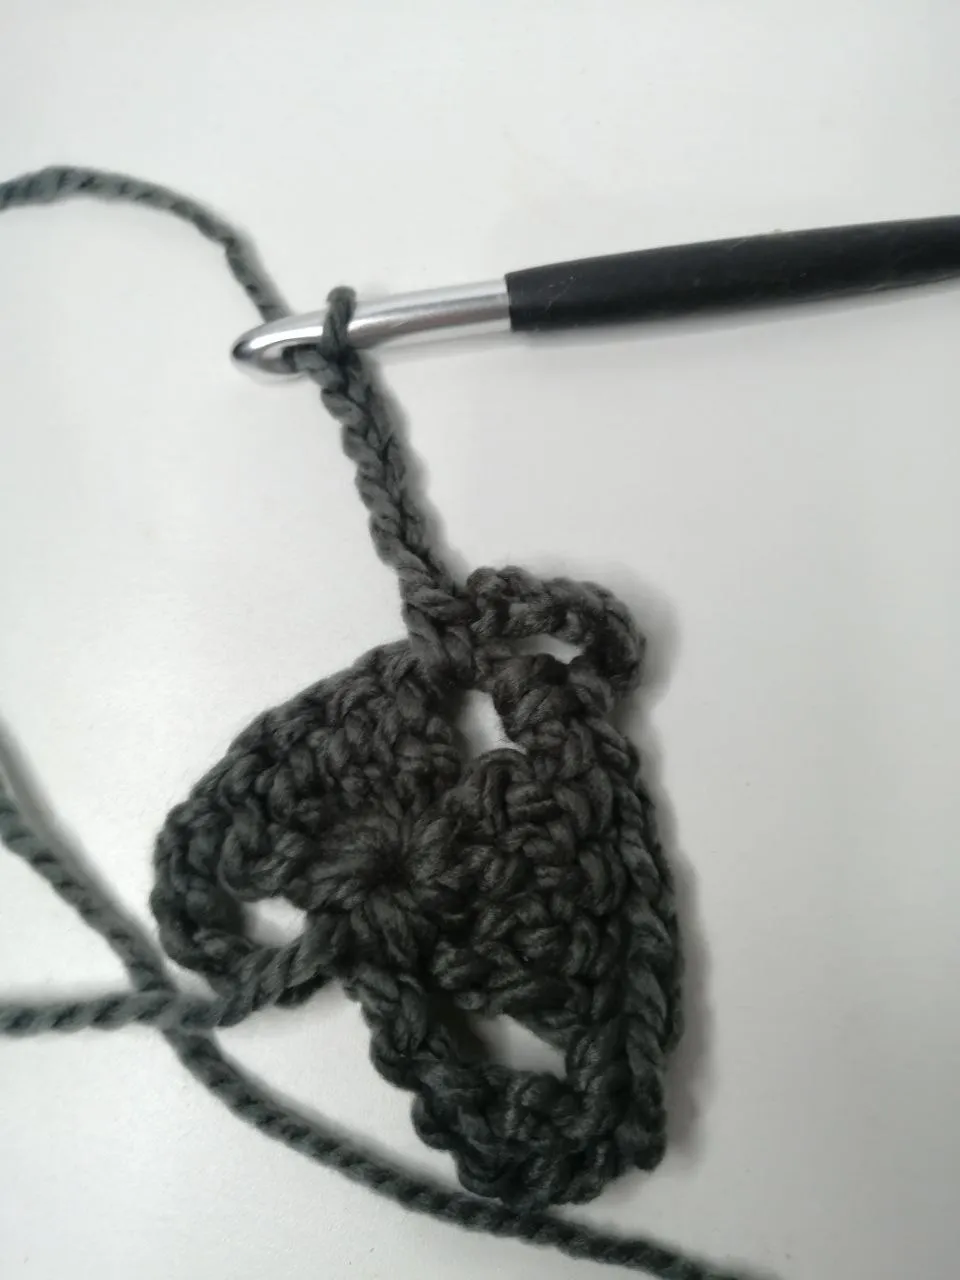
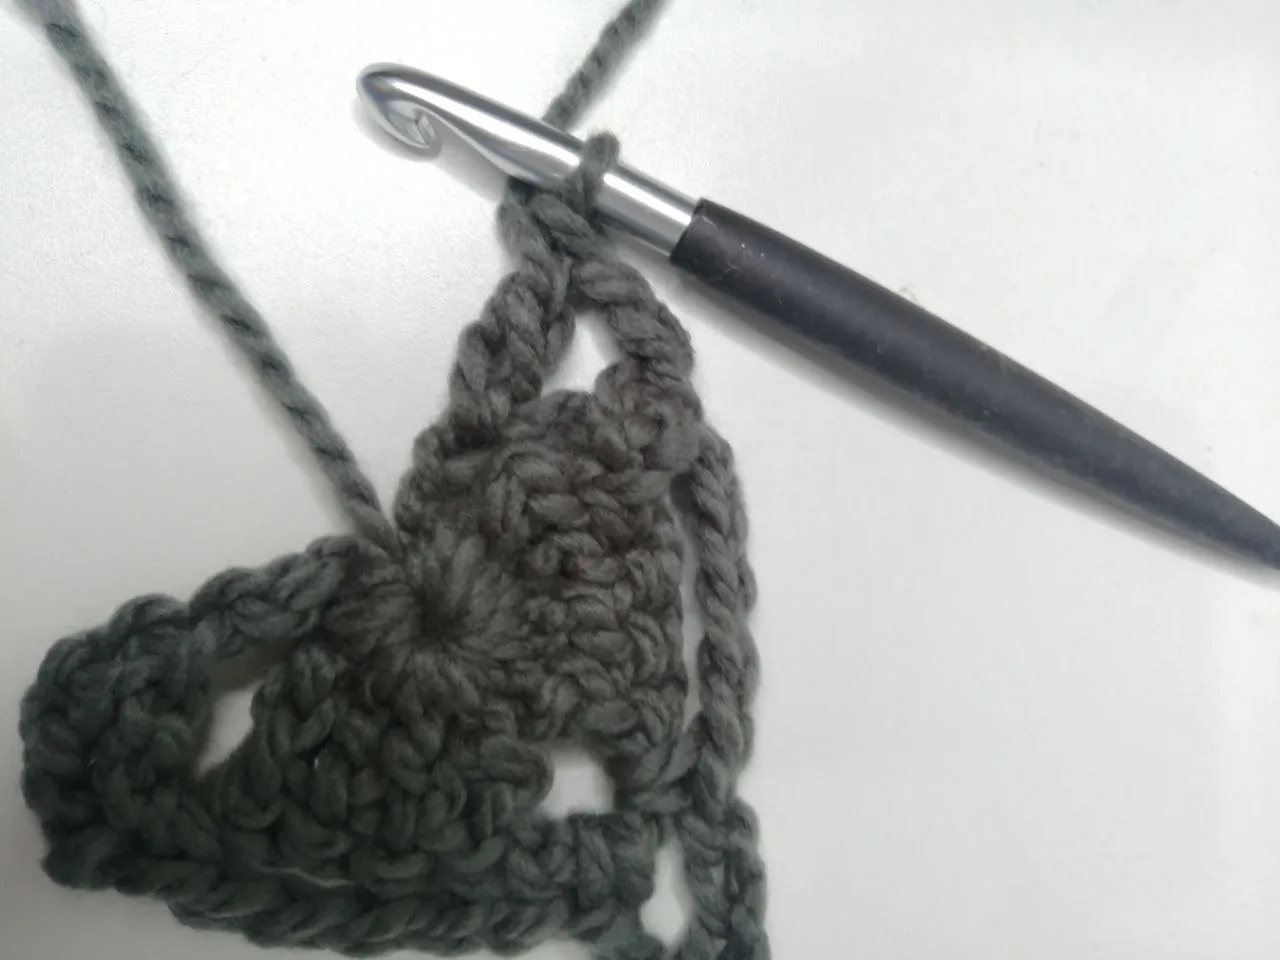
PASO #4: Al finalizar los cuatro puntos altos extendidos vamos a
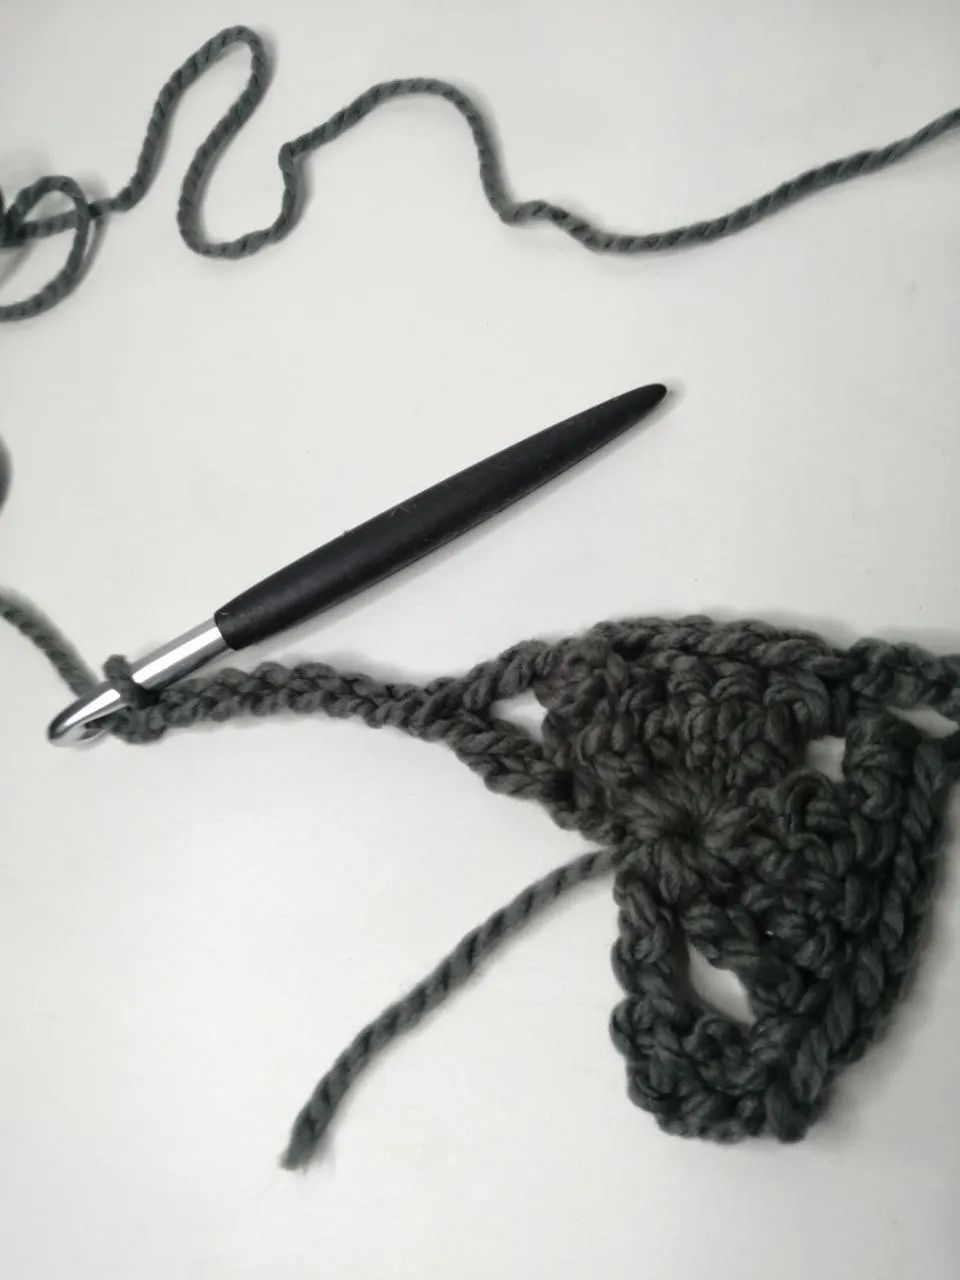
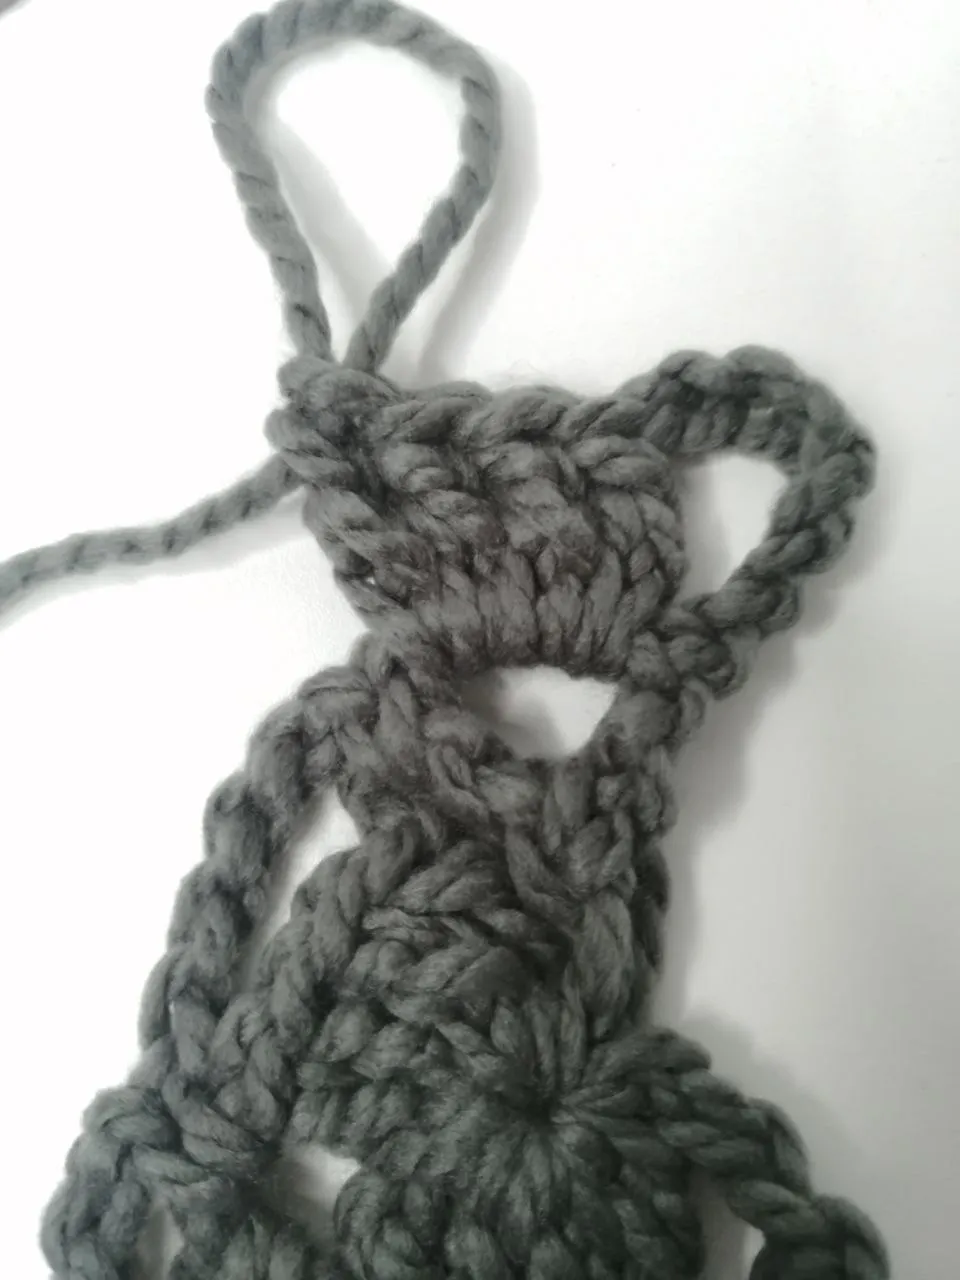
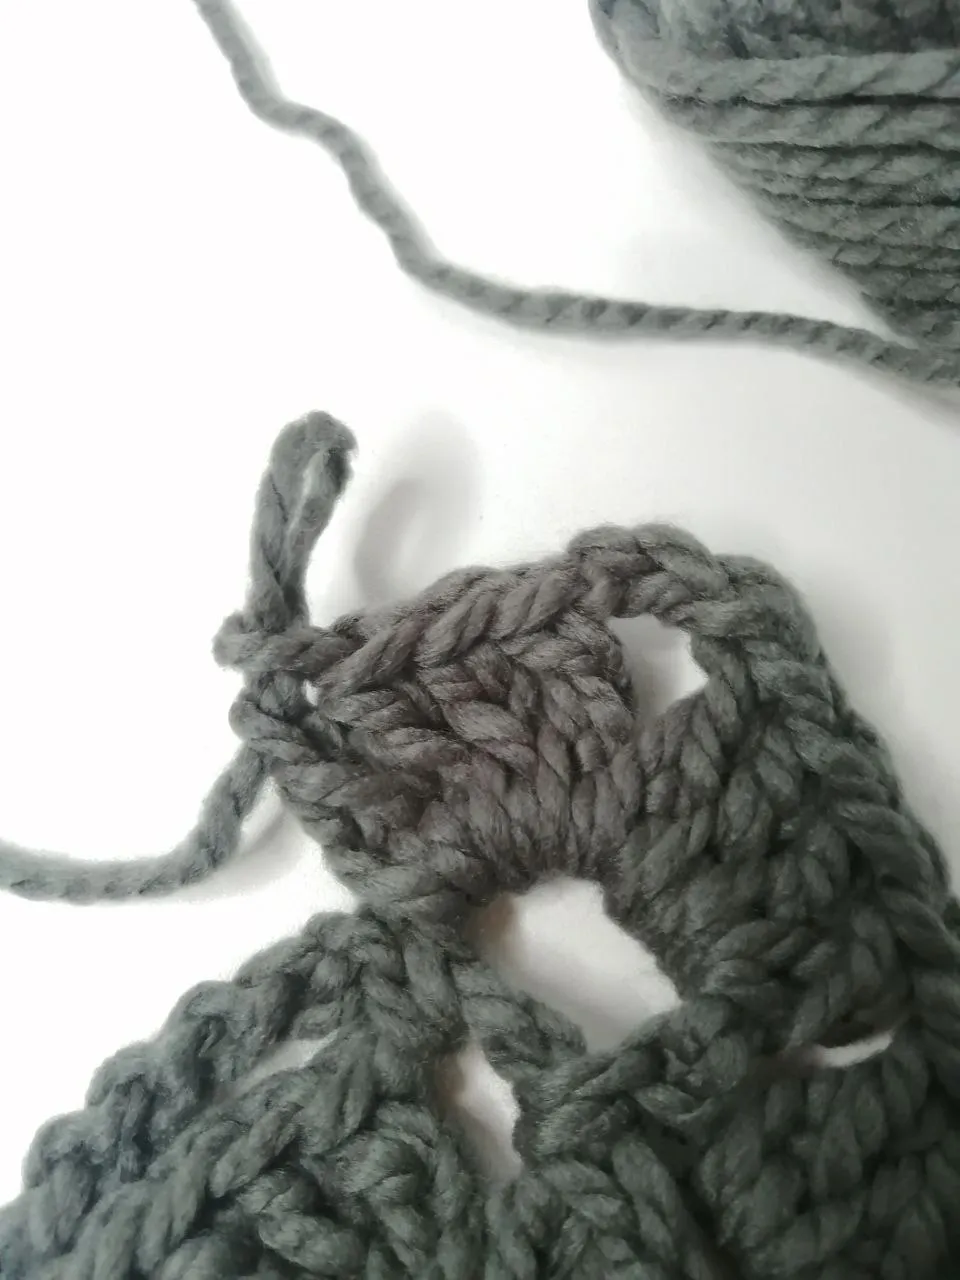
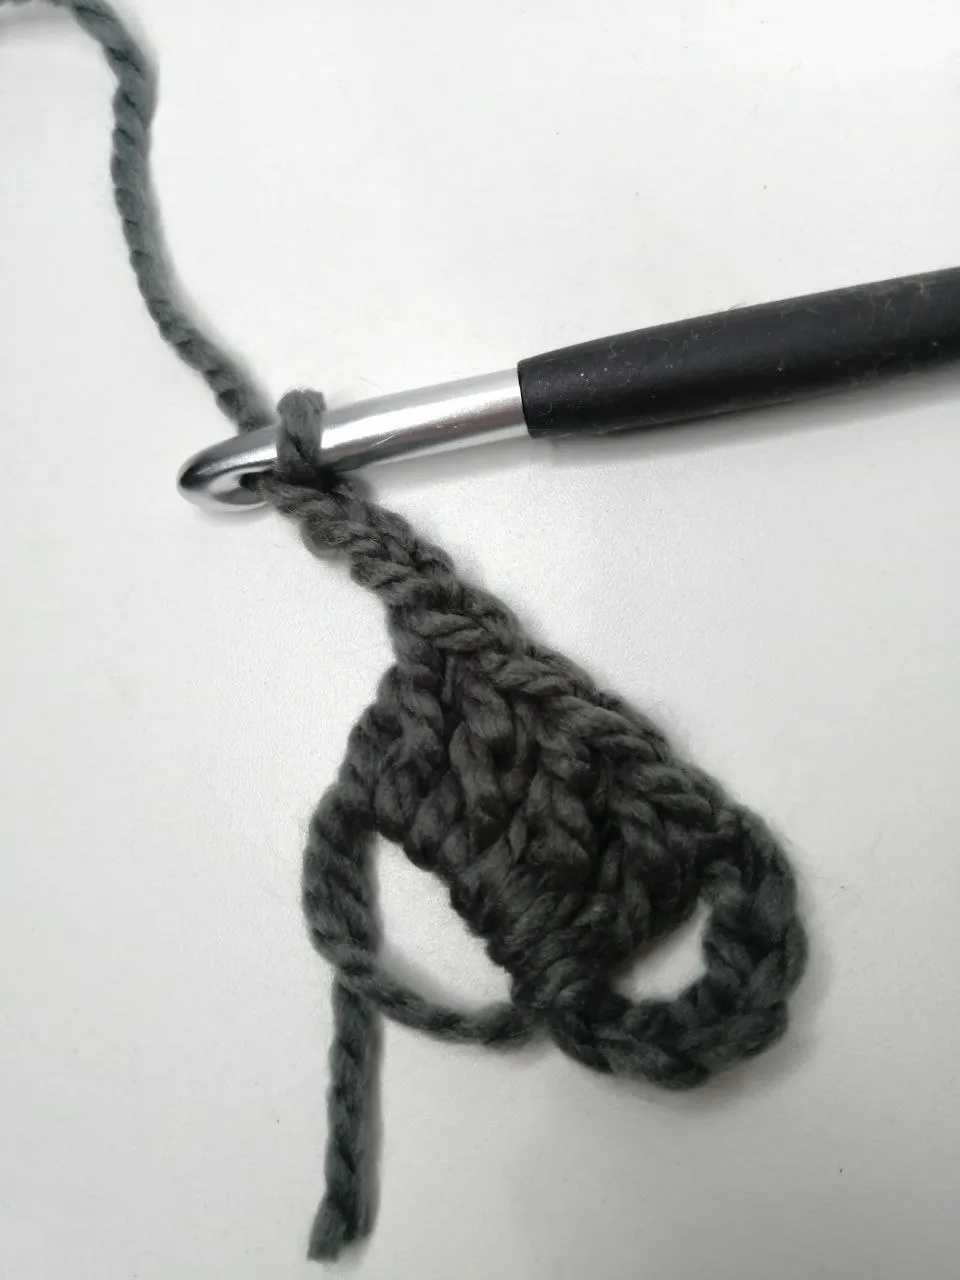
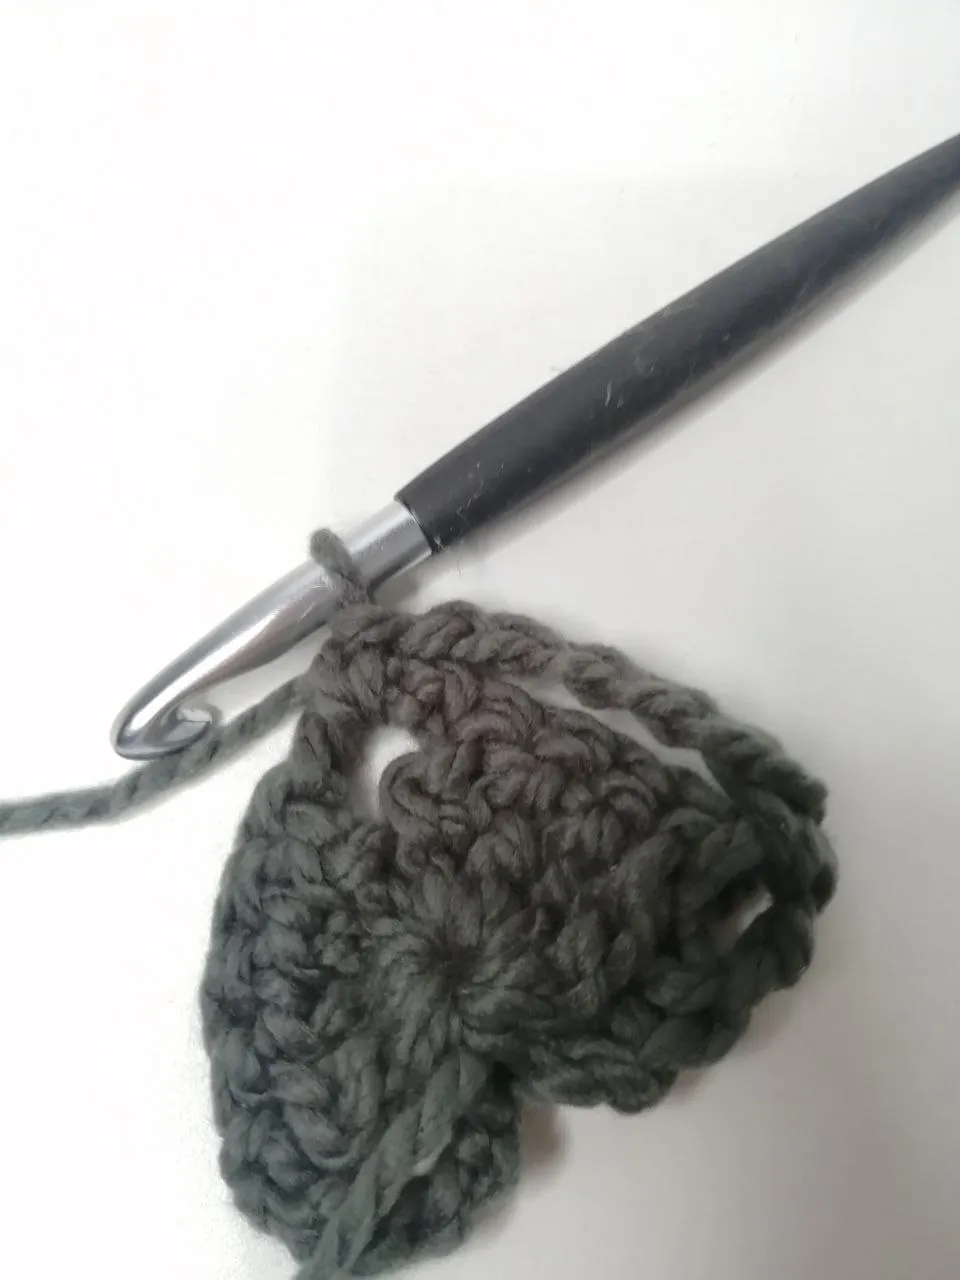
elaborar tres cadenas, tejemos nuevamente dentro del anillo mágico cuatro puntos altos extendidos, posteriormente tejemos tres cadenas y elaboramos un punto alto extendido (todo esto dentro del anillo mágico con el que iniciamos). De está forma ya culminamos la primera vuelta podemos estirar un poco el hilo sobrante del anillo para que se encoja y notarán que se hace la forma de un corazón muy lindo.
 |  |
|---|
 |  |
|---|
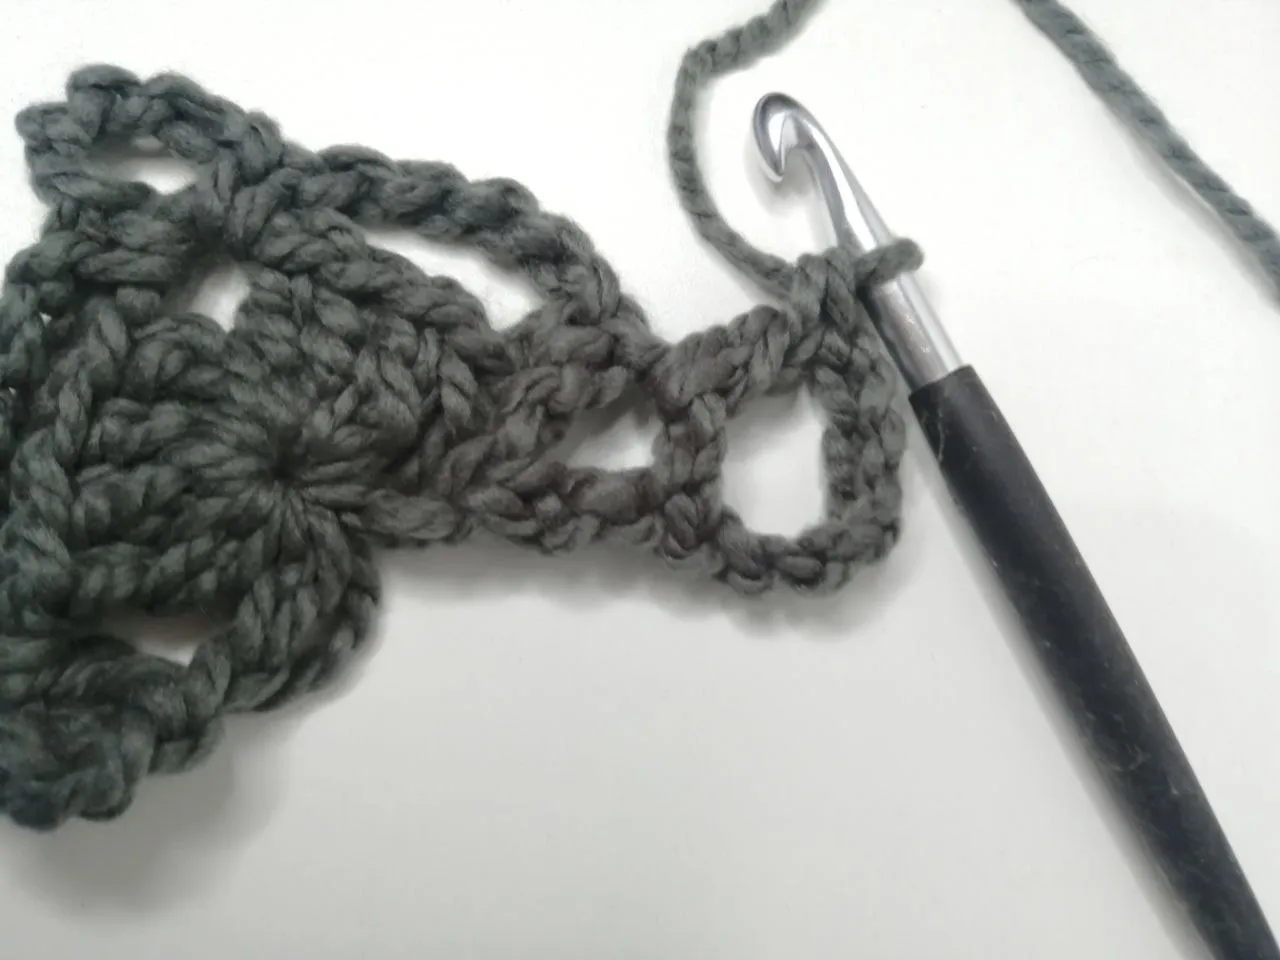
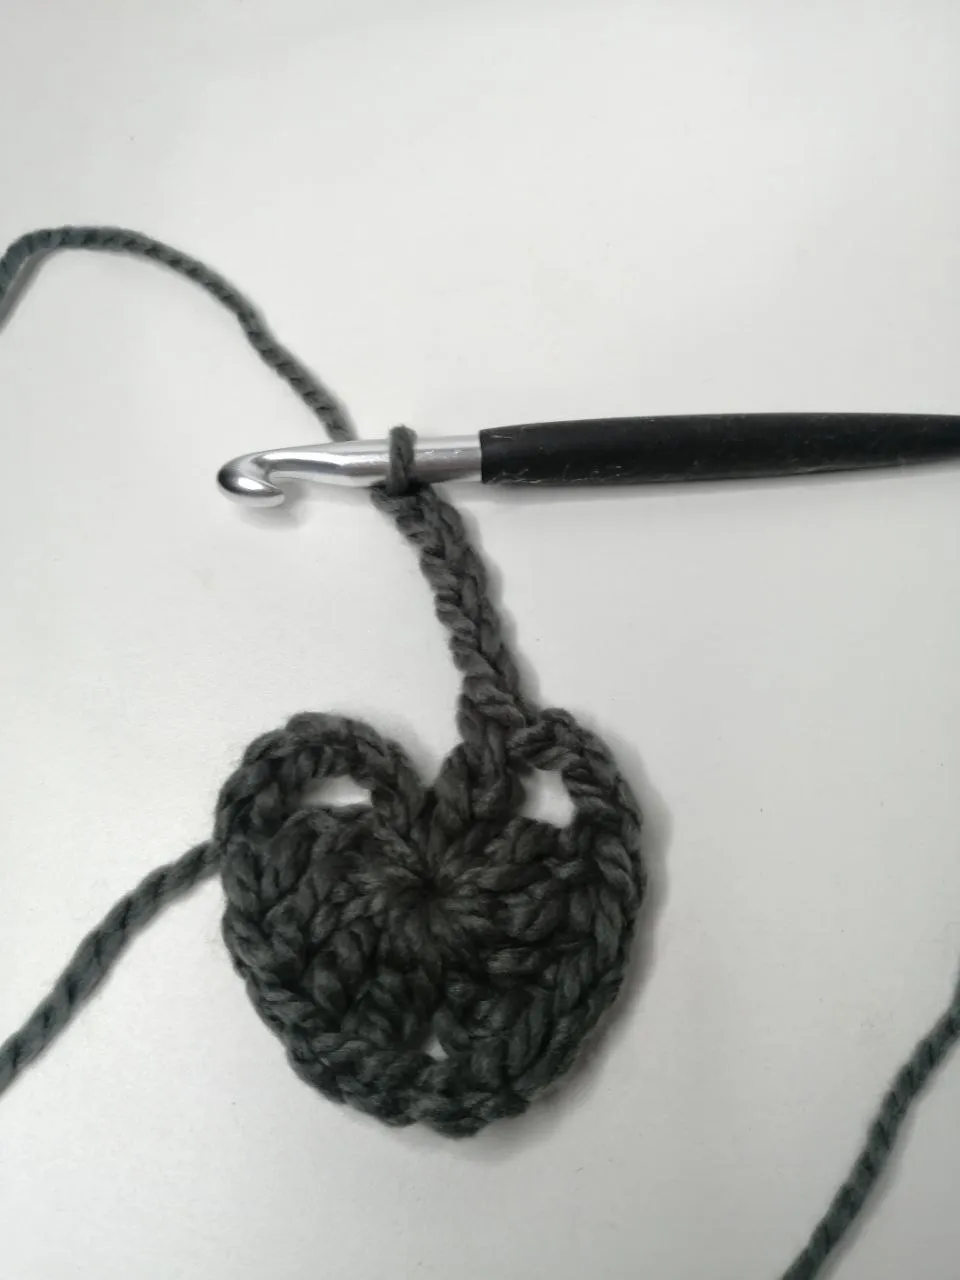
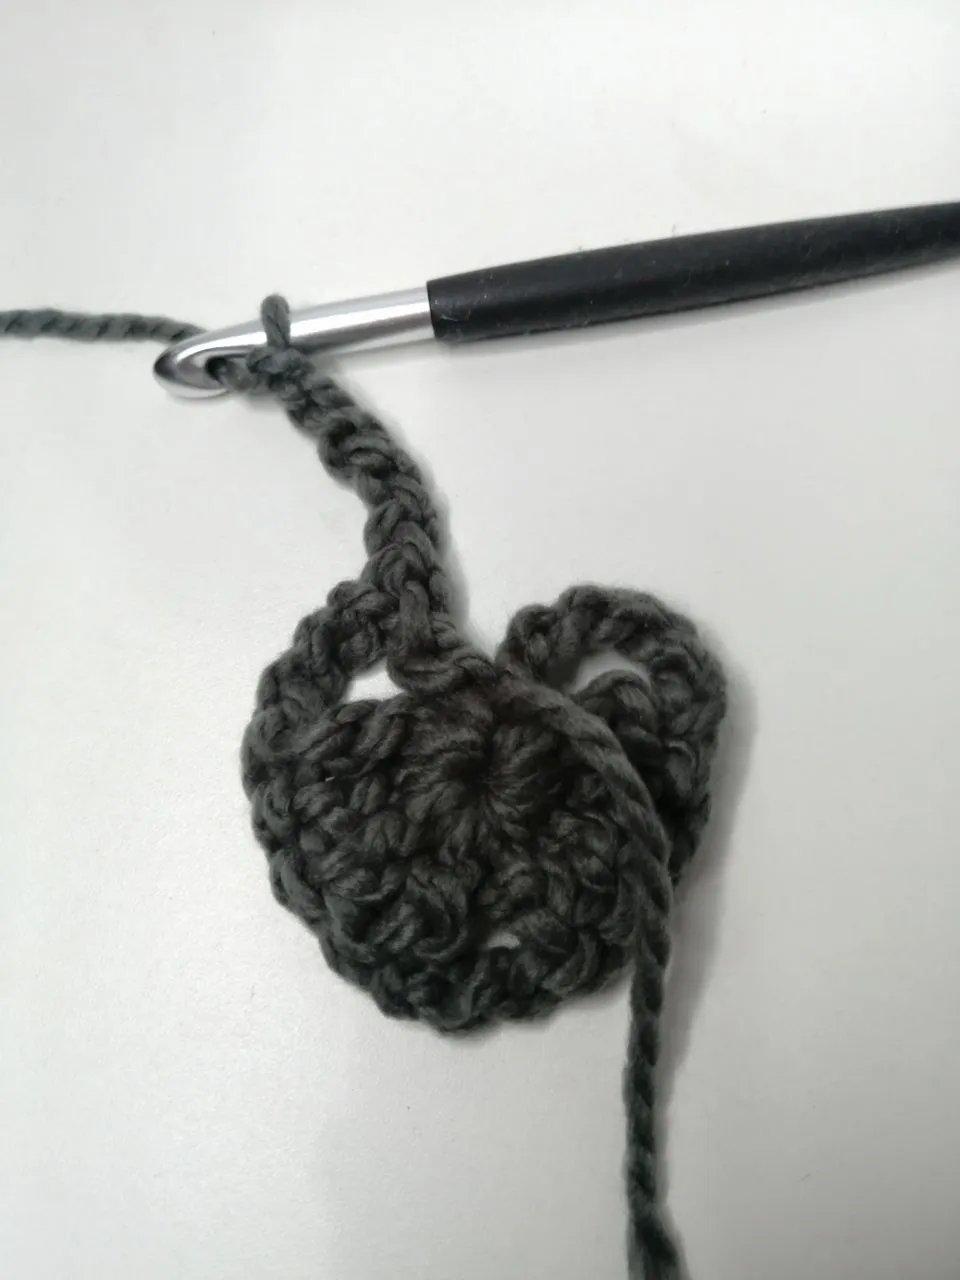
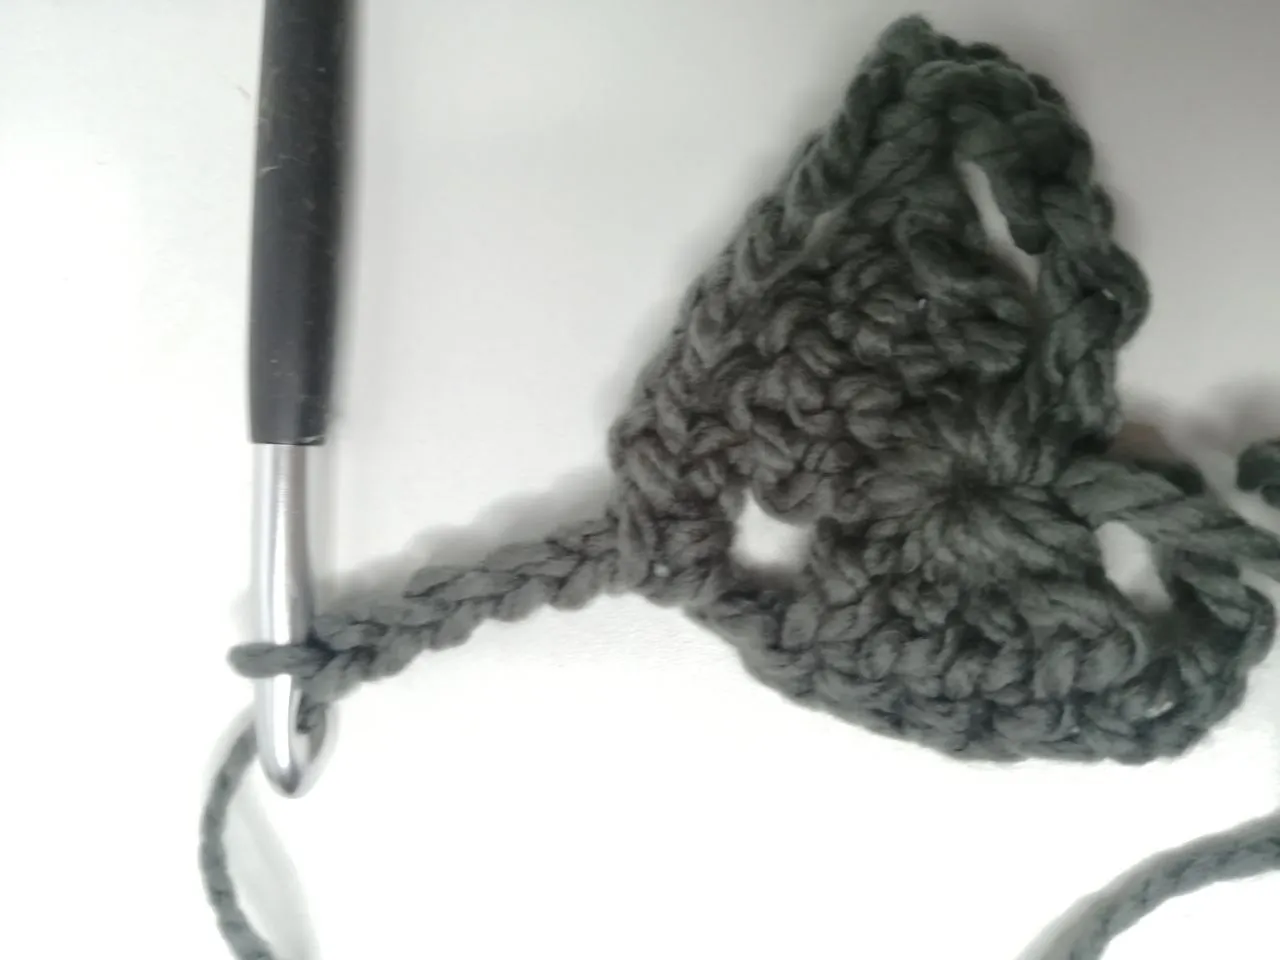
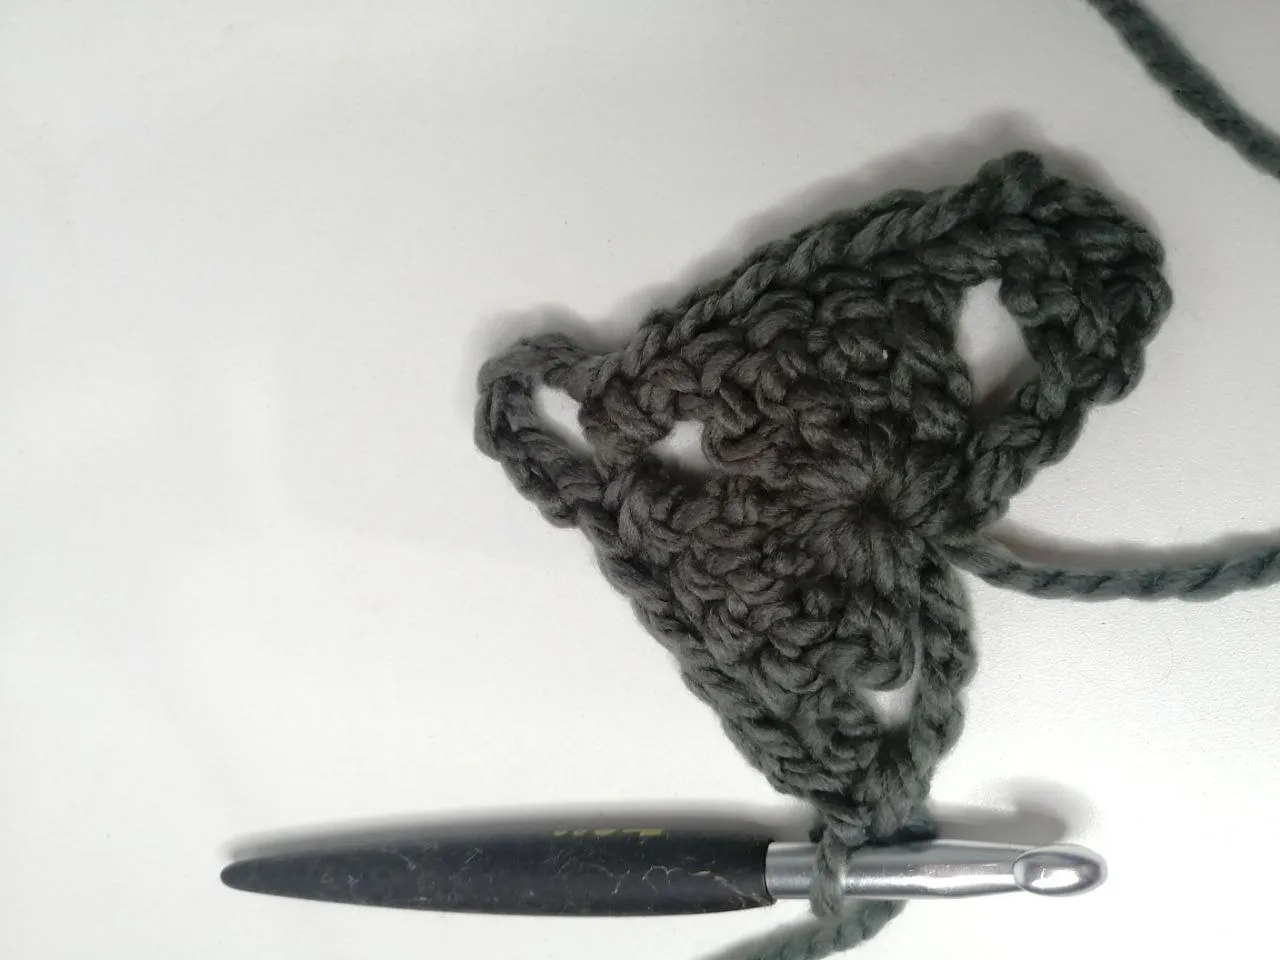
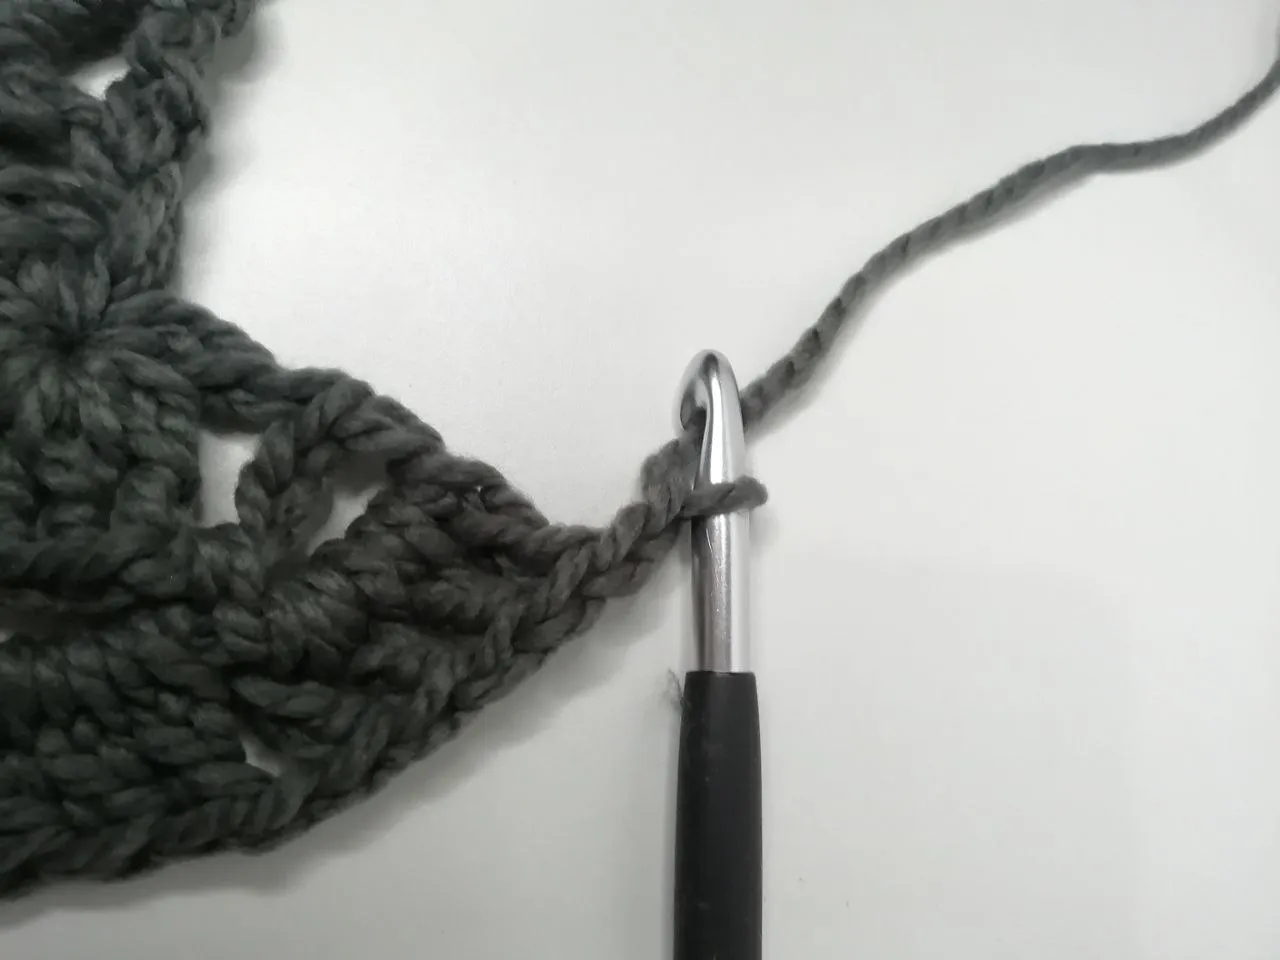
PASO #5: Damos inicio a la vuelta número dos levantando un total de cinco cadenas, al finalizarlas damos vuelta a nuestro trabajo, en el primer espacio que quede vamos a realizar un punto bajo, pasamos por dicho espacio tomamos estambre y pasamos por los dos anillos que nos quedan en el ganchillo, nuevamente tejemos cinco cadenas, en el siguiente espacio que se forma en la punta del corazón vamos a realizar otro punto bajo seguido de cinco cadenas en ese mismo espacio de la punta o pico del corazón tejemos otro punto bajo, nuevamente tejemos otras cinco cadenas y vamos a buscar el último espacio que nos queda y tejemos un punto bajo para finalizar tejemos dos cadenas, nos ubicamos en ese mismo espacio que está compuesto por cadenas giramos un poco y contamos en la tercer cadena vamos a sujetar con un punto alto extendido, a través de esa tercer cadena se realiza ese punto alto extendido como se detalló al inicio tomado el hilo o lana en tres tiempos, así finalizamos la vuelta número dos.
 |  |
|---|
 |  |
|---|
 |  |
|---|
 |  |
|---|
 |  |
|---|
 |  |
|---|
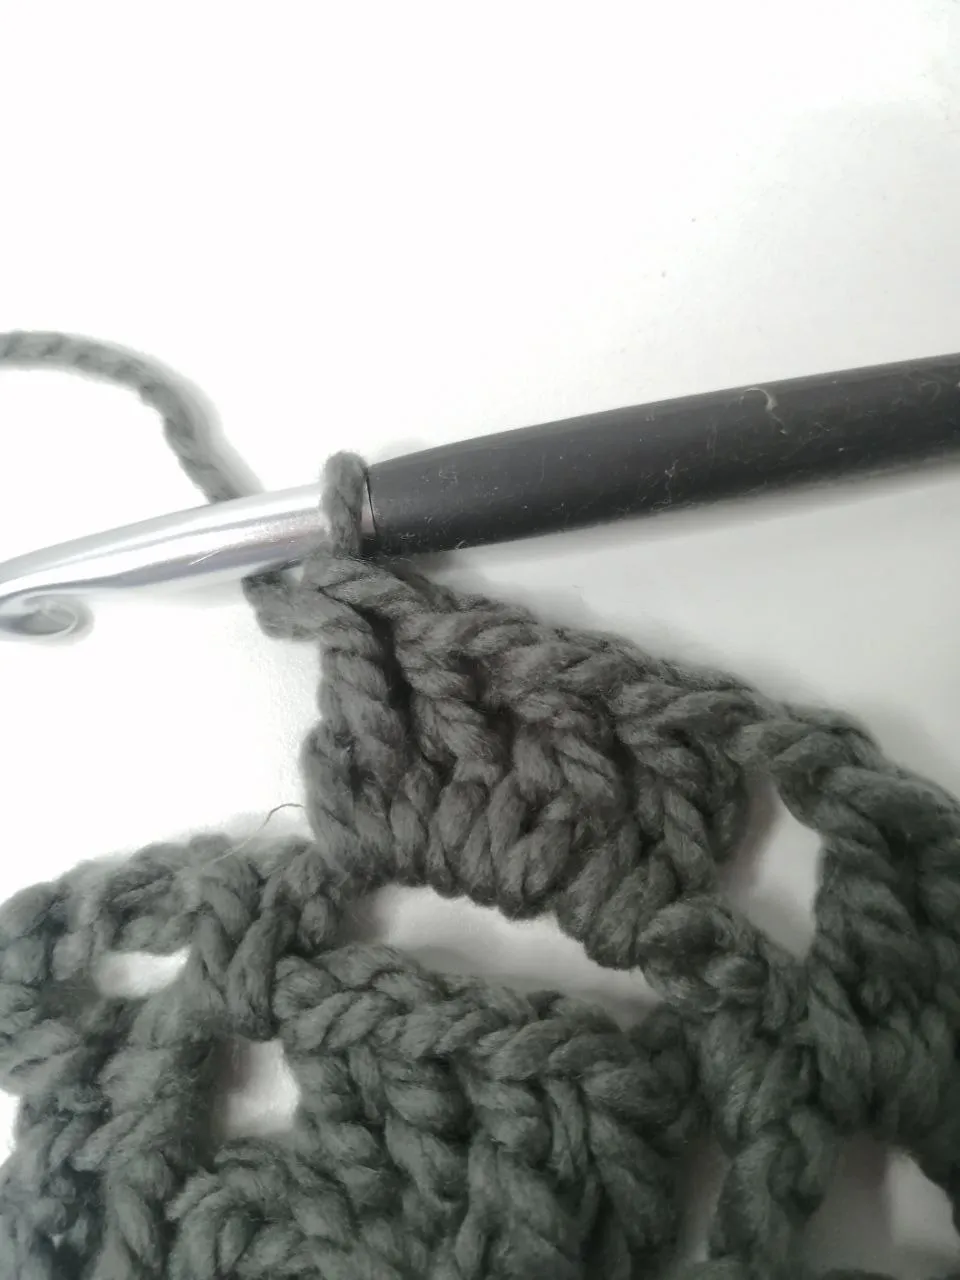
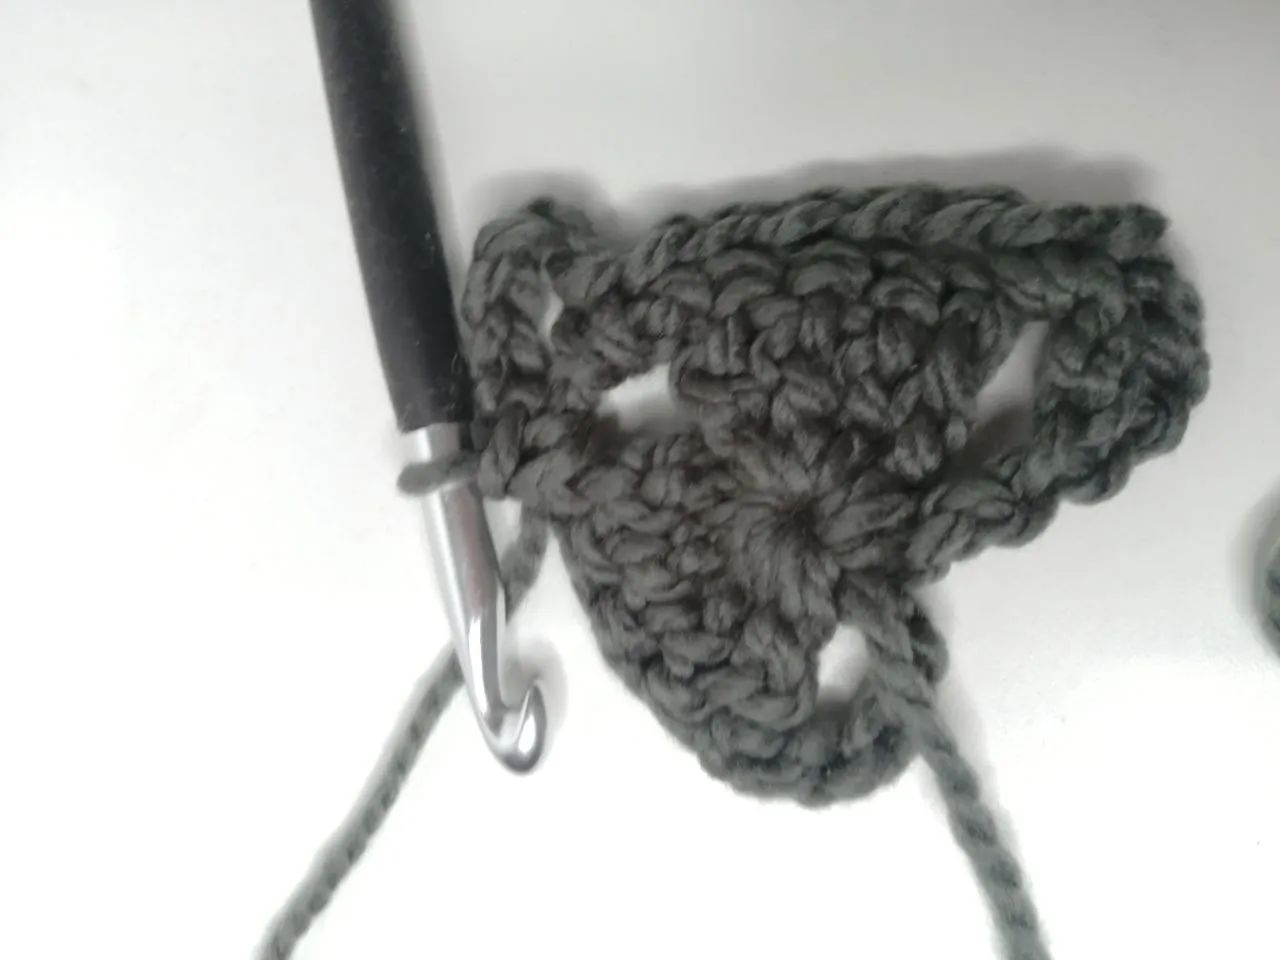
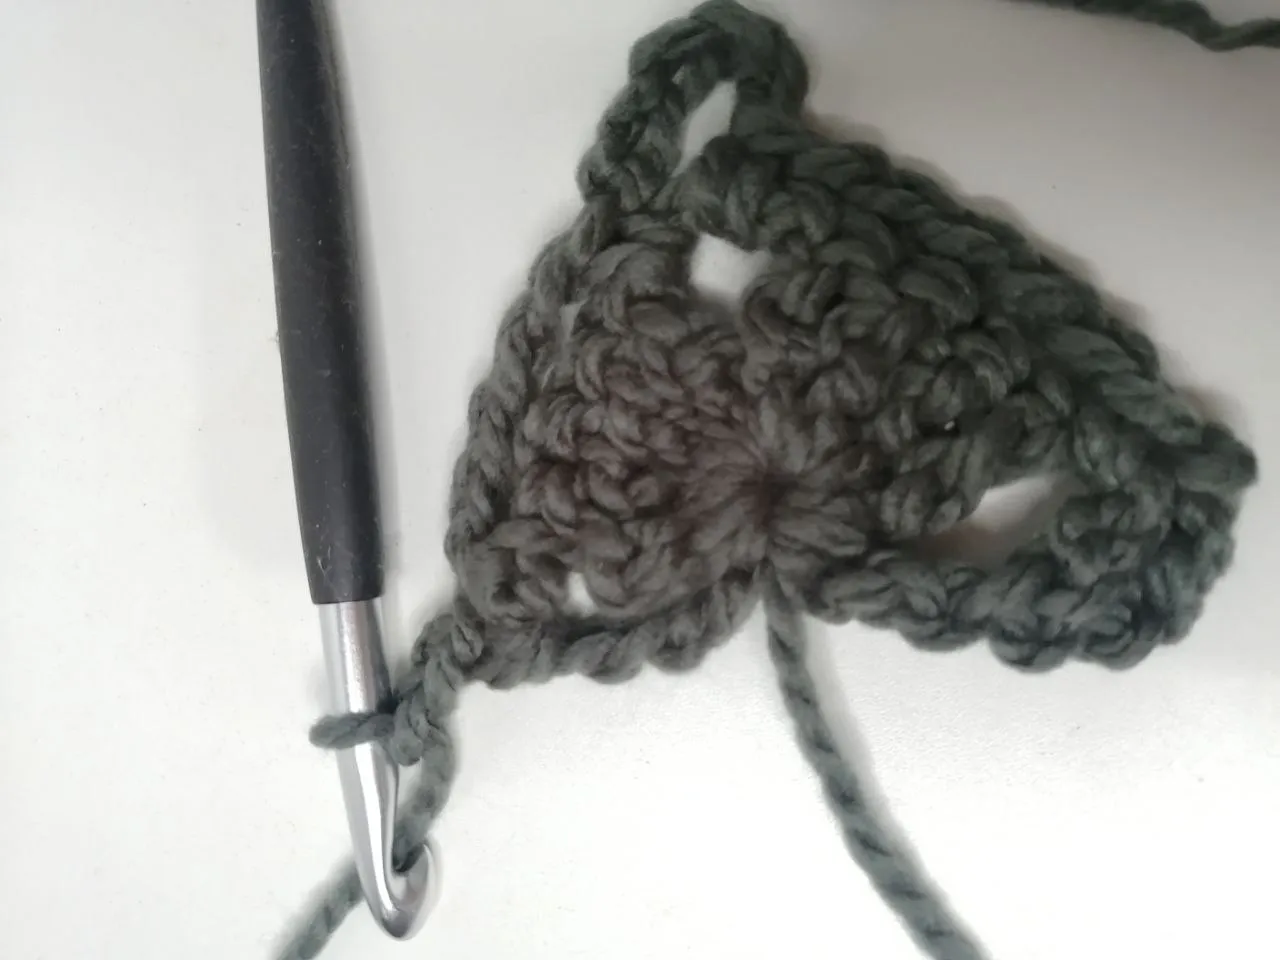
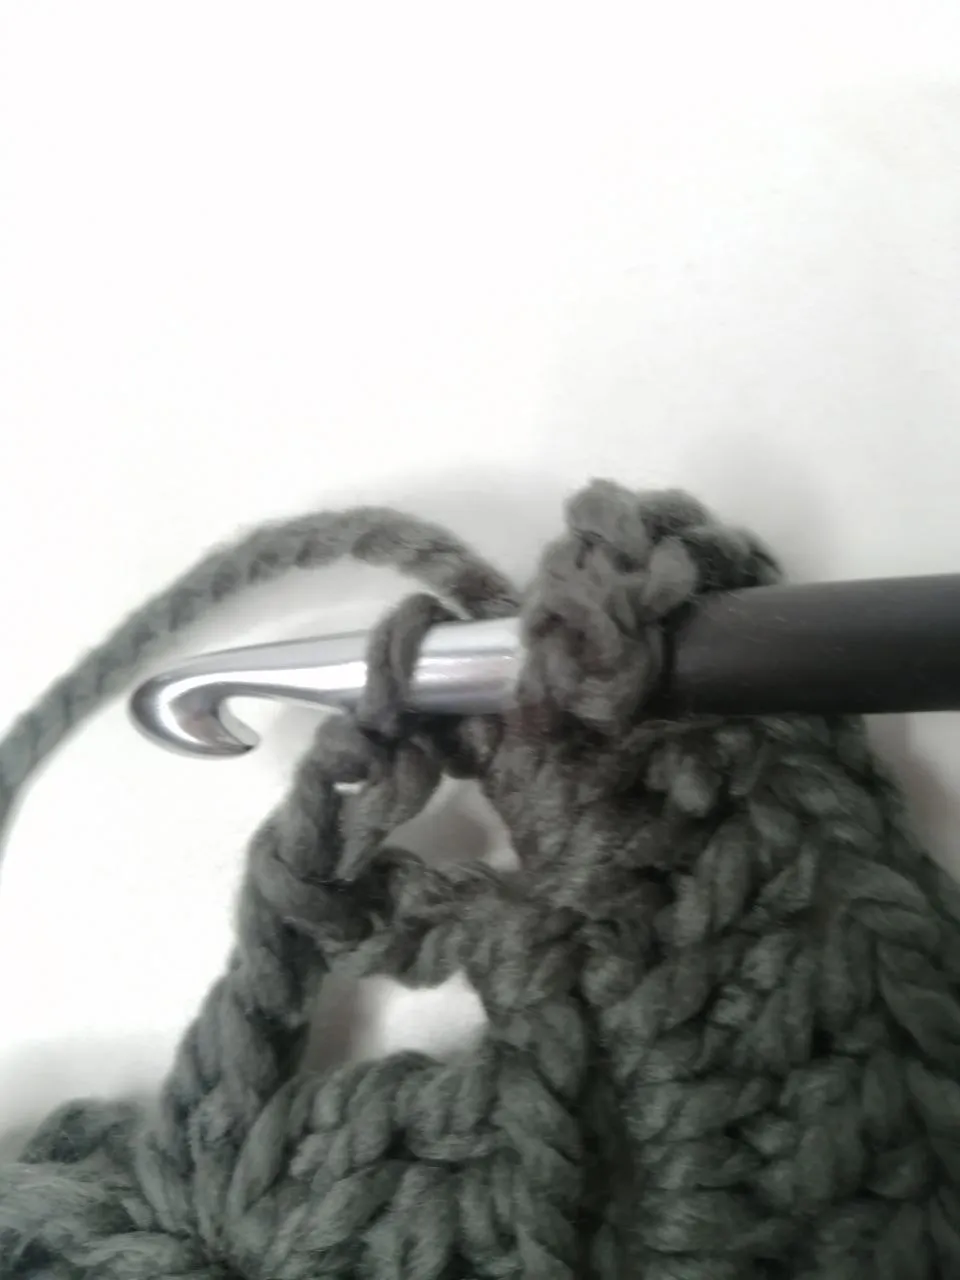
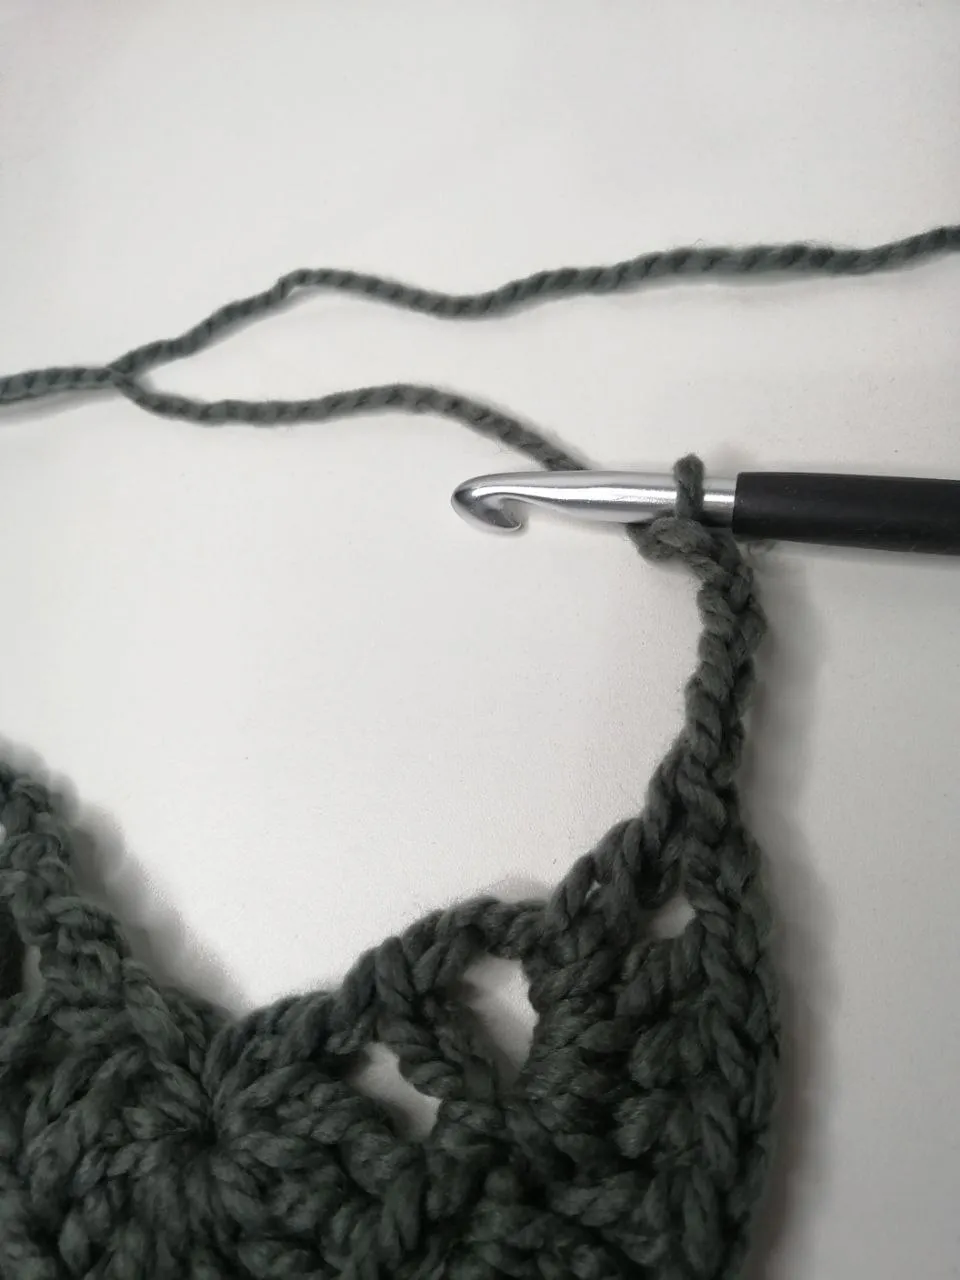
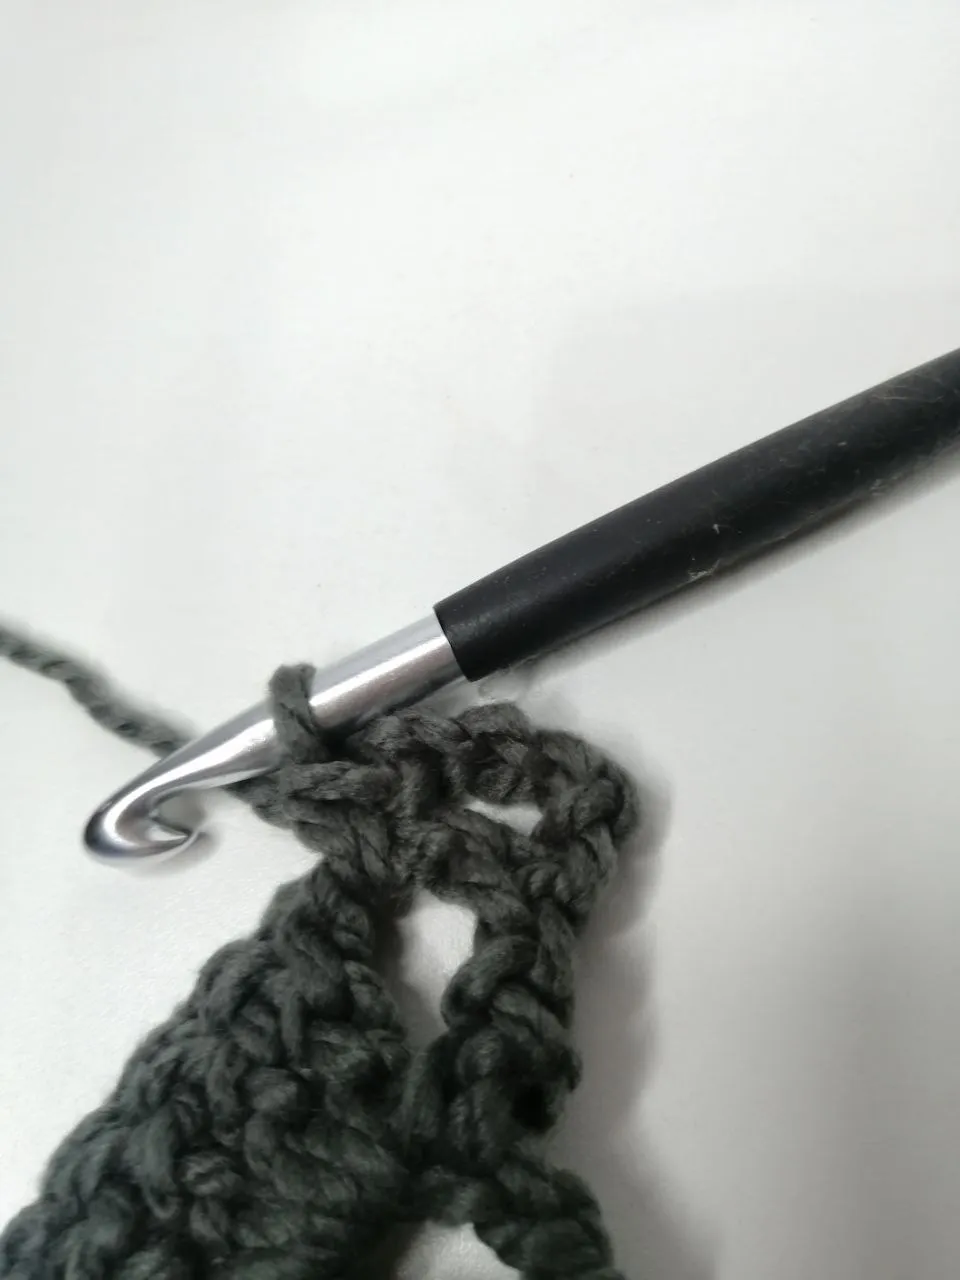
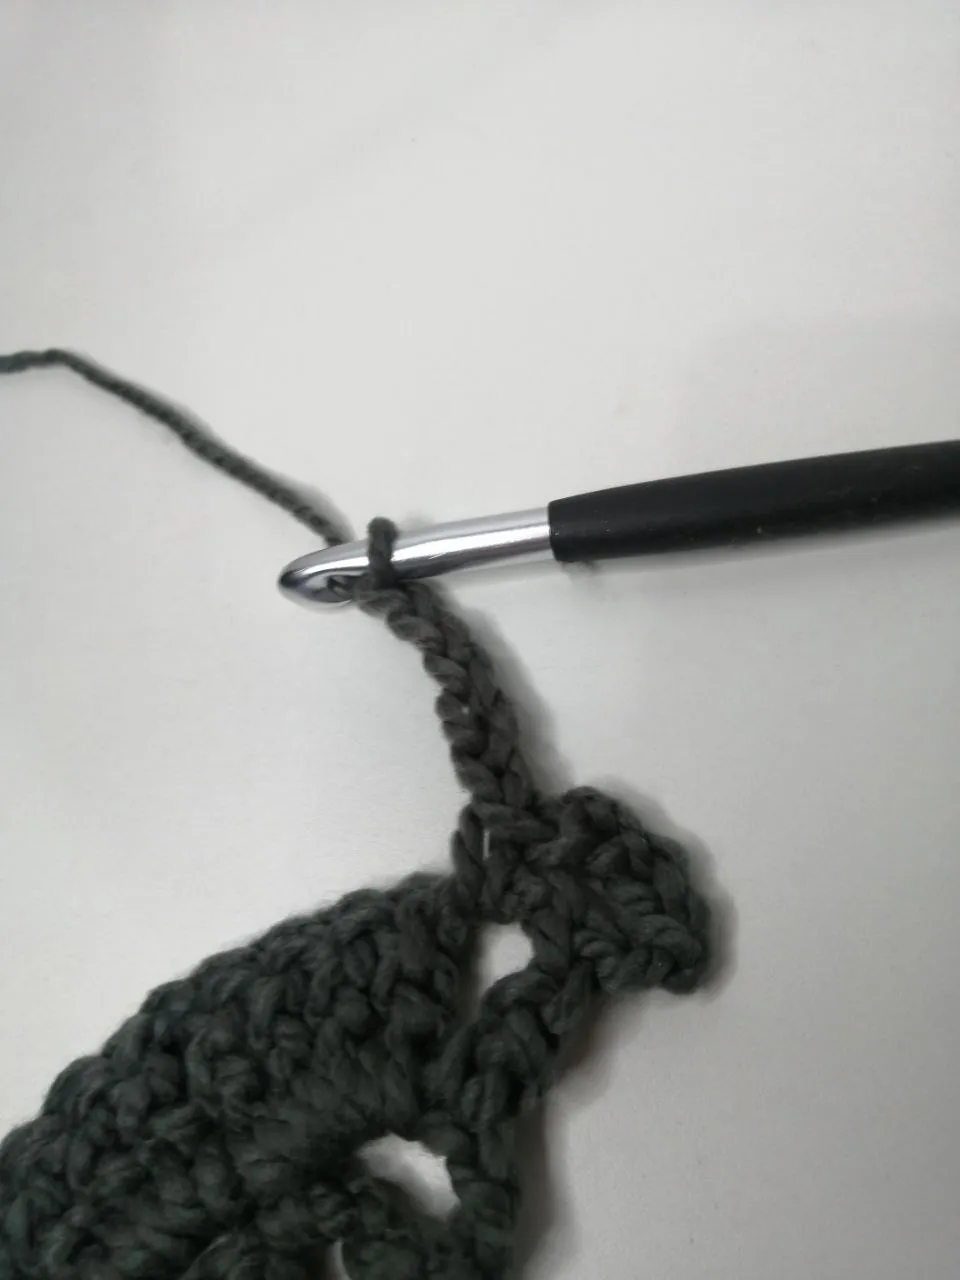
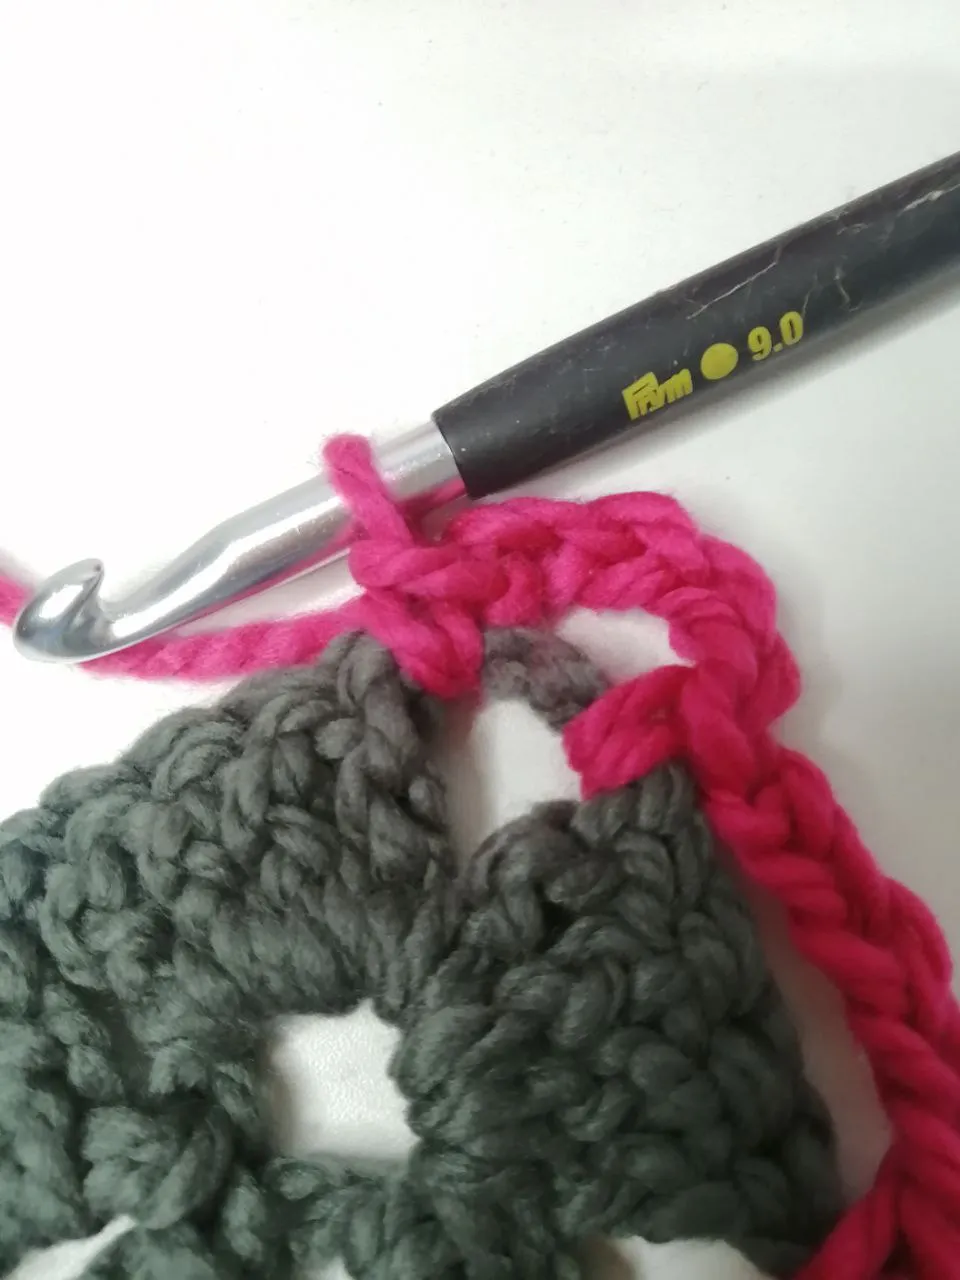
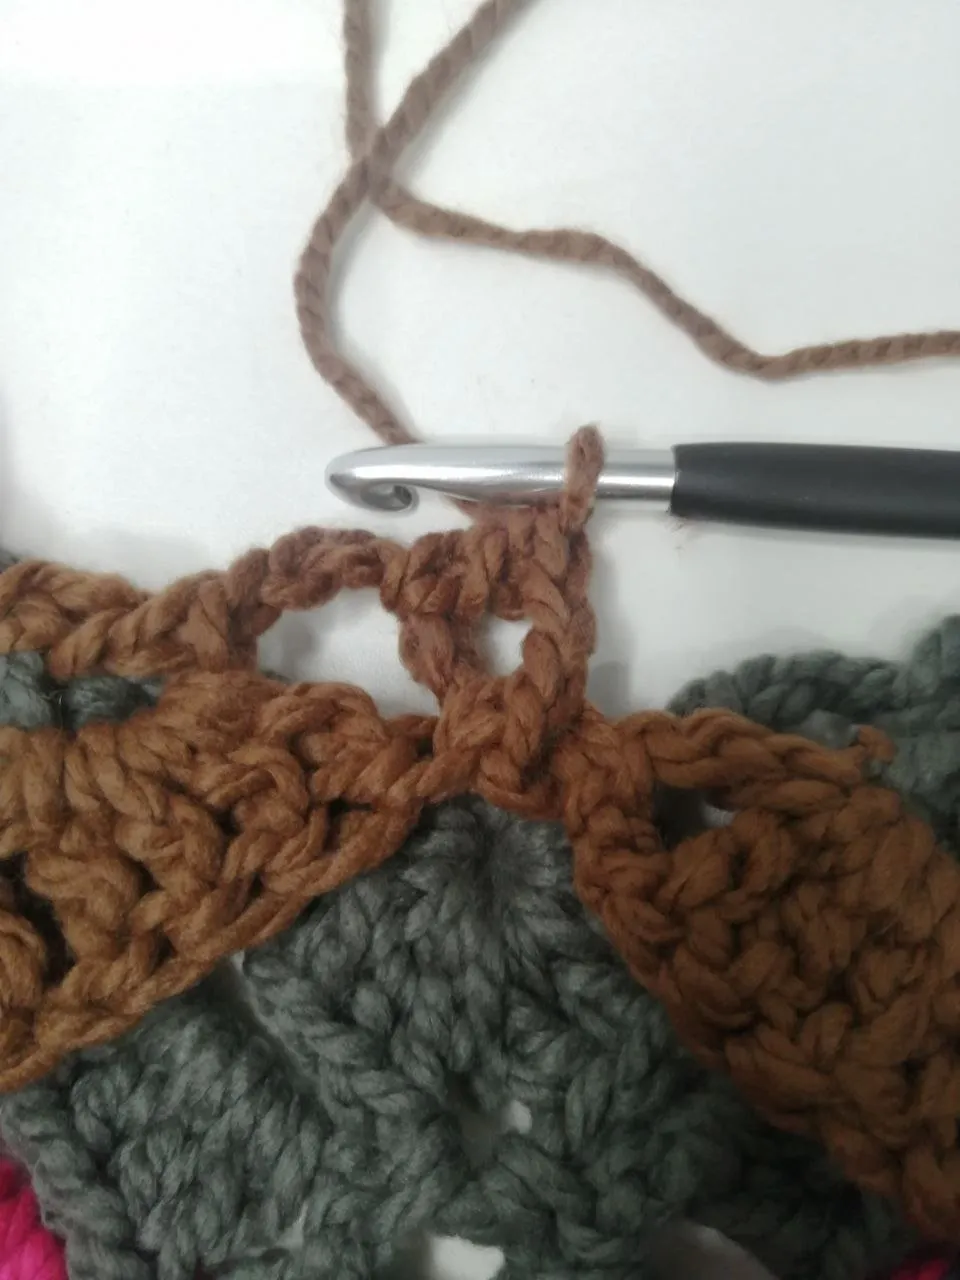
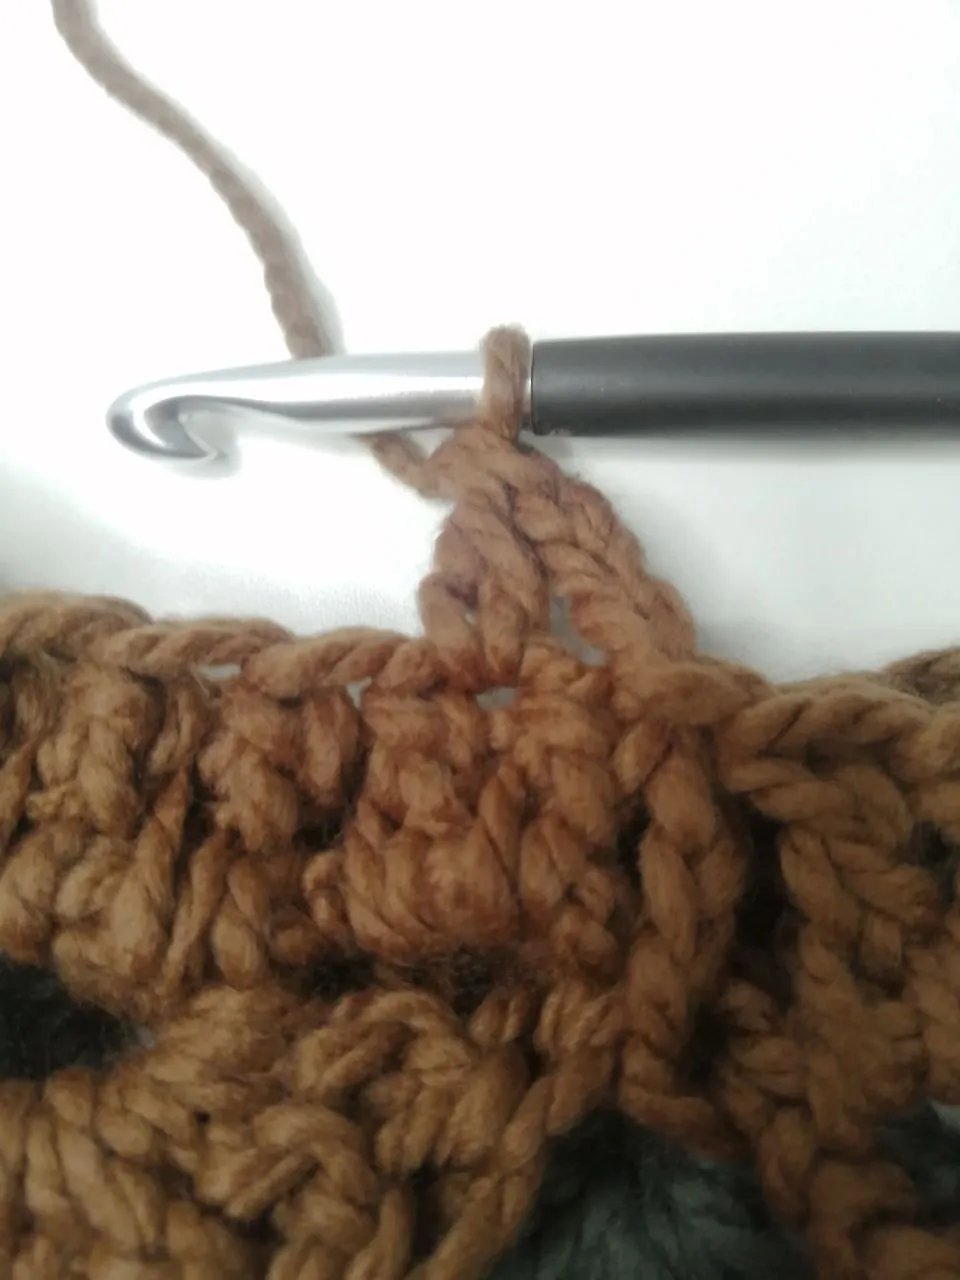
PASO #6: Para tejer la vuelta número tres vamos a iniciar con siete cadenas posteriormente giramos nuestro trabajo en ese primer espacio que se forma vamos a elaborar cuatro puntos altos extendidos de la misma forma que realizamos antes (sacando el estambre en tres tiempos), una vez finalizados los cuatro puntos altos extendidos en el mismo espacio nos vamos a pasar al siguiente espacio antes de pasar tejemos una cadena de separación , en ese siguiente espacio tejemos cuatro puntos altos extendidos finalizando con una cadena.
PASO #7: Vamos a toparnos nuevamente con la punta o pico de esa forma de corazón en la realizaremos cuatro puntos altos extendidos en el mismo espacio posteriormente tres cadenas y en ese mismo espacio cuatro puntos altos extendidos con la finalidad de seguir aumentando para que se forme esa punta o pico, concluimos con una cadena para pasarnos al siguiente espacio y volver a realizar cuatro puntos altos extendidos y una cadena de separación.
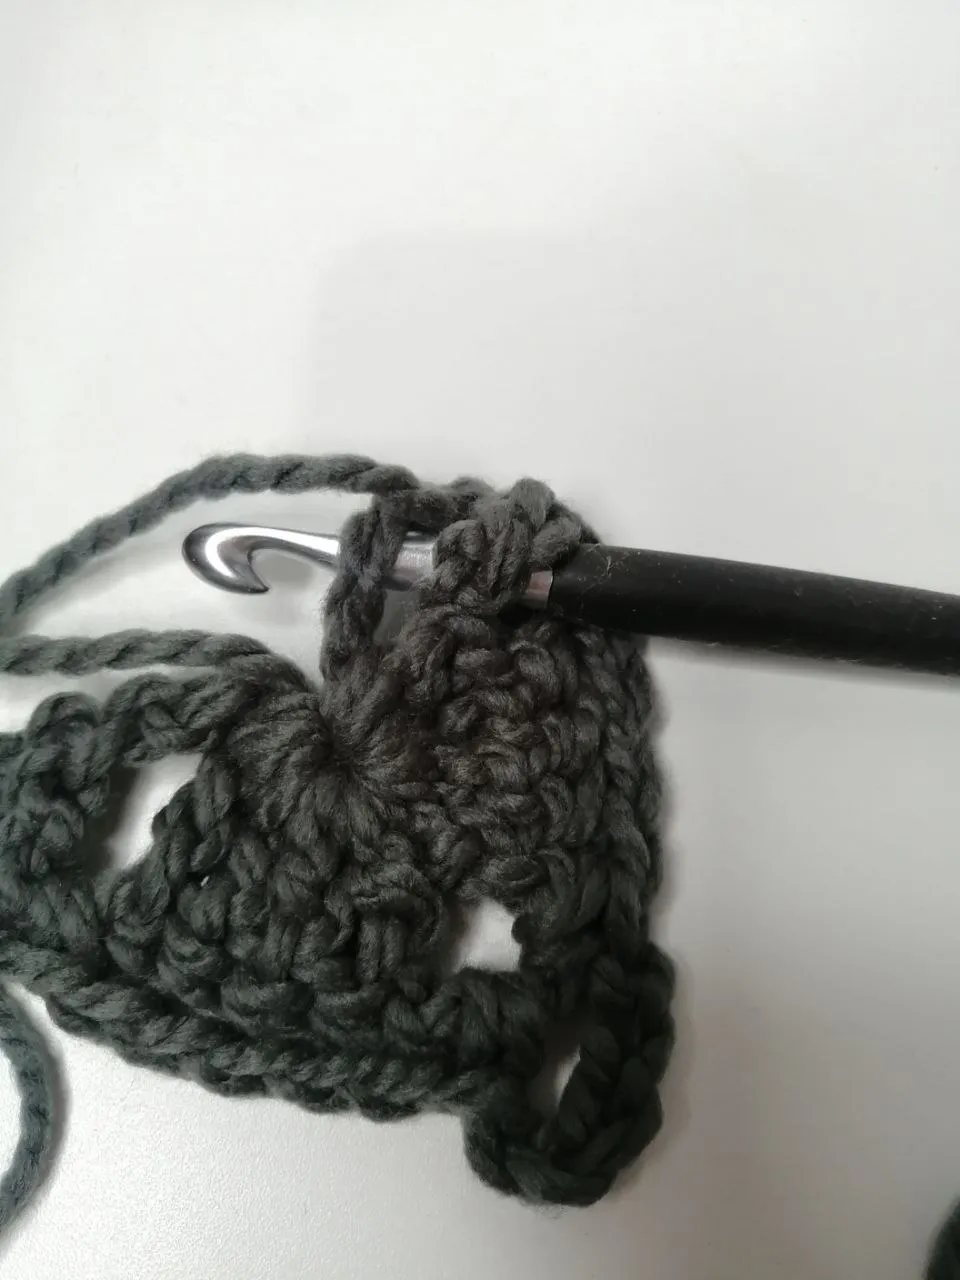
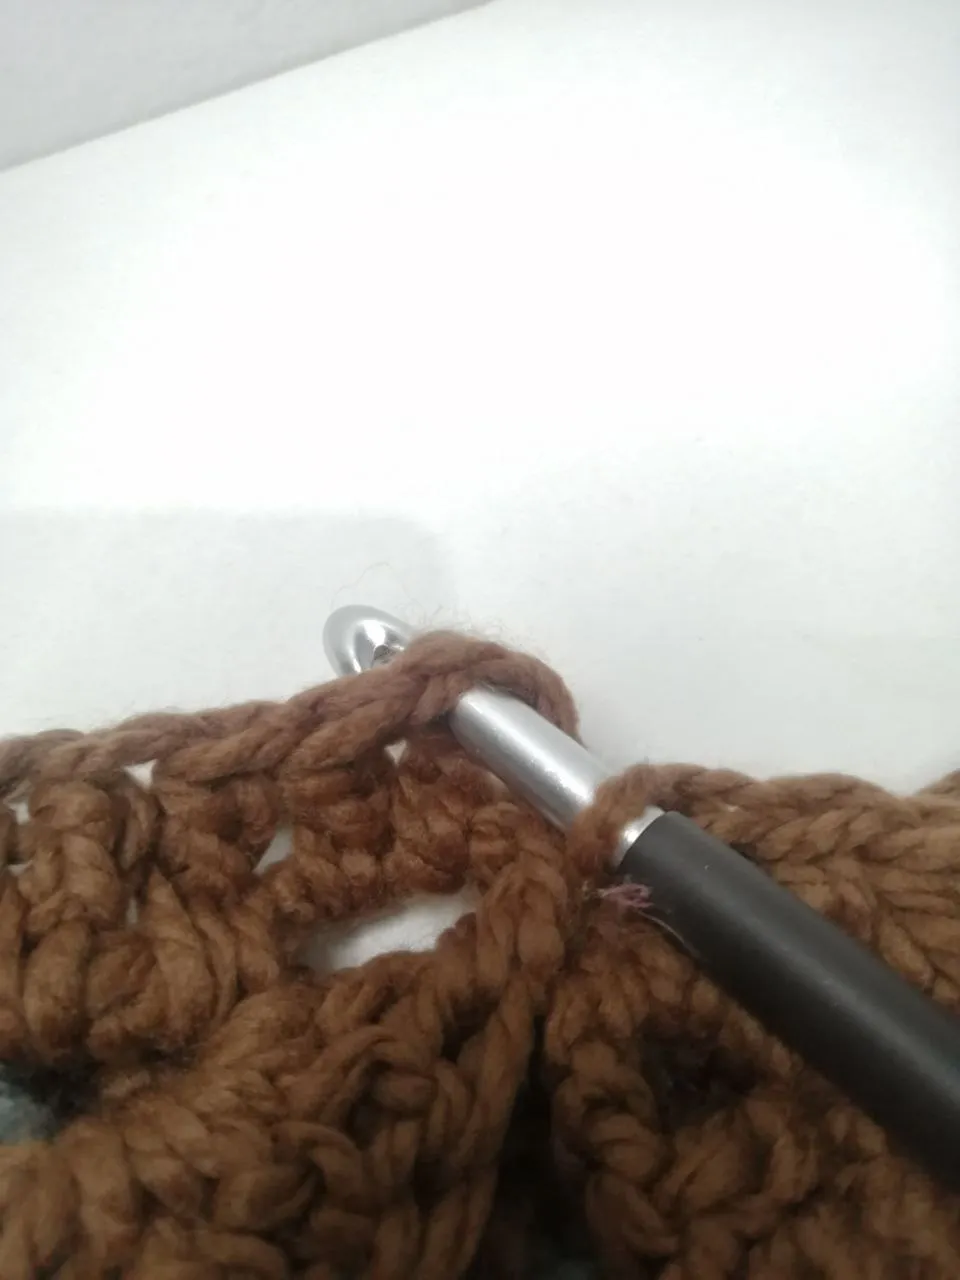
PASO #8 al toparnos con el último espacio tejemos nuevamente cuatro puntos altos extendidos luego dos cadenas, en ese mismo espacio conformado por cadenas buscamos la tercera y vamos a enganchar en ella para realizar un punto alto extendido, así finalizamos la vuelta número tres. De esa forma continuamos repitiendo vuelta número dos y vuelta número tres, recordamos que la vuelta número dos la iniciamos con cinco cadenas, luego giramos nuestro trabajo y en ese primer espacio sujetamos con un punto bajo y así sucesivamente en cada espacio vamos a realizar cinco cadenas y un punto bajo a diferencia de la punta o pico del corazón donde vamos a realizar en el mismo espacio un punto bajo cinco cadenas y nuevamente en el mismo lugar otro punto bajo a modo de aumento, luego cinco cadenas y así avanzar al siguiente espacio hasta llegar al último, sujetamos con un punto bajo realizamos dos cadenas buscamos la tercera cadena y enganchamos para realizar a través de ella un punto alto extendido.
 |  |
|---|
 |  |
|---|
 |  |
|---|
 |  |
|---|
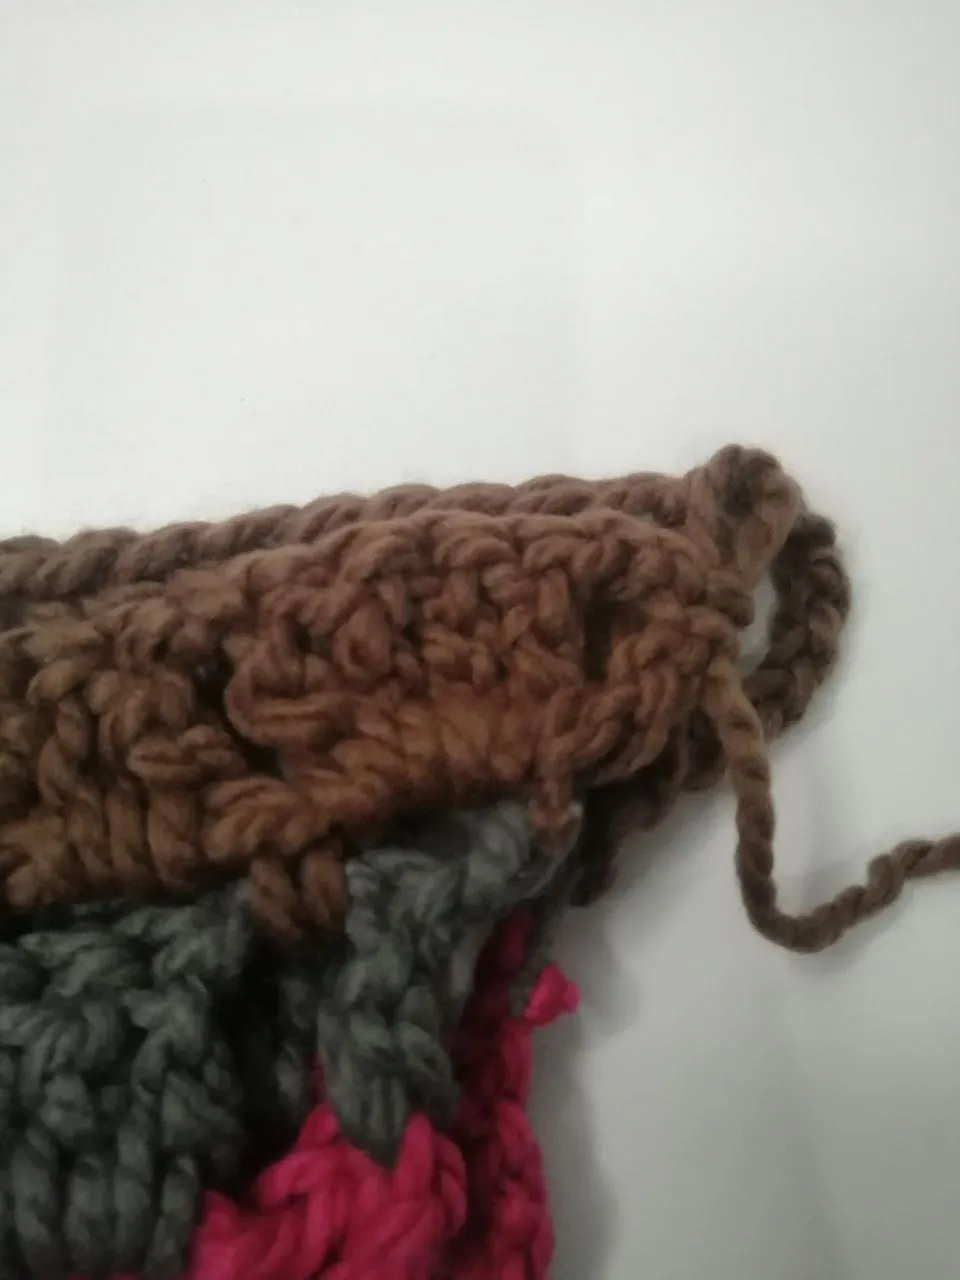
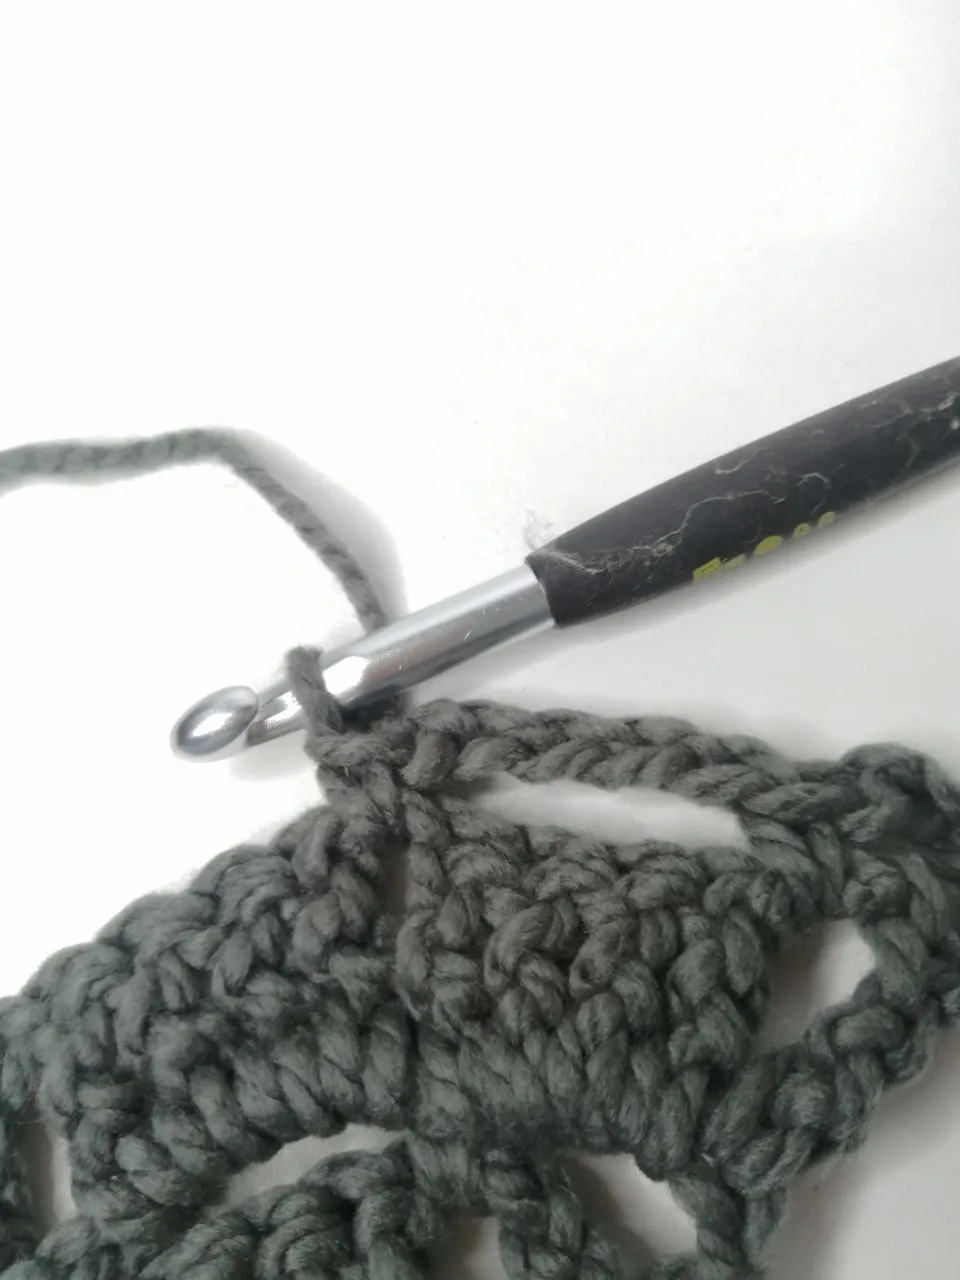
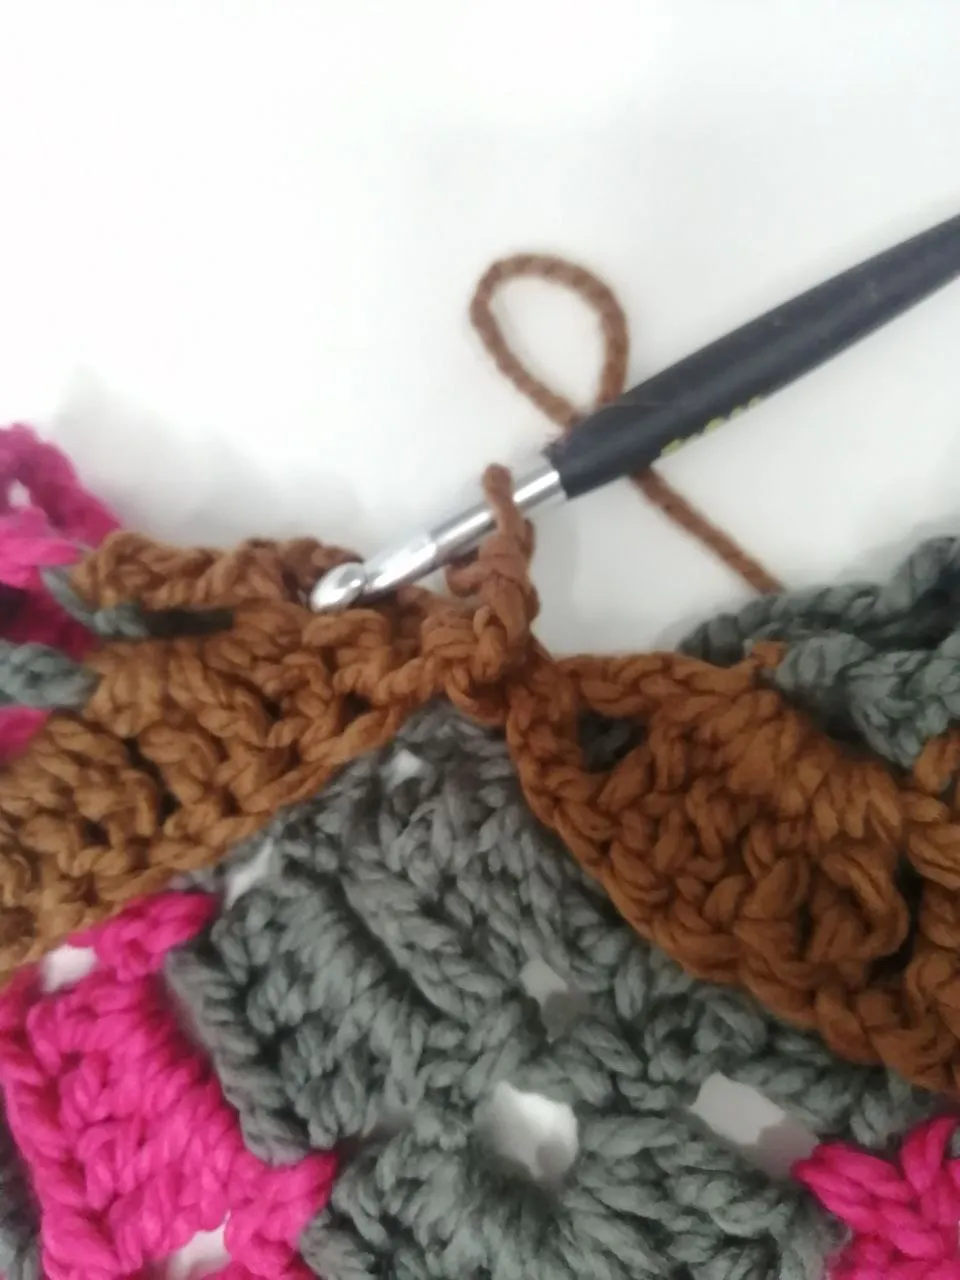
PASO # 9: Continuamos con la repetición de la vuelta número tres recordando que vamos a comenzar tejiendo siete cadenas, posteriormente giramos nuestro trabajo y vamos a buscar cada espacio en el que tejeremos cuatro puntos altos extendidos y una cadena de separación así mismo en cada espacio a diferencia de la punta o pico donde tejeremos cuatro puntos altos extendidos tres cadenas y en el mismo espacio nuevamente cuatro puntos altos extendidos una cadena y saltamos al siguiente espacio, así sucesivamente, yo realice un total de cinco vueltas de puntos altos extendidos, esto dependerá del tamaño que desees tu bufanda, una medida que ayuda seria medir desde el centro de la bufanda donde iniciamos con el anillo mágico hasta el extremo derecho debe medir aproximadamente 30 centímetros, es decir si medimos de una punta a otra en la base de nuestro triángulo debería medir 60 centímetros.
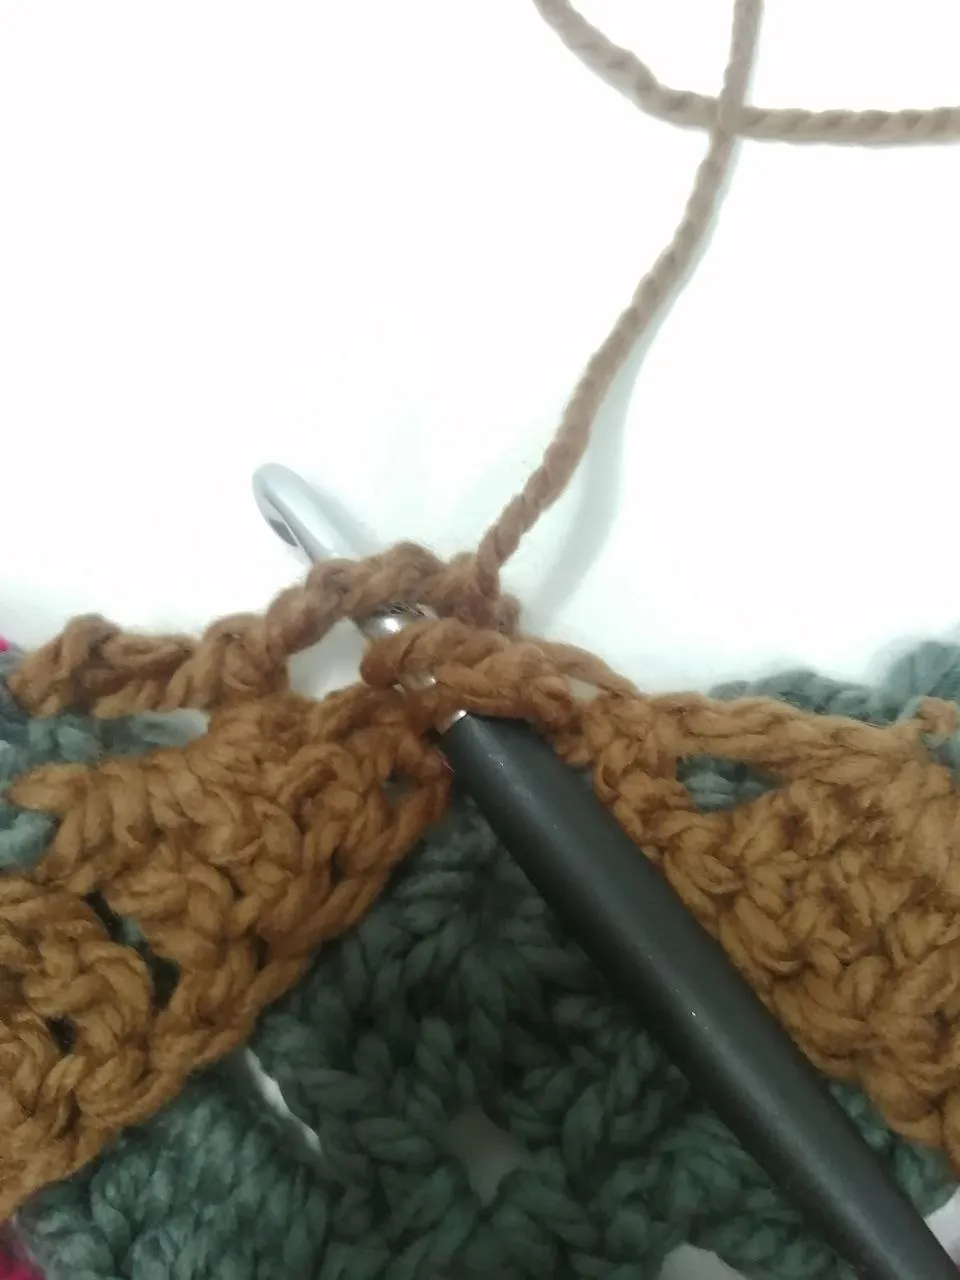
PASO # 10: Una vez culminado nuestro triángulo lo vamos a doblar a la mitad, que la parte del reverso nos quede hacia adentro, vamos a tomar la punta donde está el gancho y la esquina opuesta (uniremos ambas puntas para proceder a tejer el cuello), unimos realizando un punto deslizado, tejemos tres cadenas de altura desdoblamos y vamos a observar qué nos posicionamos para ir tejiendo el cuello, vas a observar que quedan espacios grandes, en cada uno de ellos tejeremos dos puntos altos extendidos hasta llegar al inicio de las tres cadenas con las que subimos, al llegar a ese espacio que representa el anillo mágico con que habías iniciado vas a tejer un solo punto alto extendido y continuamos en los siguientes espacios tejiendo dos puntos altos extendidos, una vez finalizados los dos últimos puntos altos extendidos se observan las tres cadenas con las que iniciamos el cuello, nos posicionamos en el primer punto alto extendido y sobre él unimos realizando un punto deslizado.
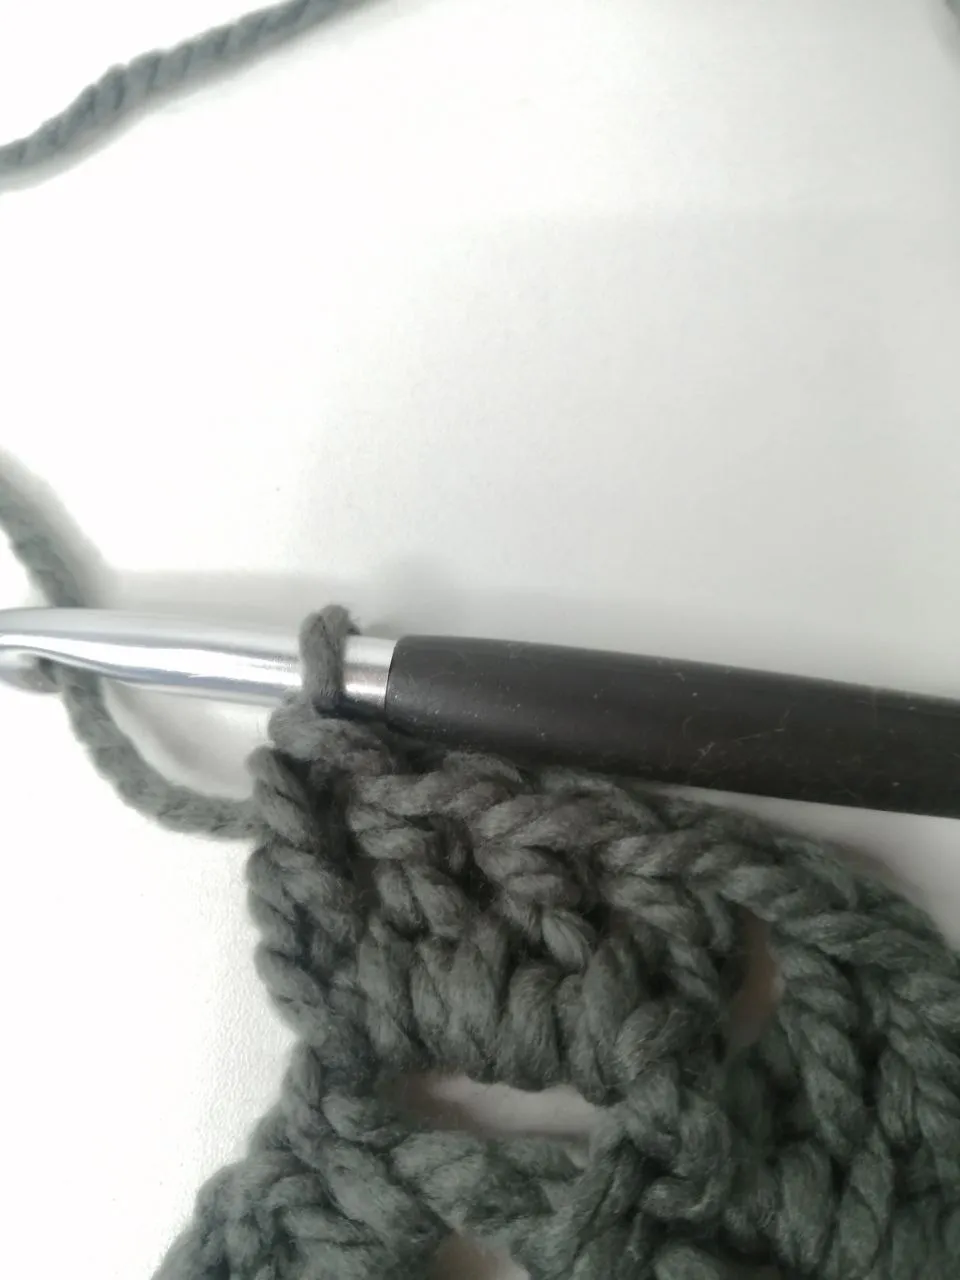
PASO #11: Vamos a iniciar la segunda vuelta del cuello subiendo con tres cadenas y realizaremos un tipo de elástico nos posicionamos en esa primera cadena que se forma arriba del punto de la fila anterior realizamos un punto alto extendido, el segundo punto alto va a ser diferente ya que lo realizamos en relieve pasando por delante del punto anterior elaborando un punto alto extendido, pasamos en ganchillo por detrás de forma que queda ese punto anterior delante y realizamos dicho punto alto extendido, en el siguiente lo que se va a ver por delante es el ganchillo y dicho punto alto anterior queda detrás y elaboramos otro punto alto extendido, de esta forma sucesivamente para trabajar el elástico o relieve, al finalizar tomamos ese primer punto y elaboramos un punto deslizado, en mi caso hice tres vueltas para dar altura al cuello, dependiendo del número de g anchillo pueden ser más o menos vueltas.
 |  |
|---|
 |  |
|---|
 |  |
|---|
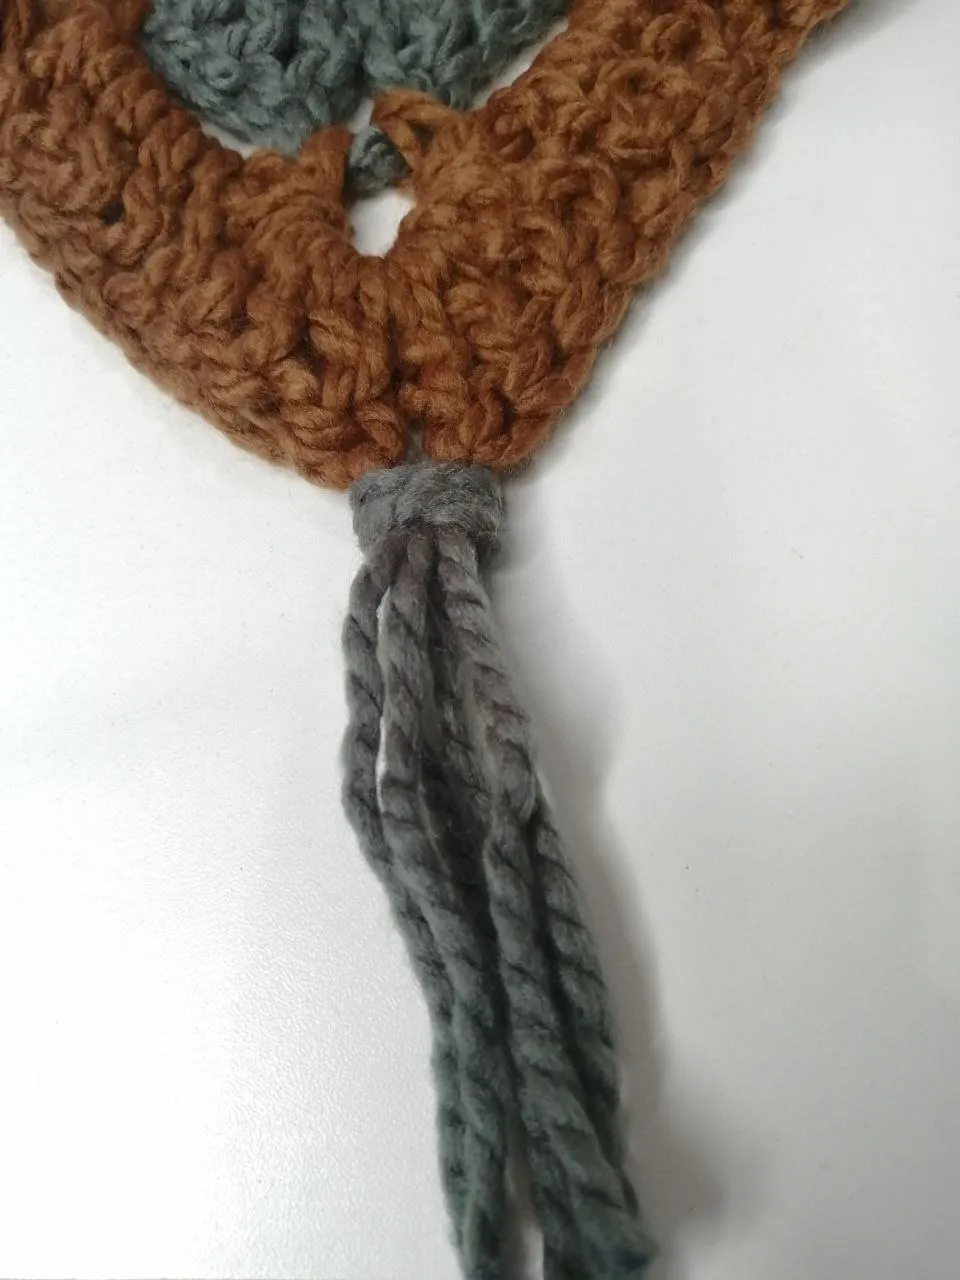
PASO #12: Una vez finalizado el cuello podemos elaborar borlas o tiras para que den un efecto bonito al final, se cortan varias tiras aproximadamente de 30 centímetros cada una y se van colocando en la cadena que se forma abajo en el triángulo, yo coloque grupos de tres tiras en cada una, ya va a depender de como consideres que se vea mejor.
Ame realizar este proyecto, seguro dirás Barbie no es tan fácil, y si, lleva muchos pasos sin embargo son repetitivos y resultado te encantará, puedes utilizar ganchillo número nuevo u ocho ya eso dependera de la lana o hilo con el cual desees trabajar.
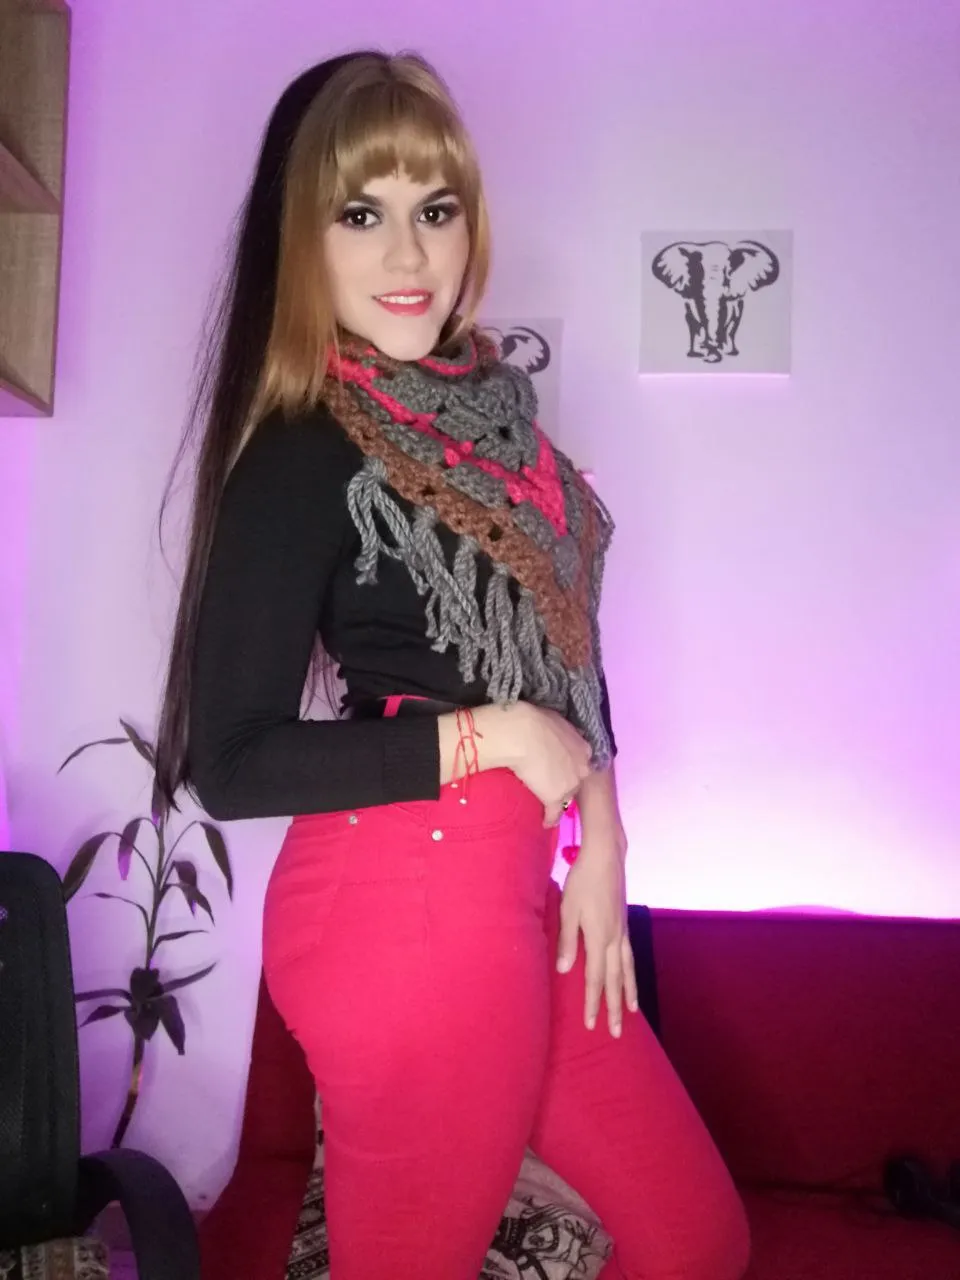
Hello everyone I'm Barbie, I hope you are very very well, this month one of the projects I have done in my knitting venture has been this beautiful triangular scarf-neck, I liked it very much, it can be combined in different shades, it is very easy to make and also takes little material, depending on the amount of colors you want to add, I hope you enjoy making it as much as I enjoy it, since I obviously have one that I use a lot taking advantage that here we are in winter, it will make you feel very fashionable and warm, without further ado let's go with the materials and step by step.
Materials:
- Wool of the thickness you want in my case I used the brand TREN wool KURMI ball of 100 grams 100% acrylic.
- Crochet hook number 9.
- Scissors.
- Lots of love.
ELABORATION.
STEP #1: Take the yarn you want to start with, in this case I used approximately 50 grams of each color, start with the gray yarn making a magic ring.
STEP #2: After I have the magic ring, I proceed to climb by making (7) seven chains.
STEP #3: The end of the yarn or wool that is left in the ring below we can pull it a little to close it slightly because now we are going to work inside that circle, we are going to start knitting high stitches extended inside the circle mentioned above, to make this stitch we take yarn and we are going to pass through the magic ring, we take a loop and bring it back until we have three loops left in our crochet hook, we are going to draw in three times, you take again the loop and you are going to pass through the first ring that is left on your hook, then you take again the loop and pass through two of the yarns, in the third time you take the loop again and pass through the two remaining rings, we already have an extended high stitch, in total we are going to elaborate 4 extended high stitches inside this magic ring.
| |
|---|
STEP #4: At the end of the four extended double crochet stitches we are going to knit three chains.
knit three chains, knit again inside the magic ring four extended double crochet stitches, then knit three chains and knit one extended double crochet stitch (all this inside the magic ring we started with). This way we have finished the first round, we can stretch a little the excess yarn of the ring so that it shrinks and you will notice that it makes the shape of a very nice heart.
| |
|---|
| |
|---|
STEP #5: We start with the second row by raising a total of five chains, at the end we turn our work, in the first remaining space we will knit a single crochet stitch, we pass through that space we take yarn and pass through the two rings that are left on the crochet hook, again we knit five chains, in the next space that is formed at the tip of the heart we will knit another single crochet stitch followed by five chains in that same space at the tip or peak of the heart we knit another single crochet stitch, again we knit another five chains and we are going to look for the last space that we have left and we knit a single crochet stitch to finish we knit two chains, we place ourselves in that same space that is composed of chains we turn a little and we count in the third chain we are going to hold with an extended high stitch, through that third chain we make that extended high stitch as it was detailed at the beginning taken the thread or wool in three times, this way we finish the turn number two.
| |
|---|
| |
|---|
| |
|---|
| |
|---|
| |
|---|
| |
|---|
STEP #6: To knit row number three we are going to start with seven chains, then we turn our work in that first space that is formed we are going to knit four extended high stitches in the same way we did before (pulling out the yarn in three steps), once we have finished the four extended high stitches in the same space we are going to move to the next space before we knit a separating chain, in that next space we knit four extended high stitches finishing with a chain.
STEP #7: We are going to meet again with the tip or peak of that heart shape in which we will make four extended high stitches in the same space, then three chains and in that same space four extended high stitches in order to continue increasing to form that tip or peak, we conclude with a chain to move to the next space and again make four extended high stitches and a separating chain.
STEP #8 when we come to the last space we knit again four extended high stitches then two chains, in that same space formed by chains we look for the third one and we are going to hook in it to make an extended high stitch, this way we finish row number three. In that way we continue repeating round number two and round number three, remember that round number two we start with five chains, then we turn our work and in that first space we hold with a low stitch and so on in each space we will make five chains and a low stitch unlike the tip or peak of the heart where we will make in the same space a low stitch five chains and again in the same place another low stitch as an increase, then five chains and so advance to the next space until you reach the last space, we hold with a low stitch we make two chains we look for the third chain and hook to make through it an extended high stitch.
| |
|---|
| |
|---|
| |
|---|
| |
|---|
STEP # 9: We continue with the repetition of round number three remembering that we are going to start by knitting seven chains, subsequently we turn our work and we are going to look for each space in which we will knit four extended high stitches and a separating chain likewise in each space unlike the tip or peak where we will knit four extended high stitches three chains and in the same space again four extended high stitches one chain and we jump to the next space, This will depend on the size you want your scarf, a measure that helps would be to measure from the center of the scarf where we started with the magic ring to the right end should measure approximately 30 centimeters, ie if we measure from one end to another at the base of our triangle should measure 60 centimeters.
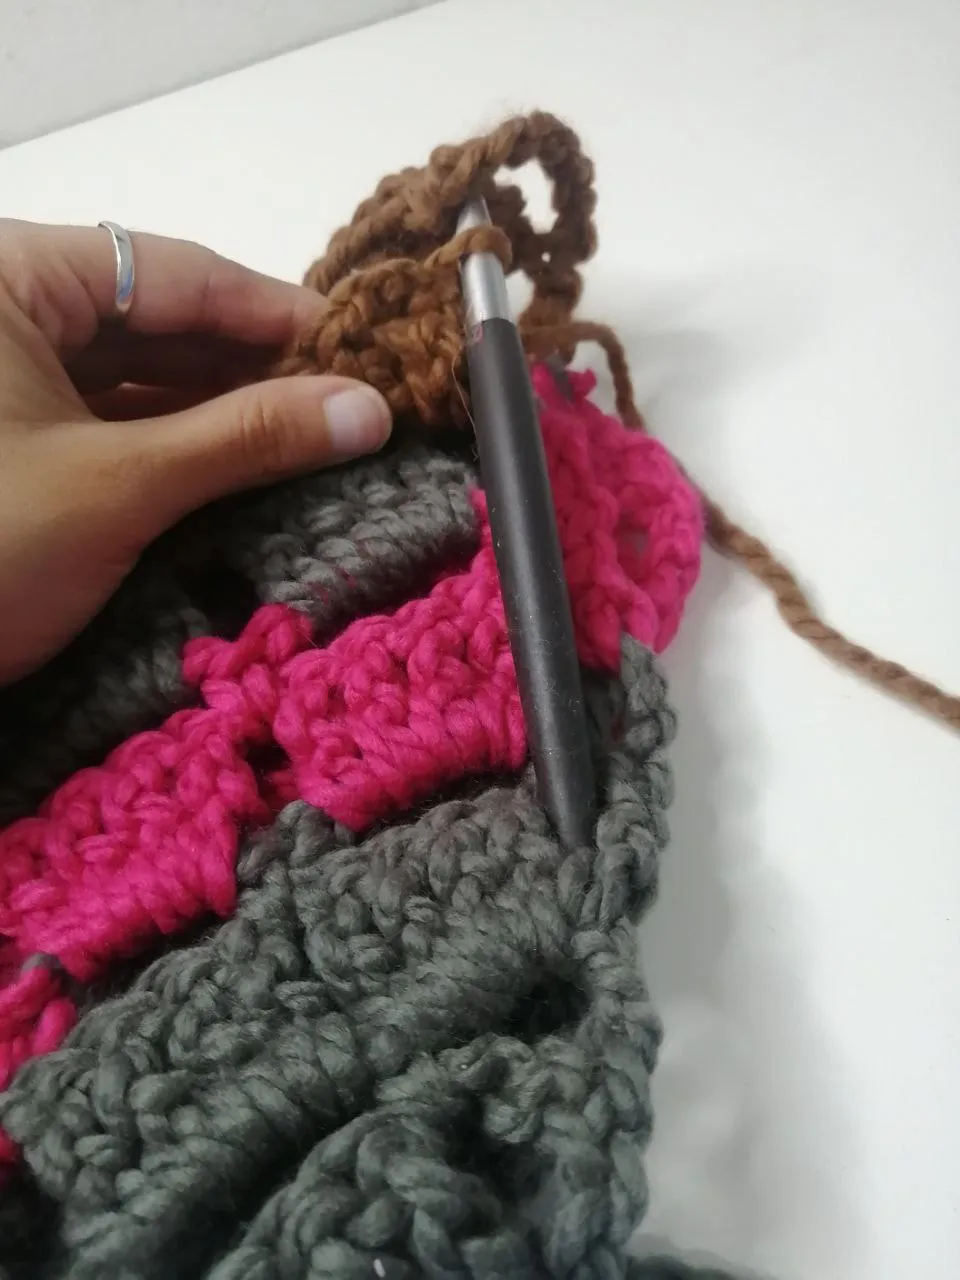
STEP # 10: Once we have finished our triangle we are going to fold it in half, we are going to take the point where the hook is and the opposite corner (we will join both points to proceed to knit the neck), we join making a slipped stitch, we knit three chains of height we unfold and we are going to observe what we position ourselves to go knitting the neck, you are going to observe that there are big spaces left, in each one of them we will knit two extended high stitches until we reach the beginning of the three chains with which we went up, when we reach that space that represents the magic ring with which you had started you will knit a single extended high stitch and we continue in the following spaces knitting two extended high stitches, once the last two extended high stitches are finished you will observe the three chains with which we started the neck, we position ourselves in the first extended high stitch and on it we join making a slipped stitch.
STEP #11: We are going to start the second round of the neck going up with three chains and we will make a type of elastic we position ourselves in that first chain that is formed above the stitch of the previous row we make an extended high stitch, the second high stitch is going to be different since we make it in relief passing in front of the previous stitch elaborating an extended high stitch, we pass in crochet behind so that the previous stitch remains in front and we make that extended high stitch, in the next one what is going to be seen in front is the crochet and that previous high stitch is behind and we make another extended high stitch, in this way successively to work the elastic or relief, at the end we take that first stitch and we make a slipped stitch, in my case I made three rounds to give height to the neck, depending on the number of g width can be more or less rounds.
| |
|---|
| |
|---|
| |
|---|
STEP #12: Once the collar is finished we can make tassels or strips to give a nice effect at the end, cut several strips of approximately 30 centimeters each and place them in the chain that is formed below in the triangle, I placed groups of three strips in each one, it will depend on how you think it looks better.
Love making this project, I'm sure you will say Barbie is not that easy, and yes, it takes a lot of steps but they are repetitive and you will love the result, you can use crochet hook number new or eight and that will depend on the wool or yarn with which you want to work.