🇪🇸 ESPAÑOL
¡¡Saludos para todos mis amigos de hive!!
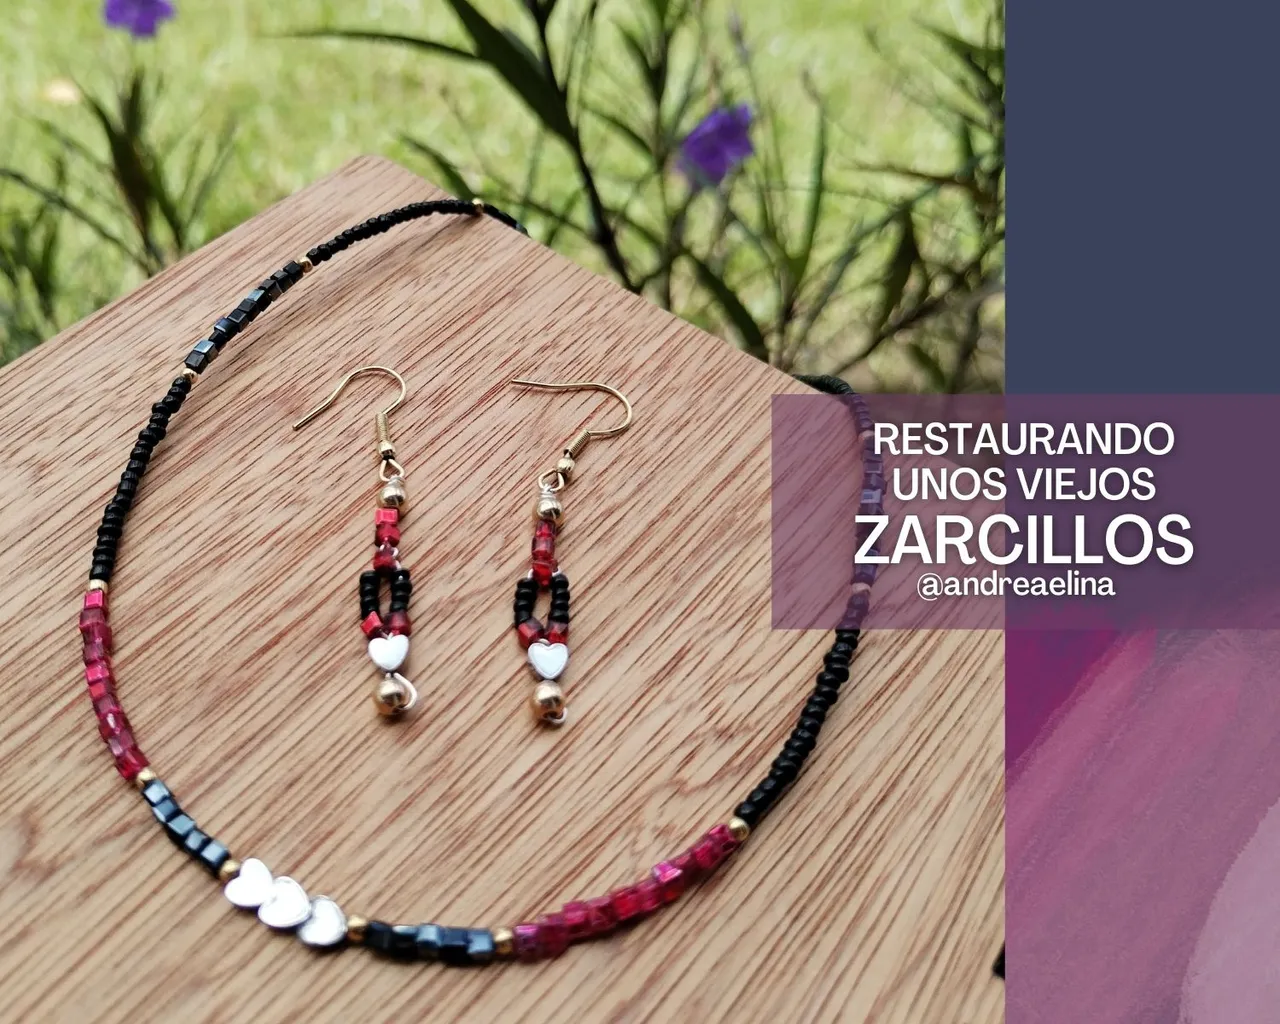
Hoy quiero mostrarles como ayude a mi tía a recuperar sus zarcillitos rotos. La historia es la siguiente:
Ella llegó hace unos días preguntándome si podía ayudarla a restaurar unos zarcillos, ya que uno de ellos se le rompió y a esos zarcillos, aunque son bastante sencillos, les tiene mucho cariño porque se los regalo mi tío en conjunto con una cadenita muy linda.
Como yo tengo un poco de conocimiento y habilidad en la bisutería, le dije que por supuesto que podía ayudarla a arreglarlos.
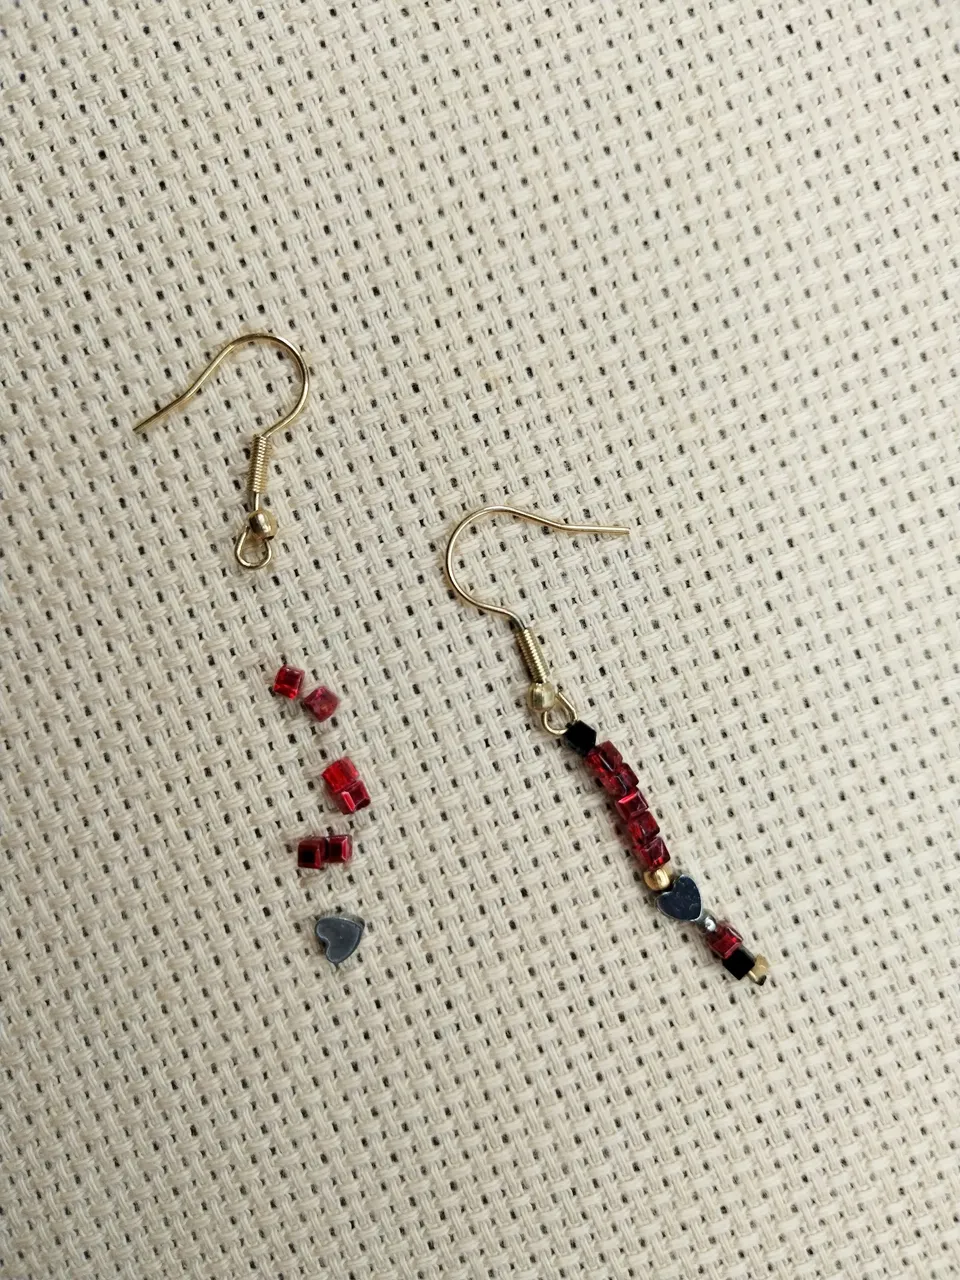
Pero paso algo... Cuando los revisé me di cuenta de que no tenía las piezas completas, le faltaban algunas piedritas para poder hacerlo igual al otro.
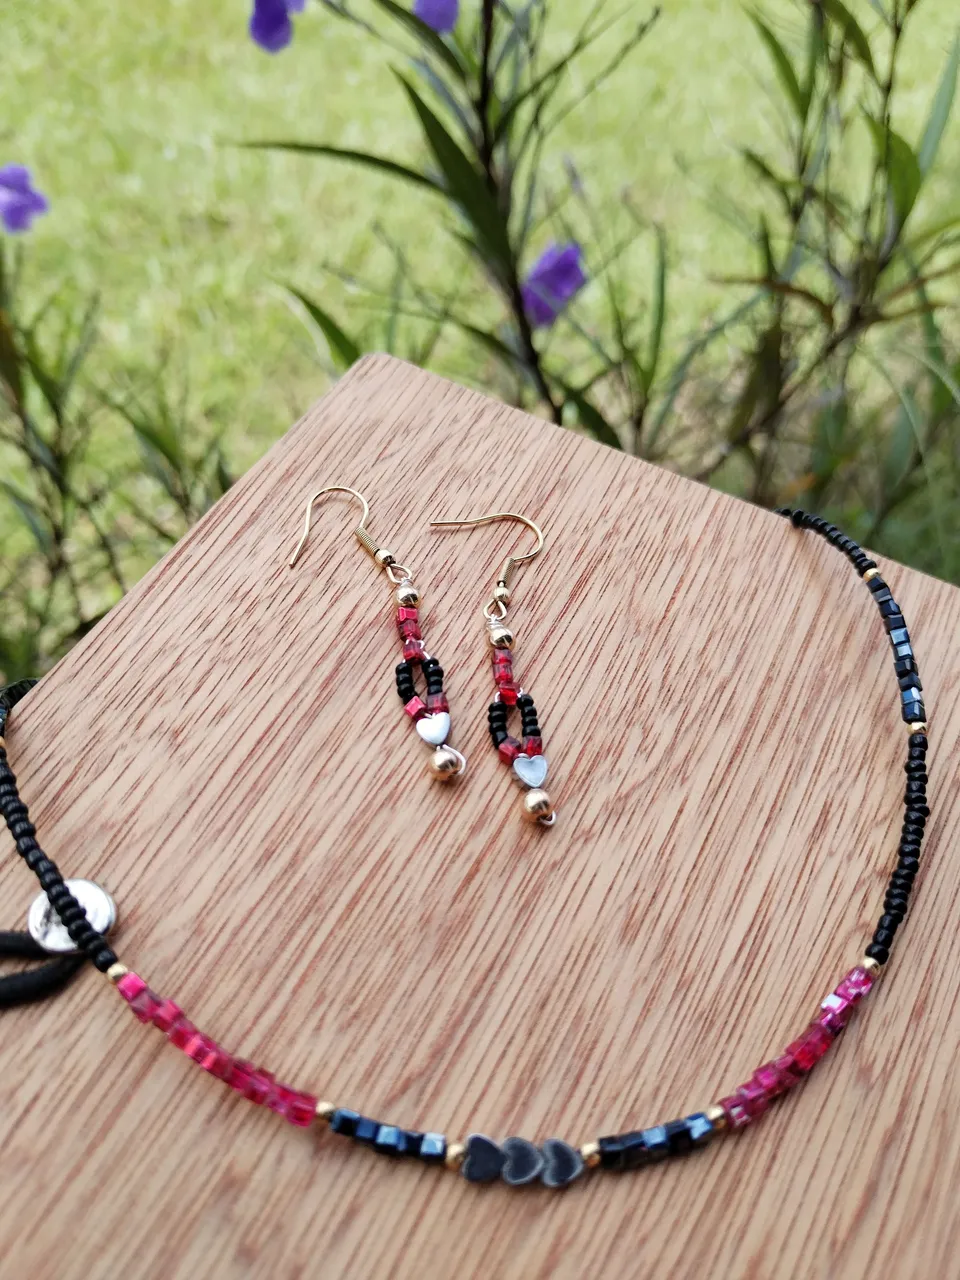
Entonces mi propuesta fue deshacerlos a ambos y crear unos nuevos zarcillos con las piedritas que ya teníamos de ambos y otras nuevas que le hicieran juego a la cadena que ya ella tenía.
Mi tía estuvo encantada con la idea y así es como empieza la elaboración de estos lindos Zarcillos.
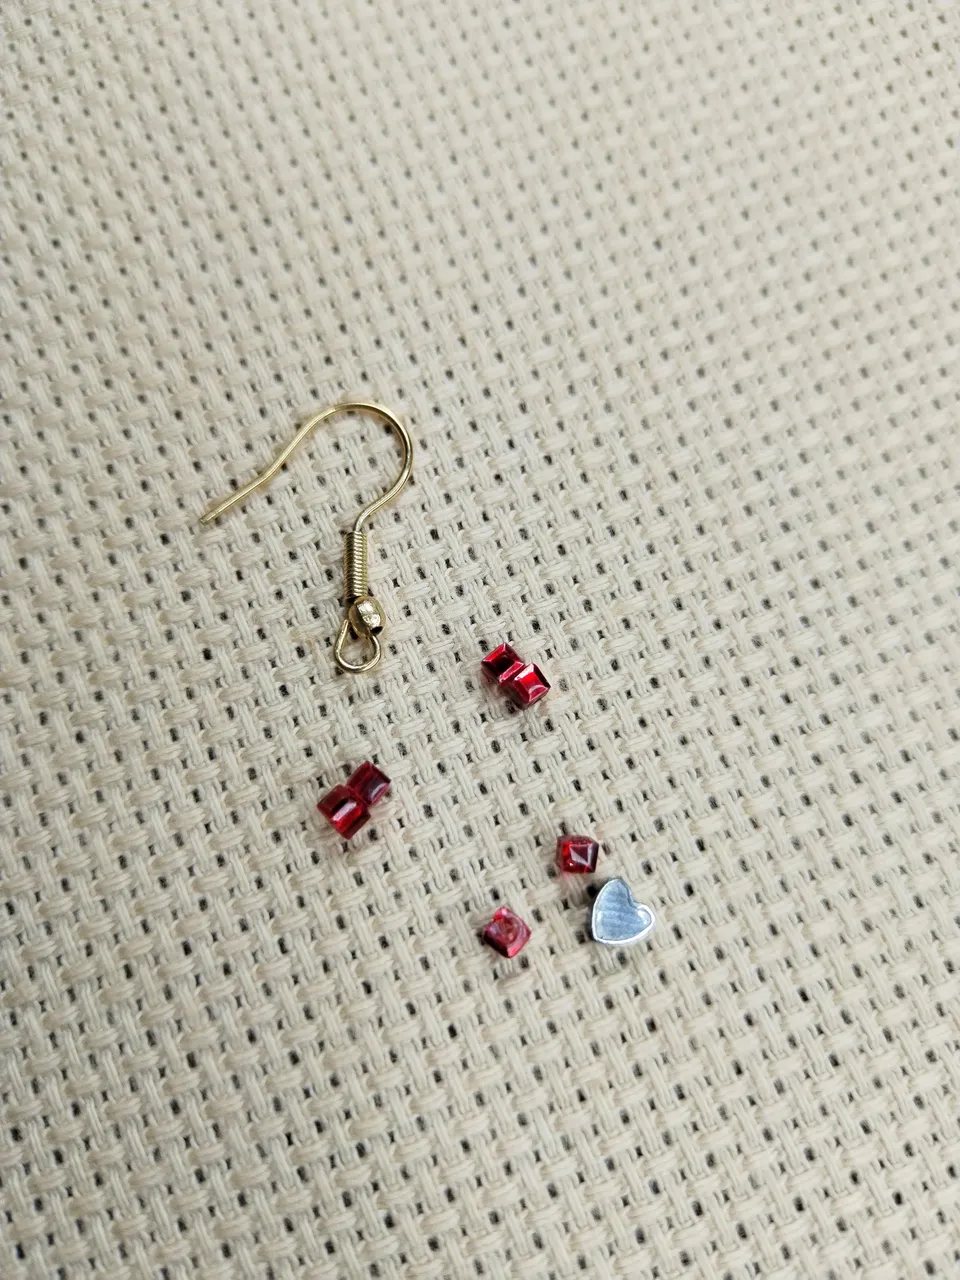
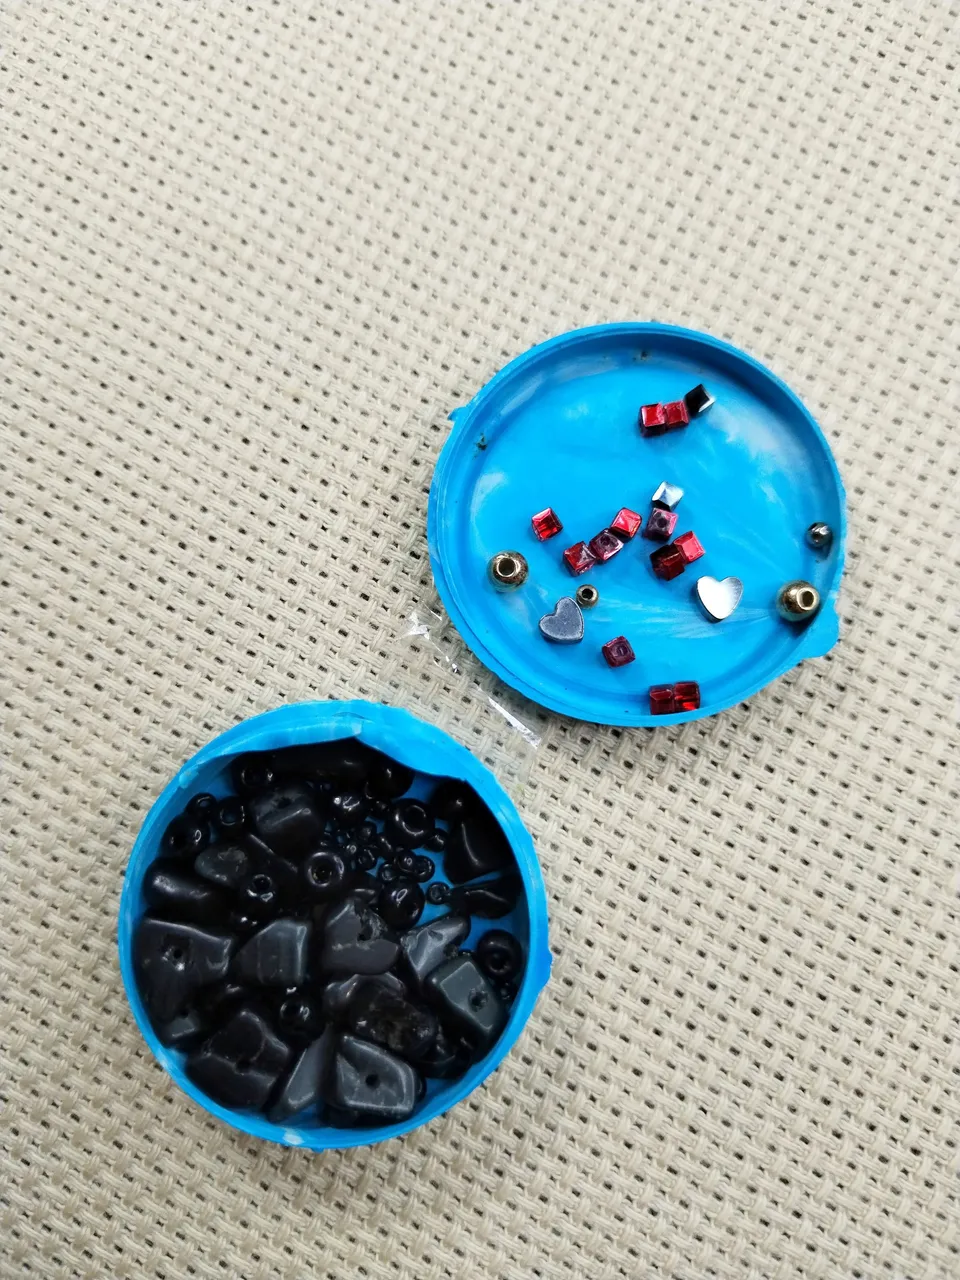
Lo primero que hice fue desarmarlo y buscar en mi estuche de bisutería todas las piedritas similares a las que ya tenía y que combinarán con la cadena, que no había sufrido ningún daño.
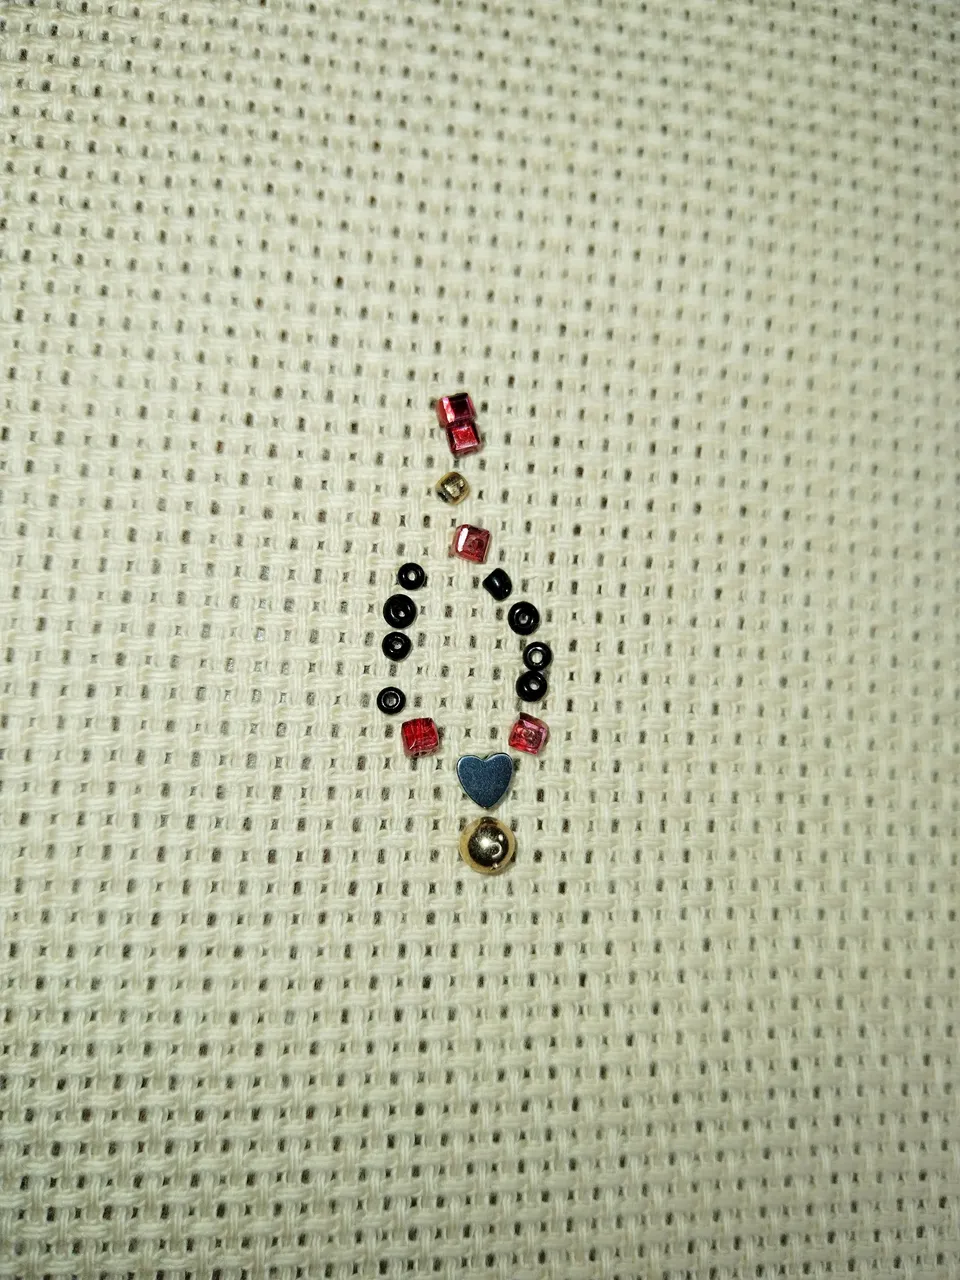
Luego de eso creé un nuevo diseño de Zarcillos y busqué el resto de los materiales necesarios para su elaboración. Hice un boceto de como me gustaría que quedaran.
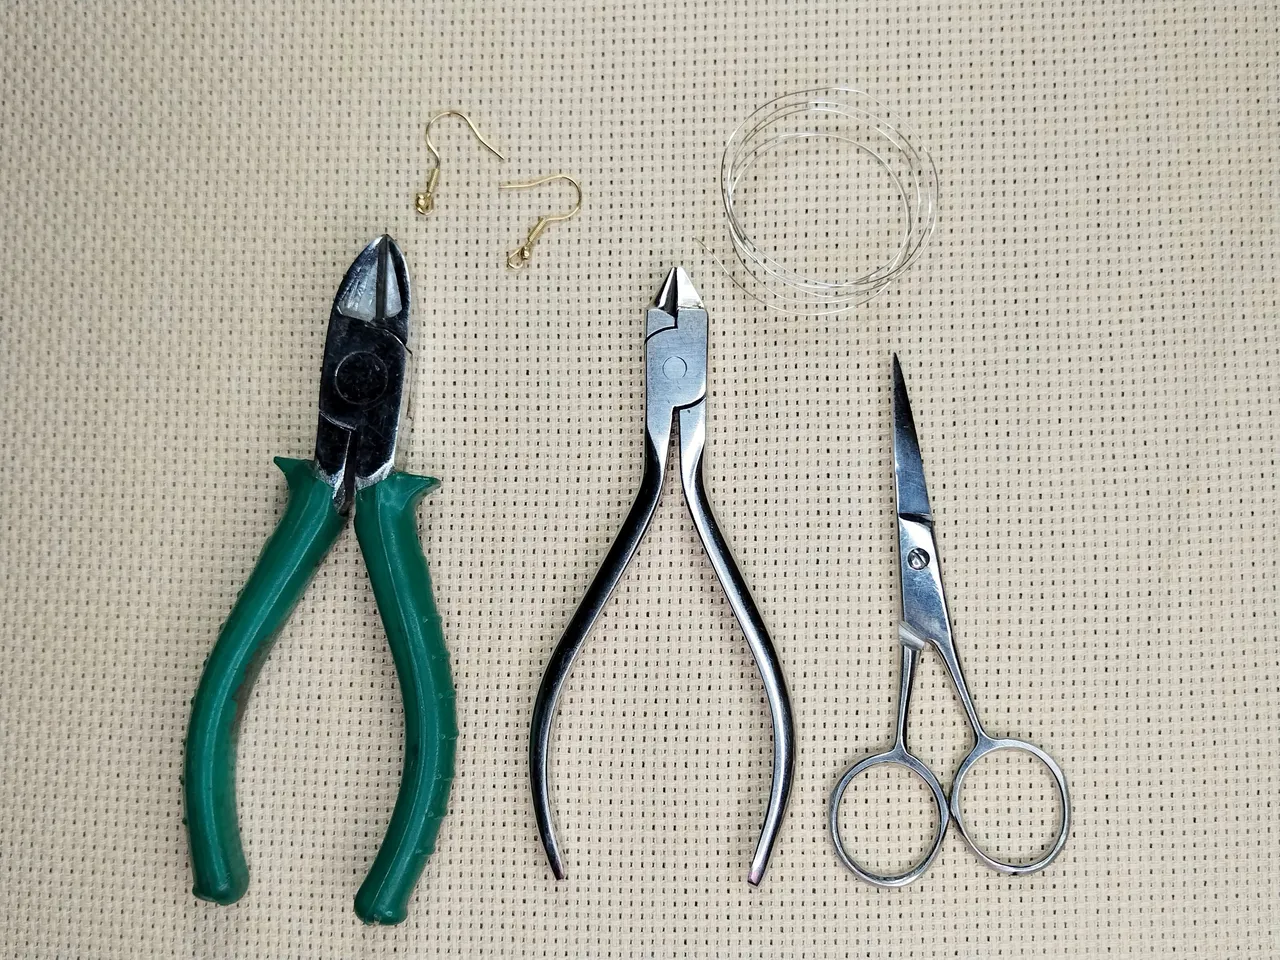
Por suerte tenía a la mano un alambrito metálico fino, las piedritas y las pinzas de trabajo.
Tenía la opción de usar nylon, lo que hubiese sido mucho más rápido y cómodo para hacerlo; sin embargo, no contaba en el momento con los escarlanchines o grapitas para sujetar el nylon y que no se abriera en un futuro.
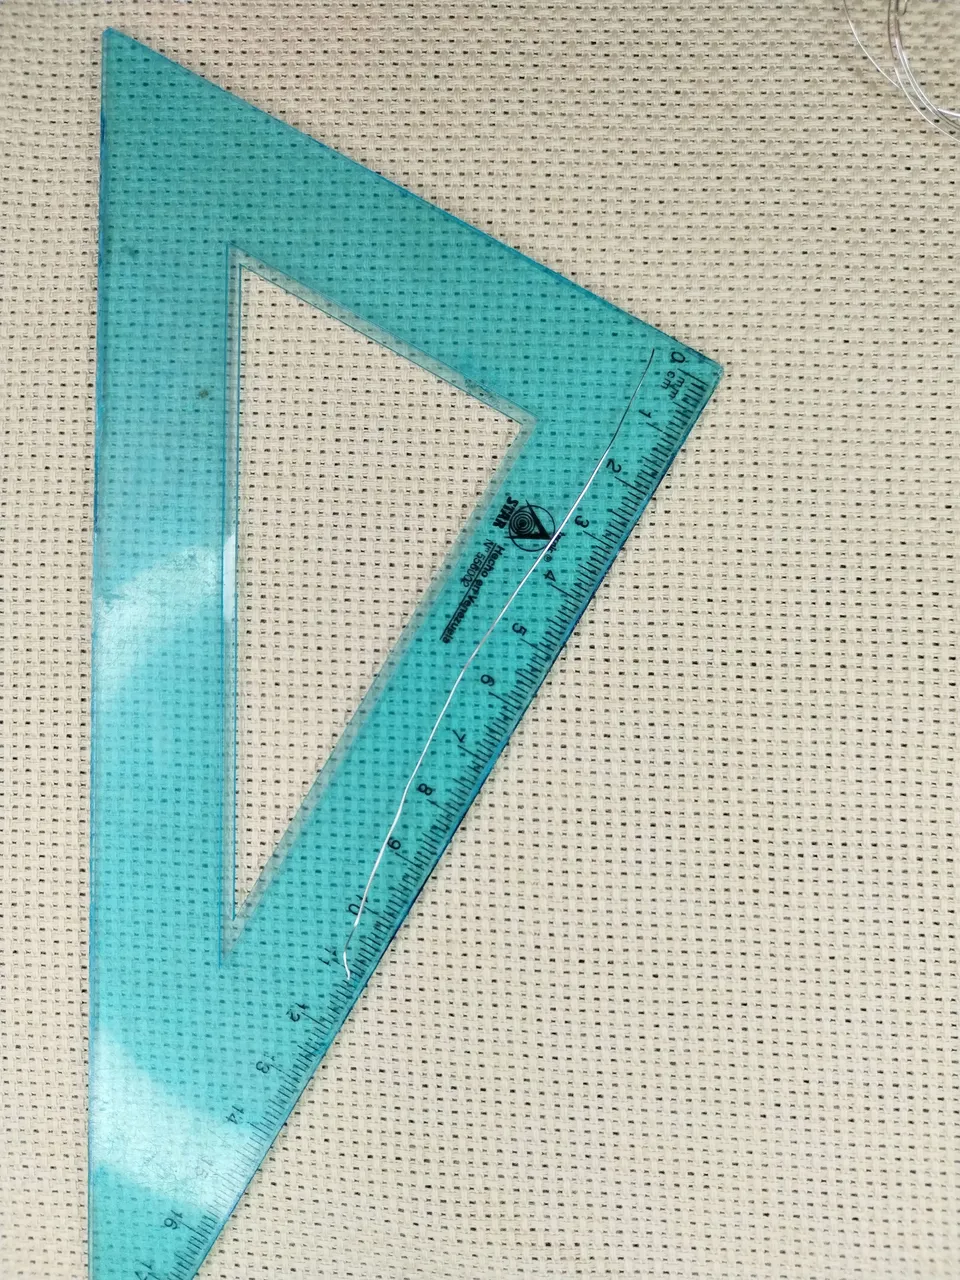
Hacerle nudos no me hace sentir tan segura, siento que no quedan tan resistentes, así que decidí hacerlos con el alambrito de bisutería que tenía en mi stock, y empecé cortando una tira de unos 11 cm aproximadamente.
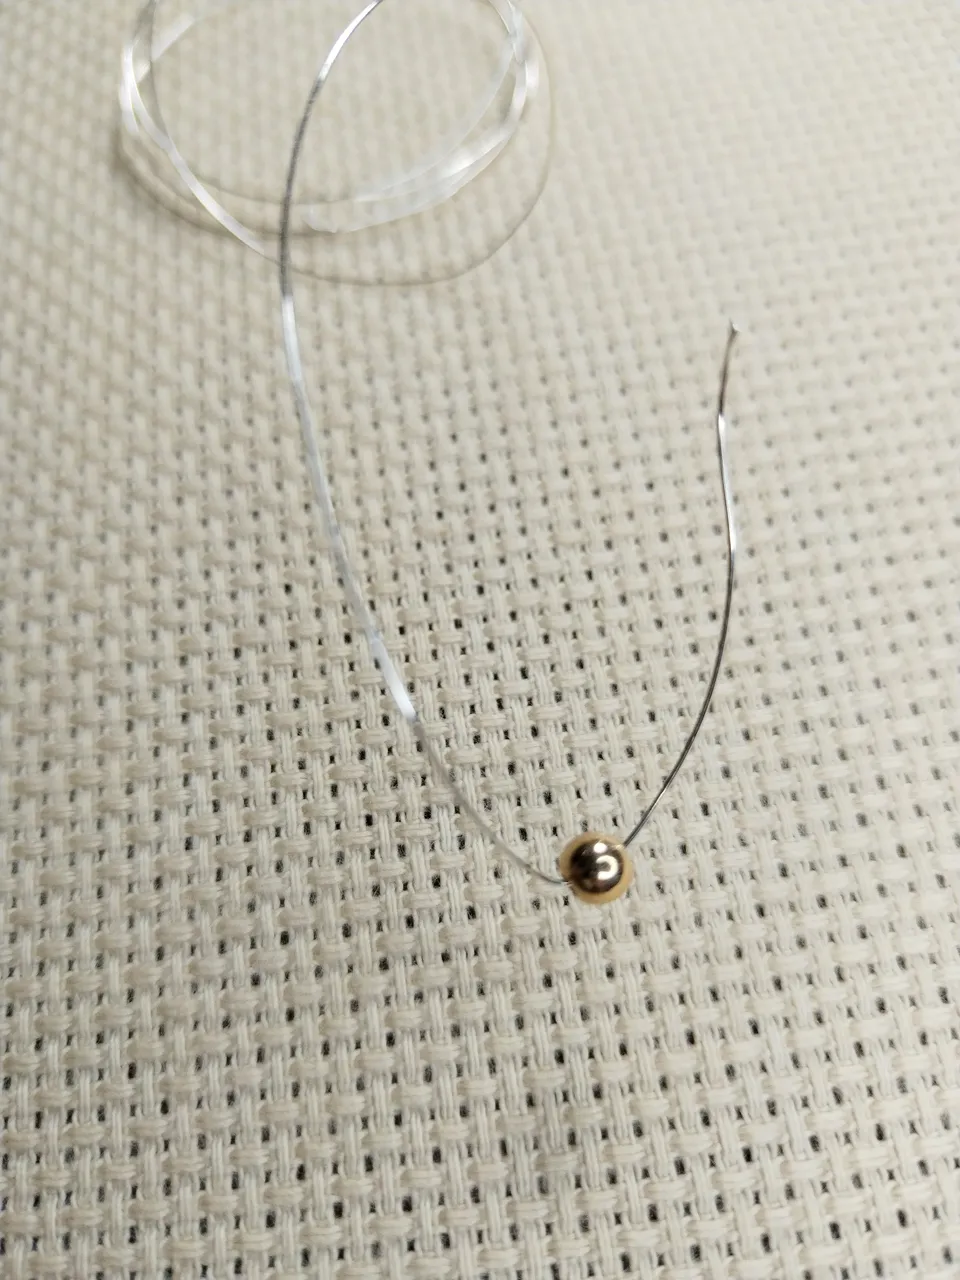
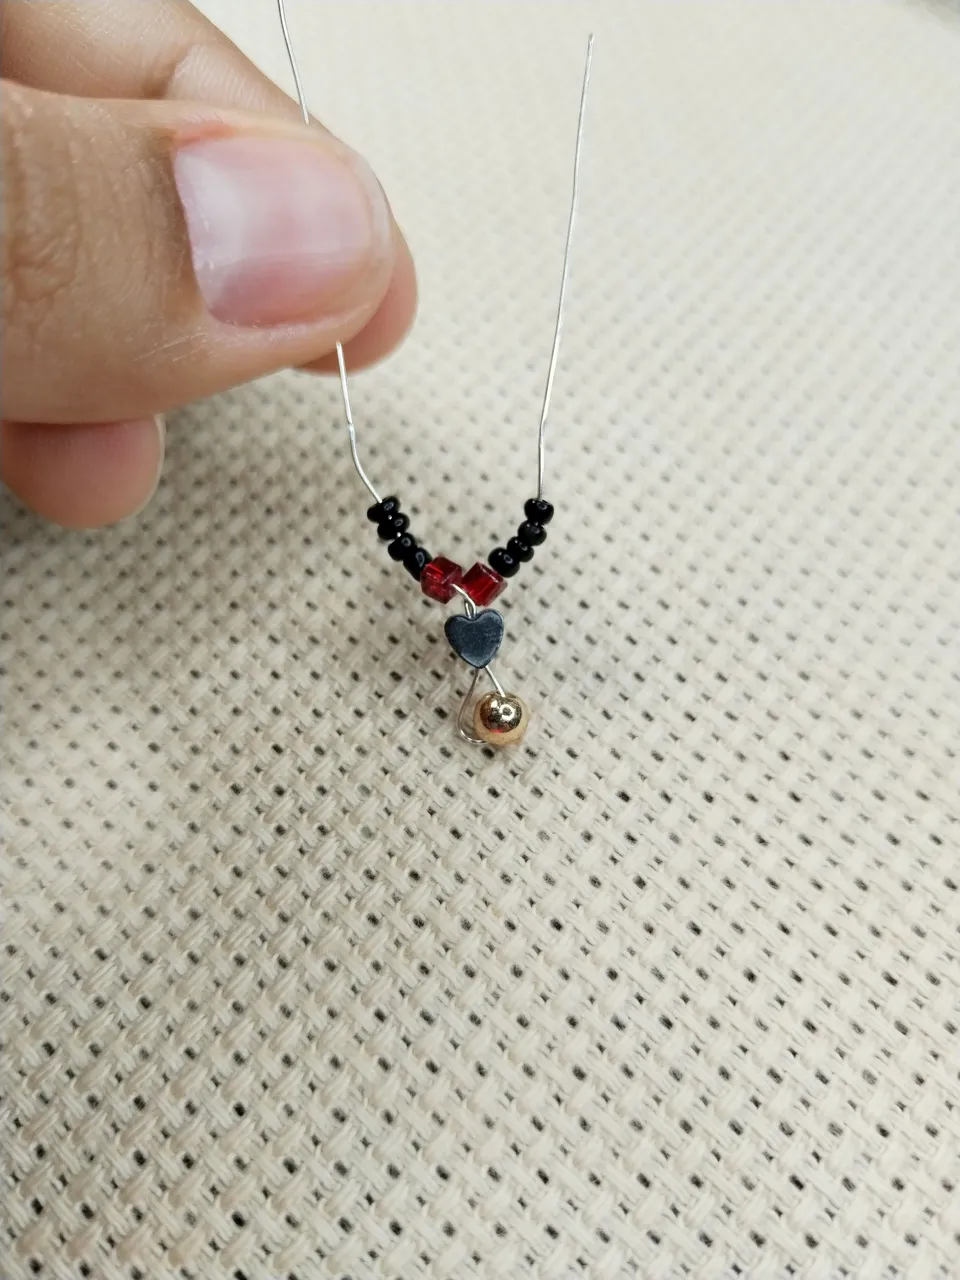
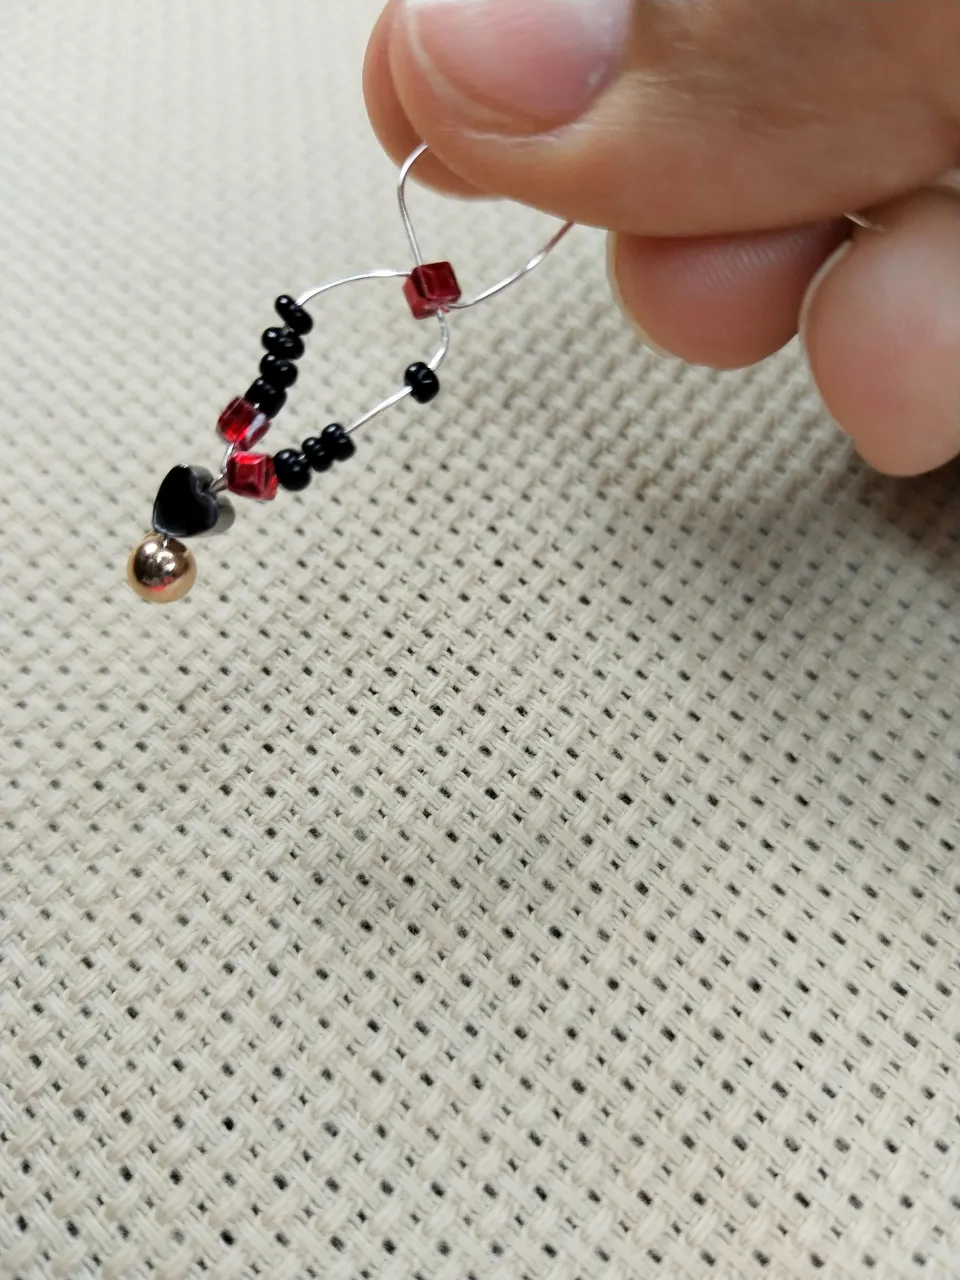
Luego introduje la primera piedrita y fui agregando una a una según el modelo que había establecido previamente.
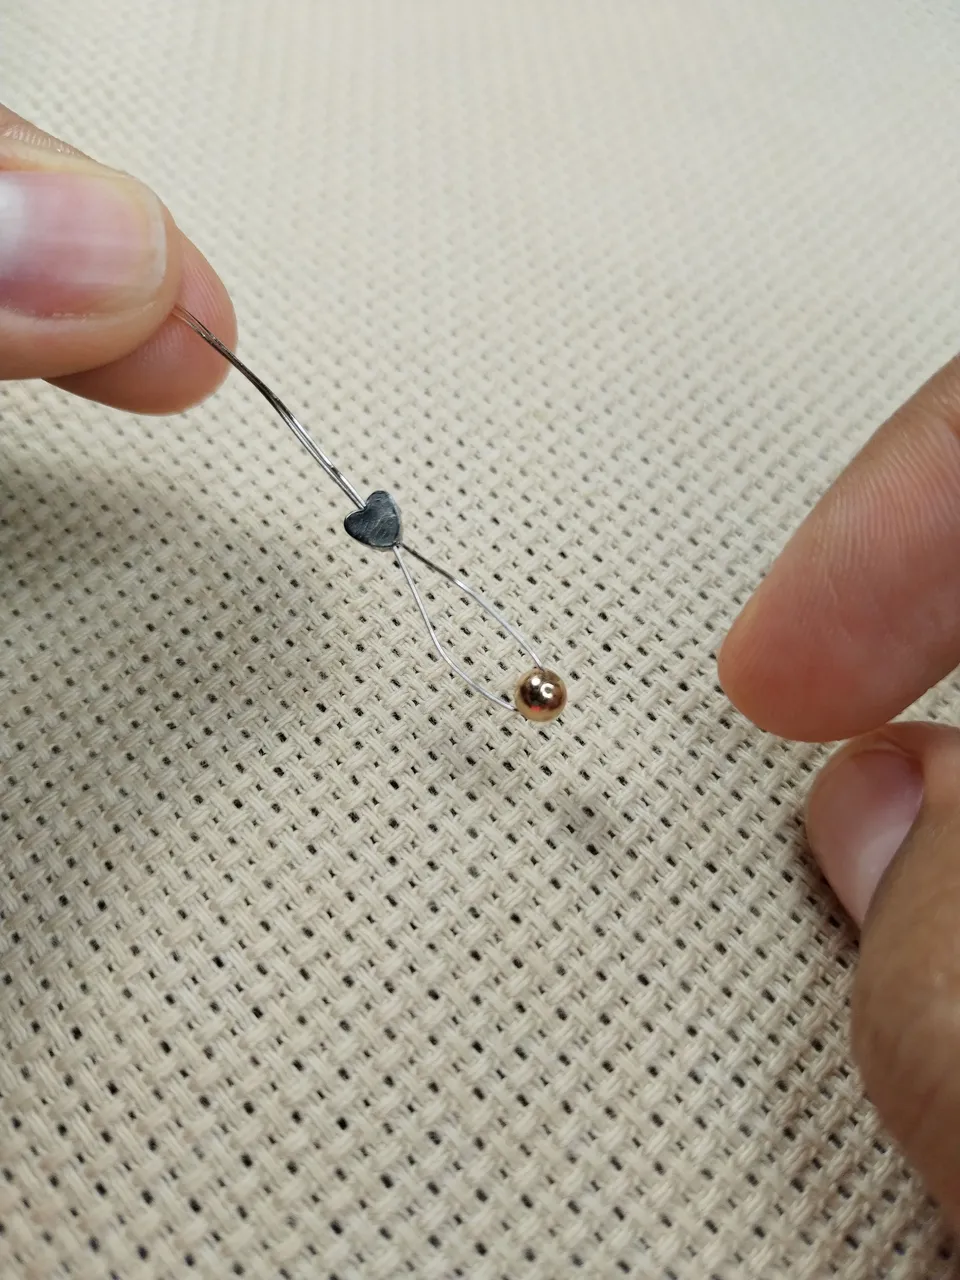
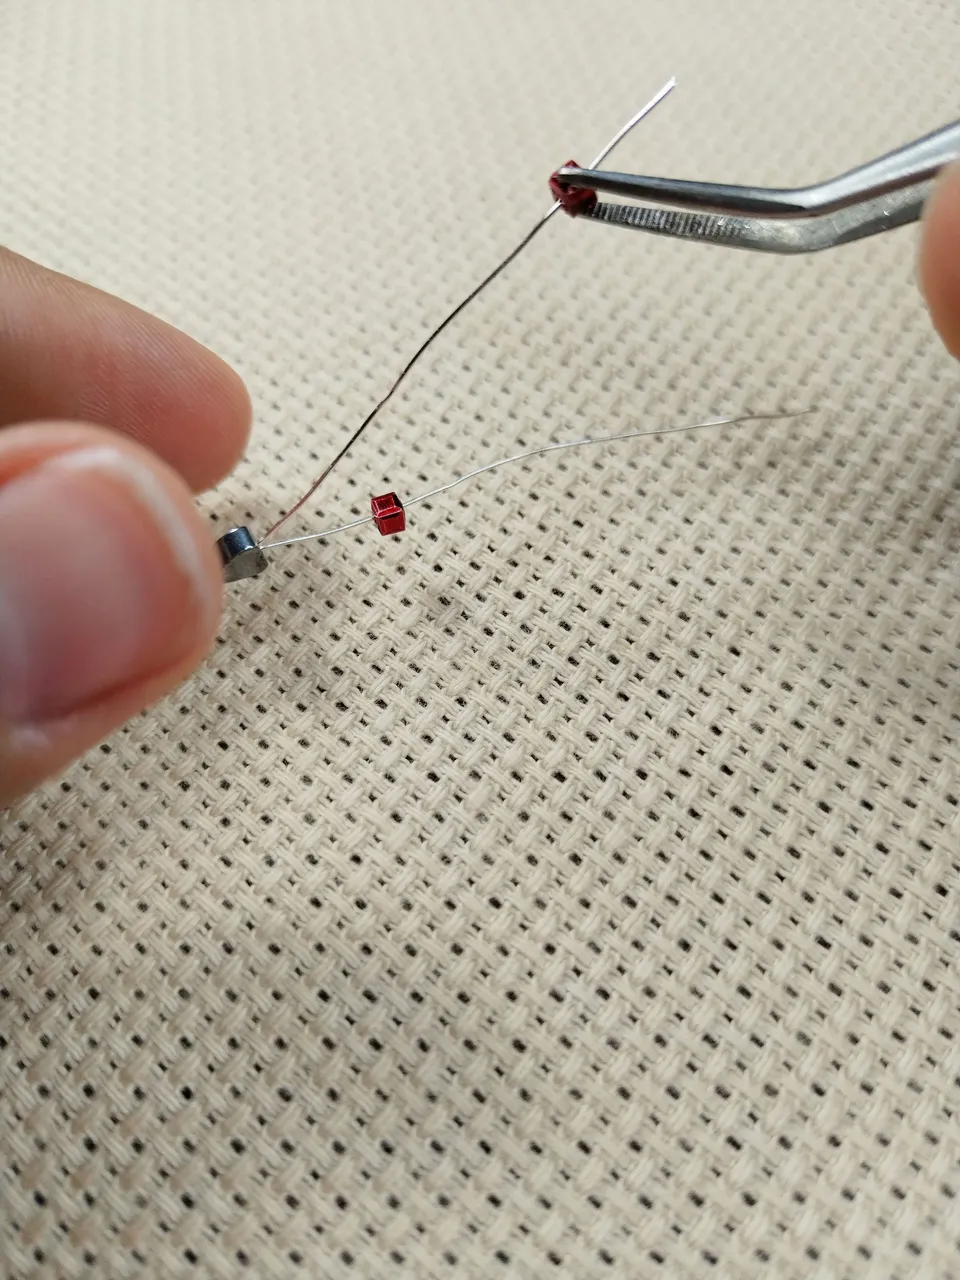
Como se trataban de piedritas tan chiquitas me ayude a incorporar una a una con una pinza, a medida que iba agregando piedritas también iba contorneando el alambrito para darle la forma que yo esperaba.
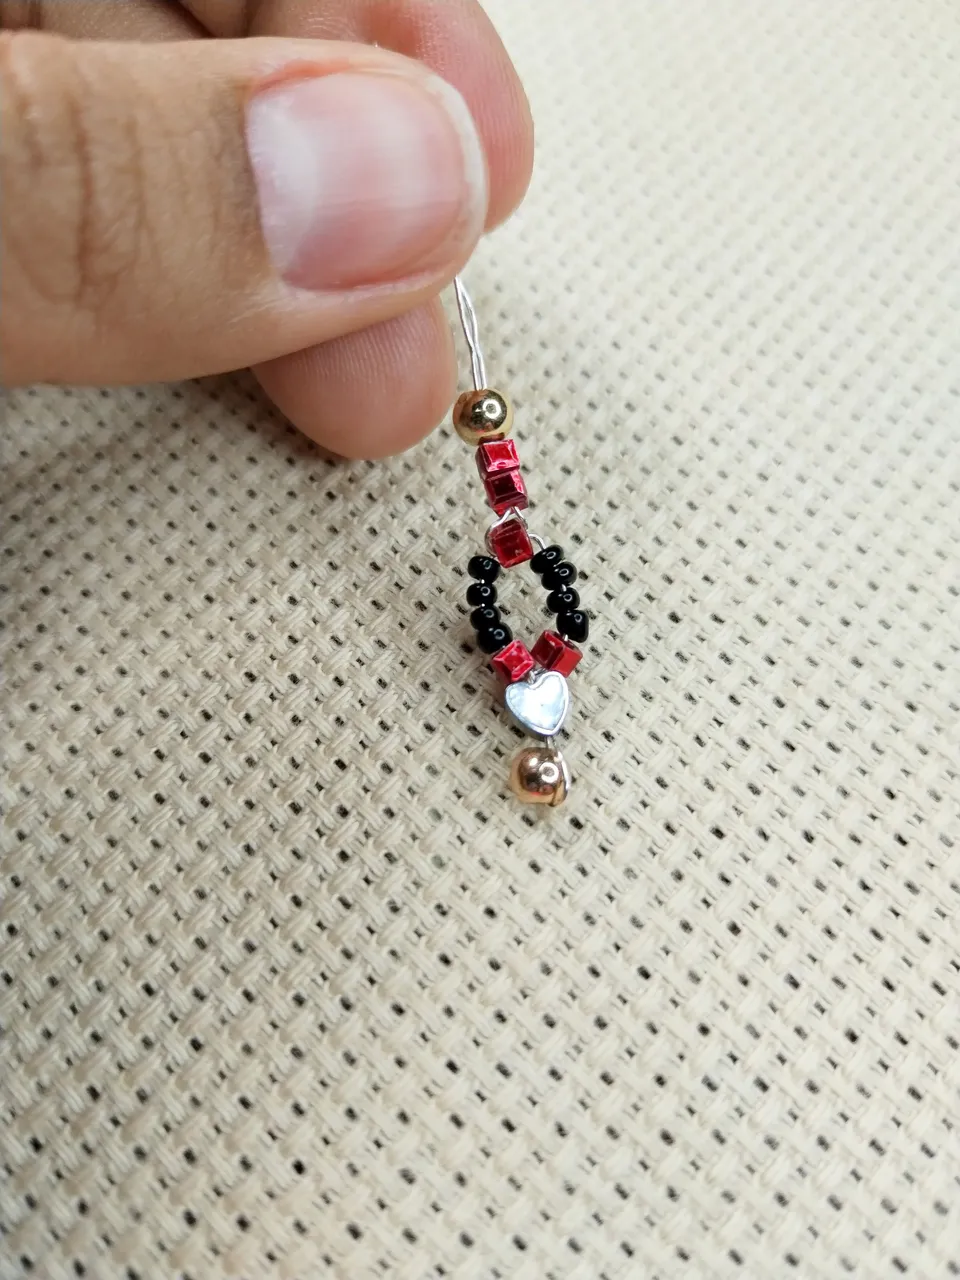
Es importante ir haciendo esto en conjunto con agregar las piedras porque si se deja para el final se vuelve más difícil.
Una vez que ya tenía todas las piezas colocadas tal cual como las había acomodado antes de empezar, me puse a darle los últimos detalles para que se viera como yo quería.
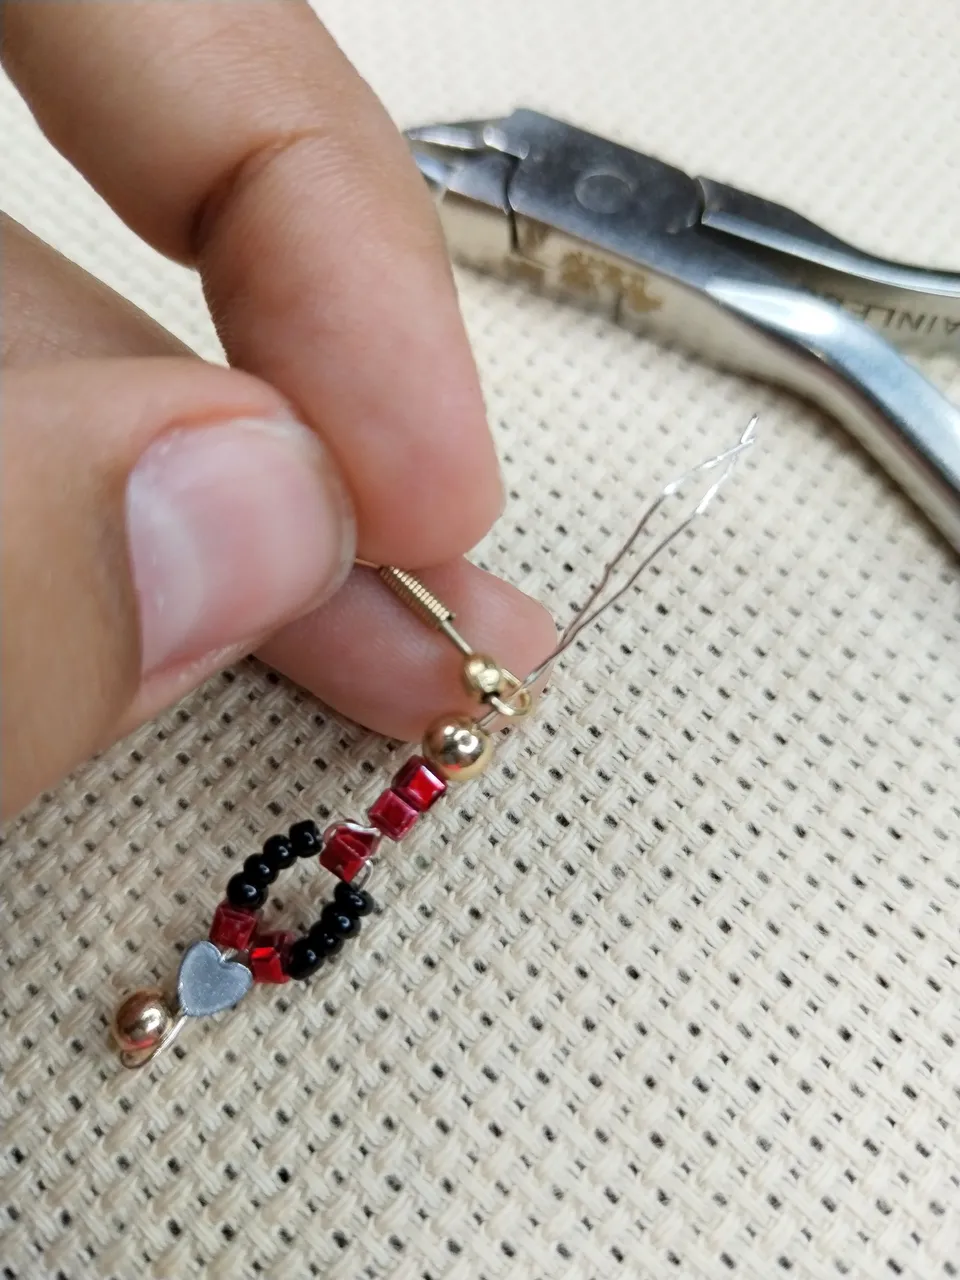
Luego de eso agregué la base del zarcillo y lo ajusté al alambre con las pinzas.
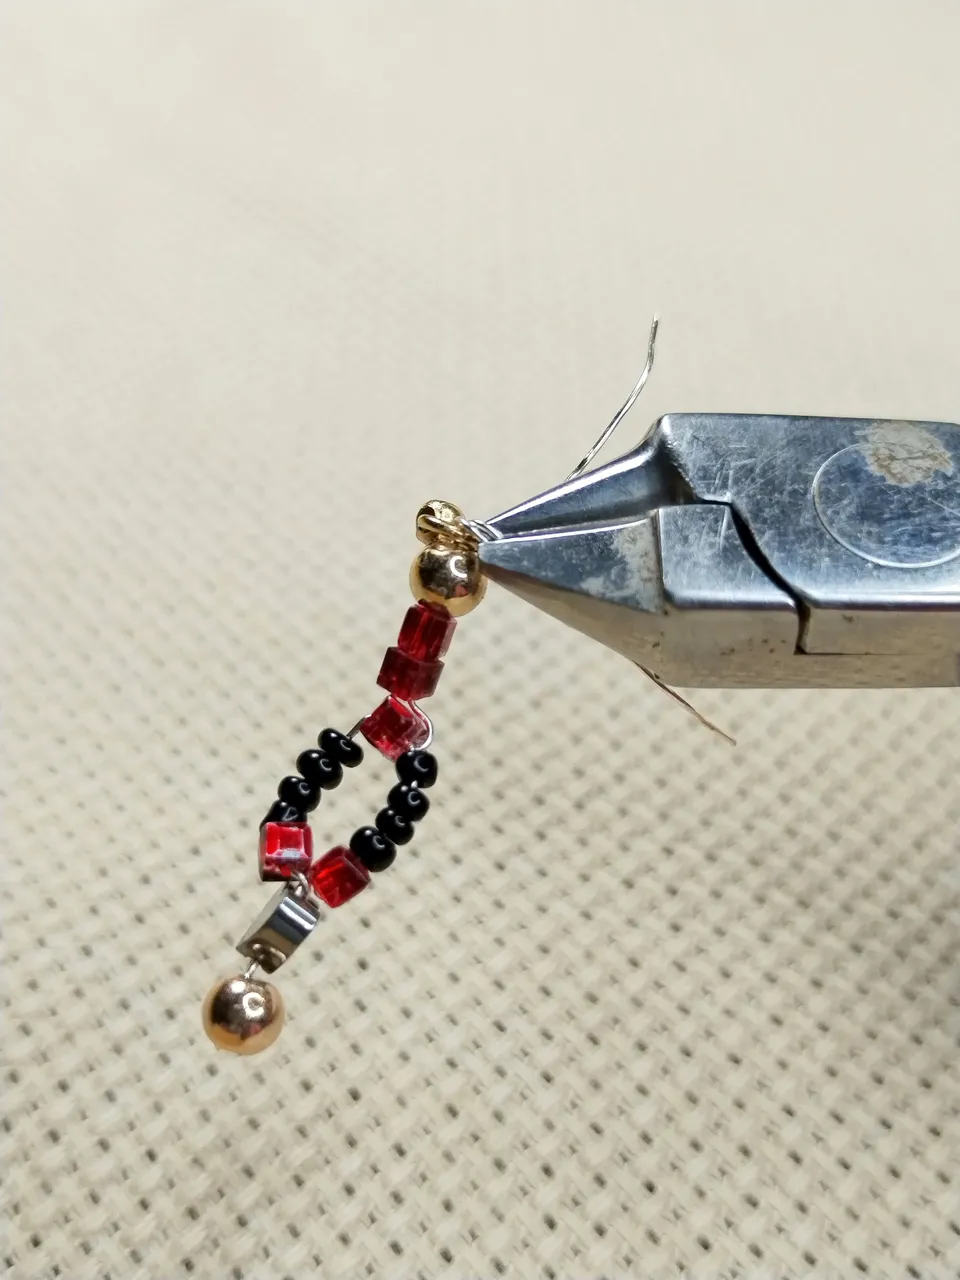
Para finalizar, corté los excesos y los doble para que no
lastimen a mi tía.
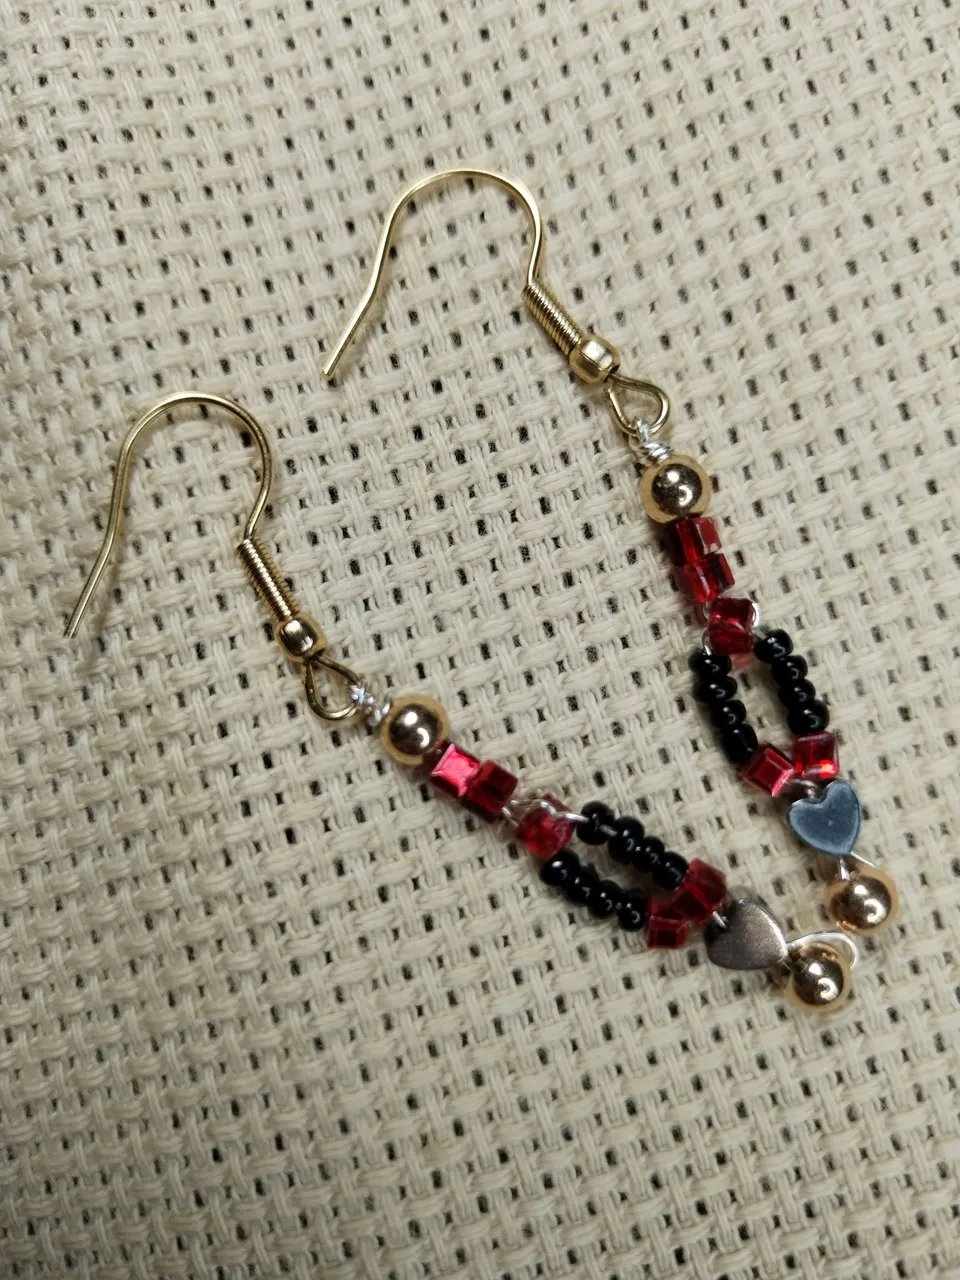
Hay que tener un poco de práctica con el material porque tiene sus trucos para elaborarlo, sin embargo, siempre que lo hagamos con paciencia y cariño, el resultado siempre va a ser muy bonito.

¡Espero les haya gustado y próximamente les seguiré mostrando las cosas que me gusta hacer en mis tiempos libres!
🇺🇸 ENGLISH
Greetings to all my hive friends!!
Today I want to show you how I helped my aunt recover her broken earrings. The story is the following:
She arrived a few days ago asking me if I could help her restore some earrings, since one of them was broken and she is very fond of those earrings, although they are quite simple, because my uncle gave them to her together with a very pretty chain.
Since I have some knowledge and skill in jewelry, I told her that of course she could help her fix them.
But something happened... When I checked them I realized that she did not have the complete pieces, she was missing some pebbles to be able to make it the same as the other one.
So my proposal was to undo them both and create new earrings with the little stones that we already had from both of them and new ones that would match the chain that she already had.
My aunt was delighted with the idea and that is how the elaboration of these cute earring begins.
The first thing I did was disassemble it and look in my jewelry case for all the little stones similar to the ones she already had and that would match the chain that hadn't suffered any damage.
After that I created a new Tendrils design and searched for the rest of the materials needed to make it. I made a sketch of how I would like them to look.
Luckily I had a fine metal wire, the pebbles and the work clamps at hand.
You had the option of using nylon, which would have been much faster and more comfortable to do it; however, at the time it did not have the escarlanchines or staples to hold the nylon and that it would not open in the future.
Tying knots doesn't make me feel so safe, I feel that they are not as resistant, so I decided to make them with the jewelry wire I had in my stock, and I started by cutting a strip of approximately 11cm.
Then I introduced the first pebble and added one by one according to the pattern I had previously established.
Since they were so small pebbles, help me incorporate one by one with a clamp, as I was adding pebbles I was also outlining the wire to give it the shape I expected.
It is important to do this together with adding the stones because if it is left until the end it becomes more difficult.
Once I had all the pieces placed just as I had arranged them before starting, I began to give it the last details so that it looked the way I wanted.
After that I added the base of the tendril and adjusted it to the wire with the pliers.
To finish, I cut the excesses and fold them so they don't hurt my aunt.
You have to have a little practice with the material because she has her tricks to make it, however, as long as we do it with patience and love, the result will always be very beautiful.
I hope you liked it and soon I will continue showing you the things I like to do in my free time!