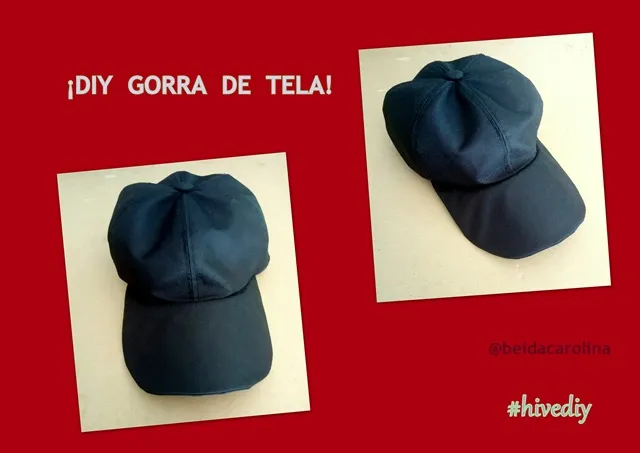
Hola amigos, espero que se encuentren muy bien❤, el día de hoy estoy muy feliz porque nuevamente vuelvo a publicar un tutorial de costuraaaa , en esta ocasión vamos a elaborar una gorra paso a paso . Les cuento que en la ciudad donde vivo esta haciendo mucha calor , los días son muuy soleados y por ese motivo decidí hacerme una gorra y quiero compartir con ustedes la elaboración de este útil y lindo accesorio que nos ayudará a proteger nuestro rostro de los rayos de sol. Creo que todos en algun punto de nuestra vida hemos tenido una gorra en casa y si no es asi esta es tu oportunidad para aprender a elaborar una gorra en casa:D
Hello friends, I hope you are very well, today I am very happy because once again I publish a sewing tutorial, this time we are going to make a cap step by step. I tell you that in the city where I live it is very hot, the days are very sunny and for that reason I decided to make myself a hat and I want to share with you the elaboration of this useful and beautiful accessory that will help us protect our faces from the sun's rays. Sol. I think that at some point in our lives we all have had a hat at home and if not, this is your chance to learn how to make a hat at home: D
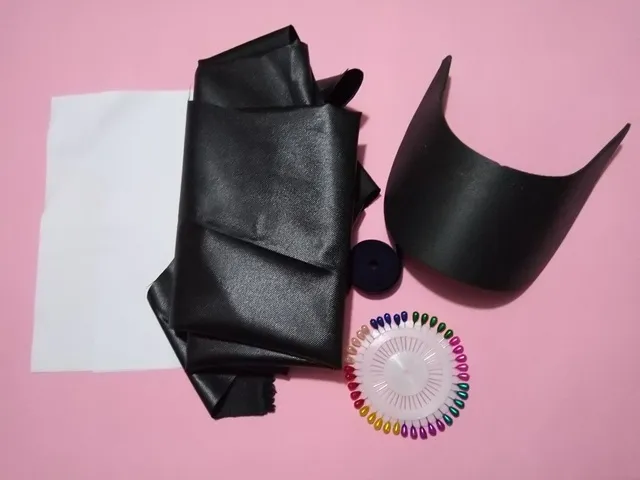
Materiales
- Tela
- Sesgo de 1,5 cm
- Hilo
- vicera de plástico
- Alfileres y aguja
- Tijera
- Papel
- Cloth
- 1.5 cm bias
- Thread
- plastic visor
- Pins and needle
- Scissors
- Paper
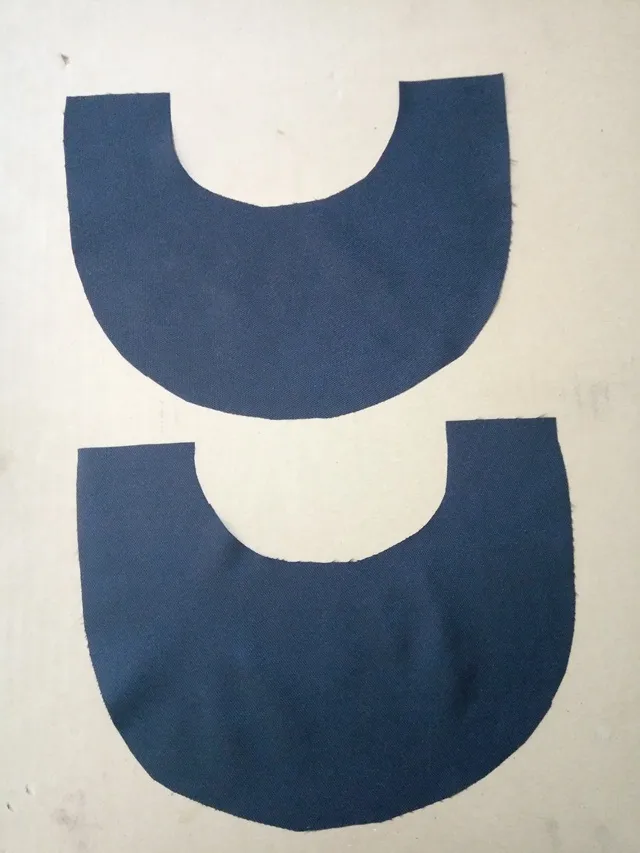
1. Primero vamos a elaborar los patrones. Podemos utilizar una gorra que este viejita y de allí sacar los moldes o también podemos descargar los patrones de internet porque en la actualidad hay muchos blogs que los regalan y también algunas personas los venden. Estos patrones que yo utilice los saqué de una gorra que tenía en casa y que estaba viejita
1. 1. First we are going to make the patterns. We can use a hat that is old and from there get the molds or we can also download the patterns from the internet because today there are many blogs that give them away and some people also sell them. These patterns that I used were taken from a cap that I had at home and that was old
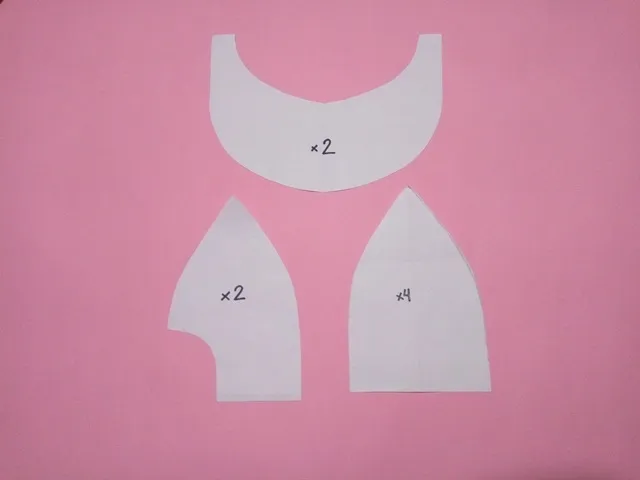
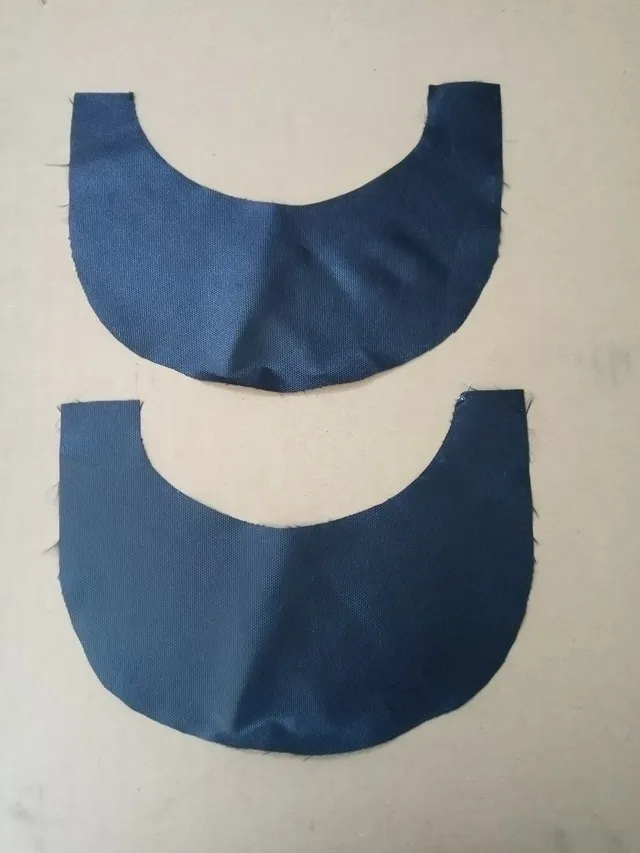
Recortamos los patrones en la tela,en este caso yo utilice una tela llamada loneta, ustedes pueden utilizar la tela de su preferencia
We cut the patterns on the fabric, in this case I used a fabric called canvas, you can use the fabric of your choice
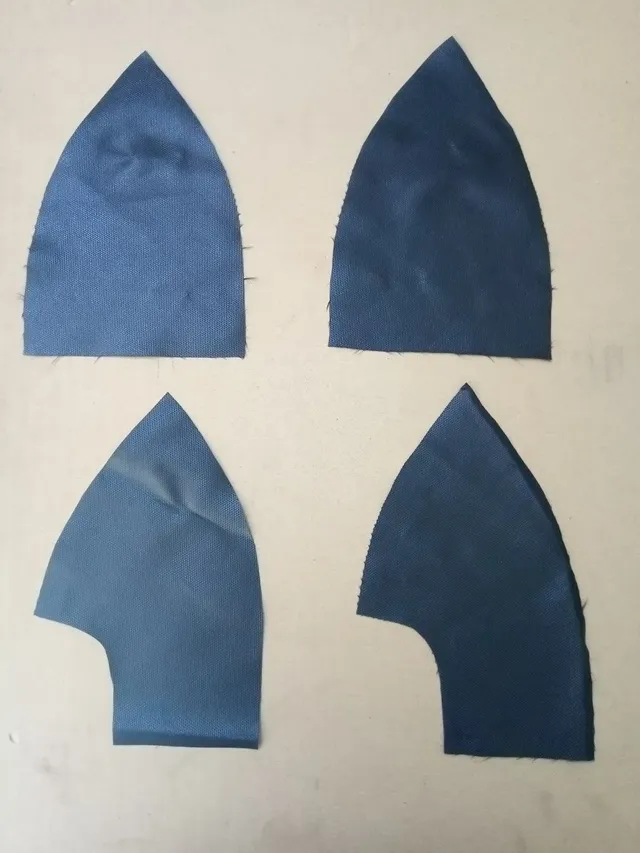
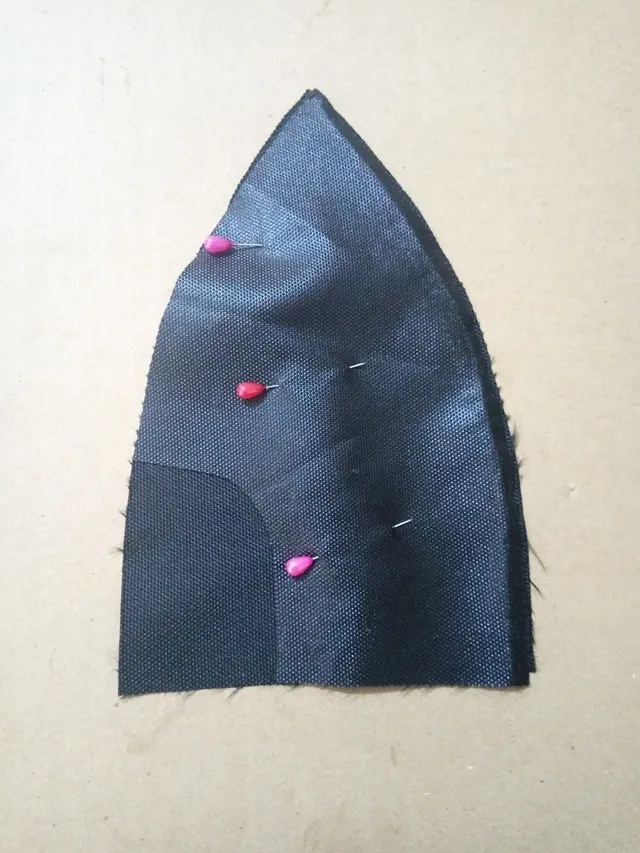
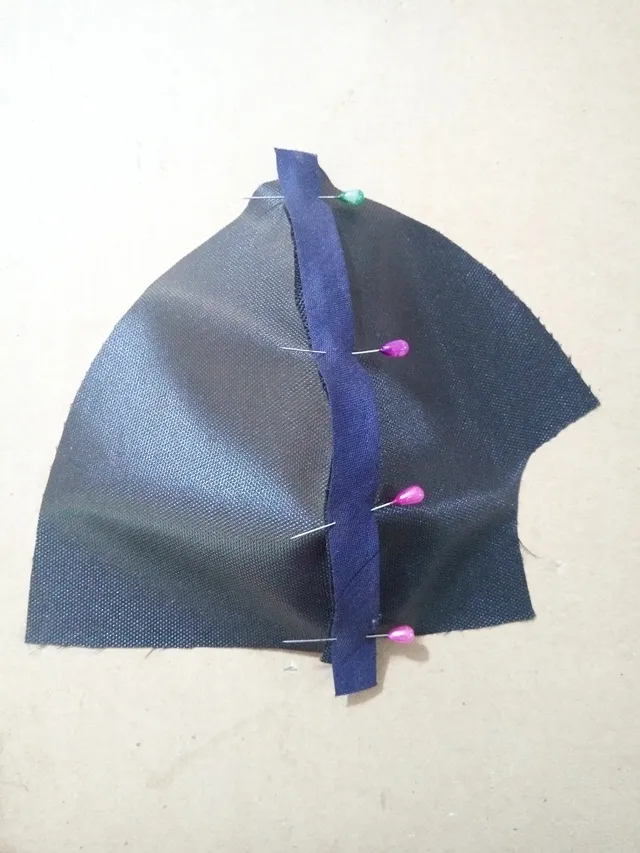
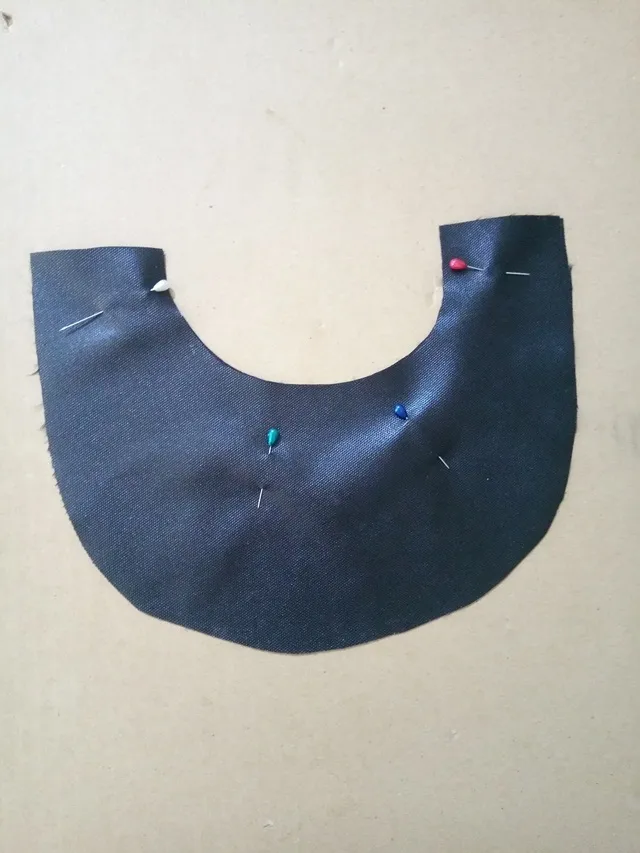
2. Vamos a unir con alfileres y coser dos piezas de tela: una que tenga la abertura y otra que no tenga abertura
2. We are going to pin and sew two pieces of fabric: one with the opening and one with no opening.
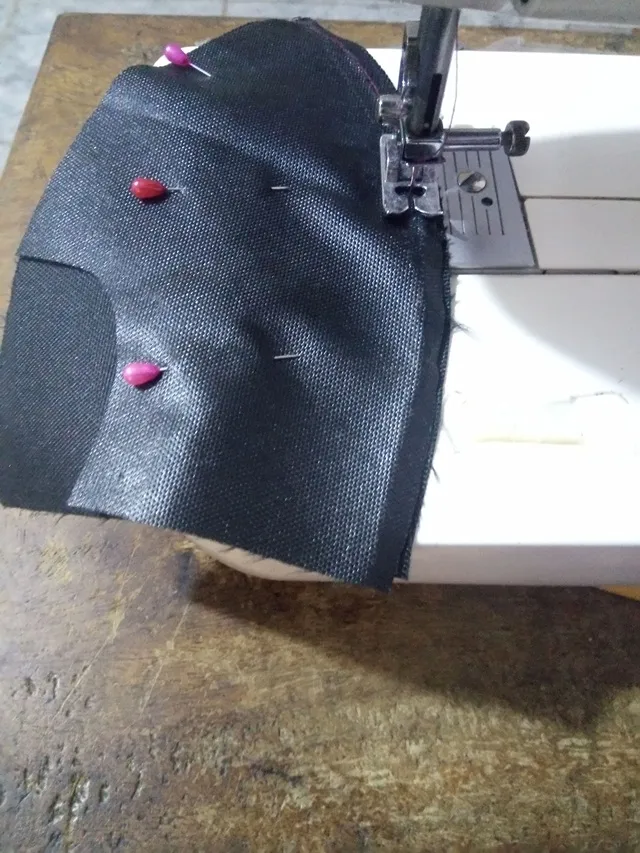
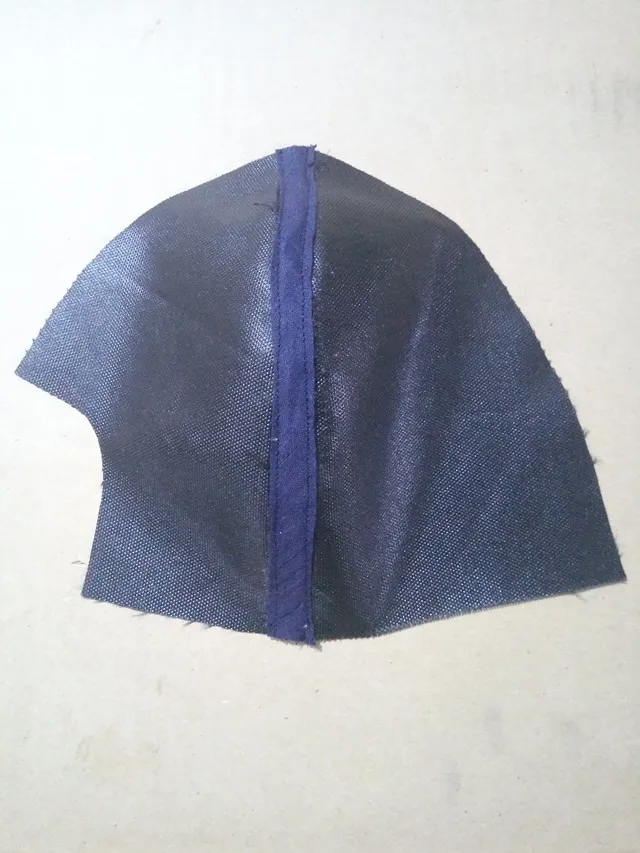
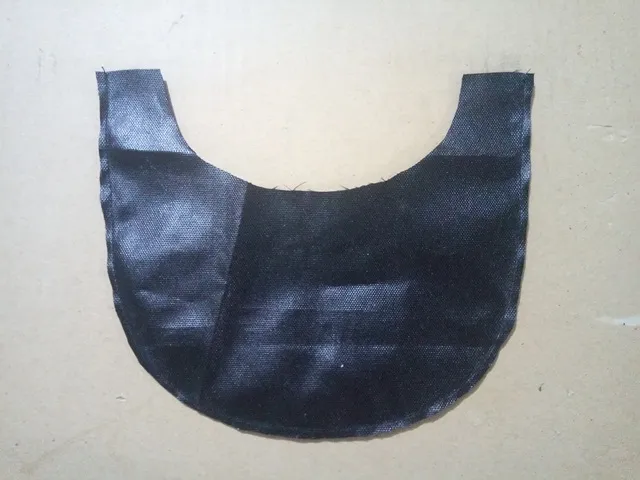
3. Luego vamos a abrir las costuras, podemos utilizar una plancha de ropa para agilizar el proceso) y le colocamos un trozo de sesgo encima y cosemos ambos extremos
3. Then we are going to open the seams (we can use a clothes iron to speed up the process) and place a piece of bias on top and sew both ends
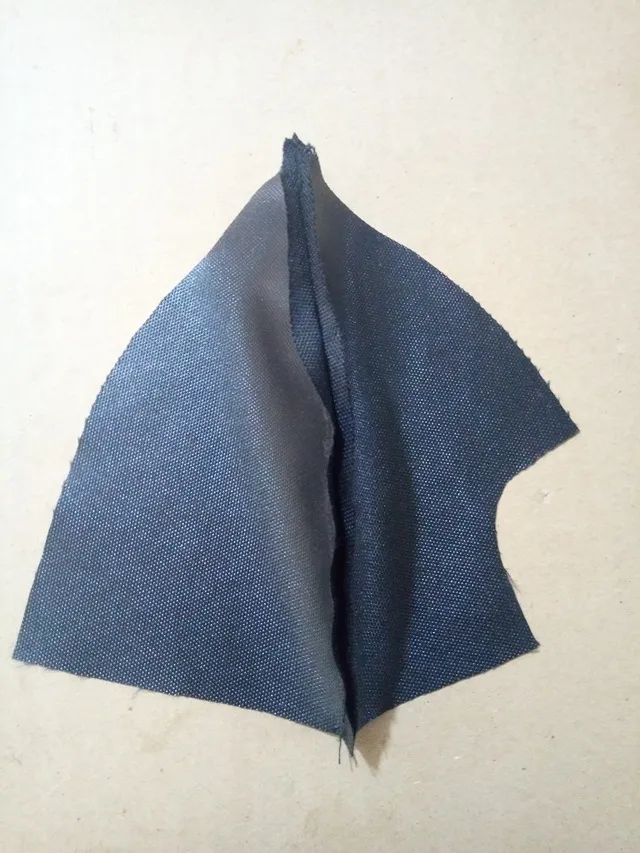
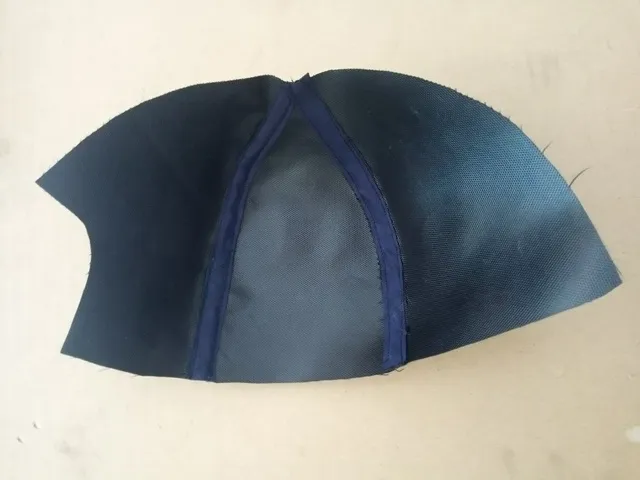
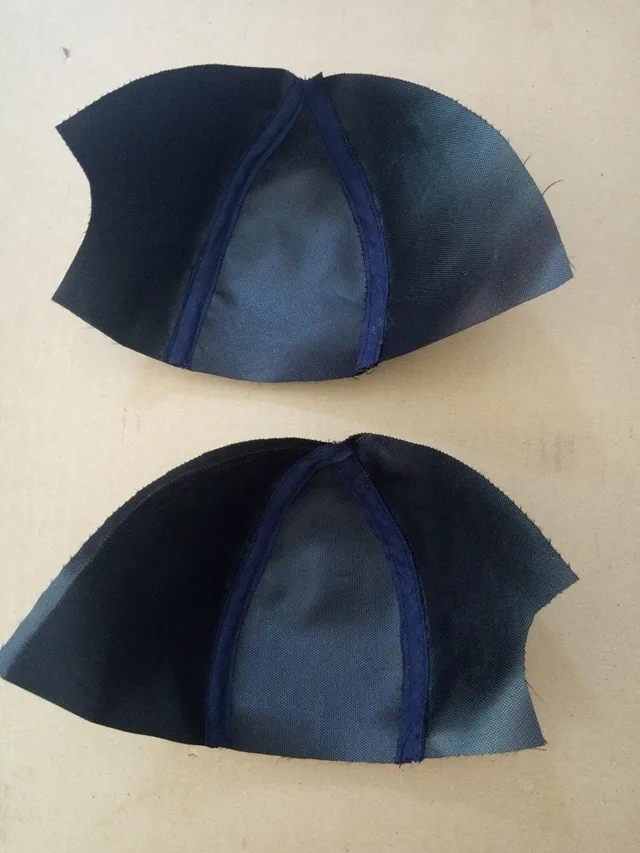
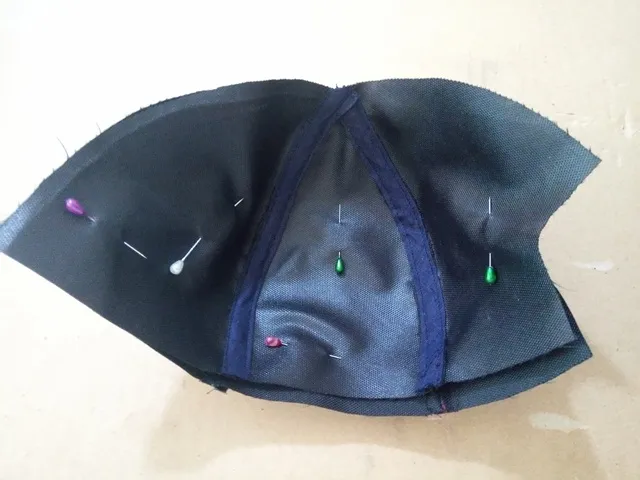
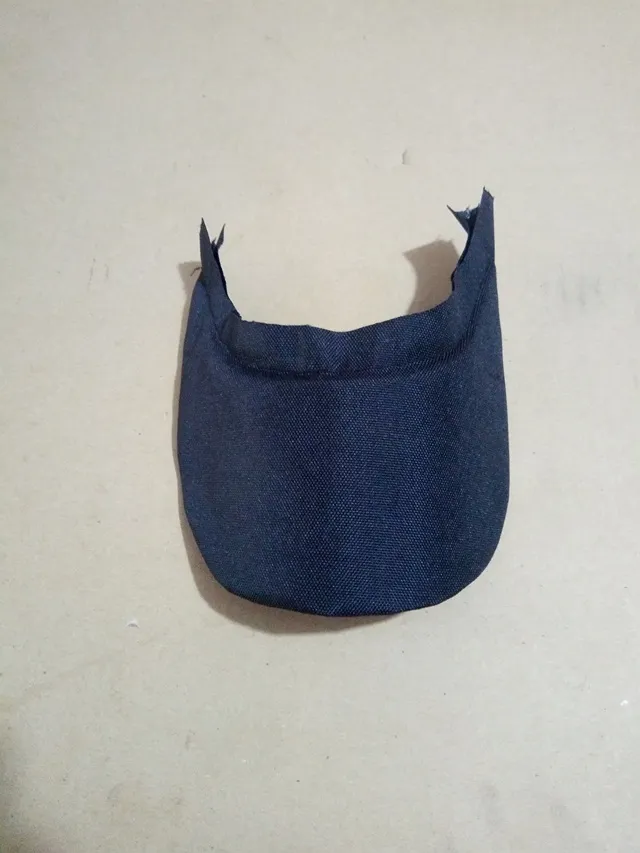
4. Ahora una vez que tengamos las dos piezas anteriores cosidas y reforzadas con sesgo vamos a agregar otra pieza y vamos a repetir el procedimiento anterioor, de esta manera nos quedarán tres piezas juntas y reforzadas que representan la mitad de la gorra. Lo siguiente que haremos será elaborar la otra mitad de la gorra repitiendo los pasos anteriores
Now once we have the two previous pieces sewn and reinforced with a bias we are going to add another piece and we are going to repeat the previous procedure, in this way we will have three pieces together and reinforced that represent half of the cap. The next thing we will do is make the other half of the cap by repeating the previous steps
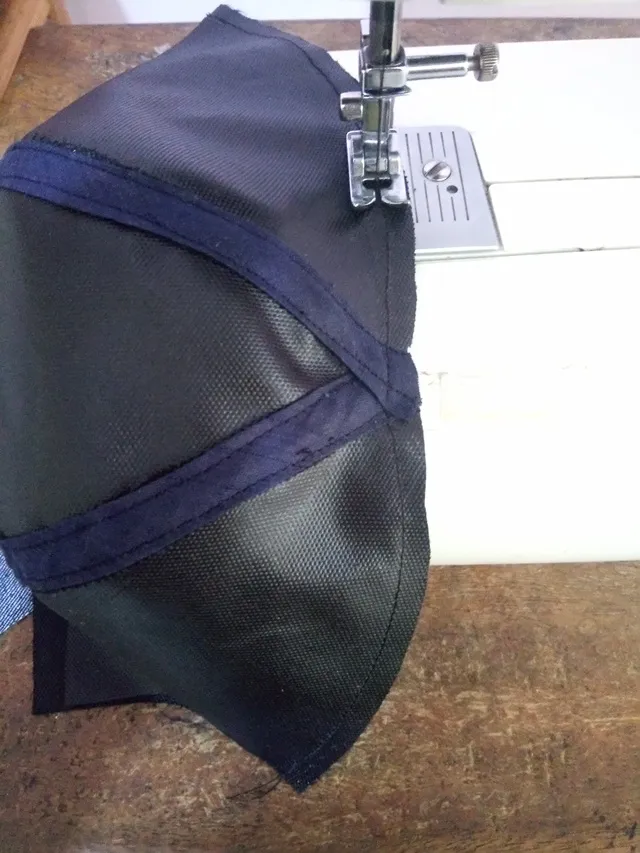
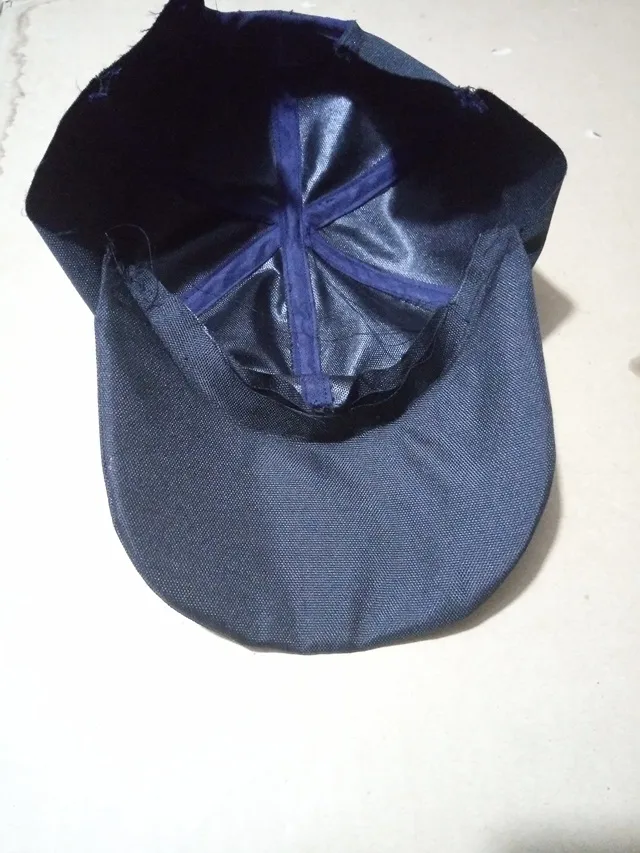
5. Una vez que esten listas ambas mitades de la gorra vamos a unirlas para lo cual debemos colocar ambas piezas con los derechos de la tela juntos ayudándonos de alfileres y seguidamente cosemos por el borde superior como se muestra en la segunda imágen de este paso:
5. Once both halves of the cap are ready, we are going to join them, for which we must place both pieces with the right sides of the fabric together using pins and then sew along the upper edge as shown in the second image of this step:
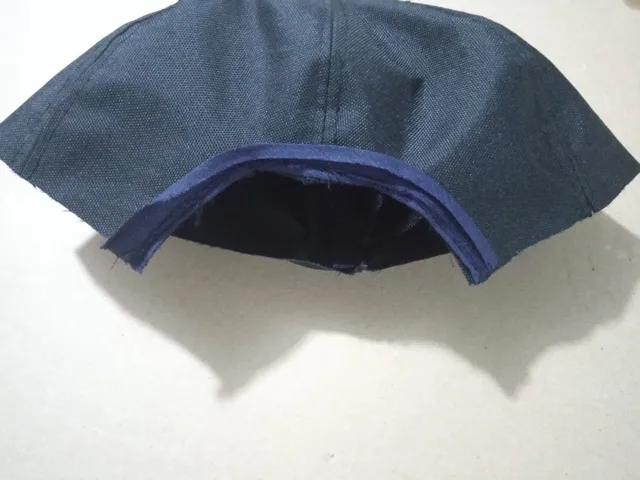
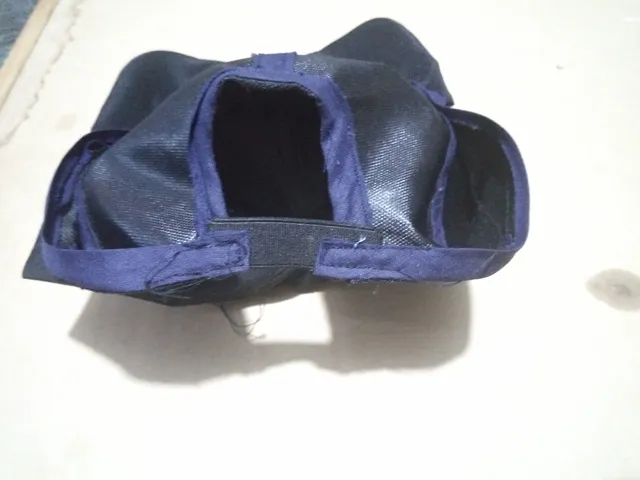
6. Casi listosツ , recuerda que la parte posterior de una gorra tiene una abertura la cual puede ajustarse con elástico u otro material acorde y este paso consiste en colocar un sesgo por la abertura de la gorra con la finalidad de que luzca mucho mejor
6. Almost ready, remember that the back of a cap has an opening which can be adjusted with elastic or other suitable material and this step consists of placing a bias through the opening of the cap with the purpose that it looks so much better
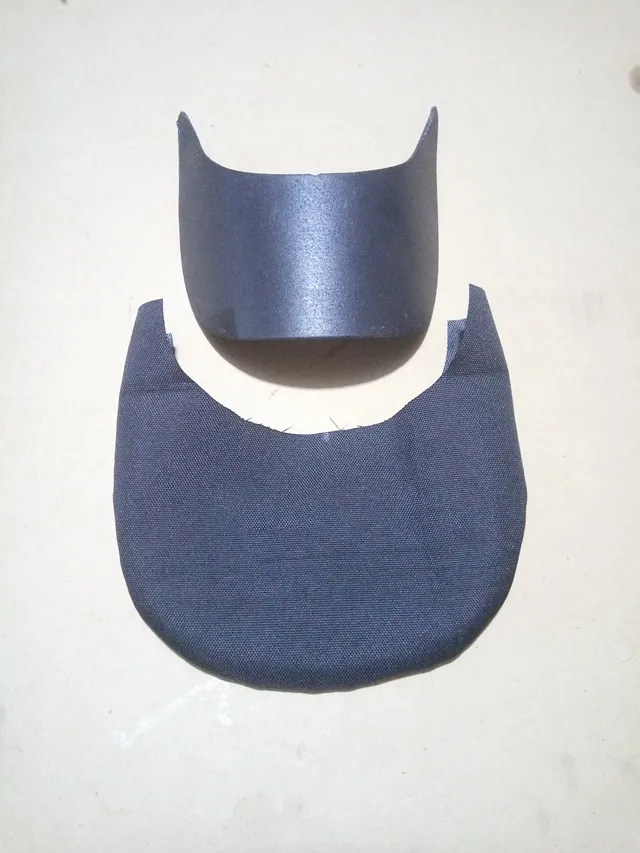
7. Muy bien amigos, ahora es hora de coser la visera de la gorra. Vamos a unir ambas piezas de la vicera con alfileres y luego cosemos por toda la curva inferior
7. Alright folks, now it's time to sew the bill of the cap. We are going to pin both pieces of the visor together and then sew along the entire lower curve
8. Seguidamente vamos a introducir la visera de plástico en la pieza de tela que cosimos recientemente y luego vamos a coser lo más pegadito posible al plástico, esto es con la finalidad de sujetar la vicera y así evitamos que se ruede y nos cause molestias en el siguiente paso
8. Next we are going to insert the plastic visor into the piece of fabric that we recently sewed and then we are going to sew as close as possible to the plastic, this is in order to hold the visor and thus prevent roll and cause us inconvenience in the next step
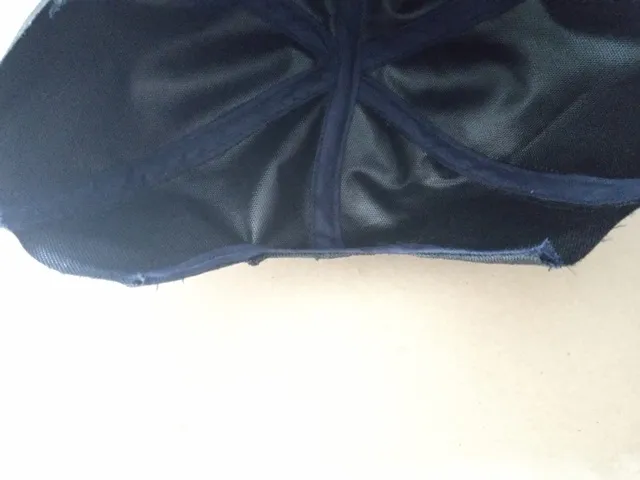
9. En este paso vamos a unir poco a poco ambas parte de la gorra. Para serles sincera debemos hacer este paso con mucha mucha paciencia porque no es tan sencillo como parece especialmente si utilizamos una máquina de coser, por tal motivo recuerden relajarse a la hora de hacer esta unión para que quede lo mejor posible
9. In this step we are going to join both parts of the cap little by little. To be honest, we must do this step with a lot of patience because it is not as simple as it seems, especially if we use a sewing machine, for this reason remember to relax when making this union so that it looks as good as possible.
10. Por último pero no menos importante vamos coser la elástica en la abertura, como ya saben esto nos permitirá que la gorra se adapte bien, recuerden cortar los hilos de coser de las piezas
10. Last but not least we are going to sew the elastic in the opening, as you already know this will allow us to adapt the cap well, remember to cut the sewing threads of the pieces
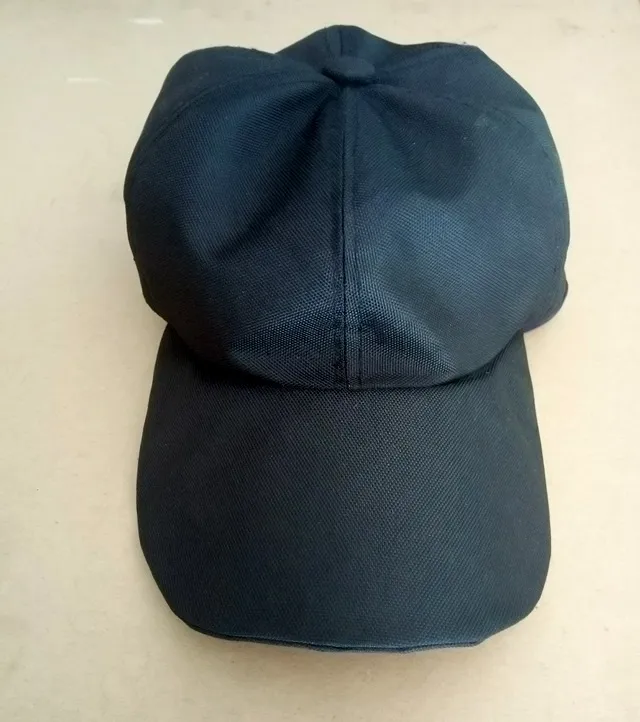
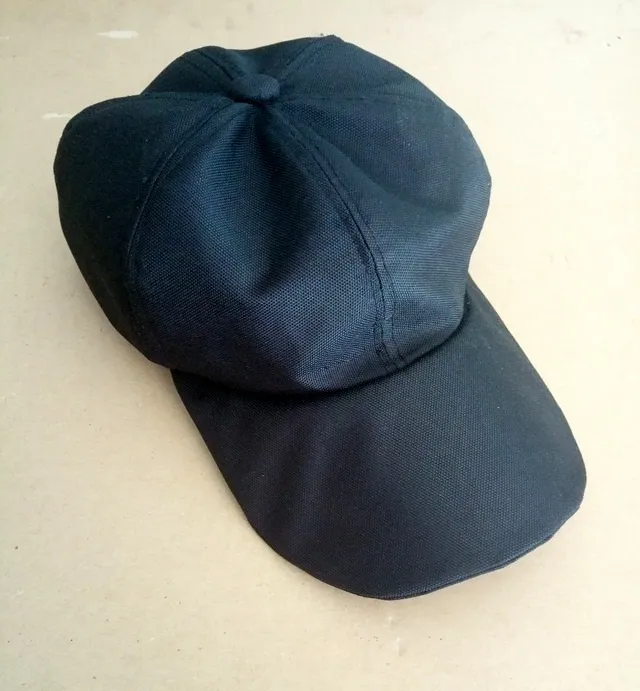
Espero que les haya gustado y sobretodo que les sea de utilidad este paso a paso!, muchas gracias por su visita❤, hasta la proximaaa:*
I hope you liked it and above all that this step by step is useful to you!, thank you very much for your visit, until next time:*
las imágenes fueron tomadas por mi, editadas en photoscape y el texto fue traducido con el traductor de google
the images were taken by me, edited in photoscape and the text was translated with the google translator