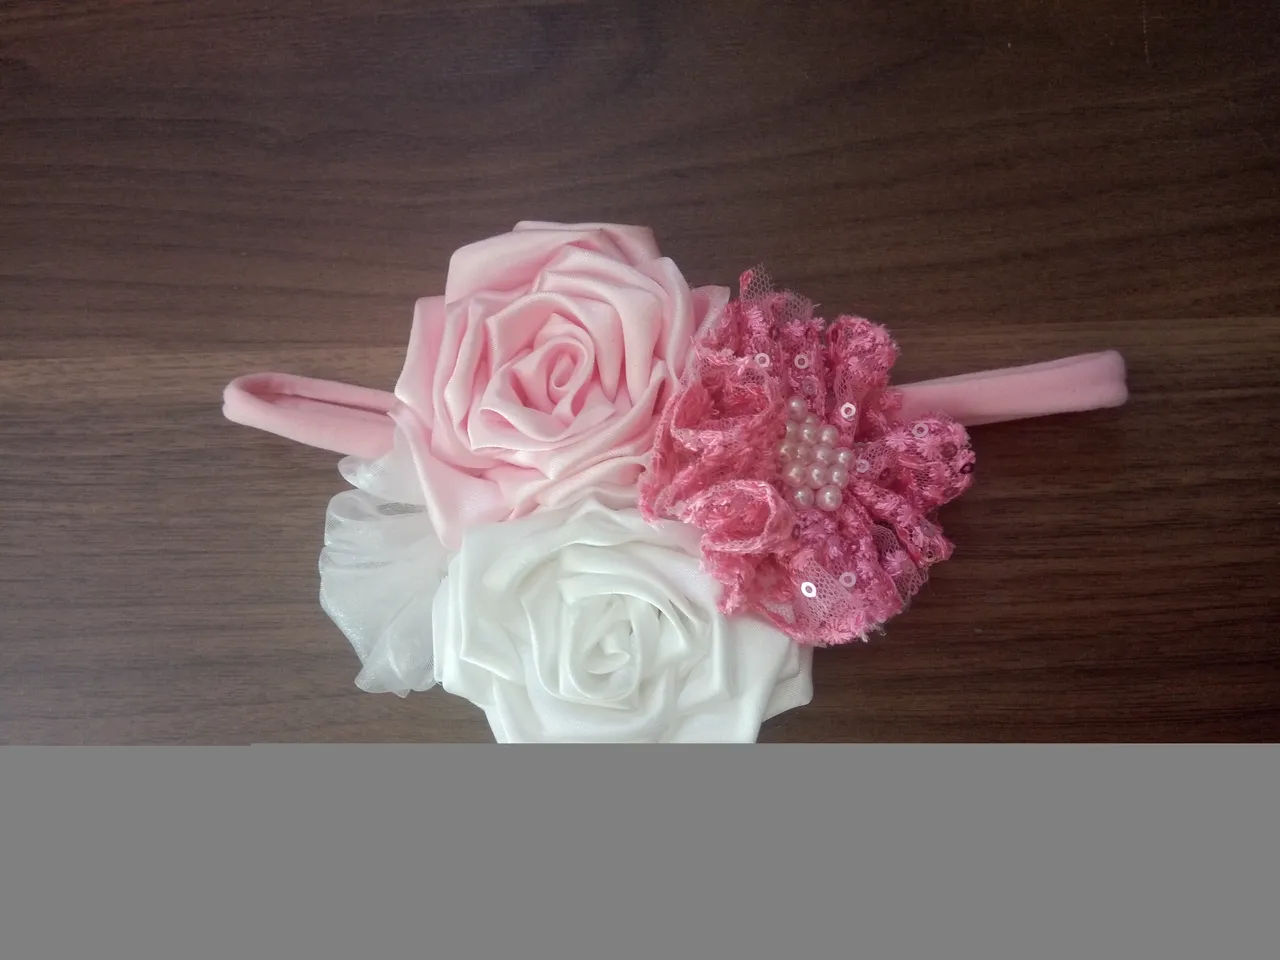
Holaaa amigos, espero que se encuentren muy bien🥳 . Hoy les voy a enseñar como hice un cintillo para una bebé muy especial ❤️ . Este tipo de accesorio es muy utilizado por las princesitas del hogar en momentos como sesiones de foto, bautizos,cumple mes y otras fechas importantes (aunque para mí todos los días importan) les confieso que me encantan las flores y rosas, de verdad es muy bonito para mí elaborarlas aunque si ustedes vieran la primera rosa de tela que yo hice y la comparan con las que hago ahora seguramente se inspiraran a crear😅 porque los milagros existen xD , ok no , claro que si existen los milagros pero en el caso de las manualidades y cualquier oficio la constancia es la que nos demostrará nuestro avance y siempre podemos mejorar. ¡Comencemos!
Hello friends, I hope you are very well. Today I am going to show you how I made a headband for a very special baby. This type of accessory is widely used by the little princesses of the home at times such as photo sessions, baptisms, birthdays and other important dates (although for me every day matters) I confess that I love flowers and roses, it really is very nice for me to make them although if you saw the first fabric rose that I made and compared it with the ones I make now you would surely be inspired to create because miracles exist xD, ok no, of course miracles do exist but in the case of crafts and any trade, perseverance is what will show us our progress and we can always improve. Let's get started!
Materiales
- Tela de razo
- Tull
- perlitas
- Tela reforzada
- Tira elástica
- Silicón
- Encendedor
- Vela
- Tijera
satin fabric
- Tulle
- pearls
- Reinforced fabric
- Elastic strap
- silicone
- Lighter
- Candle
- Scissors
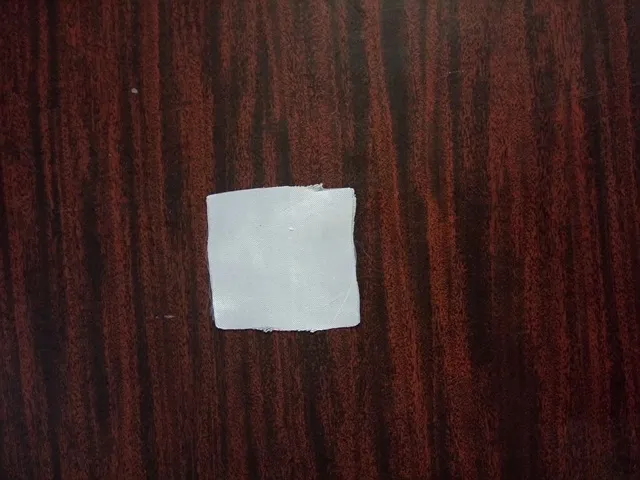
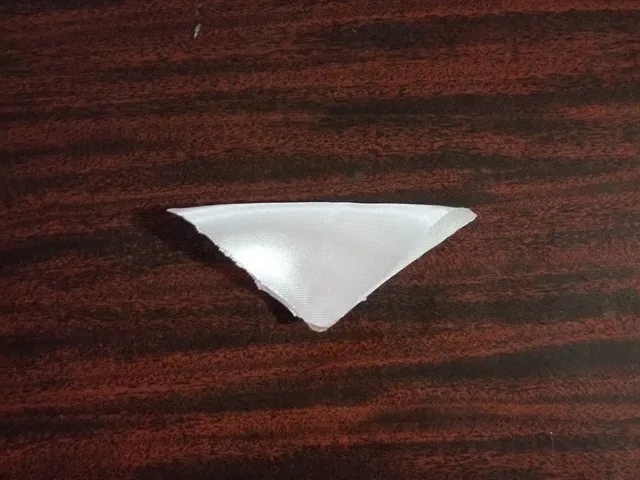
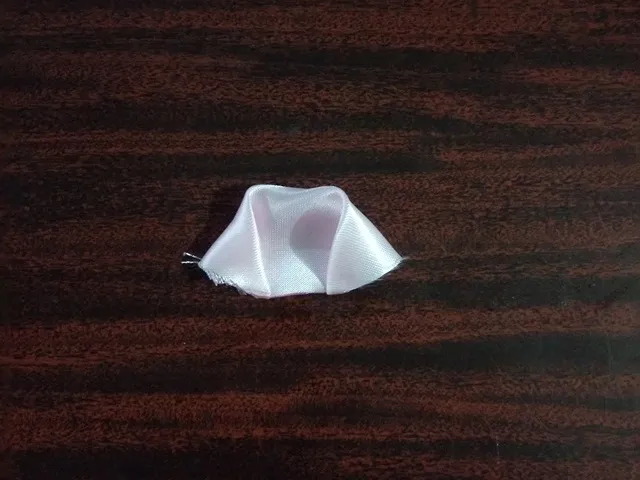
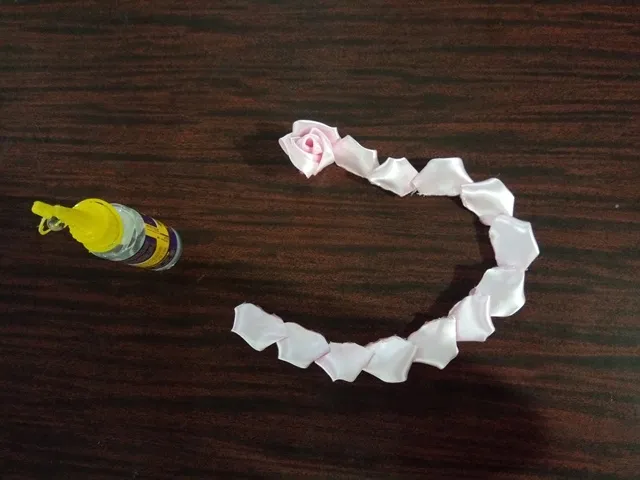
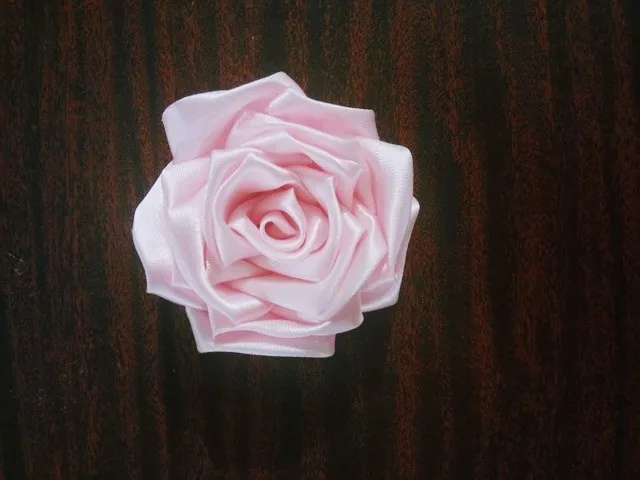
1. Cuando estoy haciendo una manualidad siempre me gusta empezar por las piezas mas complejas y en este caso yo empezaré elaborando las rosas de tela. Para formar los pétalos vamos a cortar un cuadrado de tela de 6cm, luego lo vamos unir dos extremos formando así una especie de triangulo y luego vamos a bajar ambos extremos laterales, le cortamos el excendente y sellamos con un encendedor o vela. Para esta rosa yo hice 22 pétalos y luego los uní con silicon
1. When I'm making a craft I always like to start with the most complex pieces and in this case I'll start by making the fabric roses. To form the petals we are going to cut a 6cm square of fabric, then we are going to join two ends, thus forming a kind of triangle and then we are going to lower both lateral ends, cut off the excess and seal with a lighter or candle. For this rose I made 22 petals and then I joined them with silicone
2. Cuando todos los pétalos esten unidos debemos empezar a enrollarlos para darle la forma de rosa y es necesario ir colocando pega a medida que vamos formando la rosa para que quedé bien sujeta
2. When all the petals are joined we must begin to roll them to give it the shape of a rose and it is necessary to place glue as we form the rose so that it is well attached
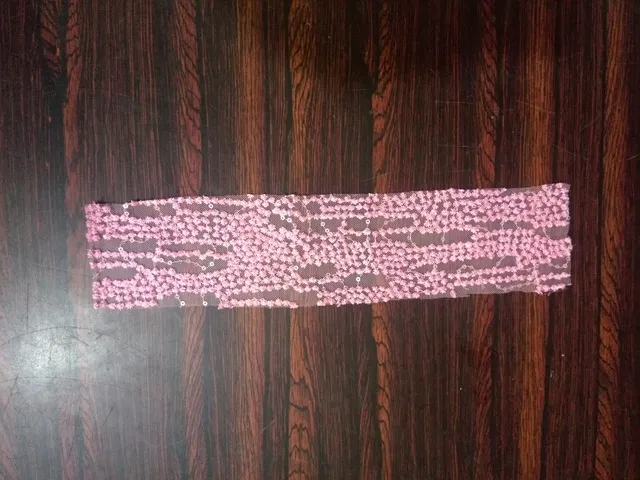
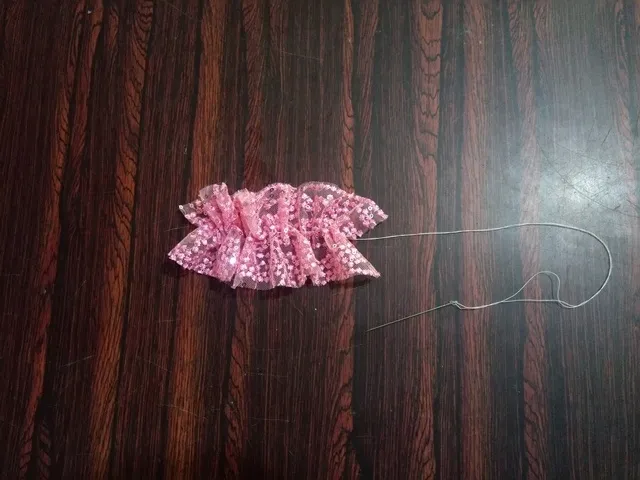
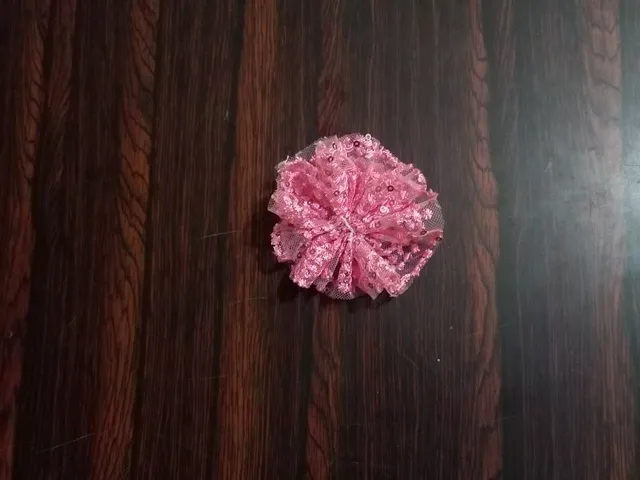
3. Ahora vamos a elaborar una flor un poco más sencilla, para realizarla debemos cortar un rectángulo de tela de la medida deseada, luego hacemos un pespunte en la mitad de la pieza y fruncimos para formar la florecita, es importante hacer un nudo porque se puede deshacer, mientras más longitud tenga la pieza la flor quedará más bonita, aunque es cierto que todo es cuestión de gustos y depende de como a tí te parezca mejor
3. Now we are going to make a slightly simpler flower, to make it we must cut a rectangle of fabric of the desired size, then we make a backstitch in the middle of the piece and gather to form the little flower, it is important to make a knot because it can be undone, the longer the piece is, the more beautiful the flower will be, although it is true that everything is a matter of taste and depends on how you like it
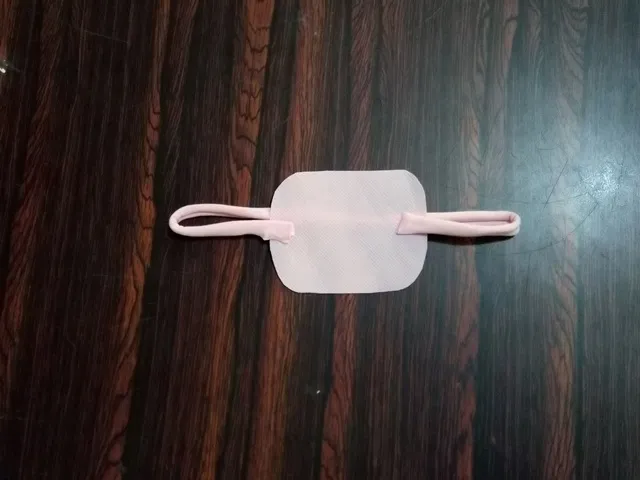
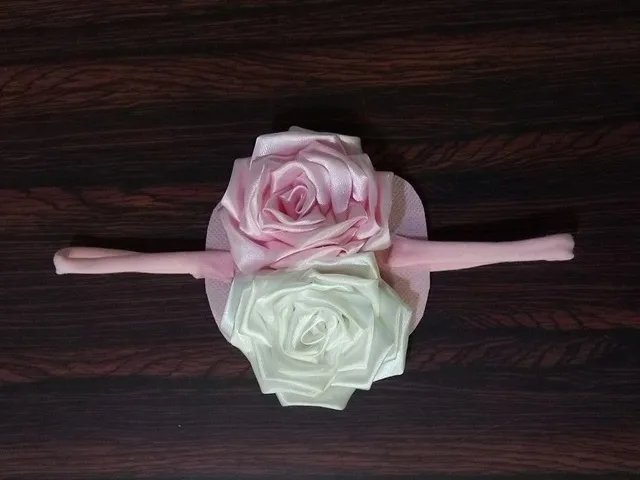
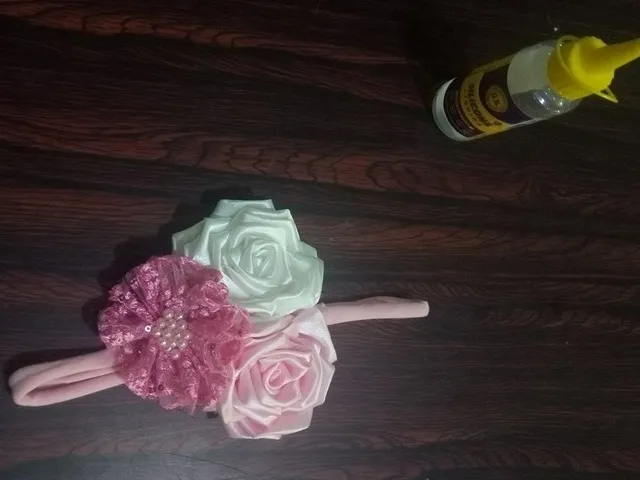
4.¡Ya casi terminamos!. Ahora armaremos el cintillo. Para la base podemos utilizar fieltro, tela reforzada o cualquier tejido que sea resistente y que al mismo tiempo sea suave porque recodermos que estamos elaborando un accesorio para una bebe. Seguidamente le colocamos la elástica, para diademas de bebé se recomienda que la tira sea de tela de algodón licrado, tubo de media, o cualquier tejido suave que estire, para que no le moleste al bebe. Luego de hacer la base del cintillo la imáginación no tiene límites :D , yo le coloqué las rosas en el centro y a uno de los lados le puse la florecita que hicimos anteriormente y al otro lado le coloqué tull brillante
4. We are almost done!. Now we will assemble the headband. For the base we can use felt, reinforced fabric or any fabric that is resistant and at the same time soft because we remember that we are making an accessory for a baby.Then we put the elastic, for baby headbands it is recommended that the strip be made of lycra cotton fabric, stocking tube, or any soft fabric that stretches, so that it does not bother the baby. After making the base of the headband, the imagination has no limits :D , I placed the roses in the center and on one side I put the little flower we made earlier and on the other side I placed shiny tulle
💞💞
Muchas gracias por visitar mi publicación♥, Hasta la próxima, cuidense!
Thank you very much for visiting my publication ♥, Until next time, take care!
las imágenes fueron tomadas por mi, editadas en photoscape y el texto fue traducido con el traductor de google
the images were taken by me, edited in photoscape and the text was translated with the google translator