 Fotografías de mi propiedad editadas en Canva.
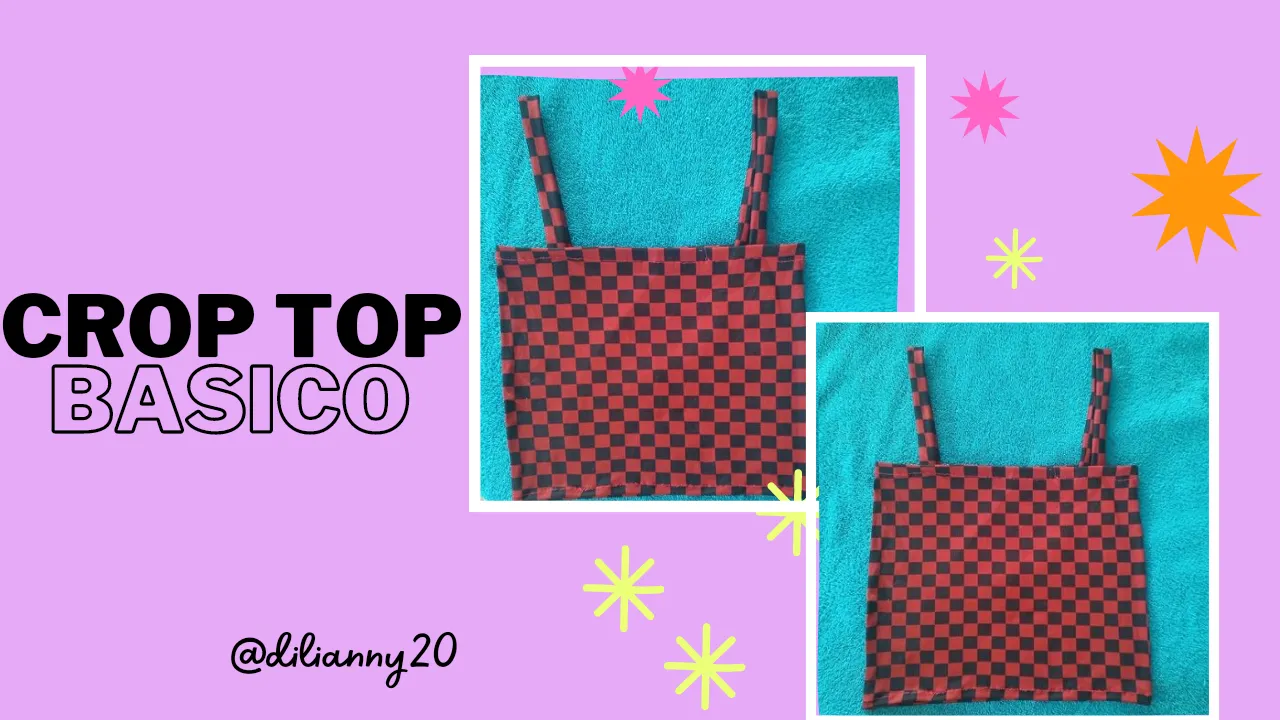
Hola mis queridos amigos de Hive Diy, 😊😊💕espero hayan tenido un bonito fin de semana y que está que está comenzando este llenas de las mejores energías, yo el día de hoy quiero enseñarles un trabajo que realice, se trata de un crop top básico que no puede faltar en nuestro closet.💖
Hace semanas había realizado un vestido sencillo y me quedo algo de tela, así que después de meditar qué podía hacer se me ocurrió hacer este crop top, la tela de piel durazno me gusta mucho, es muy elástica y se ajusta perfectamente a nuestro cuerpo, así que por esa parte solo debemos sacar bien nuestras medidas 😊😊 sin más preámbulos vamos a comenzar con los materiales que utilice.✨🧠✍️✍️
Hello my dear friends of Hive Diy, 😊😊💕I hope you had a nice weekend and that this one is starting to be full of the best energies, today I want to show you a work that I made, it is a basic crop top that can not miss in our closet.💖.
Weeks ago I had made a simple dress and I had some fabric left, so after meditating what I could do it occurred to me to make this crop top, I really like the peach skin fabric, it is very elastic and fits perfectly to our body, so for that part we just have to get our measurements right 😊😊 without further ado let's start with the materials I use.✨🧠✍️✍️✍️.
Materiales // Materials 📝✍️✍️

- 🌸 Tela piel durazno de cuadros
- 🌸 Ganchillos 📍📍
- 🌸Tijera ✂️
- 🌸 Máquina de coser
- 🌸 Cinta métrica
- 🌸 Peach checkered leather fabric
- 🌸 Crochet hooks 📍📍
- 🌸 Scissors ✂️
- 🌸 Sewing machine
- 🌸 Tape measure
Procedimiento // Procedure
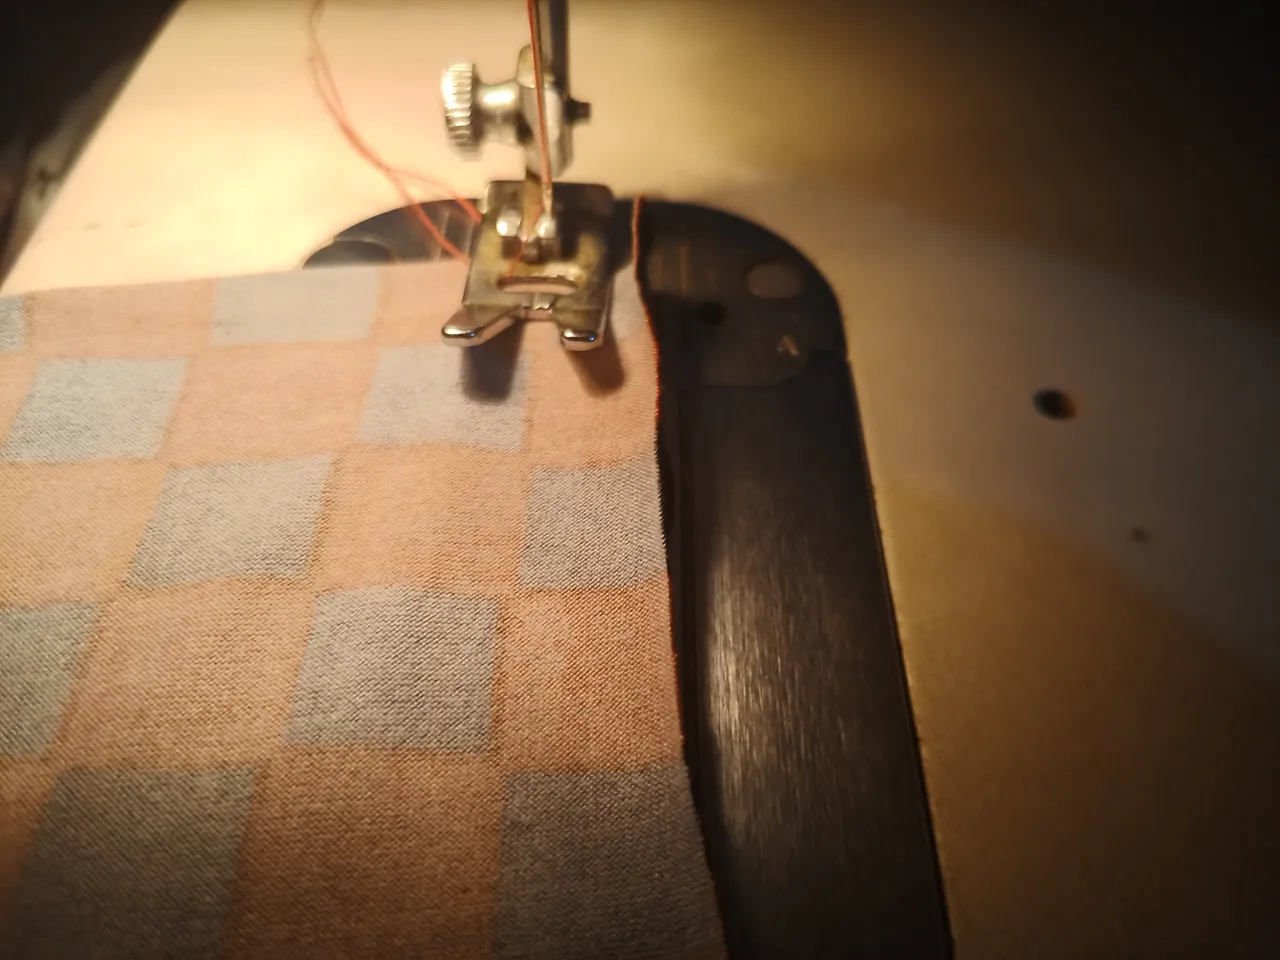
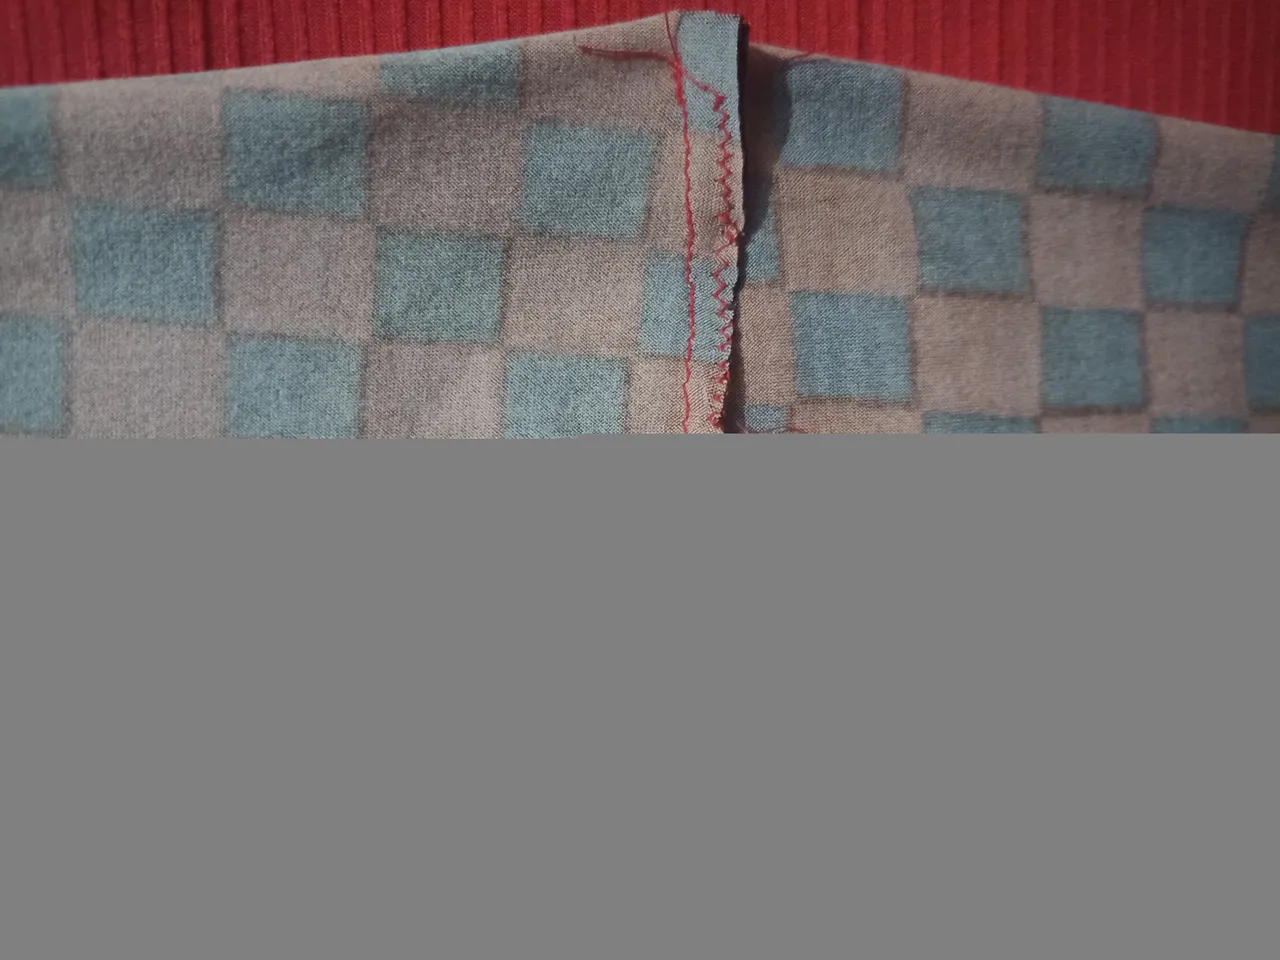
Paso 1: Lo primero que debemos hacer es medir la tela con la cinta metrica, mediremos 30 cm de largo y 33 cm de ancho, en estas medidas está incluído 1 cm de costura. Luego de medir vamos a utilizar la tijera para recortar la tela, luego colocamos ganchillos para sujetar la tela y así evitar que está se nos ruede; después vamos a la máquina de coser y vamos a pasar una costura recta y luego una costura en forma de zig zag.
Está costura solo la pasaremos por un lado.
Step 1: The first thing to do is to measure the fabric with the tape measure, we will measure 30 cm long and 33 cm wide, in these measures is included 1 cm seam allowance. After measuring we will use the scissors to cut the fabric, then we place hooks to hold the fabric and thus prevent it from rolling; then we go to the sewing machine and we will pass a straight seam and then a zig zag seam.
This seam will only go through one side.
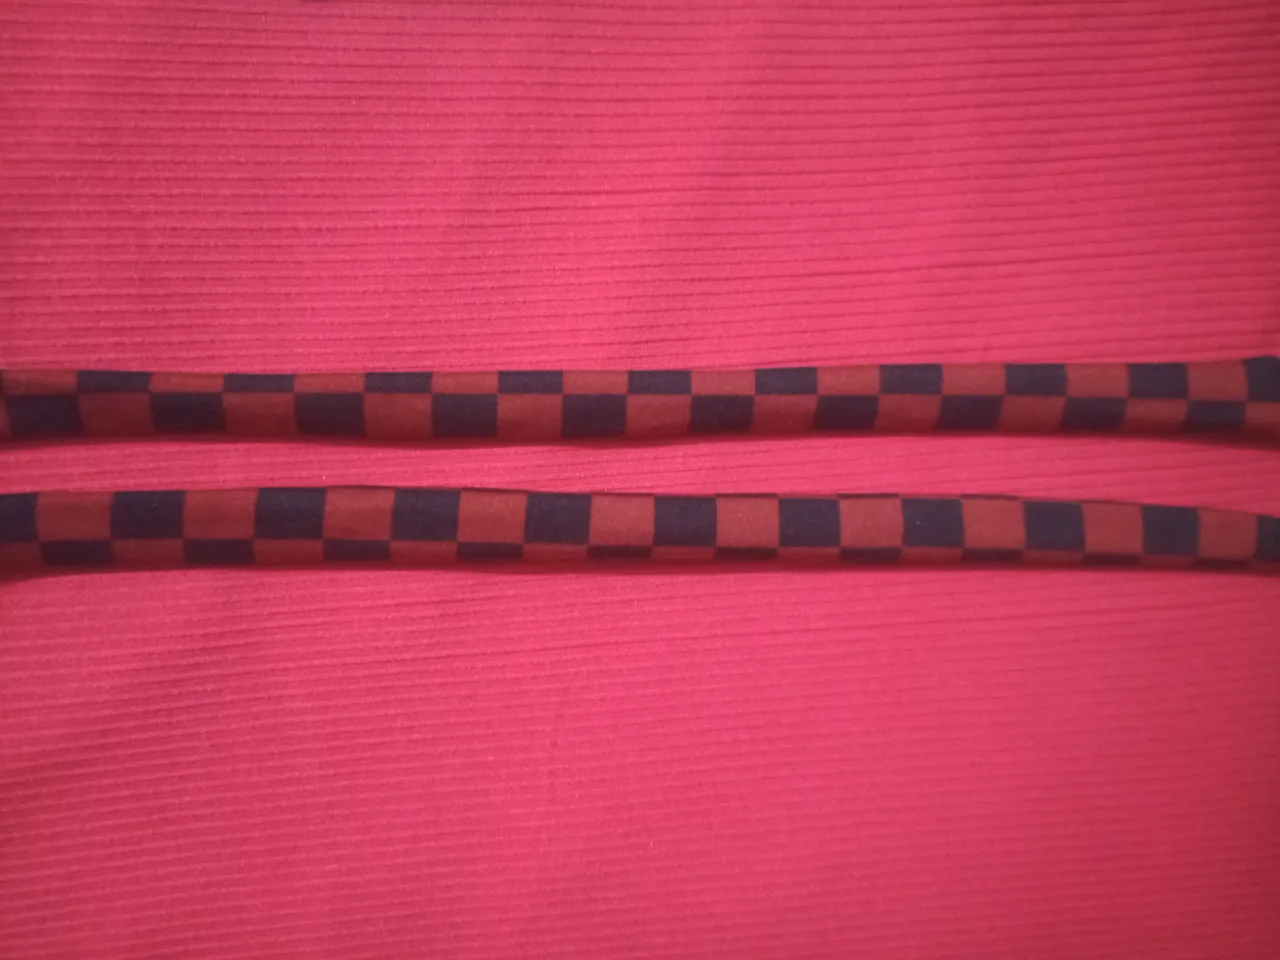
Paso 2: Ahora vamos a cortar dos piezas de tela de 33 cm de largo y 4,5 cm de ancho. Luego doblamos la tela a la mitad y vamos a coser una costura recta con la máquina y luego una costura de forma zig zag, después de hacer esto vamos a voltear la tela al derecho, yo utilice un lapicero para que se hiciera el trabajo más fácil, también se puede utilizar la tijera pero hay que tener mucho cuidado en no romper la tela.
Step 2: Now we are going to cut two pieces of fabric 33 cm long and 4.5 cm wide. Then we fold the fabric in half and we will sew a straight seam with the machine and then a zig zag seam, after doing this we will turn the fabric right side out, I used a pencil to make the work easier, you can also use the scissors but you have to be very careful not to tear the fabric.
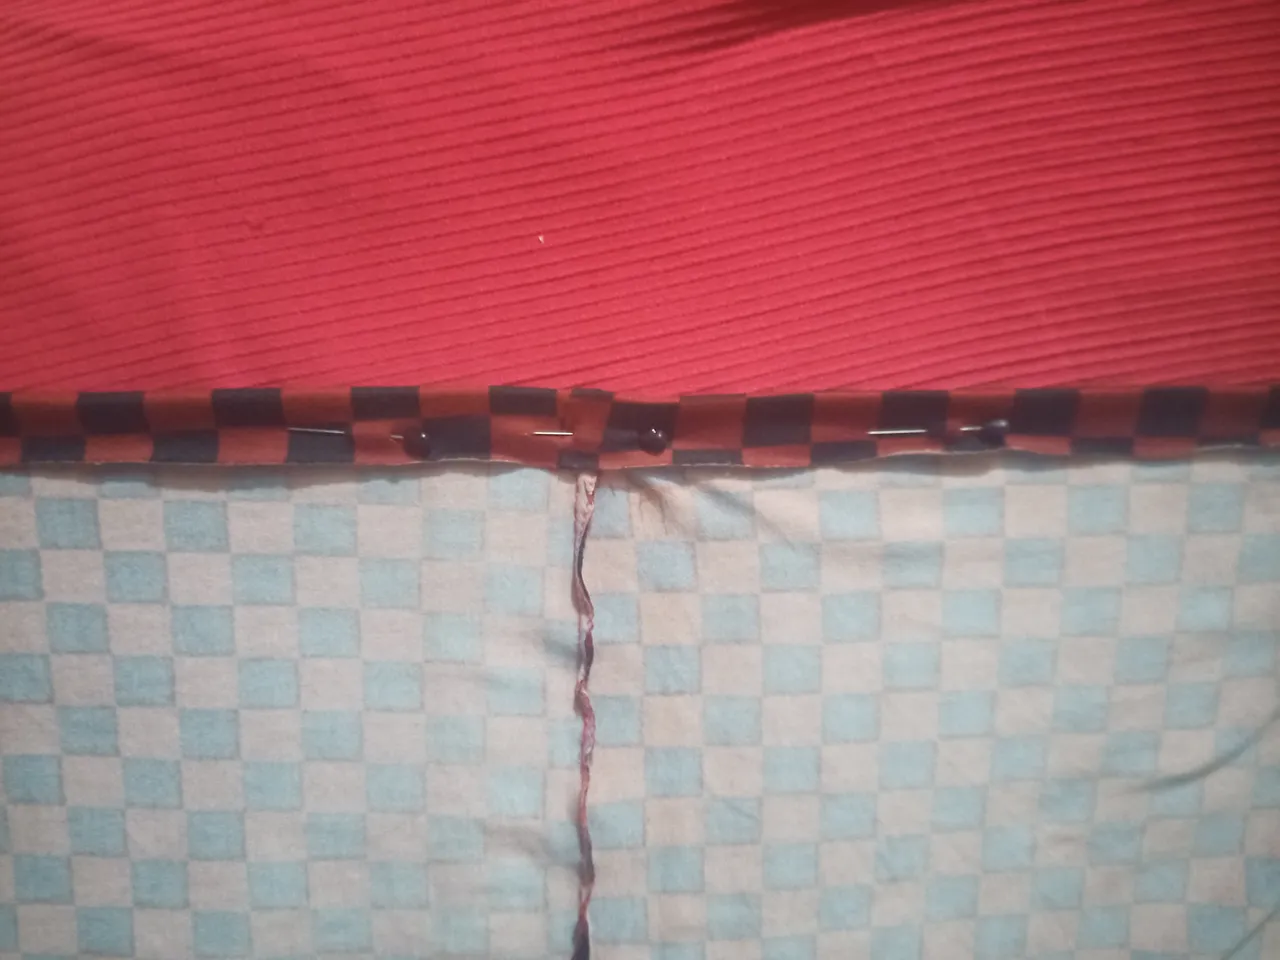
Paso 3: Ahora vamos a tomar la pieza que se hizo en el paso número 1 y vamos a realizar un dobladillo de 1 cm, colocaremos ganchillos para sujetar bien nuestra pieza.
Step 3: Now we are going to take the piece that was made in step number 1 and we are going to make a hem of 1 cm, we will place crochets to hold our piece well.
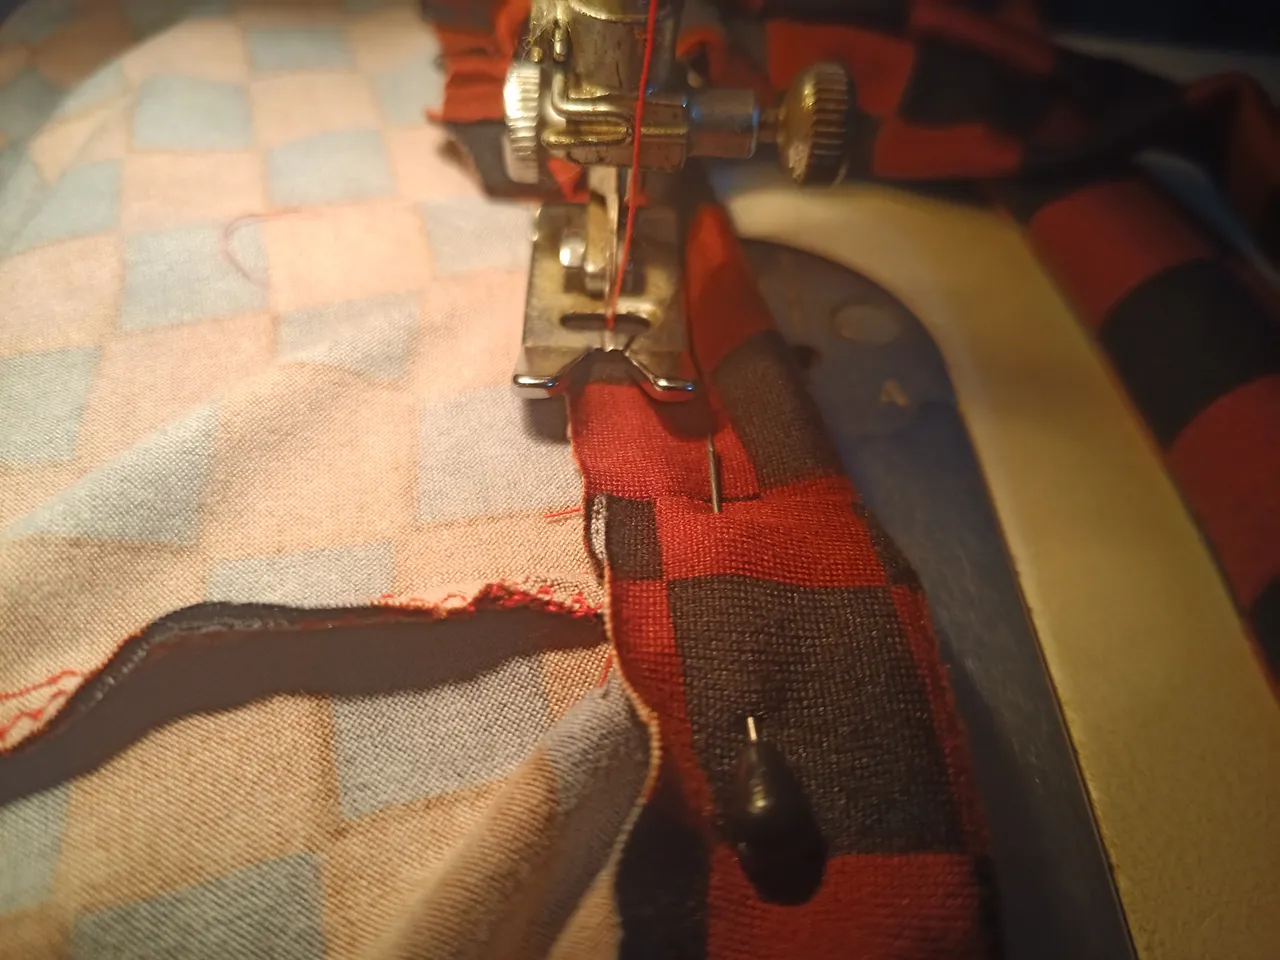
Paso 4: Ahora vamos a colocar las tiras que habíamos realizado en el paso número 2 y vamos a sujetar con los ganchos, después vamos a pasar una costura recta. Yo he utilizado hilo rojo, también se puede utilizar hilo de color negro.
Step 4: Now we are going to place the strips that we had made in step number 2 and we are going to fasten them with the hooks, then we are going to sew a straight seam. I have used red thread, but you can also use black thread.
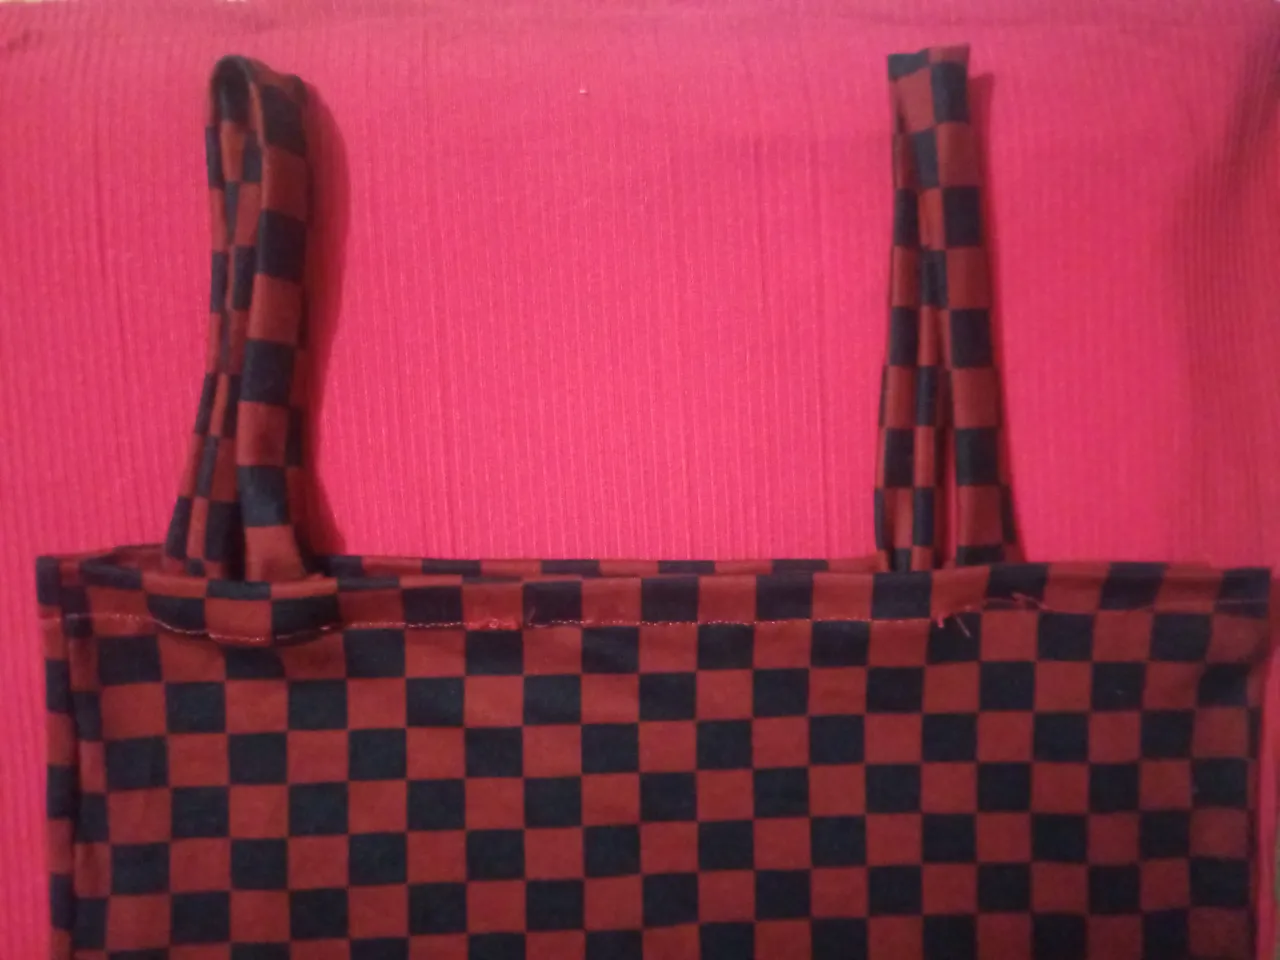
Paso 5: Ya para culminar vamos a realizar el dobladillo de la parte inferior, también de 1 cm de ancho, y así damos por terminado nuestro trabajo. 🤭😊😊💕
Step 5: To finish, we are going to hem the bottom, also 1 cm wide, and thus we finish our work. 🤭😊😊💕
Resultado//Result
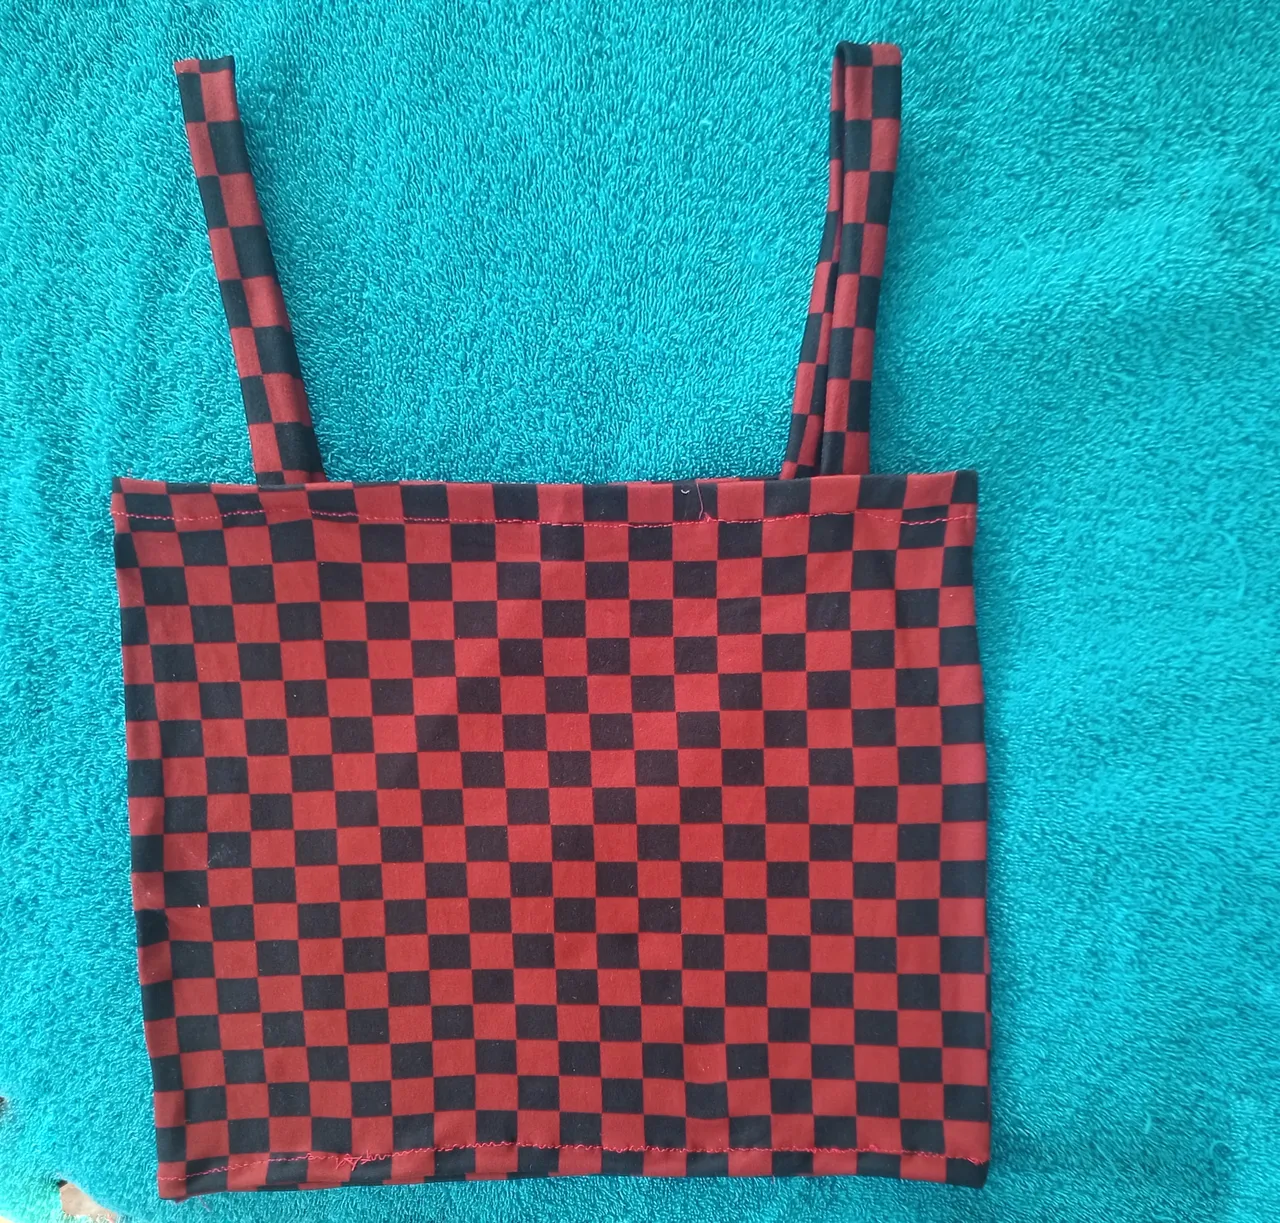
Fotografías de mi propiedad editadas en Canva.Muchas gracias por tomarte el tiempo de ver mi publicación, espero que te sirva este tutorial, los crop top son piezas muy fabulosas y siempre conminan con todo. Hasta la próxima amigos💖💕💕✨
Thank you so much for taking the time to view my post, I hope you find this tutorial helpful, crop tops are very fabulous pieces and always conminate with everything. Until next time friends💖💕💕✨💖💕💕✨
All pictures are my property, taken with my umidigi phone.