English version
Greetings to all, friends of HIVE. This time I bring you another figure I made as part of a project I call "The Terminal Assemble", this project consists of a series of figures representing the staff members, that I know, of @theterminal, the community where I grew up here in HIVE.
In previous posts I have shown you the other figures I have made, you can see them by following these links:
Iron-Kitty (@thekittygirl):
@gaboamc2393/iron-kitty-sculpture-escultura-de-iron-kitty-engesp
Hawk-wes (@wesphilbin):
@gaboamc2393/hawk-wes-sculpture-eng-esp
Captain Britt (@brittandjosie):
@gaboamc2393/captain-britt-sculpture-eng-esp
Well, the figure that I will share with you in this publication is a representation of nothing more and nothing less than one of my other colleagues of TheTerminal. I remember that in a previous publication he got excited when I tagged him, because he thought I had made a figure of him, but no, it was the Iron Kitty figure; however, now he will have reason to get excited because now I present to you the Winter Greeter, the sculpture I made for @stayten.
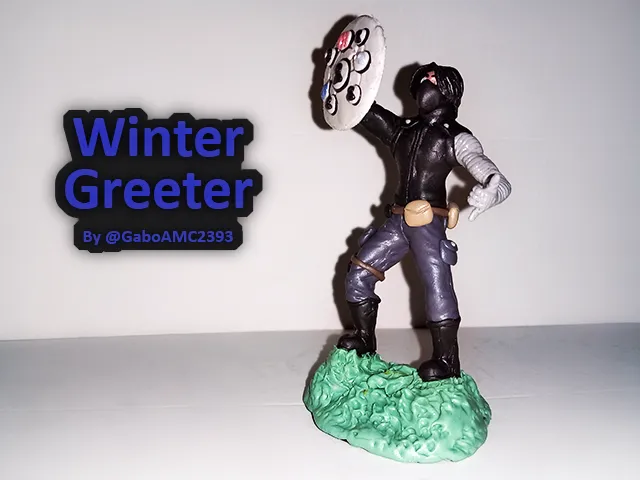
For all these series of figures I have been inspired by characters like Iron Man, Hawkeye and Captain Marvel; for this case, I was inspired by Winter Soldier, a character well known in the Captain America series/movies.
In TheTerminal discord, Stayten has the role of Greeter, so I made a play on words between Winter Soldier and Stayten-Greeter to name the sculpture: Winter Greeter. As an additional touch, I decided that Stayten should carry a shield, as a banner, with the logo of TheTerminal.
Having said all the above, I will show you the step by step of the sculpture.
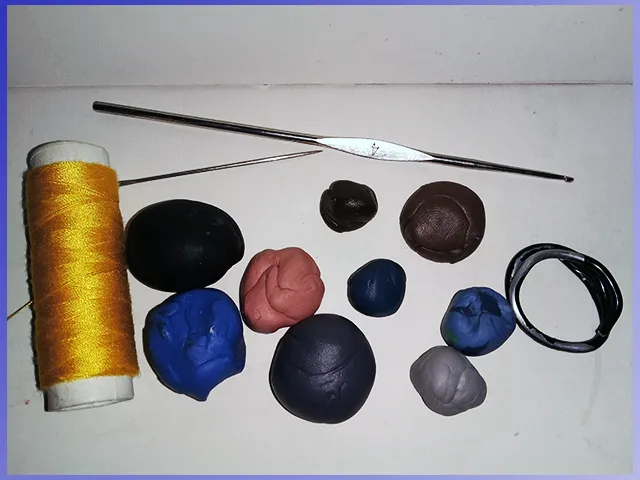
The materials I used were the usual ones:
*Colored Plasticine.
*Wire
*Thread to hold the wire skeleton of the figure.
*Sewing and knitting needles.
*I also used some cardboard for the shield but it does not appear in the picture.
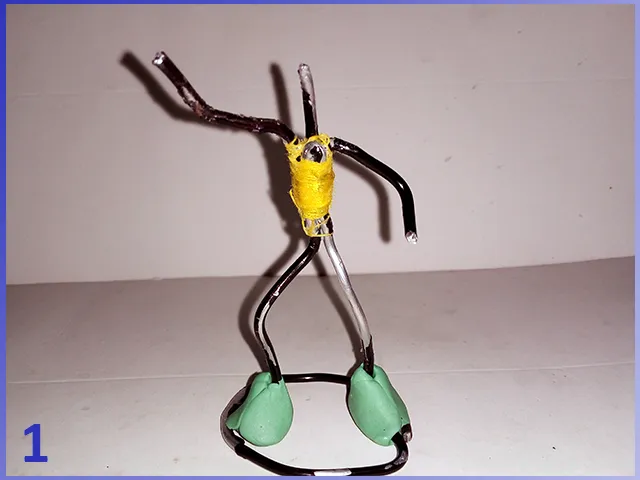
The shape we give to the skeleton of the figure is always important, because if we do it wrong, our sculpture will have disproportionate measures, such as very long arms or very short legs.
In my case I try to do it in the most appropriate way possible. Below you can see the skeleton I made:
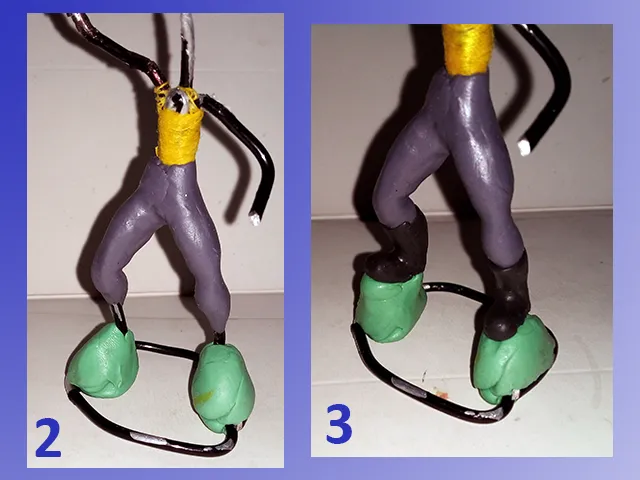
On this skeleton I began to add plasticine and to mold it. First the legs, as usual (2). Next were the boots (3).
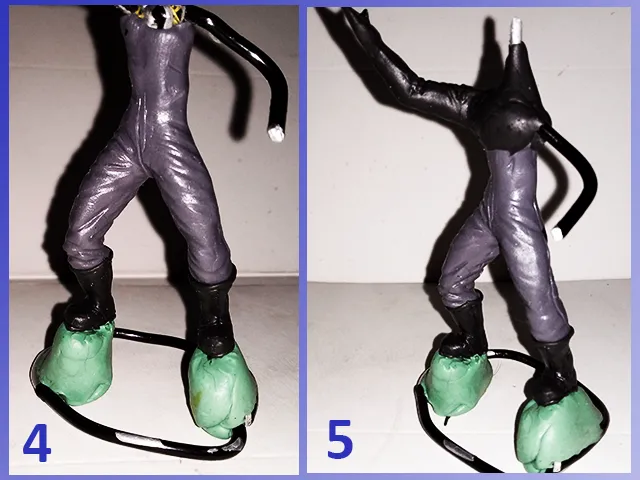
With the help of the needles mentioned above, I began to shape the folds, wrinkles and seams of the pants (4). Over time, the plasticine expands again a little, so you have to make these folds of the wrinkles a little deeper than we want, so that after expanding, it is in the right way.
In the image below you can see the folds made in the first instance (4) and how they were when the plasticine expanded (5). At this point I also continued molding the torso, neck and right arm of this sculpture (5).
I continued with the chest, molding a kind of leather vest, I also used the aforementioned knitting needle to mold the right arm (6). Then, I molded the left arm with a gray color, as if it were metal (7).
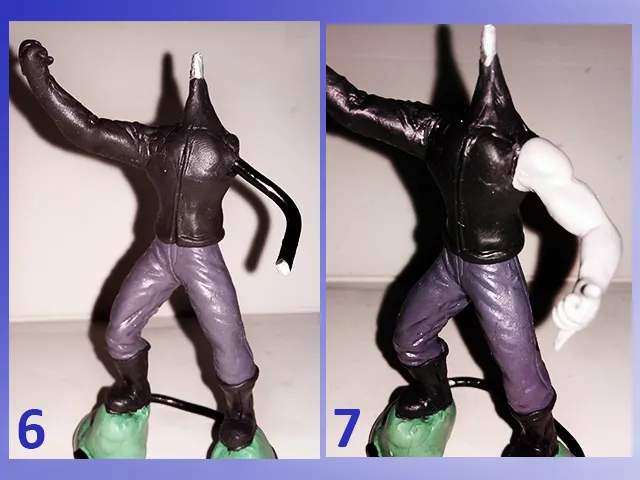
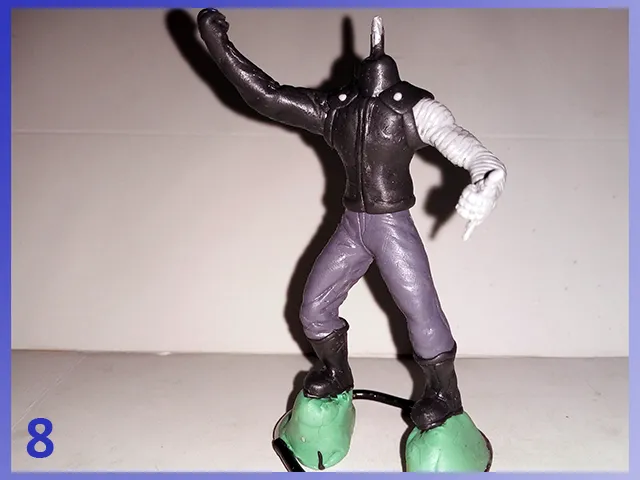
With more black plasticine I placed lines at the joints of the arms and torso, plus a pair of shoulder pads with gray studs. Finally I made the lines on the left arm and this is how the body of the sculpture looked like:
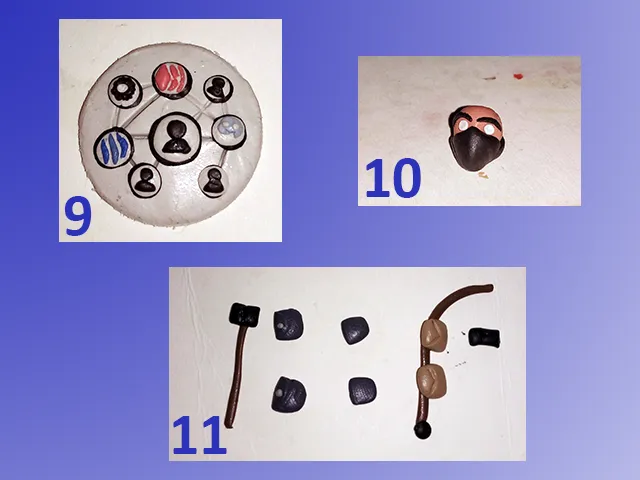
To be honest, this figure represented a challenge for me for the simple fact of having to make the shield with the logo of TheTerminal (9). The figures are small, so get an idea of how difficult it is to make this logo in detail.
Besides the shield, I also made the head (10) and a few accessories (11).
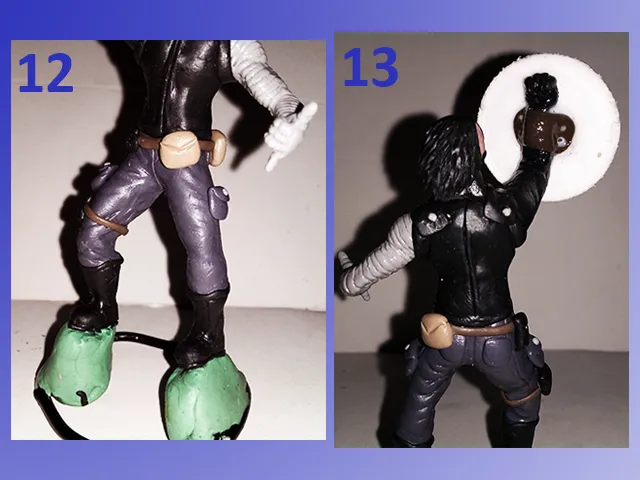
Once everything was ready, I started with the assembly. First I placed the aforementioned accessories on the legs and waist (12), then I fixed the shield with plasticine and glue (13). I also fixed the head in place and attached the hair.
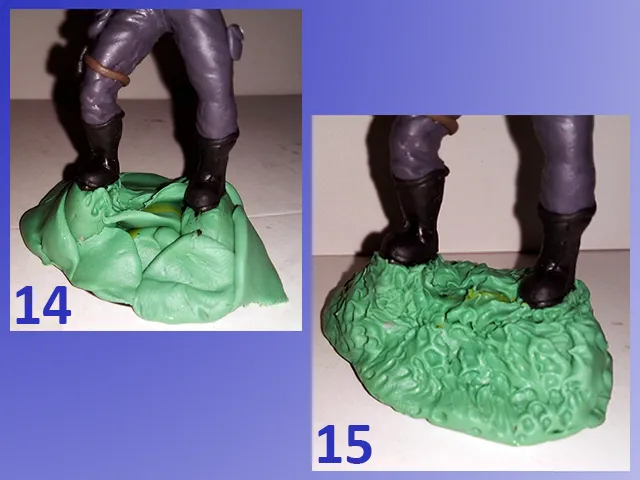
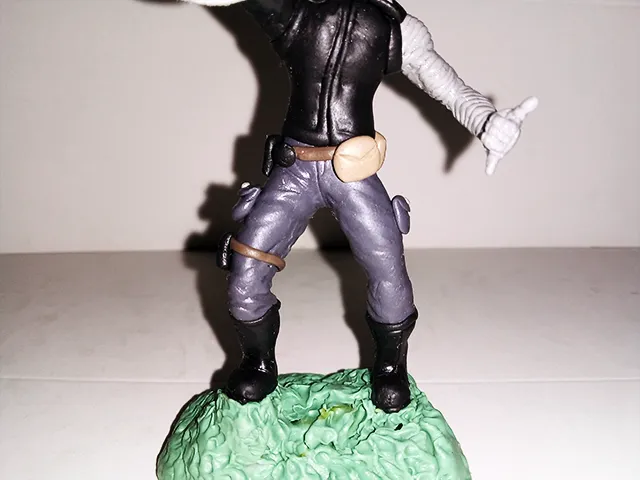
The last thing I did for this figure was the base. I used a bunch of green play dough and stacked it around all the wire of the base (14), then molded it with the rounded tip of my knitting needle, to give it the shape shown in the picture below (15).
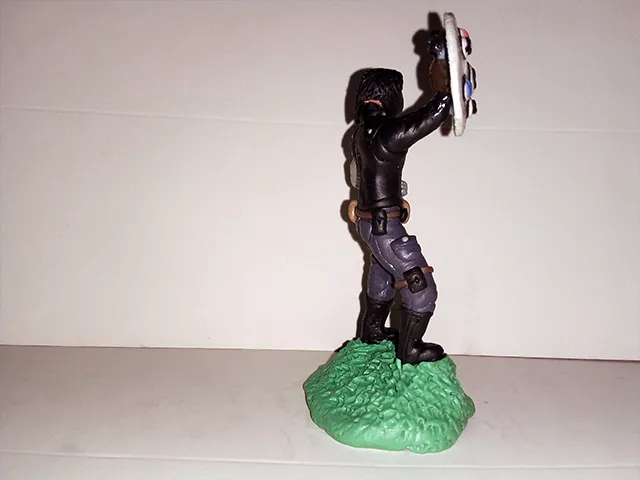
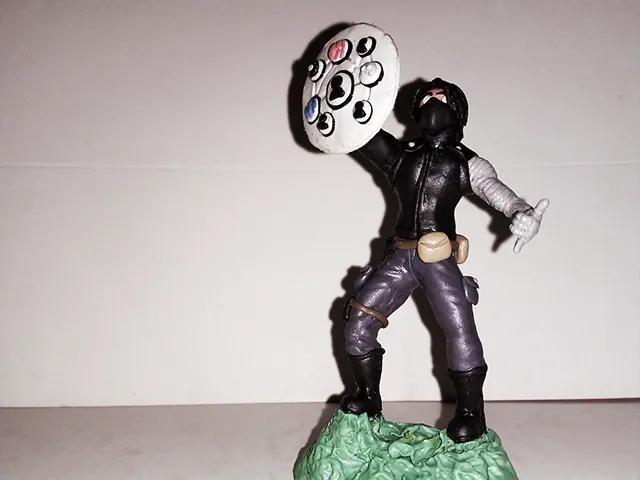
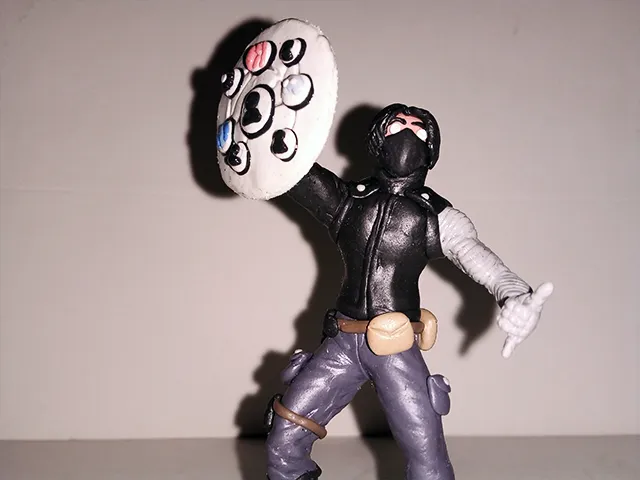
This is how the figure was finished, with its metal arm, accessories, shield and a face that I think represents well this esteemed member of TheTerminal.
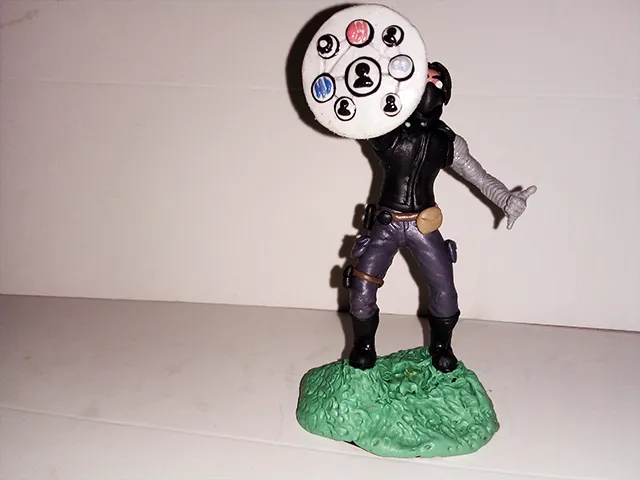
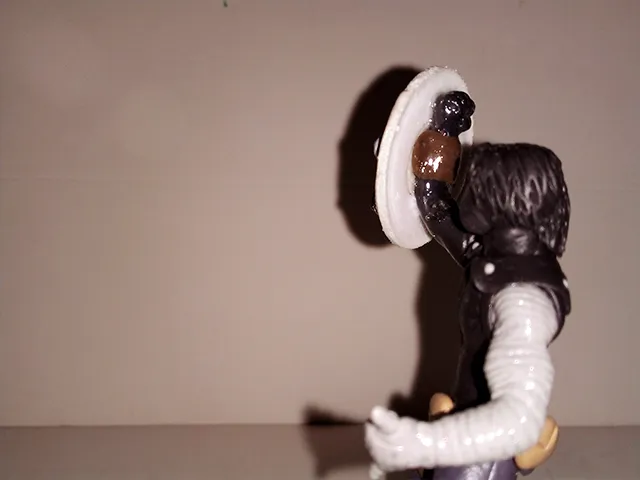
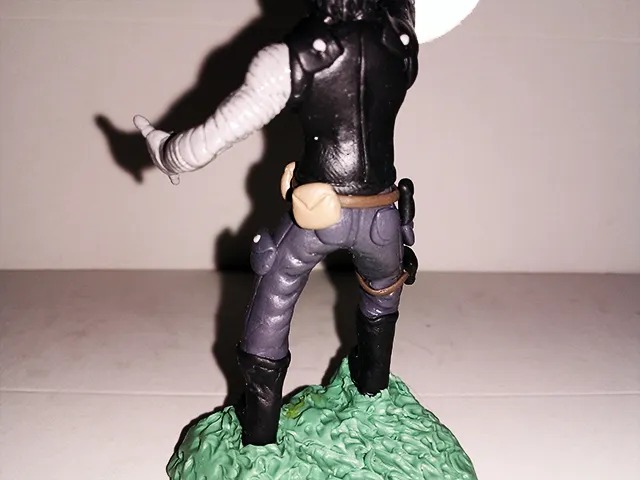
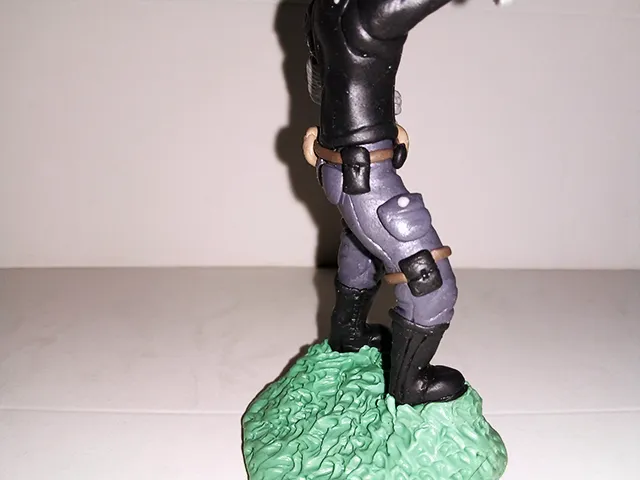
Here are a few pictures taken from different angles:


Here is a closer look at the accessories:
And that was it, what did you think of the figure? I am very happy with the result because it was just as I imagined it and that is really something very satisfying, to be able to create something that you imagine and that it is just as you wanted it to be.
Stayten, I hope you like it my friend, I made it with a lot of love, just as I have done the other figures of the other colleagues. Here I'm going to take the liberty of tagging the esteemed @nineclaws, who I'm sure will like to see how this sculpture I made of my friend stayten has turned out.
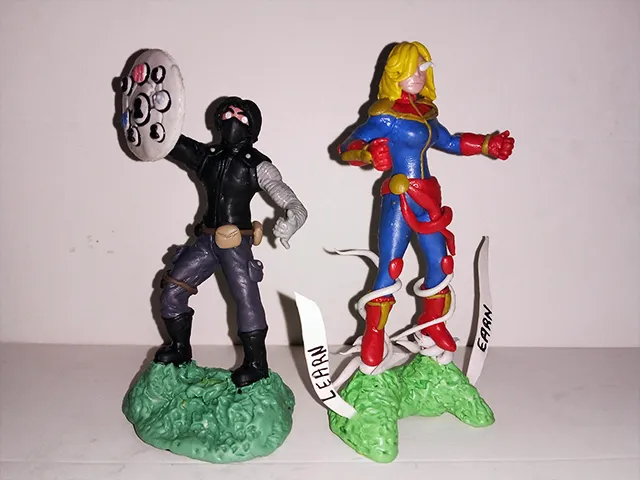
As a side note, I should comment that unfortunately @brittandjosie's figure fell off and damaged some of its parts. In other circumstances I wouldn't have worried too much, because eventually I would have repaired it with time, but this is a figurine that I have to put together with the others, so I tried to repair it as fast as I could and since I was molding it again, I decided to make some changes and improvements.
You can see below a picture of how the figurine looked like next to Stayten:
So far it has been quite an interesting and creative journey. For now I only plan to make six figures, that of the staff members I know. I'm only missing @justclickindiva and @jamerussell. First the ladies, so James will be the last one.
Well folks, I sincerely hope you liked my post. As I said, it's a pleasure to share my work with you and more this project related to TheTerminal. If you like to leave your opinions, you can do it below in the comments, I will be happy to read them. With nothing more to add, I'll say goodbye then....
See you next time!
Versión en español
Saludos a todos, amigos de HIVE. En esta ocasión les traigo otra figura que hice como parte de un proyecto al que llamo "The Terminal Assemble", este proyecto consiste en una serie de figuras representativas de los miembros del staff, que yo conozco, de @theterminal, la comunidad donde crecí aquí en HIVE.
En publicaciones anteriores les he mostrado las otras figuras que he hecho, pueden verlas siguiendo estos enlaces:
Iron-Kitty (@thekittygirl):
@gaboamc2393/iron-kitty-sculpture-escultura-de-iron-kitty-engesp
Hawk-wes (@wesphilbin):
@gaboamc2393/hawk-wes-sculpture-eng-esp
Captain Britt (@brittandjosie):
@gaboamc2393/captain-britt-sculpture-eng-esp
Pues bien, la figura que compartiré con ustedes en esta publicación es una representación de nada mas y nada menos que uno de mis otros compañeros de TheTerminal. Recuerdo que en una publicación anterior él se emocionó cuando lo etiqueté, pues pensó que había hecho una figura de él, pero no, se trataba de la figura de Iron Kitty; sin embargo, ahora si tendrá razones para emocionarse pues ahora les presento al Winter Greeter, la escultura que hice para @stayten.
Para todas estas series de figuras me he inspirado en personajes como Iron Man, Hawkeye y Capitana Marvel; para este caso, me inspiré en Winter Soldier, un personaje bastante conocido en las series/peliculas del Capitán América.
En el discord de TheTerminal, Stayten tiene el rol de Greeter, así que hice un juego de palabras entre Winter Soldier y Stayten-Greeter para darle nombre a la escultura: Winter Greeter. Como toque adicional, decidí que fuese Stayten quien llevase un escudo, a manera de estandarte, con el logo de TheTerminal.
Dicho todo lo anterior, les mostraré el paso a paso de la escultura.
Los materiales que utilicé fueron los de siempre:
*Plastilina de colores
*Alambre
*Hilo para sujetar el esqueleto de alambre de la figura.
*Agujas de coser y tejer.
*También usé un poco de cartón para el escudo pero no aparece en la fotografía.
La forma que damos al esqueleto de la figura siempre es importante, ya que si lo hacemos mal, nuestra escultura quedará con medidas desproporcionadas, como brazos muy largos o piernas muy cortas.
En mi caso trato de hacerlo de la manera más apropiada posible. A continuación puede ver el esqueleto que hice:
Sobre este esqueleto comencé a agregar plastilina y a moldearla. Primero las piernas, como siempre (2). Lo siguiente fueron las botas (3).
Con ayuda de las agujas antes mencionadas, comencé a dar forma a los pliegue, arrugas y costuras del pantalón (4). Con el tiempo, la plastilina vuelve a expandirse un poco, así que hay que hacer estos pliegues de las arrugas un poco más profundos de lo que queremos, para que tras expandirse, quede de la manera adecuada.
En la imagen a continuación pueden ver los pliegues hechos en primera instancia(4) y cómo quedaron al expandirse la plastilina (5). En este punto también continué moldeando el torso, el cuello y brazo derecho de esta escultura (5).
Continué con el pecho, moldeando una especie de chaleco de cuero, también usé la aguja de tejer antes mencionada para moldear el brazo derecho (6). Luego, moldeé el brazo izquierdo con un color gris, como si fuese metal (7).
Con más plastilina negra coloqué líneas en las uniones de los brazos y el torso, además de un par de hombreras con tachuelas grises. Por último hice las líneas en el brazo izquierdo y así quedó el cuerpo de la escultura:
Siendo honestos, esta figura representó un reto para mi por el simple hecho de tener que hacer el escudo con el logo de TheTerminal (9). Las figuras son pequeñas, así que háganse una idea de lo difícil que es hacer este logo con todo lujo de detalle.
Además del escudo, también hice la cabeza (10) y unos cuántos accesorios (11).
Una vez listo todo, comencé con el armado. Primero coloqué los accesorios antes mencionados en las piernas y en la cintura (12), luego fijé el escudo con plastilina y pegamento (13). También fijé la cabeza en su lugar y le coloqué el cabello.
Lo último que hice para esta figura fue la base. Usé un montón de plastilina verde y la apilé alrededor de todo el alambre de la base (14), luego la moldeé con la punta redondeada de mi aguja de tejer, para darle la forma que aparece en la imagen a continuación (15)
De esta manera quedó terminada la figura, con su brazo metálico, accesorios, escudo y un rostro que creo que representa bien a este estimado miembro de TheTerminal.
A continuación les dejo unas cuántas fotografías tomadas desde distintos ángulos:
Acá un acercamiento a los accesorios:
Y esto fue todo. ¿Qué les pareció la figura? Yo estoy muy contento con el resultado ya que me quedó tal como lo imaginé y eso es realmente algo muy satisfactorio, poder crear algo que imaginas y que esto quede tal como lo deseabas.
Stayten, espero que te guste amigo, lo hice con mucho cariño, tal como he hecho las otras figuras de los demás compañeros. Aquí me voy a tomar el atrevimiento de etiquetar a la estimada @nineclaws, a quien seguro le gustará ver cómo ha quedado esta escultura que hice del amigo stayten.
Como nota adicional, debo comentar que lamentablemente la figura de @brittandjosie se me cayó y se dañó algunas de sus partes. En otras circunstancias no me habría preocupado demasiado, pues eventualmente la habría reparado con tiempo, pero esta es una figurita que debo juntar a las otras, así que traté de repararla tan rápido como pude y ya que estaba moldeandola de nuevo, decidí hacerle unos cambios y unas mejoras.
Pueden ver a continuación una fotografía de cómo quedó la figurita junto a Stayten:
Hasta ahora ha sido un recorrido bastante interesante y lleno de creatividad. Por ahora solo planeo hacer seis figuras, la de los miembros del staff que yo conozco. Solo me faltan @justclickindiva y @jamerussell. Primero las señoritas, así que James será el último.
Bien amigos, sinceramente espero que mi publicación les haya gustado. Como dije, es un placer compartir mi trabajo con ustedes y más este proyecto relacionado con TheTerminal. Si gustan dejar sus opiniones, pueden hacerlo abajo en los comentarios, yo estaré encantado de leerlos. Sin más que agregar, me despido entonces...
¡Hasta la próxima!

Imagenes editadas con Photoshop
Traducido con DeepL
Photos edited with Photoshop
Translated with DeepL
Rising Star: First steps - Buying Pack
Dibujo #3: ánade real
Helio: Microrrelato Ilustrado