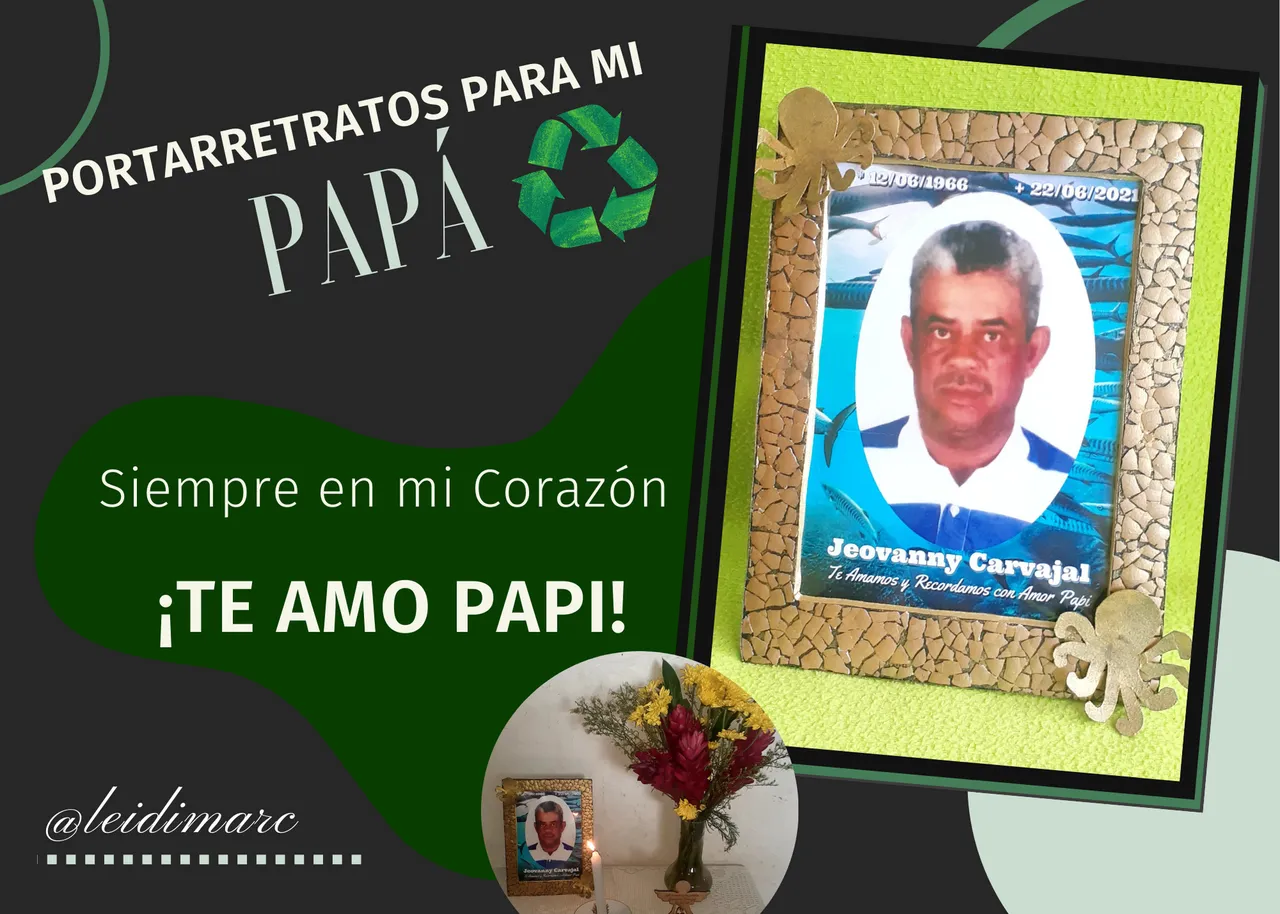
Hola mi gente creativa de DIY. Está por terminar esta semana que Dios nos regaló, agradeciendo que esta que está por empezar sea de mucho provecho y bendiciones. Hoy les traigo una de mis creaciones que hice con mucho amor para mi Padre querido.
El miércoles 22 de junio se cumplió 1 año de su partida al cielo, muchos sentimientos encontrados recordando aquel triste y doloroso momento.
Pero no les vengo a comentar sobre aquel nefasto día, ni de lo mucho que lo extraño y me hace falta. Si no de una linda manualidad que hice en su honor.
Para ese Día le hicimos un Rosario, para el cual fue una osadía comprar un recuerdo para los asistentes a acompañarnos en ese momento especial y algo que yo quería era sacar una de sus fotos en donde posaba para la cámara, ya que a él no le gustaban las fotos.
Quise colocarle en el fondo de la foto, el mar y unos peces, porque era lo que más le gustaba y la venta de estos fue durante muchos años su fuente de trabajo.
Pero más que comprar un lindo portarretratos, quise hacerle uno con mis propias manos con toda la dedicación, ya que tenía tiempo que quería hacer algo con esta técnica de las cáscaras de huevos, que ya verán que se ve muy lindo.
Soy de las que cuando en casa vamos a celebrar cualquier ocasión especial, me gusta meter la mano (hacer algo) en lo que sea que pueda y si es con mis propias manos mejor y esta no fue la excepción.

Hello my creative DIY people. It's about to end this week that God gave us, thanking that this one that is about to begin will be of much benefit and blessings. Today I bring you one of my creations that I made with love for my dear Father.
Wednesday, June 22 was the first anniversary of his departure to heaven, many mixed feelings remembering that sad and painful moment.
But I am not here to tell you about that fateful day, nor about how much I miss him and how much I miss him. But about a beautiful craft I made in his honor.
For that day we made him a Rosary, for which it was a daring idea to buy a souvenir for those who came to accompany us in that special moment and something I wanted was to take one of his photos where he posed for the camera, since he did not like photos.
I wanted to place in the background of the photo, the sea and some fish, because it was what he liked the most and the sale of these was for many years his source of work.
But more than buying a nice picture frame, I wanted to make one with my own hands with all my dedication, since I had wanted to do something with this eggshell technique for a long time, and you will see that it looks very nice.
I am one of those that when we celebrate any special occasion at home, I like to put my hand (do something) in whatever I can and if it's with my own hands better and this was no exception.
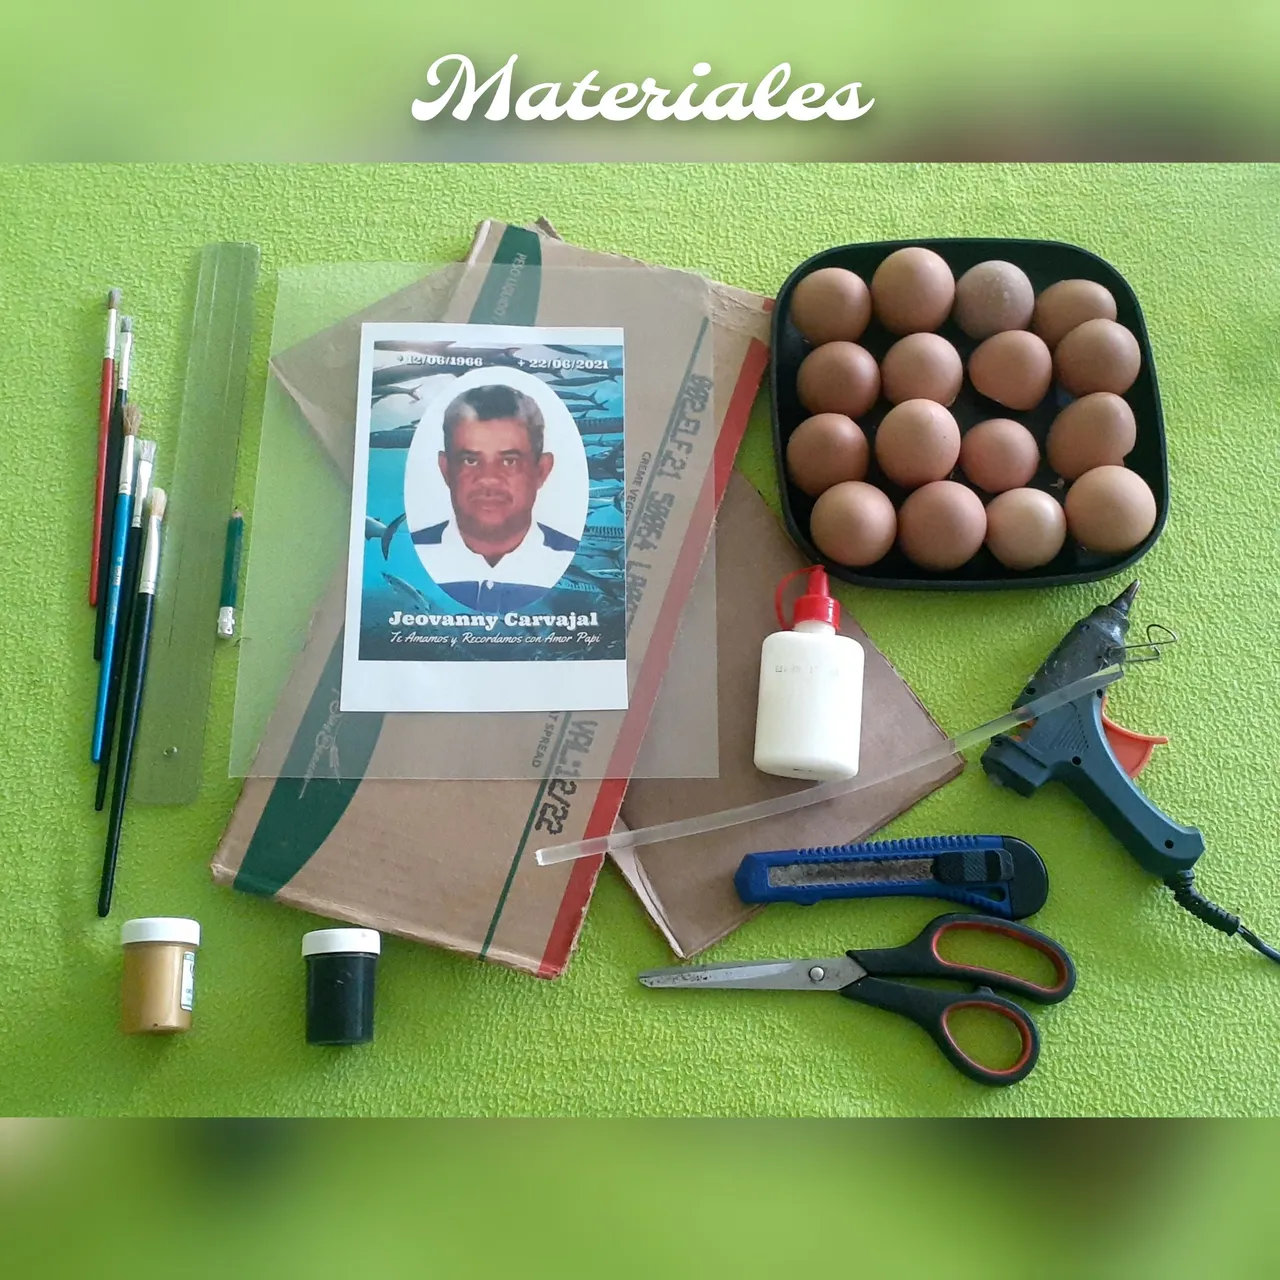
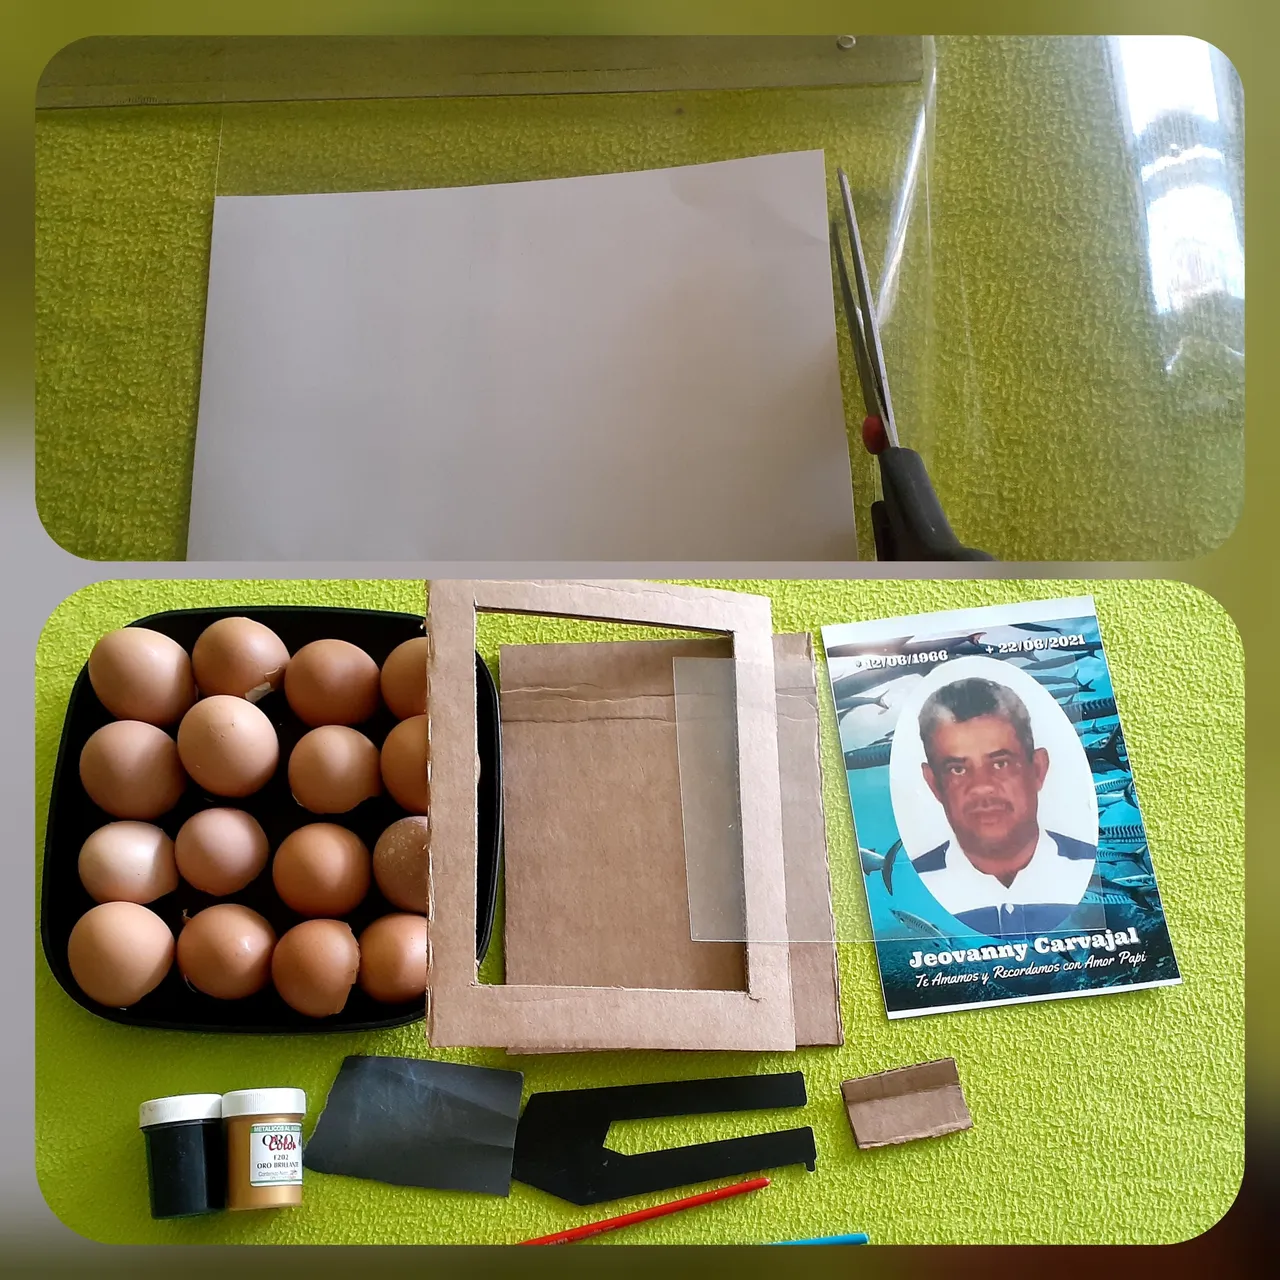
Entonces, ahora sí les muestro paso a paso como fue que hice esta manualidad con material reciclado. Estos son los materiales que utilice.
- Una foto.
- Cartón.
- Acetato.
- Cascarás de huevo.
- Pega.
- Silicona.
- Pinturas: negra y dorada.
- Cuchilla.
- Regla.
- Lápiz.
- Pistola de silicona.
- Pinceles.
- Tijera.
I show step by step how I made this craft with recycled material. These are the materials I used.
- A photo.
- Cardboard.
- Acetate.
- Eggshells.
- Glue.
- Silicone.
- Paints: black and gold.
- Blade.
- Ruler.
- Pencil.
- Silicone gun.
- Brushes.
- Scissors.
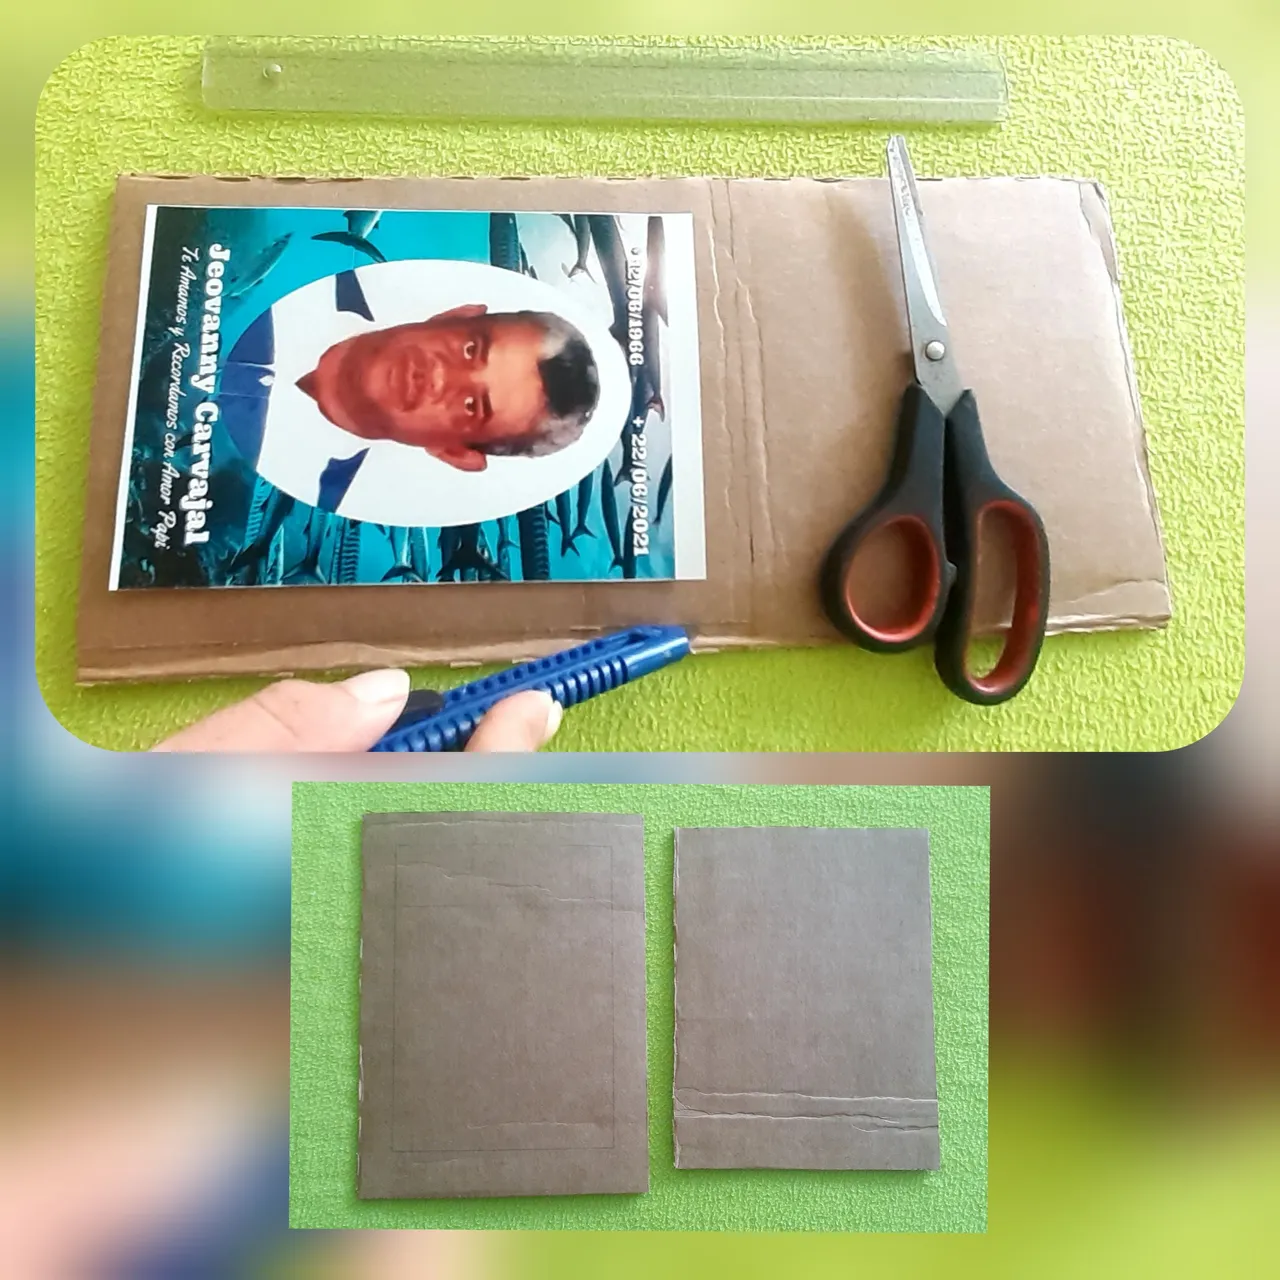
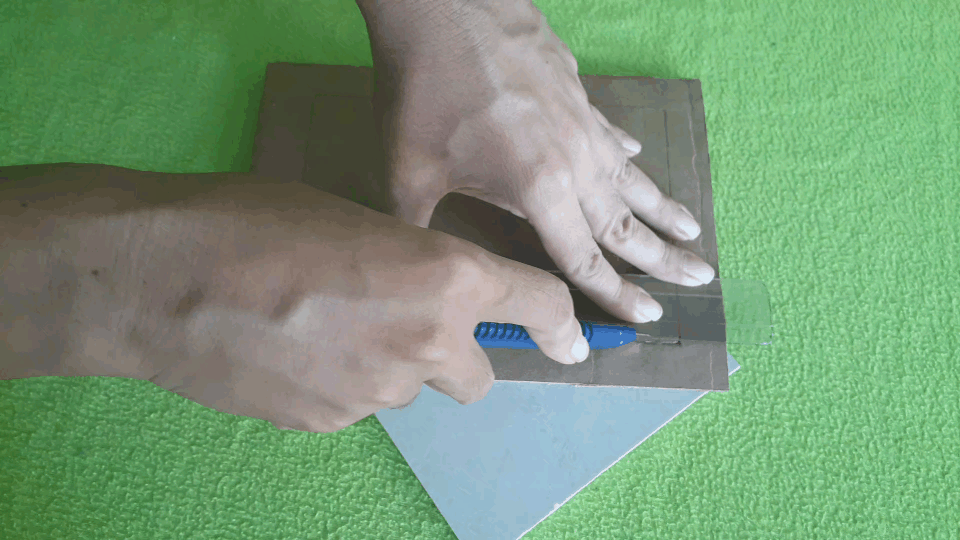
Para comenzar con esta creación, marcamos con un lápiz el área que vamos a recortar del cartón. Para lo cual coloque la foto encima del cartón para sacar la forma y tamaño del portarretrato.
Una vez marcado y cortado. Medí desde el borde del cartón hacia adentro 2 cm por 3 de sus lados y en la parte de abajo 2,5 cm.
Quedando las dos partes que cubrirán la foto. Cabe resaltar que la parte de atrás la hice un poco más pequeñas para que el borde del portarretrato no quede tan gruesa.
Y con la cuchilla hice los cortes un poco más fácil que con la tijera, que también me ayudó.
To start with this creation, we mark with a pencil the area that we are going to cut out of the cardboard. To do this, place the photo on top of the cardboard to get the shape and size of the picture frame.
Once marked and cut out. Measure from the edge of the cardboard inward 2 cm by 3 of its sides and at the bottom 2.5 cm.
This leaves the two parts that will cover the photo. It is worth noting that I made the back part a little smaller so that the edge of the picture frame is not so thick.
And with the blade I made the cuts a little easier than with the scissors, which also helped me.
Luego coloque la foto encima del acetato, el cual es una hoja plástica transparente que sirve para proteger la foto del polvo. Marque el área de corte y la recorte.
Con esa acción tenía ya las piezas listas para empezar a trabajar más cómodamente. En esta imagen pueden ver una pieza que también recicle y es la que permite que quede en pie el portarretrato, esa negra que ven por ahí también un trozo de cartón para fijar esa pieza por la parte de atrás. También anexo un trozo de lija.
Then place the photo on top of the acetate, which is a clear plastic sheet that serves to protect the photo from dust. Mark the cutting area and cut it out.
With that action I had the pieces ready to start working more comfortably. In this image you can see a piece that I also recycled and is the one that allows the picture frame to stand up, the black one that you see over there and also a piece of cardboard to fix that piece on the back. I also attached a piece of sandpaper.
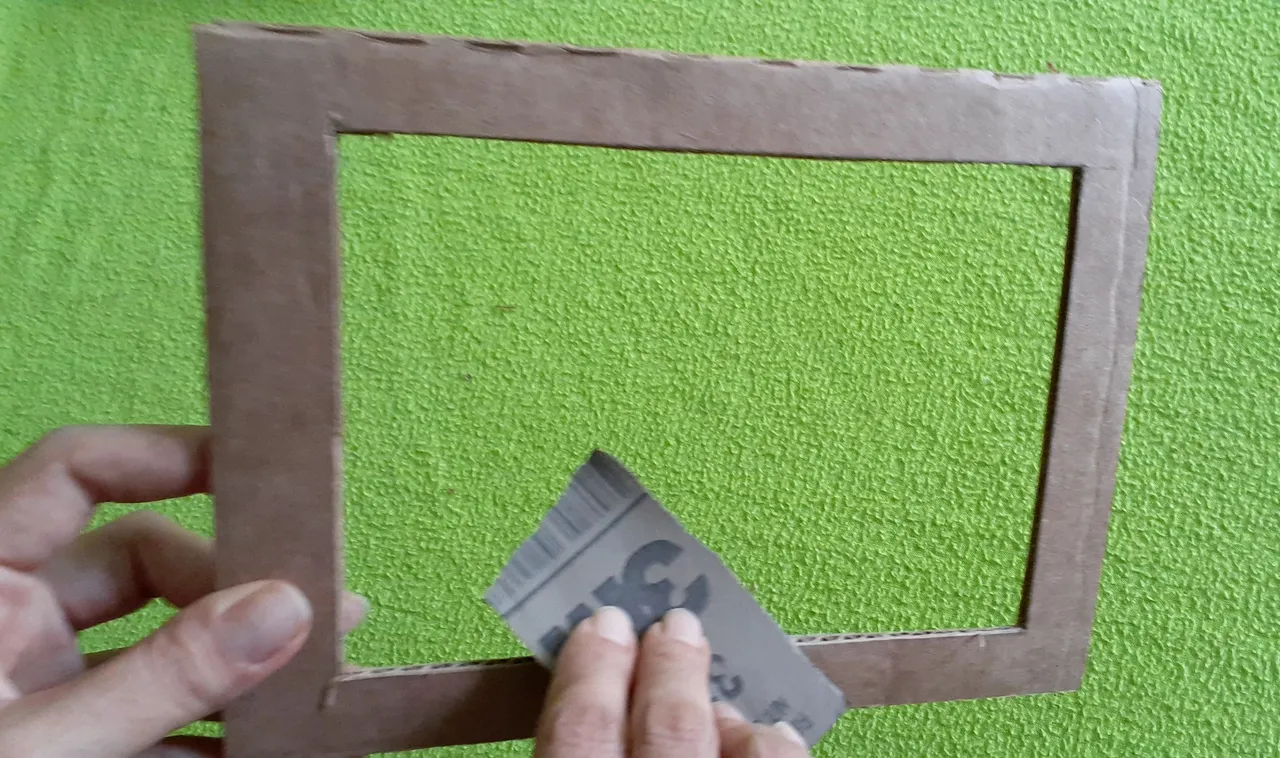
Esta parte me pareció necesaria, la de lijar cada una de las piezas de cartón, ya que al no tener unos cortes tan precisos, le quedan unas imperfecciones, que se pueden aligerar pasándole la lija.
This part seemed necessary to me, sanding each of the pieces of cardboard, since not having such precise cuts, there are some imperfections, which can be lightened by passing the sandpaper.
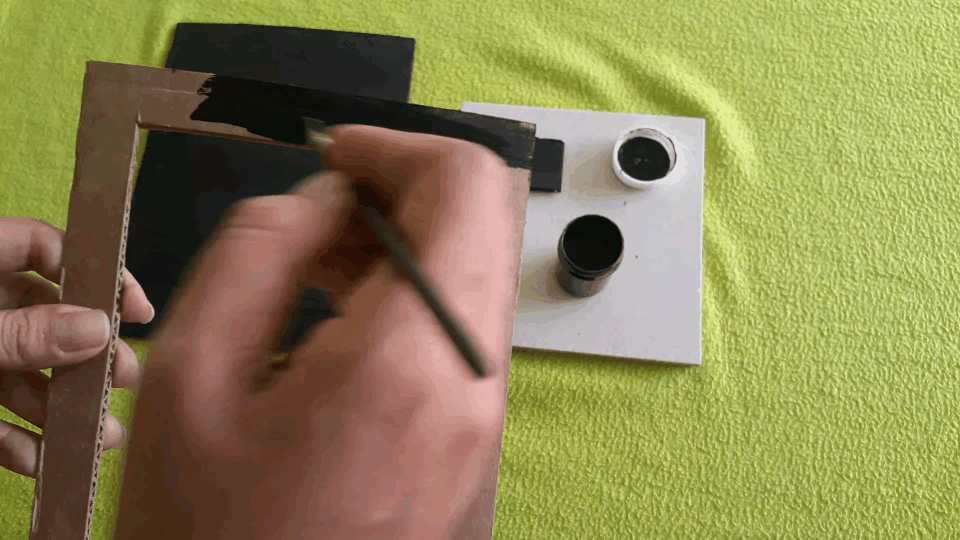
Ahora le tocó el turno a la pintada, en esta parte me ayudó Arianna que estaba impaciente por meter sus manos en la obra, no le basta con el trabajo de fotógrafa je, je, je.
A cada una de las piezas se le echó dos capas de pintura negra y se pusieron a secar al sol que entraba por la ventana.
Now it was the turn of the painting, in this part Arianna helped me, she was impatient to put her hands in the work, she is not enough with the work of photographer he, he, he, he.
Two coats of black paint were applied to each of the pieces and they were put to dry in the sun that came through the window.
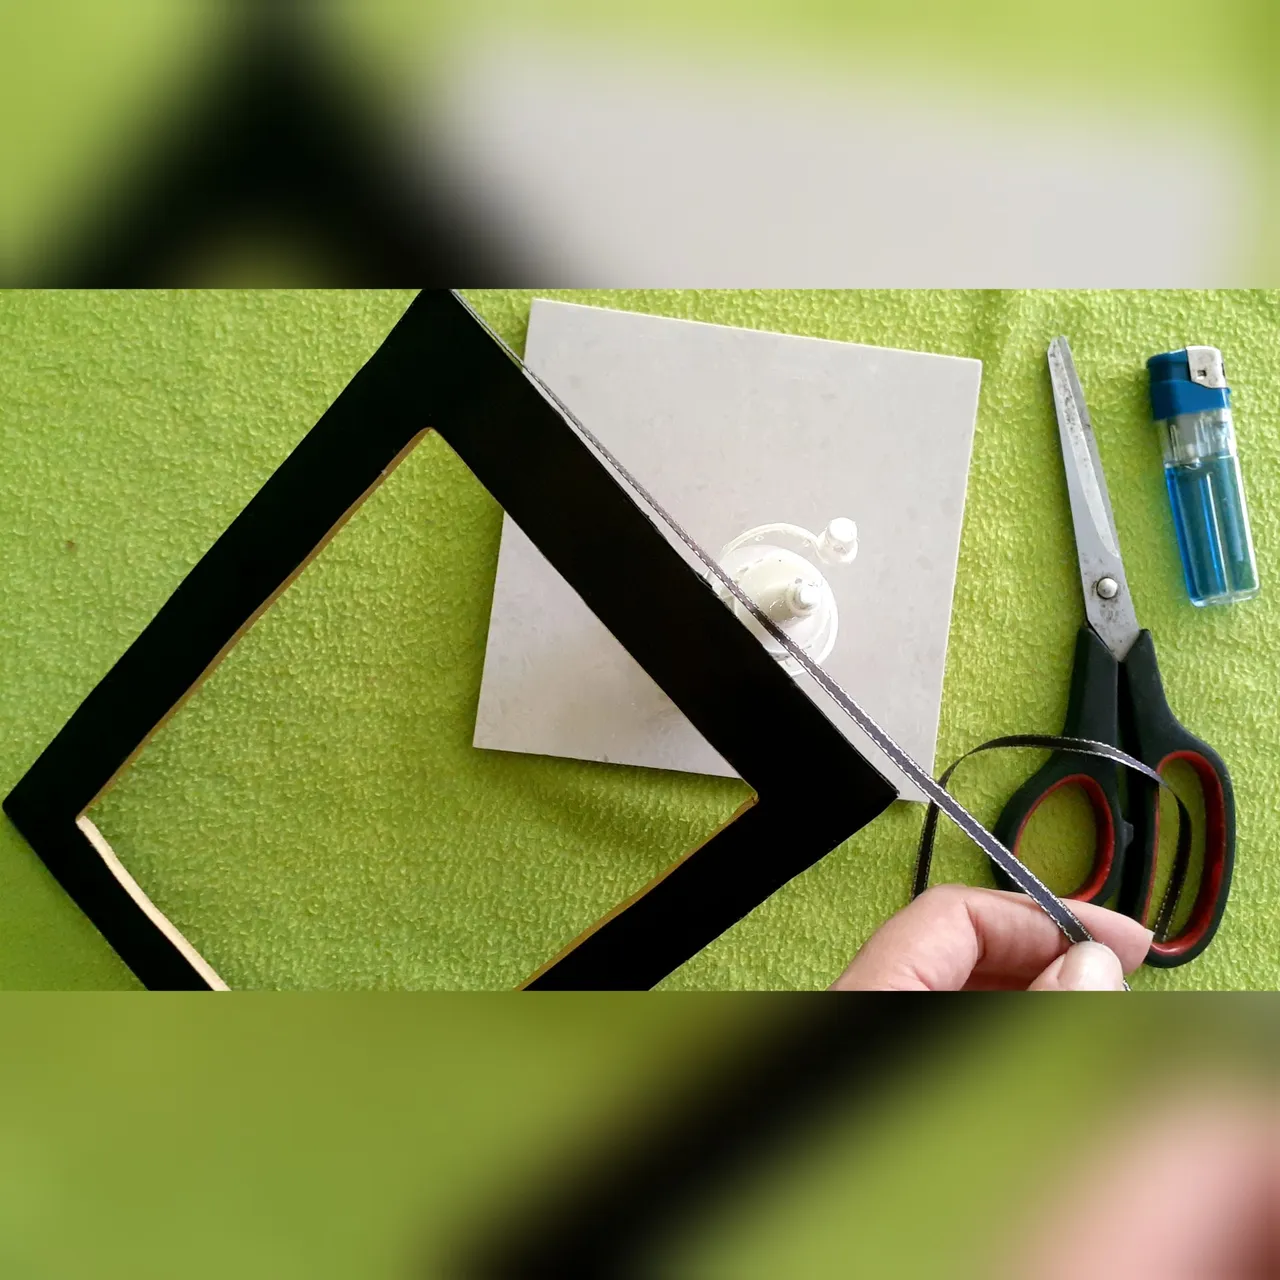
Para cuidar que las orillas me quedarán bien bonitas y no se notará tanto que era cartón, por el borde de afuera y por adentro le coloque una cinta de 0,3 ml, le puse de dos colores diferentes, pero que combinaban muy bien. Debido a que era lo que tenía en mano.
To make sure that the edges would look nice and it wouldn't be so noticeable that it was cardboard, I put a 0.3 ml ribbon on the outside and inside edges, in two different colors, but they combined very well. Because it was what I had in hand.
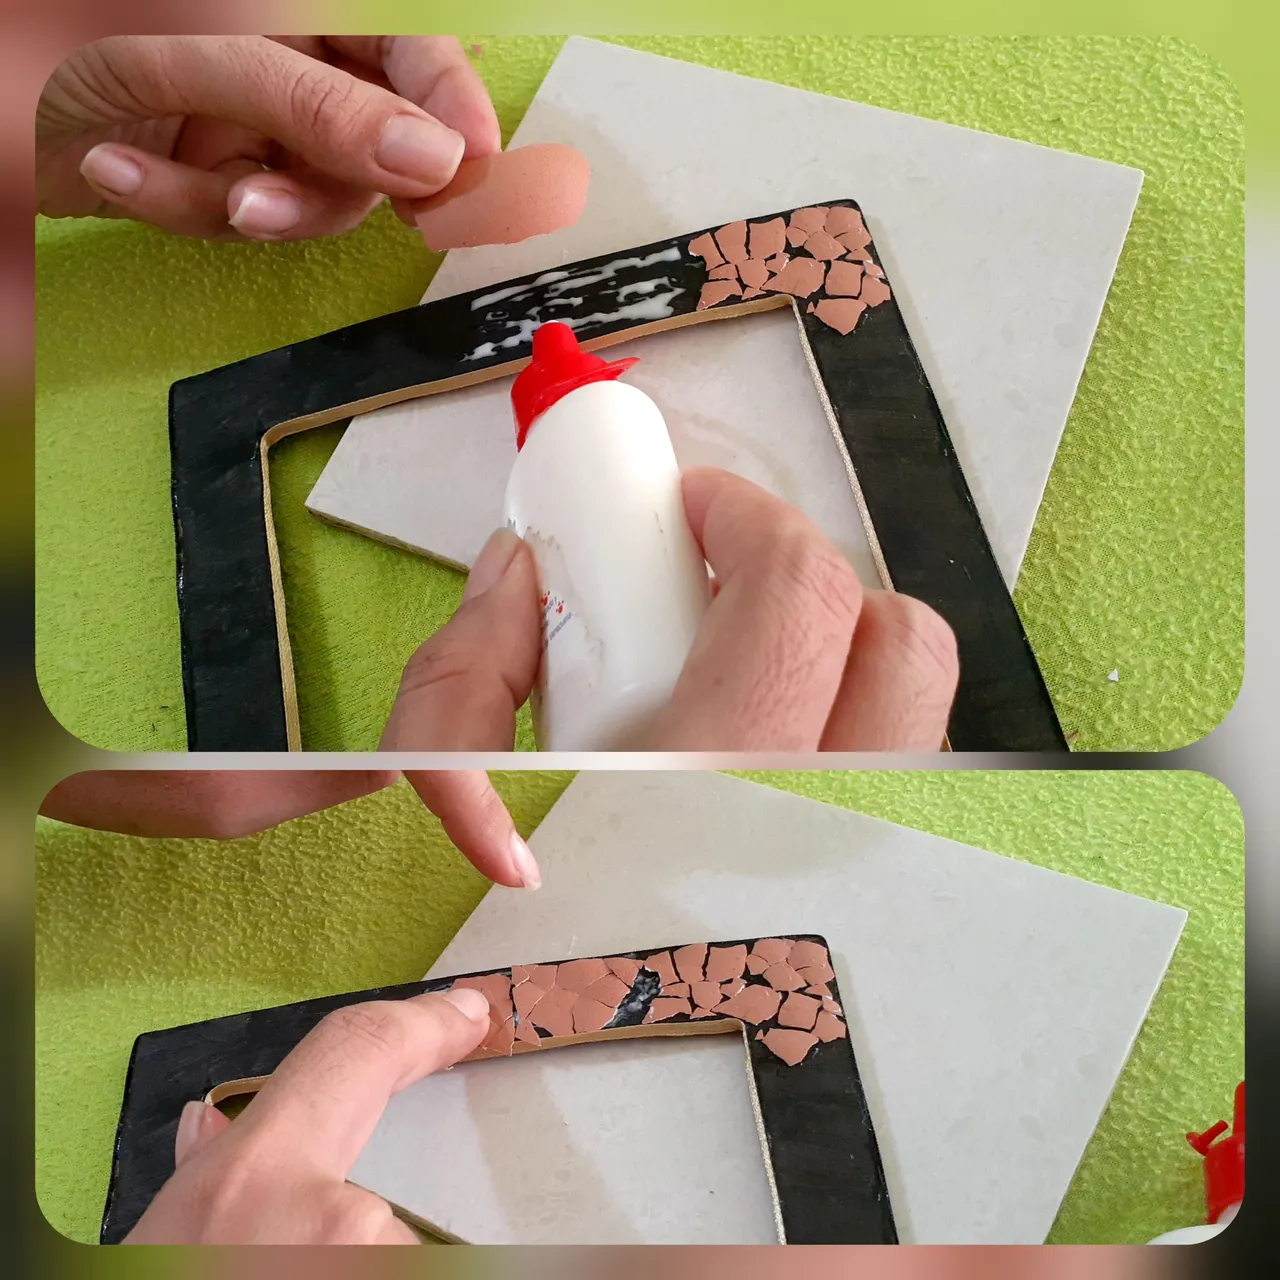
Ya viene la parte divertida, eso pensaba yo. La de pegar las cáscaras de huevos. Para lo cual echamos una porción de pega blanca y en principio le fui colocando la cascara ya picada. Pero no me gustó esa primera tanda, no se veía ordenado.
Fue por eso que de inmediato pensé en hacerlo de otra manera más práctica, fui cortando un trozo grande que abarcará un espacio que cubriera un área, como un rectángulo.
Una vez echado la pega, le puse encima la cáscara y la presioné suavemente en el cartón, y luego la fui separando un poco para que se notara como un rompecabezas. Quedando mejor organizando.
Now comes the fun part, I thought. That of gluing the eggshells. For which we put a portion of white glue and at first I was placing the chopped eggshell. But I didn't like that first batch, it didn't look tidy.
That's why I immediately thought of doing it in a more practical way, I cut a large piece that would cover a space that would cover an area, like a rectangle.
Once the glue was applied, I put the shell on top of it and pressed it gently on the cardboard, and then I separated it a little so that it would look like a jigsaw puzzle. It looks better organized.
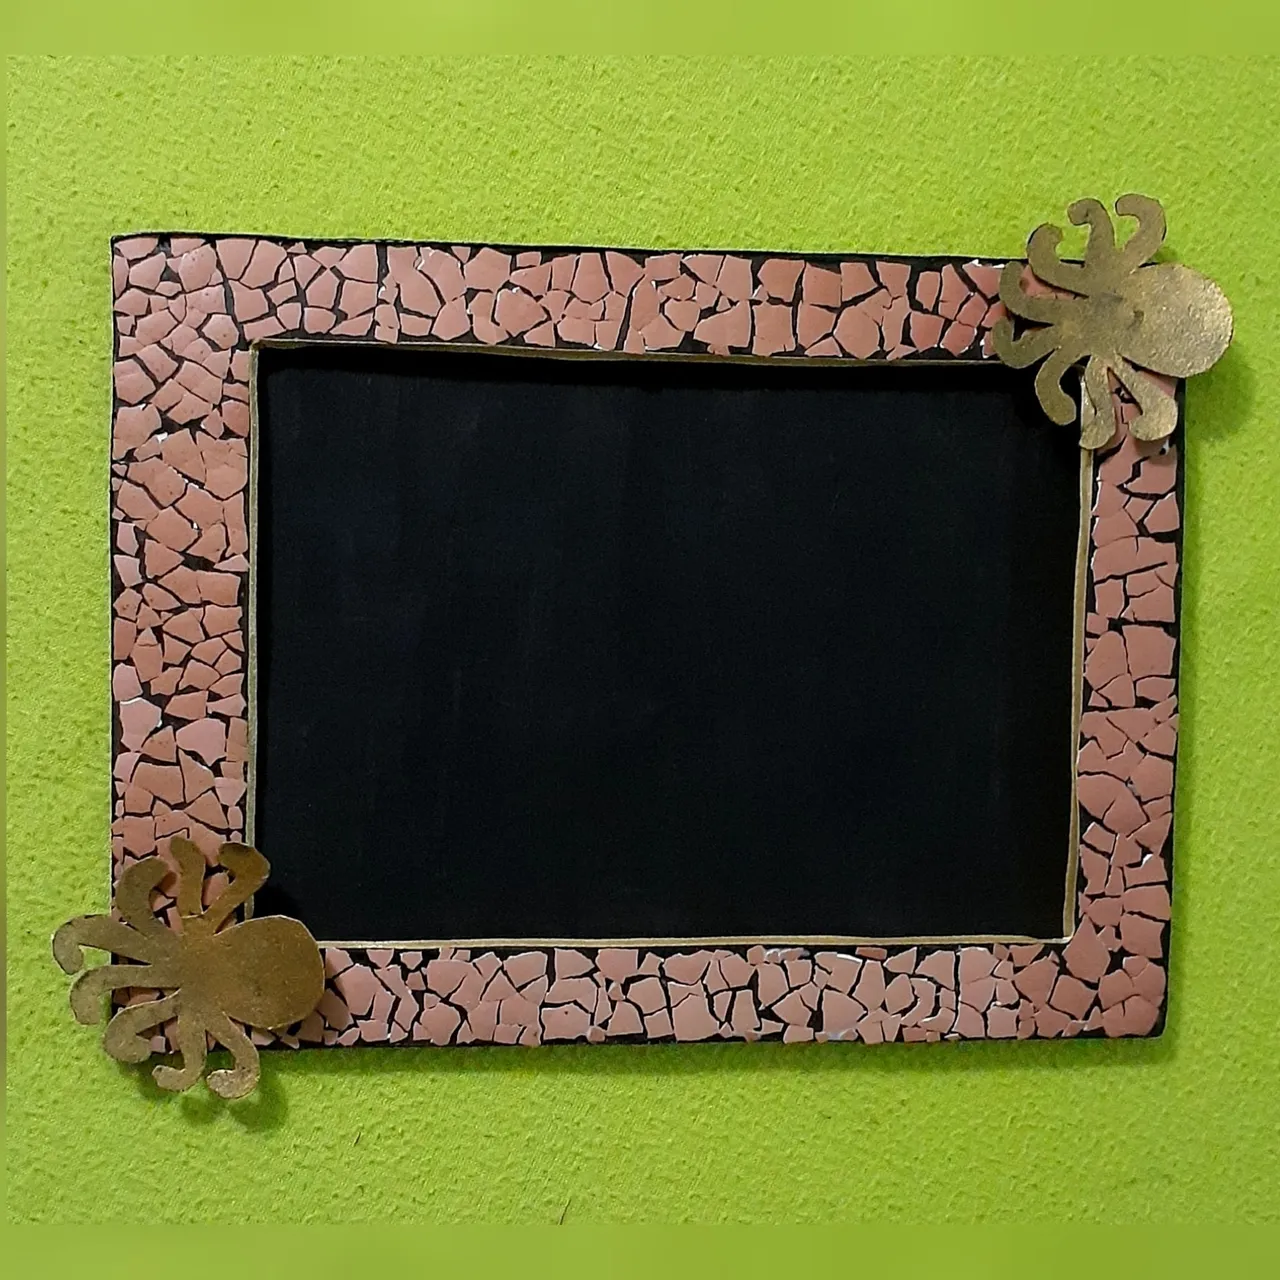
Poco a poco fui pegando las cáscaras de huevo por todo el marco, cuidando de ir cubriendo cada espacio. Mientras tanto, Arianna marcó, recortó y pintó unas figuras de pulpo que tanto le gustaba a mi papá, para que formara parte de la decoración.
Aún sin pegarlo, lo armé de esta forma, como que ya estuviese listo y mostrarle como se ve con las cáscaras de huevo al natural, se ve muy bonito también, por si no cuentan con una pintura. Está bien bueno para hacer este tipo de actividad con los niños. Las mías hicieron un reguero y pegaron cáscaras por todas partes, je, je, je.
Little by little I glued the eggshells all over the frame, taking care to cover each space. Meanwhile, Arianna marked, cut out and painted some octopus figures that my dad liked so much, to be part of the decoration.
Even without gluing it, I put it together like this, as if it was already ready and show you how it looks with the eggshells in its natural state, it looks very pretty too, in case you don't have a paint job. It's great to do this kind of activity with the kids. Mine made a mess and glued shells everywhere, heh, heh, heh, heh.
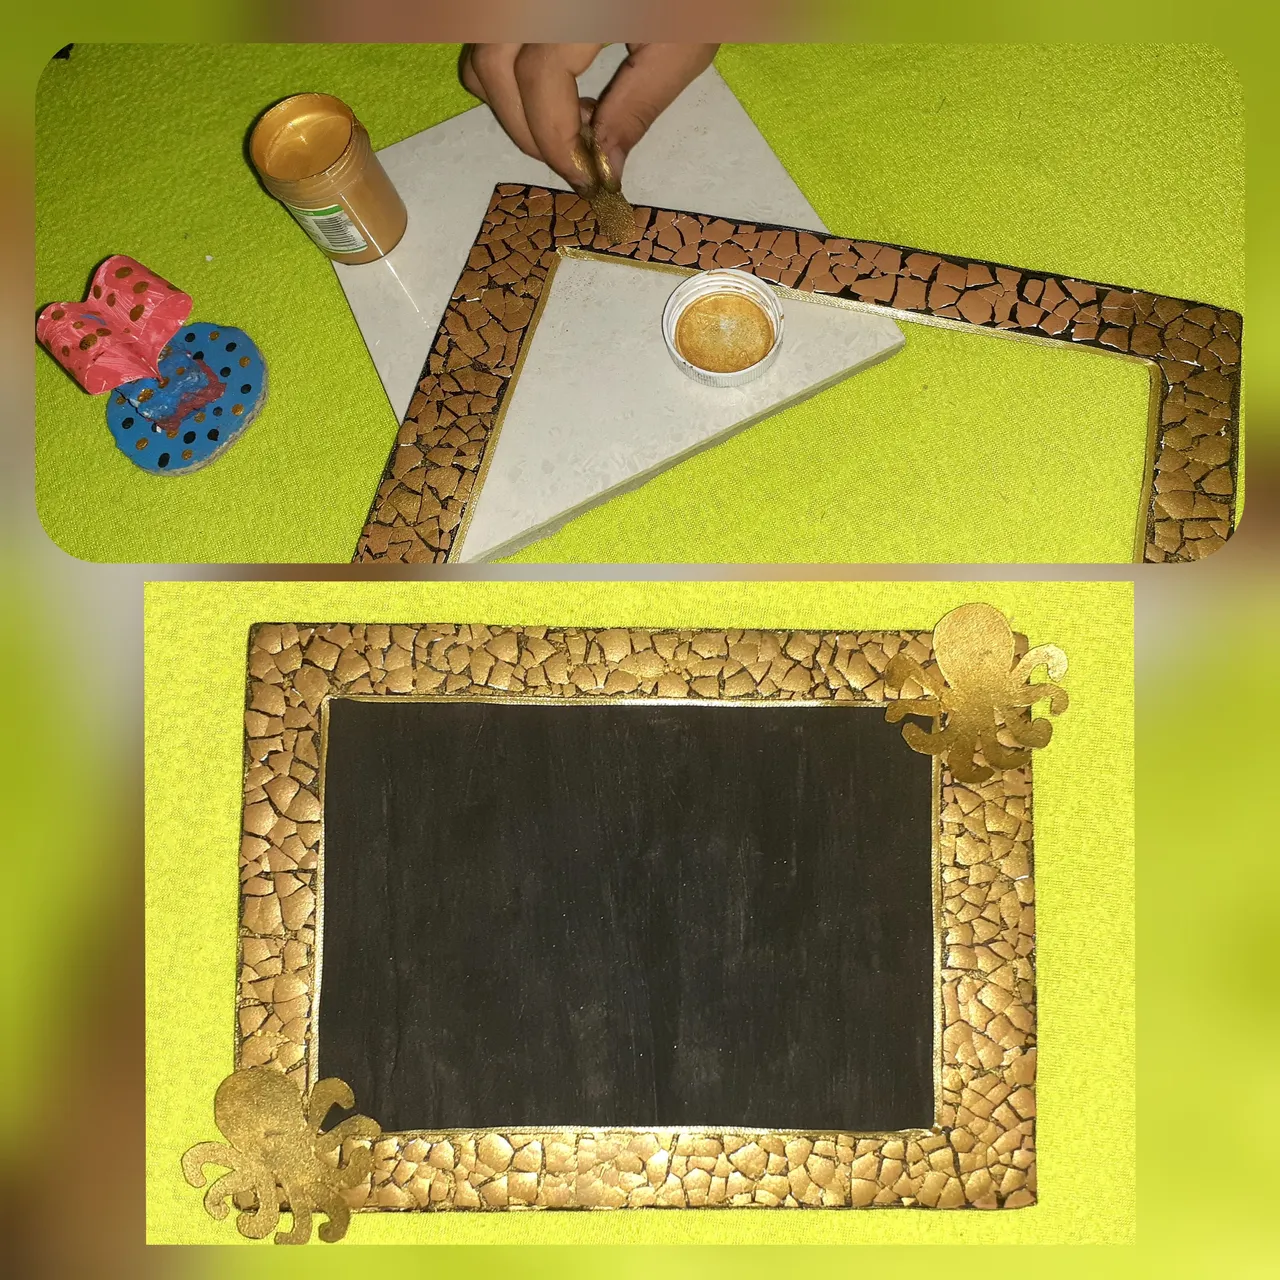
Como quería que se viera aún más bonito, lo pinté con la pintura dorada, con un trozo de esponja, fui agarrando pintura de a poco, para esparcir por todo el marco del portarretrato y se le viera aún el fondo negro, me pareció que de esta manera se veía más lindo, que todo dorado, que también es una opción.
En la imagen ven una figura, la cual es una torta con un corazón, hecha con anime y papel que hizo Arianna mientras yo trabajaba, y ella no pierde tiempo de hacer algo también y estaba empeñada que saliera en la publicación, je, je, je, yo la complací.
As I wanted it to look even prettier, I painted it with gold paint, with a piece of sponge, I took paint a little at a time, to spread it all over the frame of the picture frame and the black background could still be seen, I thought it looked nicer this way, than all gold, which is also an option.
In the picture you see a figure, which is a cake with a heart, made with anime and paper that Arianna made while I was working, and she wasted no time to do something too and she was determined to have it in the publication, heh, heh, heh, heh, I obliged her.
Una vez teniendo todas las piezas listas, empecé con el armado de este lindo portarretratos para Papi, como lo llamé hasta su último día.
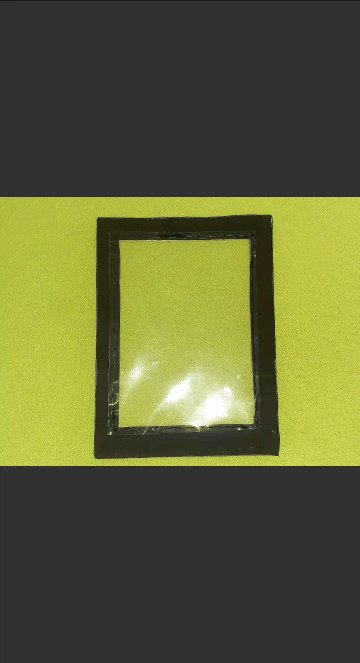
Por la parte del reverso del marco, pegue el acetato con silicona.
Encima coloqué la foto.
Por todo el alrededor de la foto, menos por la parte de arriba, le eché silicona para colocarle la tapa.
Por último le pegué la pieza que sirve para que el portarretrato quede parado sin caerse.
Y así se ve ya listo, me gustó mucho como quedó. Hecho con mucho amor y con la ayuda de mis niñas.
Once I had all the pieces ready, I started assembling this beautiful picture frame for Papi, as I called him until his last day.
- On the back of the frame, I glued the acetate with silicone.
- On top I placed the photo.
- All around the photo, except for the top, I put silicone to place the lid.
- Finally I glued the piece that serves to keep the picture frame standing upright without falling.
And this is how it looks ready, I really liked how it turned out. Made with a lot of love and with the help of my girls.
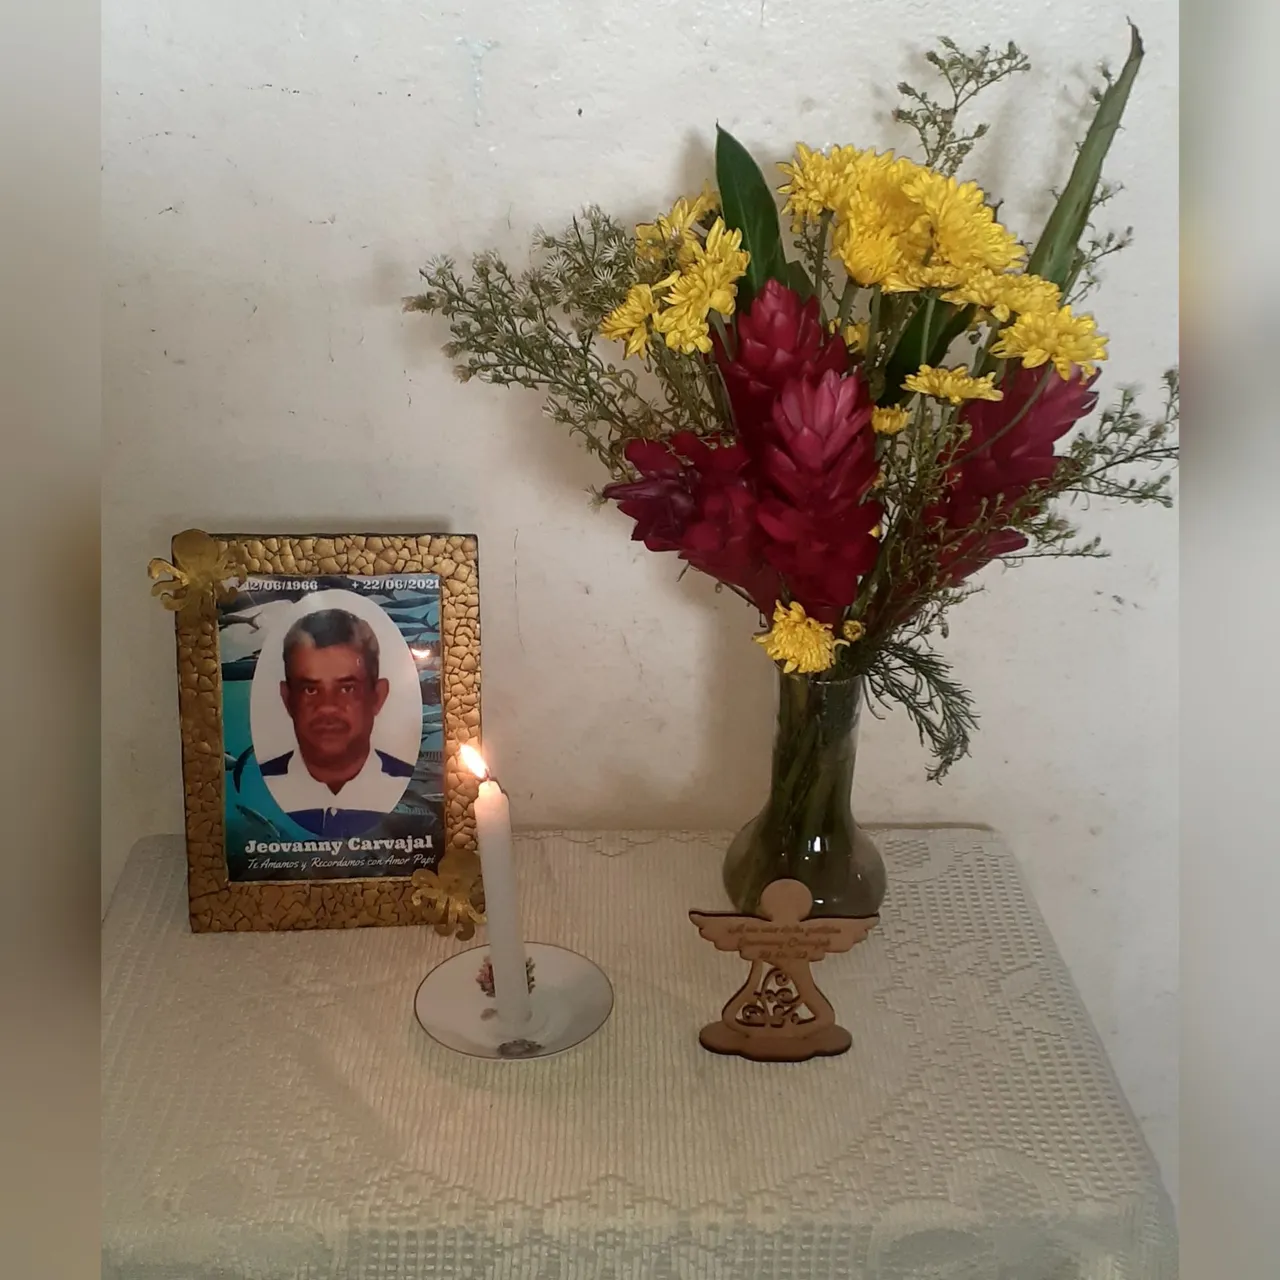
Como les comenté, lo hice para el Santo Rosario (rezo) en su honor, rogando a Dios por el eterno descanso de su alma y que lo tenga en su Santa Gloria, a un año de su partida al cielo, lo colocamos junto a unas flores, una vela y un recuerdo en forma de un angelito en madera PDF, que mandamos hacer.
Había unas señoras mayores que son las que vienen hacer el Rezo, que quedaron encantadas con el portarretrato, a mi mamá y mis hermanos también le gustaron.
As I told you, I made it for the Holy Rosary (prayer) in his honor, praying to God for the eternal rest of his soul and to have him in his Holy Glory, a year after his departure to heaven, we placed it with some flowers, a candle and a souvenir in the form of a little angel in wood PDF, which we had made.
There were some older ladies who are the ones who come to pray, who were delighted with the portrait, my mom and my brothers also liked it.
Espero que haya sido de su agrado la lectura de mi publicación y me digan que les pareció. Muchas gracias por su atención. Dios le bendiga.
I hope you enjoyed reading my publication and let me know what you thought of it. Thank you very much for your attention. God bless you.
Fotos tomadas por | Photos taken by @leidimarc
Dispositivo | Device | Samsung Galaxy A20
Fotos editadas en: |Photos edited in | App Gridart
Separadores hechos en | Separators made in | CC Express for Samsung
Gif creado en | Gif created in | App Video Maker
Los Banners los efectué con la herramienta Canva | The banners were made with the Canva.
Traducción con | Translation with| DeepL