
Hola mis queridos amigos de Hive Diy, espero que estén teniendo una semana maravillosa. Menos mal que aquí se aclaró, porque a pesar de gustarme mucho la lluvia, todo con moderación, ya es mucha jajaja, el cierre de esta primavera ha sido muy húmedo, pero para alegrar el verano os he traído unos pendientes alegres que hice con unas cuentas amarillas y marrones, me gusta mucho esa combinación y no puedo evitar asociarlo con el verano, porque el marrón es un color un poco sobrio por sí solo y el amarillo es demasiado brillante, pero cuando estos dos colores se juntan es para mi la mezcla perfecta, como si la tierra y el sol se encontraran, estos dos colores armonizan muy bien y se complementan, incluso en ropa, bolsos, zapatos se ven muy bonito, todo lo que lleva esos dos colores siempre se ve muy alegre. Además, esta siempre fue la combinación que más le gustaba a mi mamá, lo suficiente como para querer usarla en aretes.
Ahora les explico detalladamente y paso por paso como lo hice estos preciosos aretes.
Hello my dear Hive Diy friends, I hope you are having a wonderful week. Luckily it cleared up here, because despite liking the rain a lot, everything in moderation, it's already a lot hahaha, the closure of this spring has been very wet, but to brighten up the summer I have brought you some happy earrings that I made with some yellow and brown beads, I really like that combination and I can't help but associate it with summer, because brown is a bit sober on its own and yellow is too bright, but when these two colors come together it's the mix for me perfect, as if the earth and the sun met, these two colors harmonize very well and complement each other, even in clothes, bags, shoes they look very pretty, everything that wears these two colors always looks very cheerful. Also, this was always the combination that my mom liked the most, enough that she wanted to use it in earrings.
Now I explain in detail and step by step how I made these beautiful earrings.

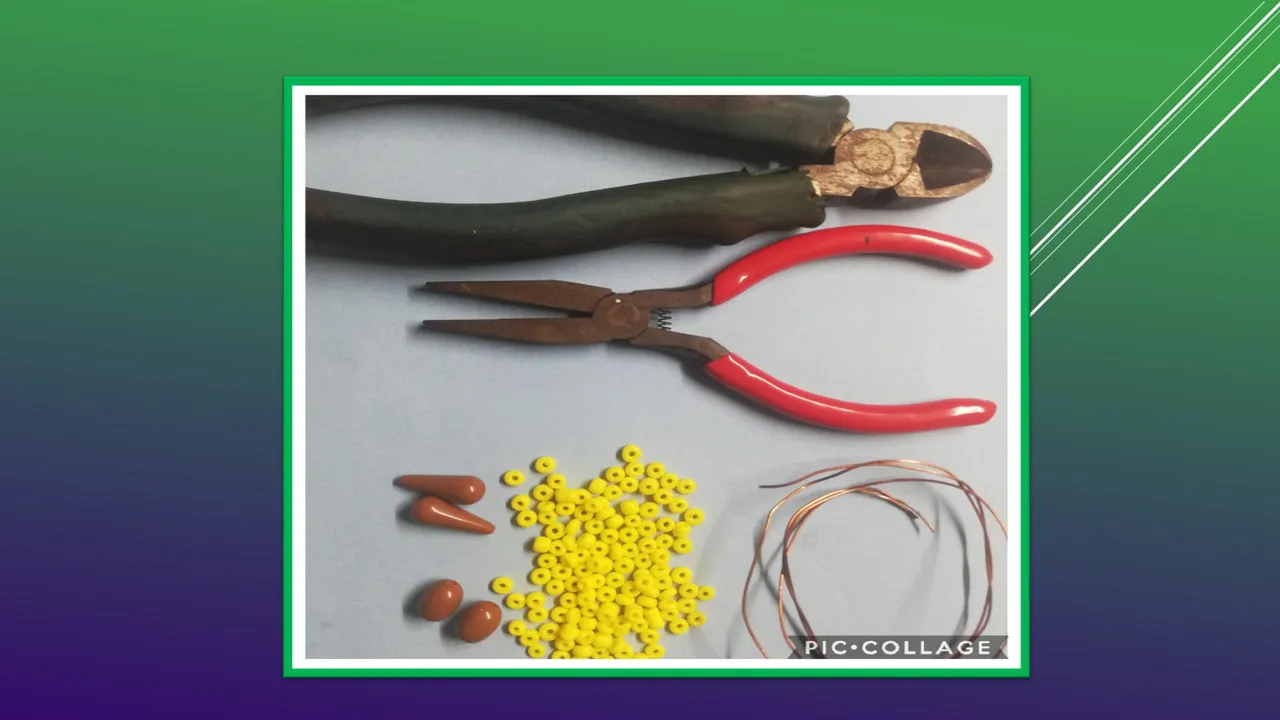
Alambre de cobre
2 cuentas marrones alargadas
2 cuentas ovaladas carmelitas
cuentas amarillas
pinzas finas
cortando alicante
Copper wire
2 elongated brown beads
2 Carmelite oval beads
yellow beads
fine pint tweezers
cutting alicante

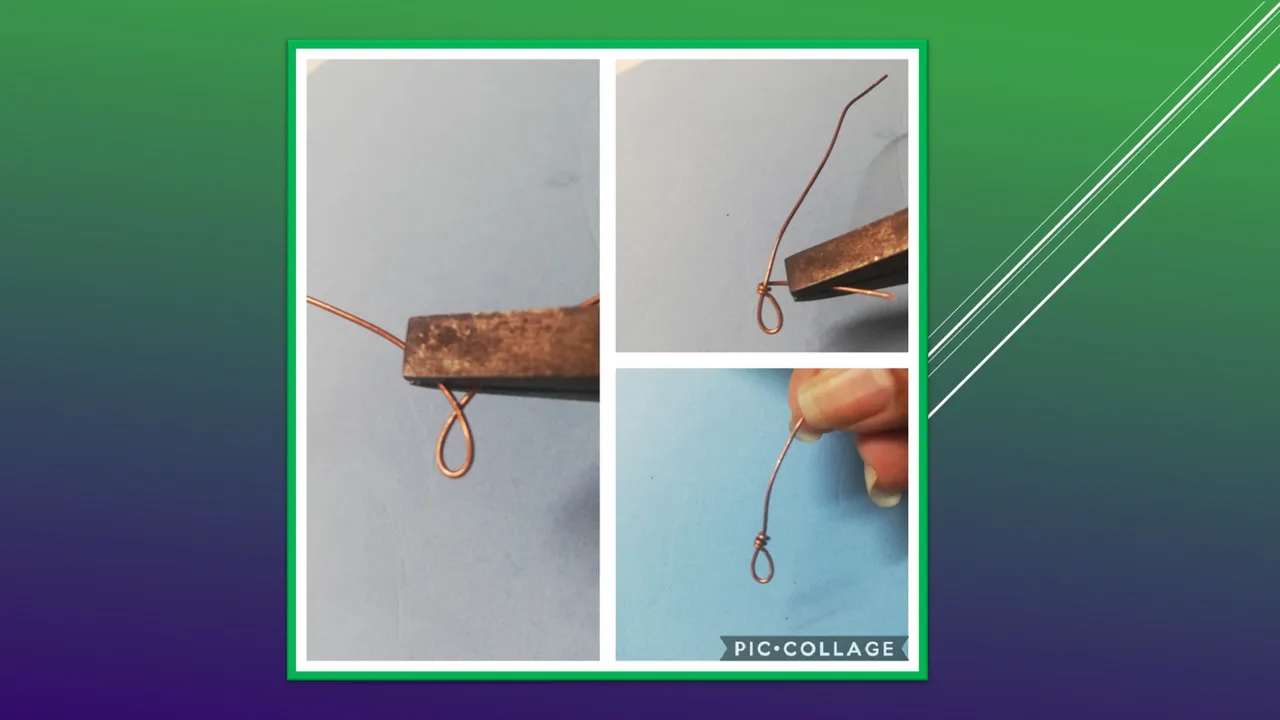
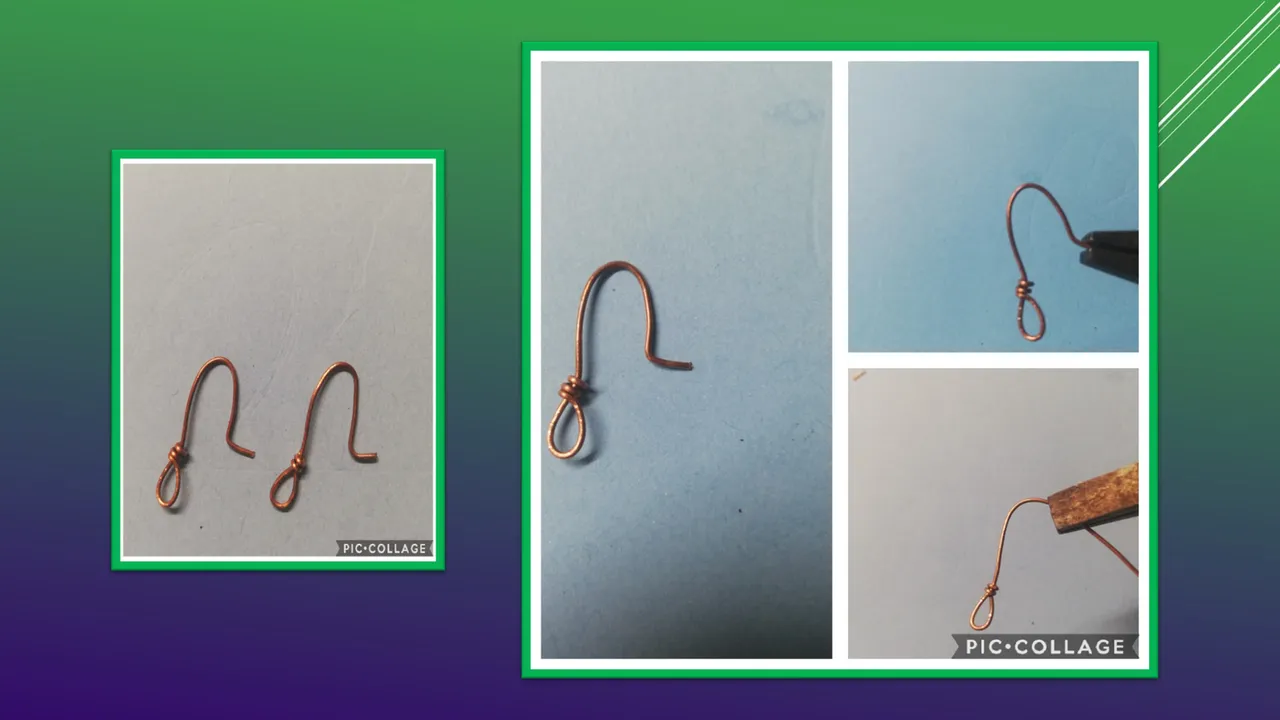
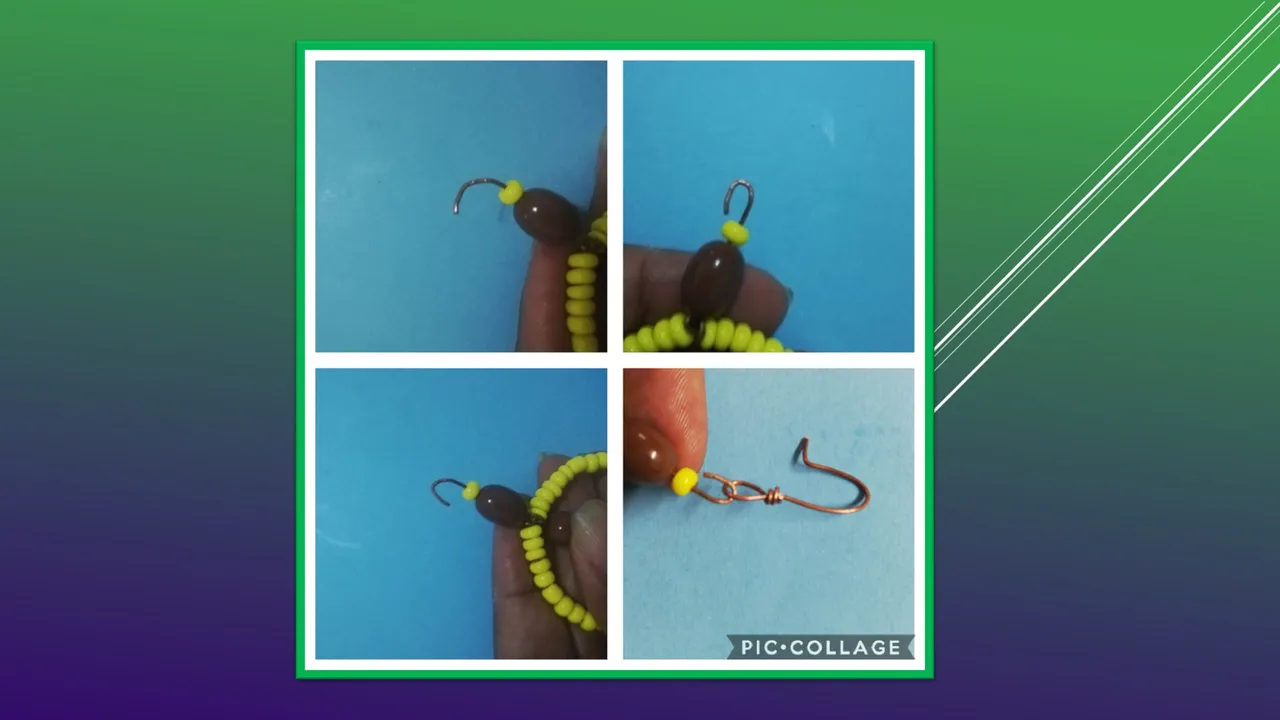
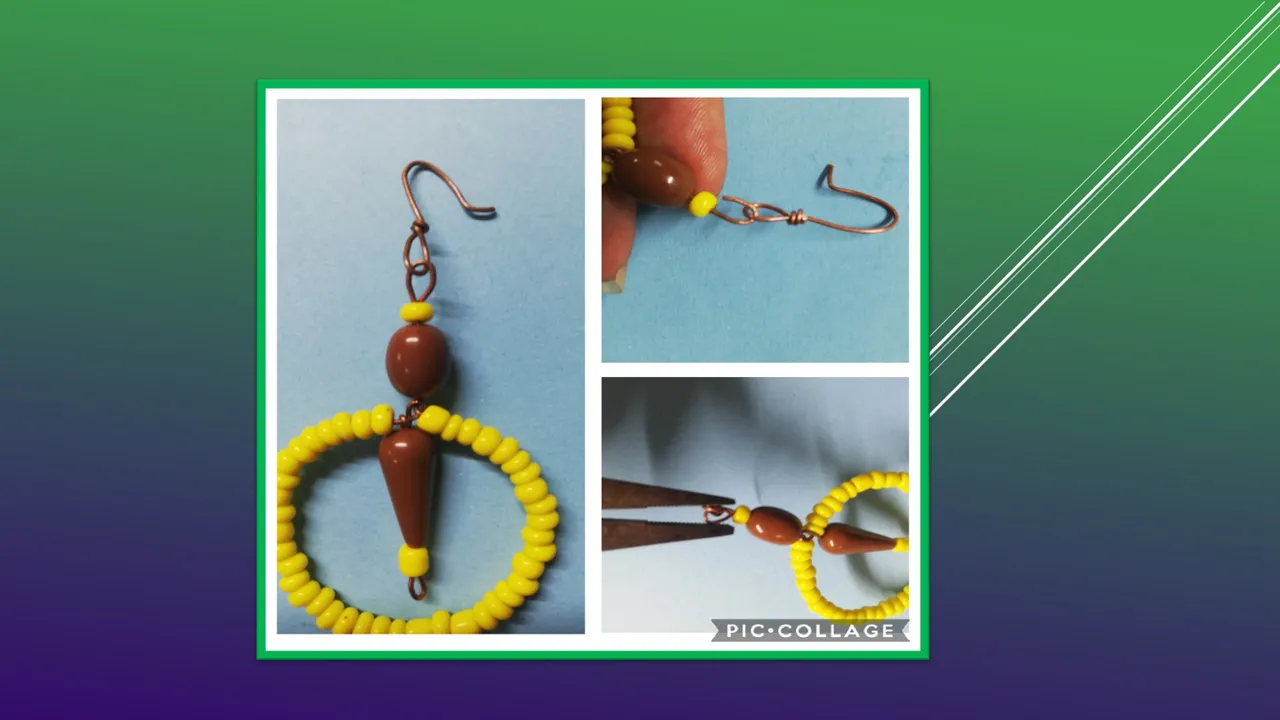
Lo primero que hago son los enganches de los aretes que son un poco trabajosos.
Se corta un alambre de cobre de 8cm se dobla uno de los extremos haciendo un óvalo y se dobla el alambre de forma que se enrolla alrededor del óvalo, se fija bien con la pinza para que no haga daño en la manipulación y cuando se use el arete, el otro extremo se mantiene recto y a la medida de 1 cm se dobla en forma de gancho, siendo esta la parte que va dentro de la oreja, al final se hace un dobles en la punta para que el arete no se salga. Ya está concluido el enganche.
The first thing I do is hook the earrings, which are a bit of a hassle.
An 8cm copper wire is cut, one of the ends is bent to make an oval and the wire is bent so that it wraps around the oval, it is fixed well with the clamp so that it does not cause damage during handling and when using the earring, the other end is kept straight and to the extent of 1 cm it is bent in the form of a hook, this being the part that goes inside the ear, at the end a double is made at the tip so that the earring does not come off. Hooking is now complete.
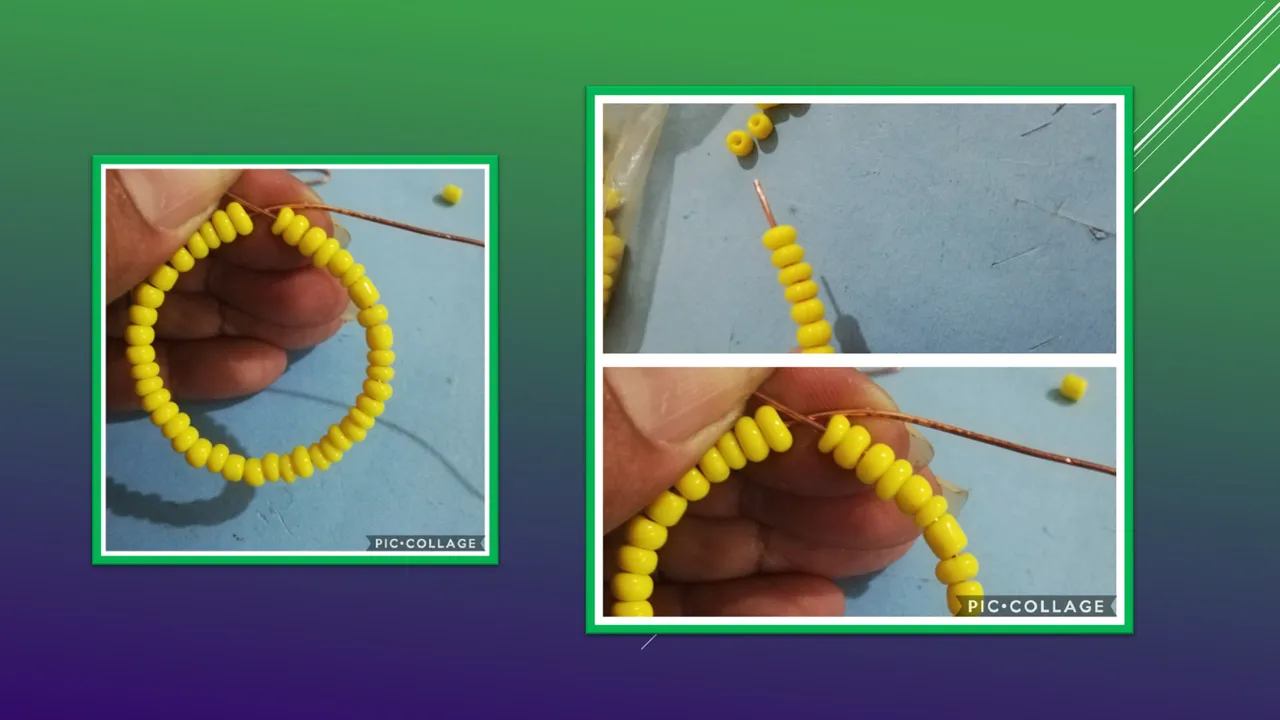
A continuación tomé dos alambre de 20 cm y ensarté 40 cuentas amarillas en cada uno y uní las dos puntas dejando que se formara un círculo.
Next I took two 20cm wires and strung 40 yellow beads on each one and joined the two ends together leaving a circle to form.
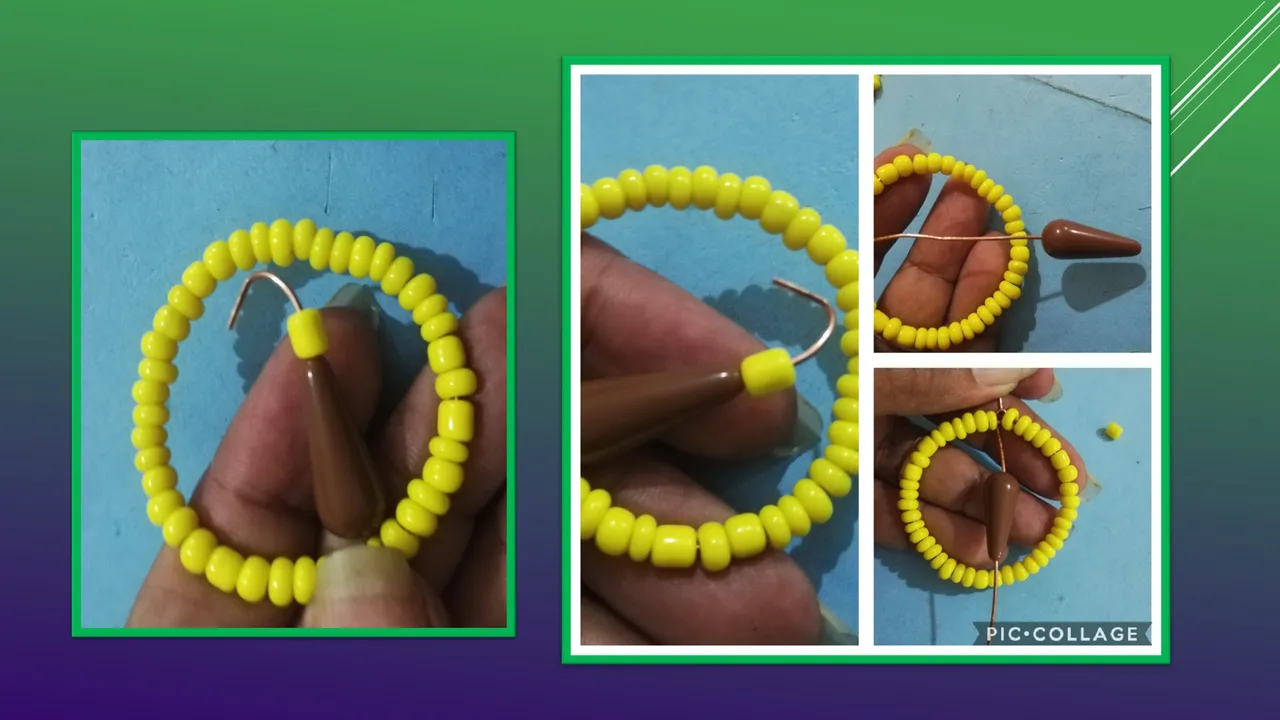
En la unión de las dos puntas torcí el alambre para obtener firmeza y separé los extremos uno para arriba y otro para bajo, en el abajo introduje la cuenta carmelita más alargada y a continuación una cuenta amarilla,
At the junction of the two ends I twisted the wire to obtain firmness and separate the ends one up and one down, in the bottom I inserted the longest brownish bead and then a yellow bead,
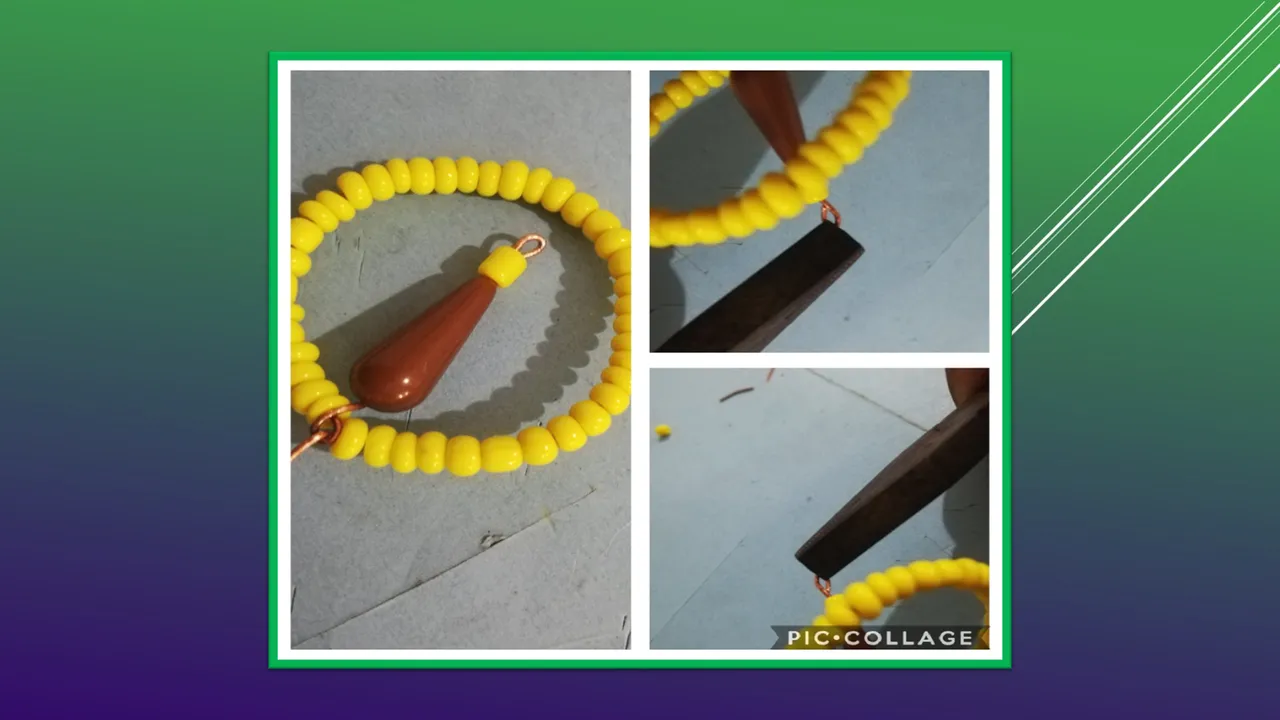
En el extremo para que sujete las cuentas se hace una argolla con el alambre y se vuelve a introducir en la cuenta amarilla, de esta forma queda rematado y no hace daño al utilizar y manipular el arete.
At the end to hold the beads, a ring is made with the wire and it is reintroduced into the yellow bead, in this way it is finished off and does not hurt when using and manipulating the earring.
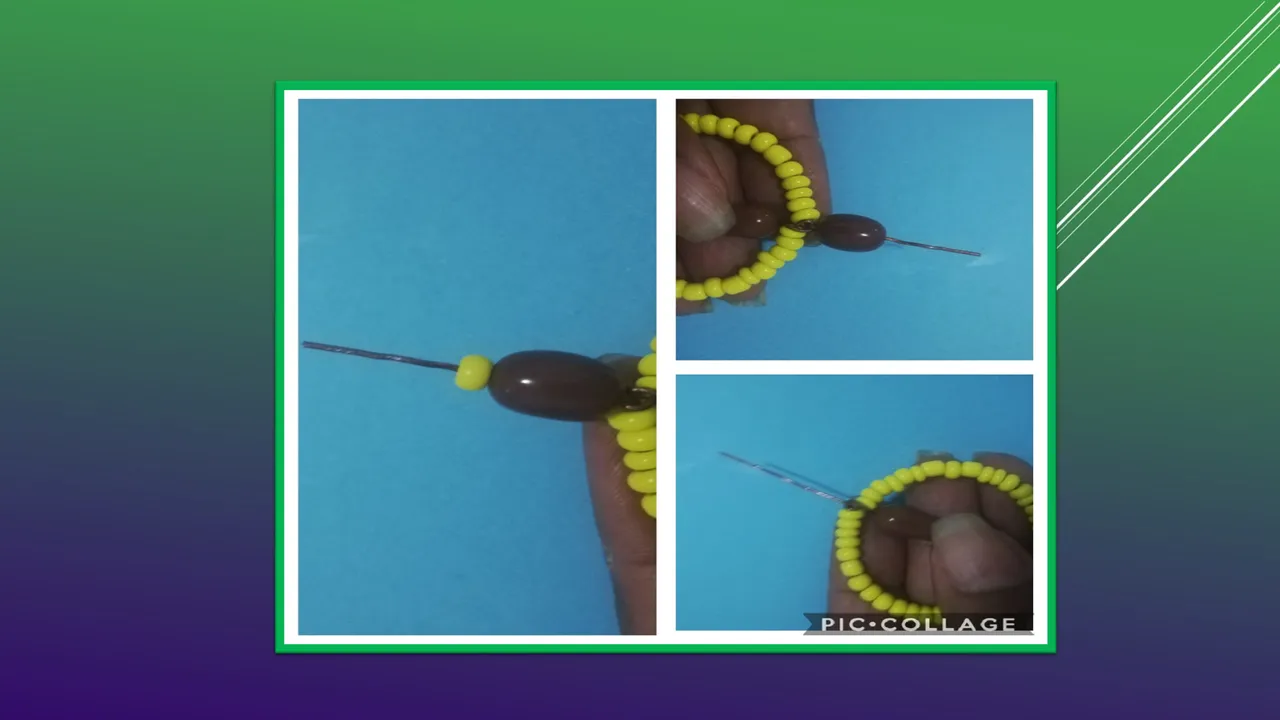
En el cable que doble hacia arriba introduje una cuenta ovalada carmelita, mas chica que la que utilicé en la parte de abajo y seguidamente otra cuenta amarilla.
In the cable that doubled up, I inserted a brownish oval bead, smaller than the one I used at the bottom, and then another yellow bead.
A continuación hago una argolla pero antes de cerrarla introduzco el enganche que hacia confeccionado previamente y introduzco el cabe en la cuenta amarilla para que igualmente quede rematado y no dañe, quedando así.
Next I make a ring but before closing it I insert the hook that I had previously made and I insert the cord into the yellow bead so that it is also finished off and does not damage, leaving it like this
Ya están concluidos estos lindos y llamativos aretes de cuentas, muy bonitos para esta época de verano por el color.
These cute and eye-catching beaded earrings are now finished, very pretty for this summer season because of the color.

Bueno mis amigos si les gustó espero su voto, un saludo grande para todos y que tengan un bonito día. Nos vemos.
Well, my friends if you liked it, I hope your vote, a big greeting to all and have a nice day. See you.

Las fotos fueron tomadas con mi teléfono Huawei P20 lite, unidas con PicCollage y PowerPoin
utilicé el Traductor de google