Español
Buenos dias amigos de las distintas comunidades de hive reciban un saludo; espero que pasen un excelente fin de semana junto a su familia.

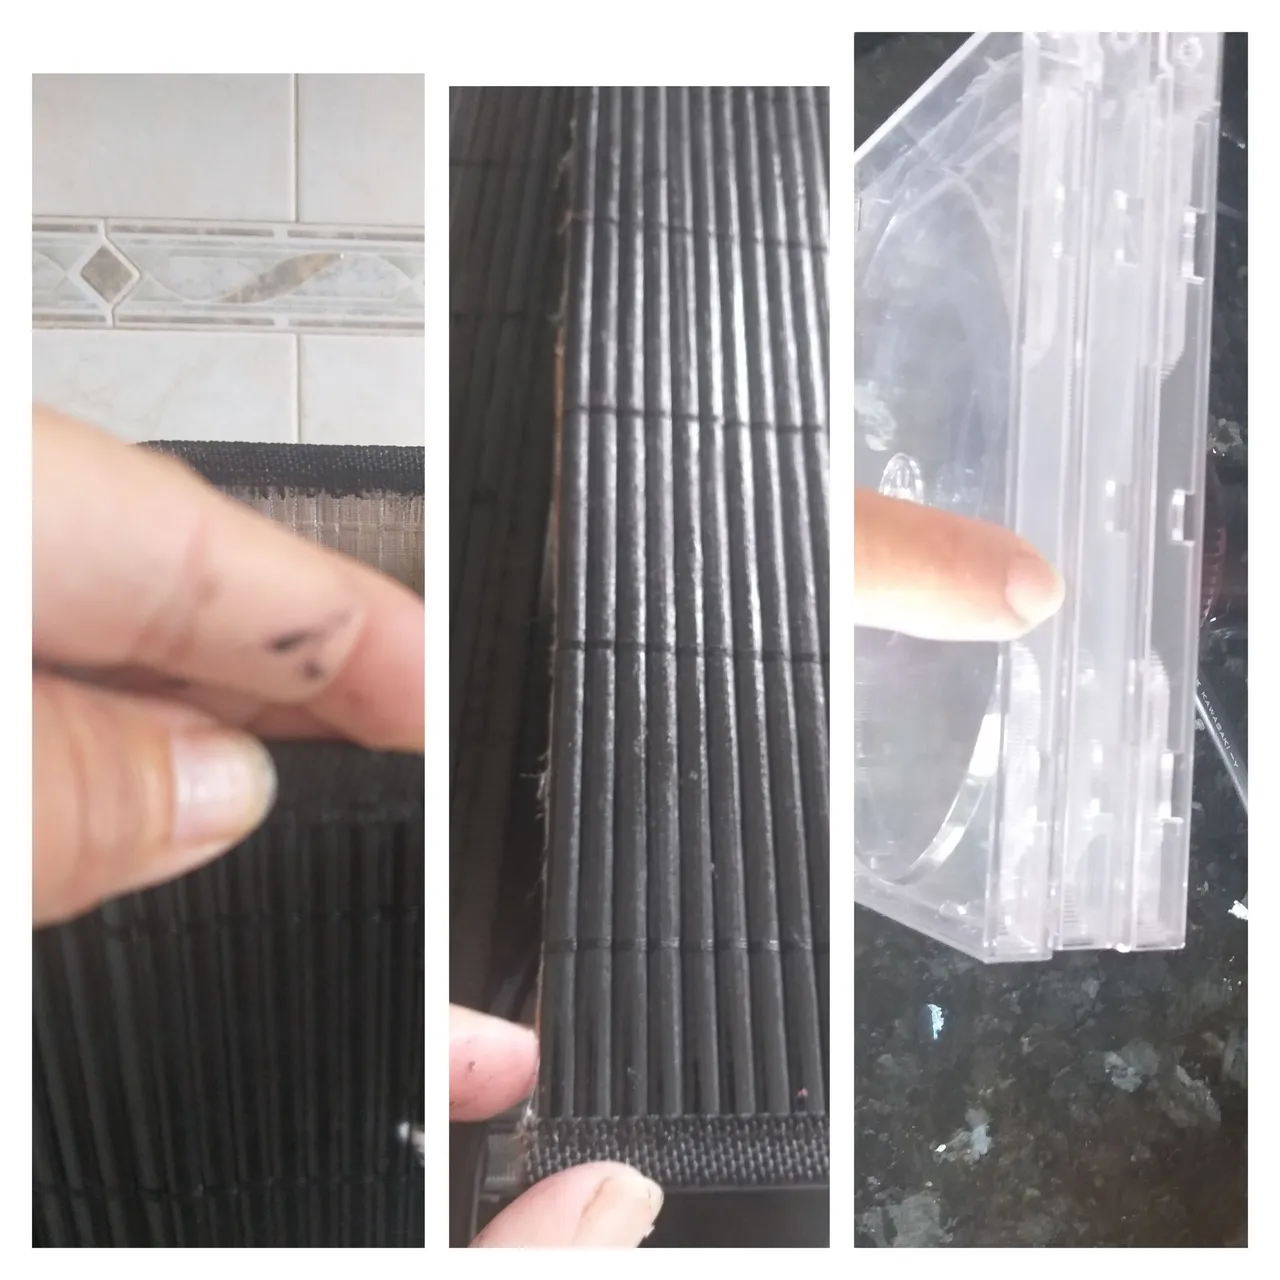
Ésta semana en mi día libre me puse a limpiar los gabinetes de la cocina y me encontré unos individuales de mesa ya roto por el uso y medio cosita botarlo a la basura, porque son de esterillas con una malla de tela y se me ocurrió🤔🧐🤯💡 de cómo darle un nuevo uso. Pensé hacer unas lámparas de mesa de noche😉 y también se me ocurrió usar CD y las carátulas de los CD y tapas de suavizantes. Así que acompañenme a realizar estas lámparas muy fácil de hacer.
Los materiales a utilizar para hacer éstas hermosas lámparas son:
Tres individuales de esterillas
Tijera
Pistola de silicona y barras de silicona caliente
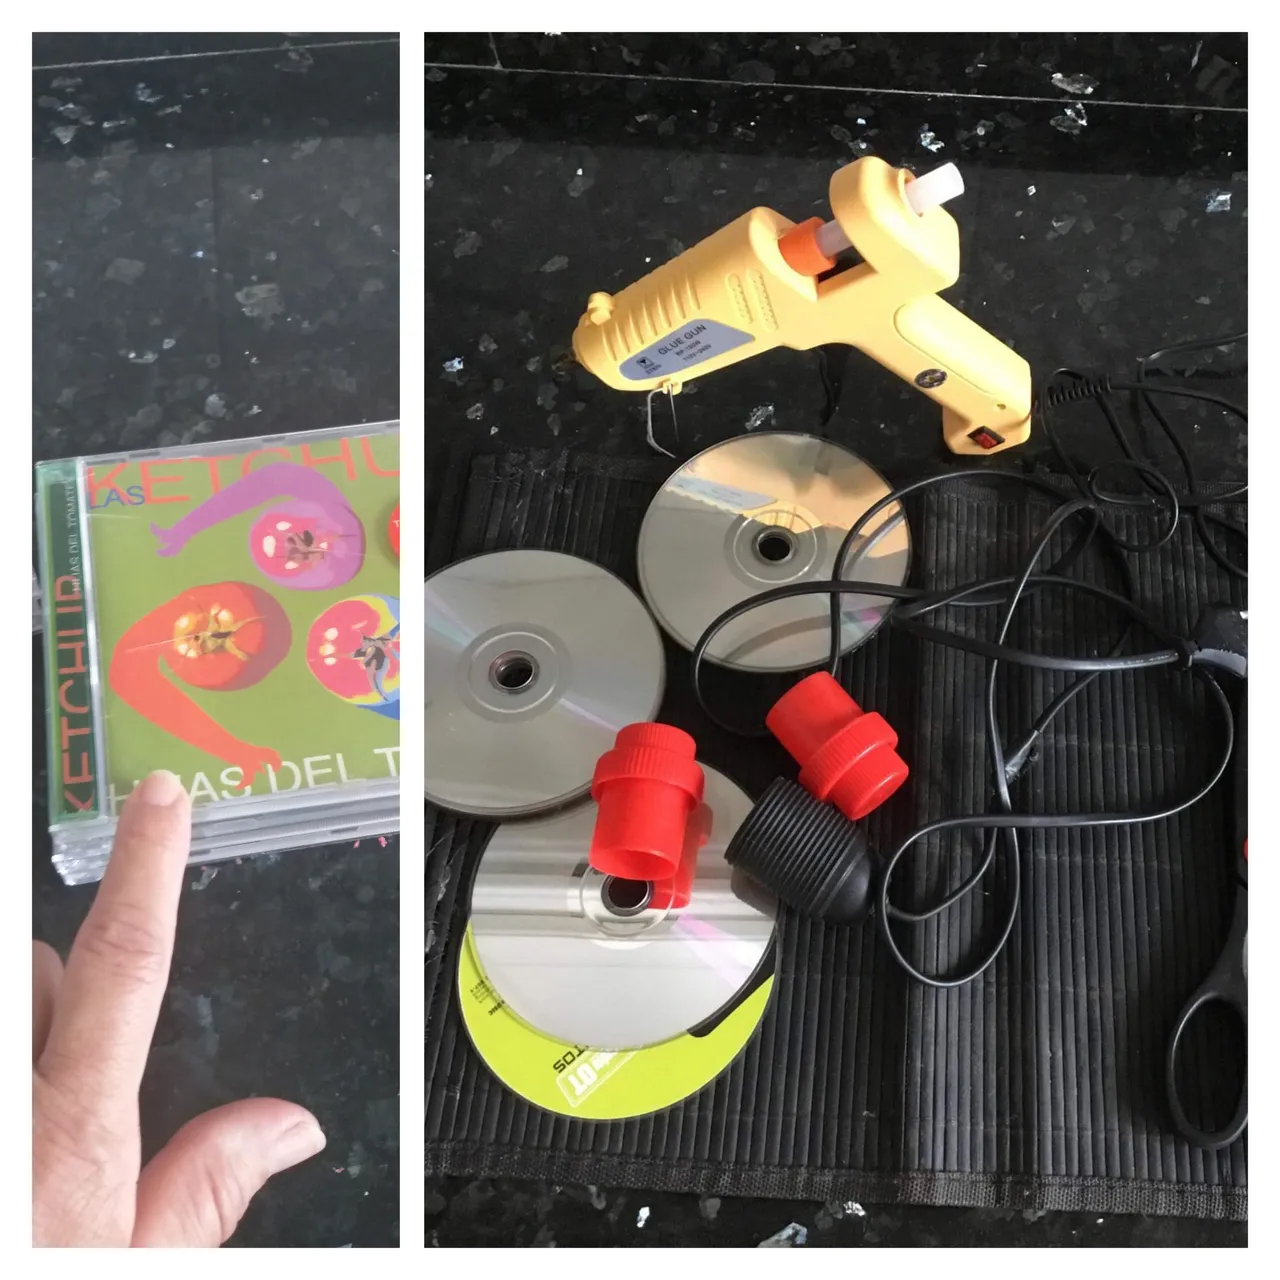
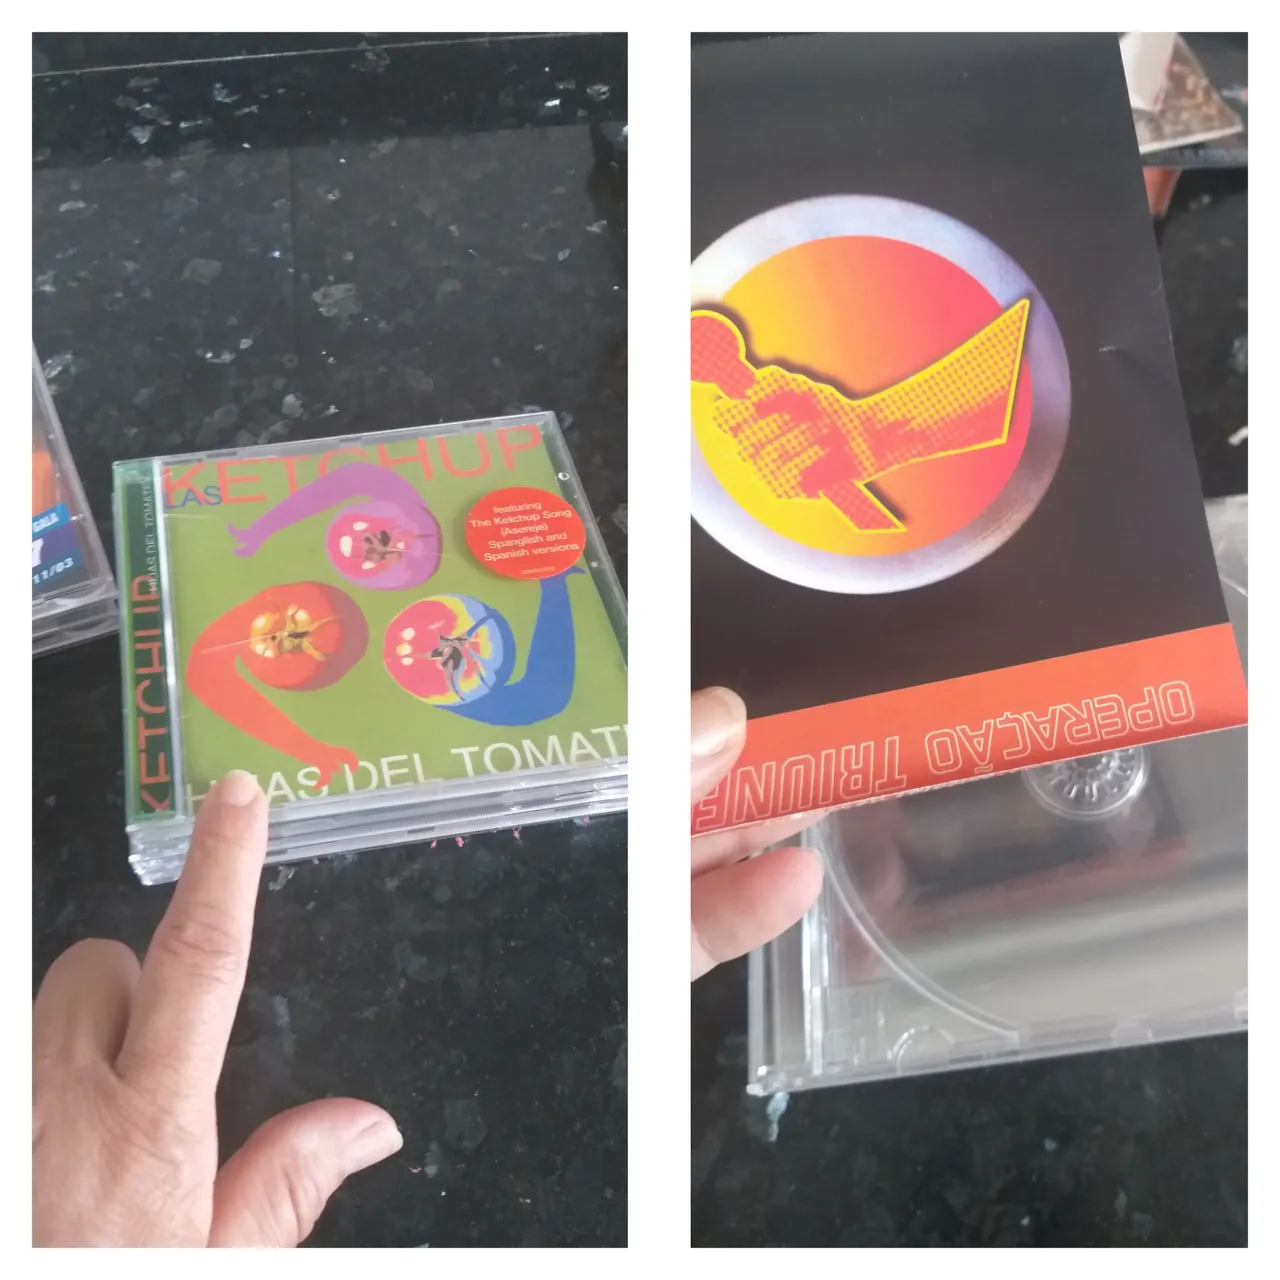
6 carátulas de CD o CD rallados
2 tapas de suavizantes
Paño de cocina húmedo
Pintura acrílica del color de su gusto o pintura en spray del color negro y blanco
Pincel
Un cuchillo * Tirro o cinta de construcción
Periódicos o revistas viejas
Dos cables con enchufe y
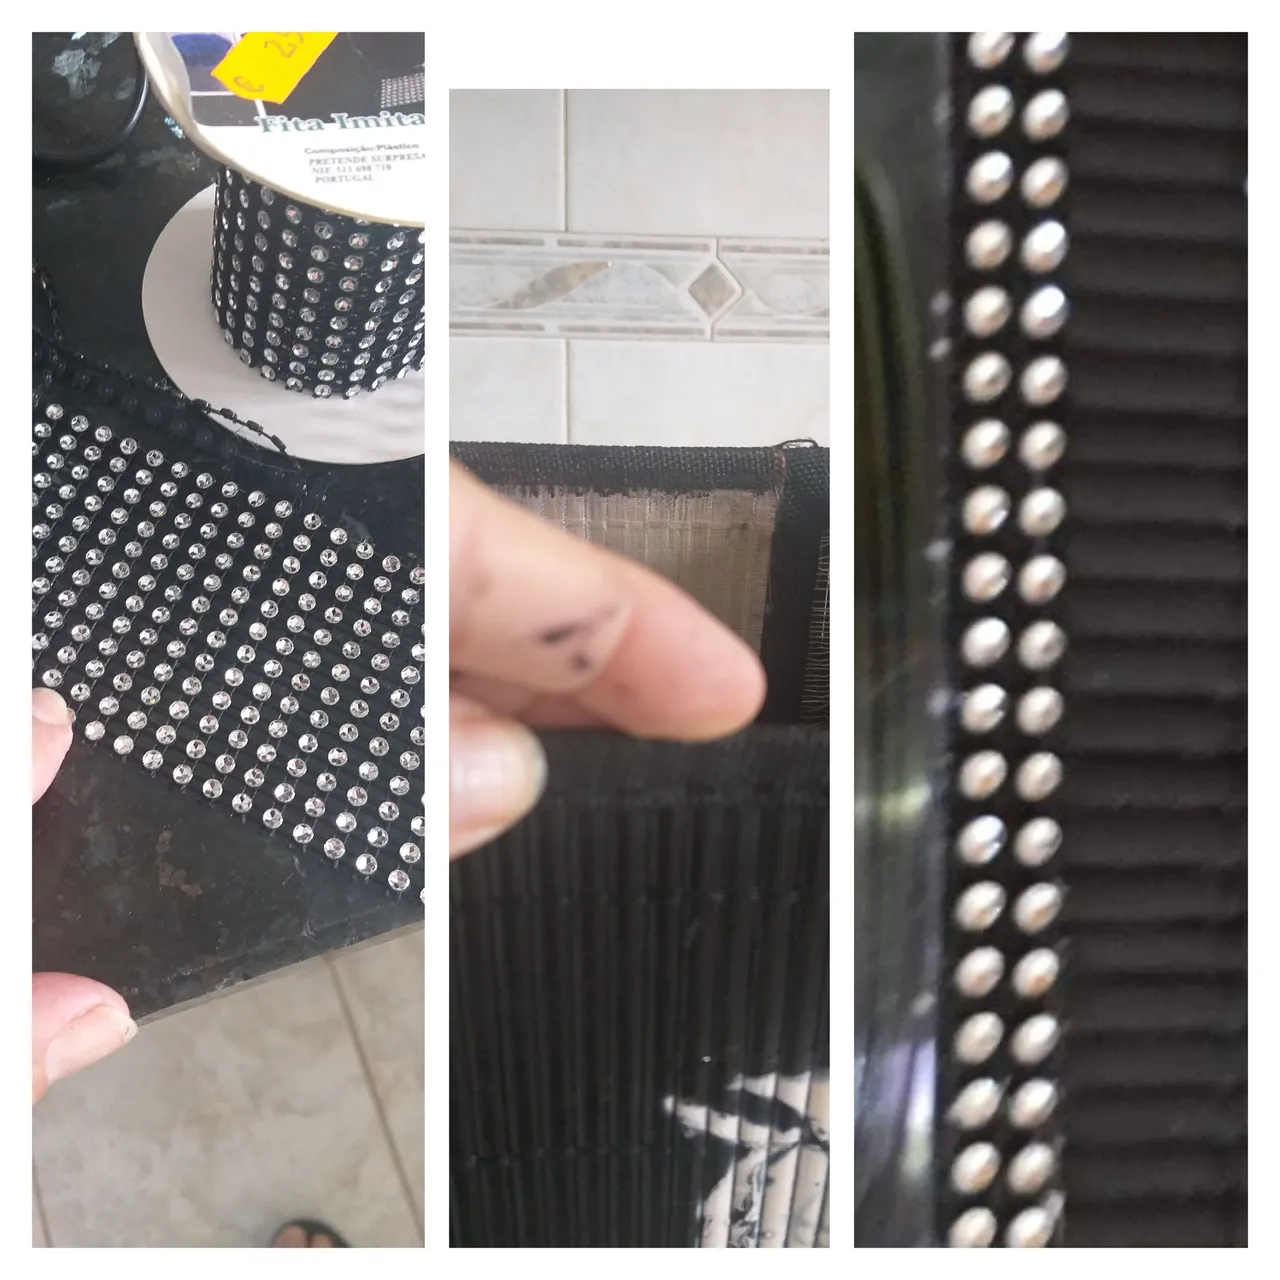
Socates de luzAccesorios para decorar, en este caso utilicé cinta con pedrería y una plantilla que ya tenía en casa y otros accesorios.
Pasos a seguir:
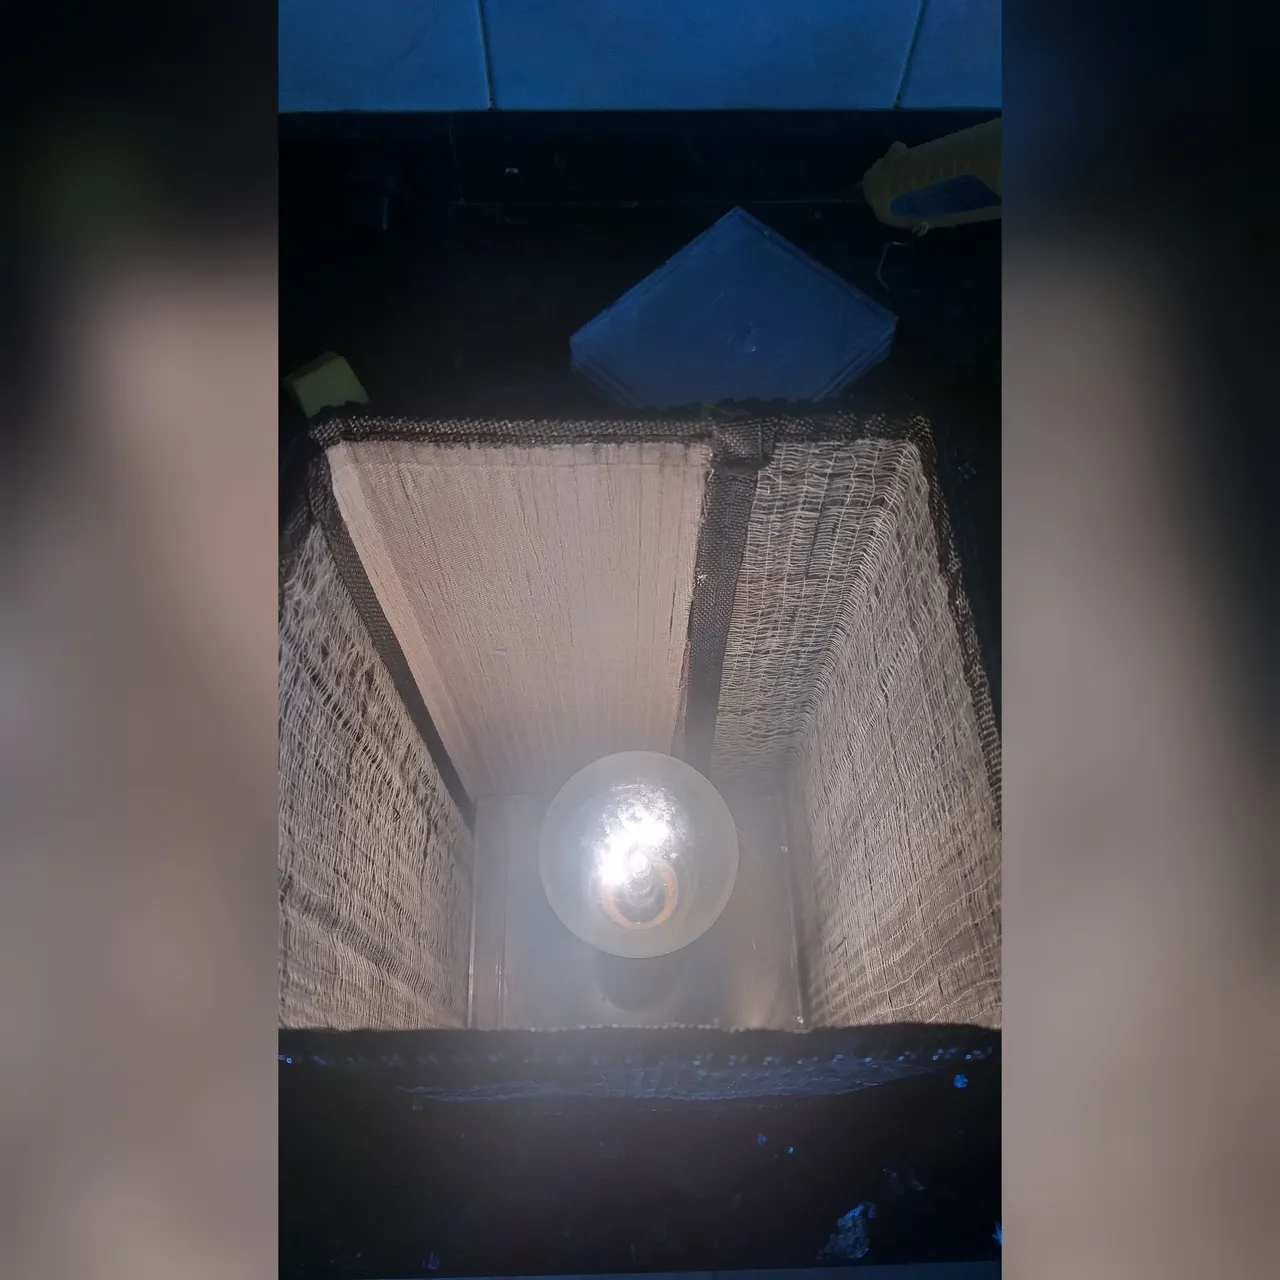
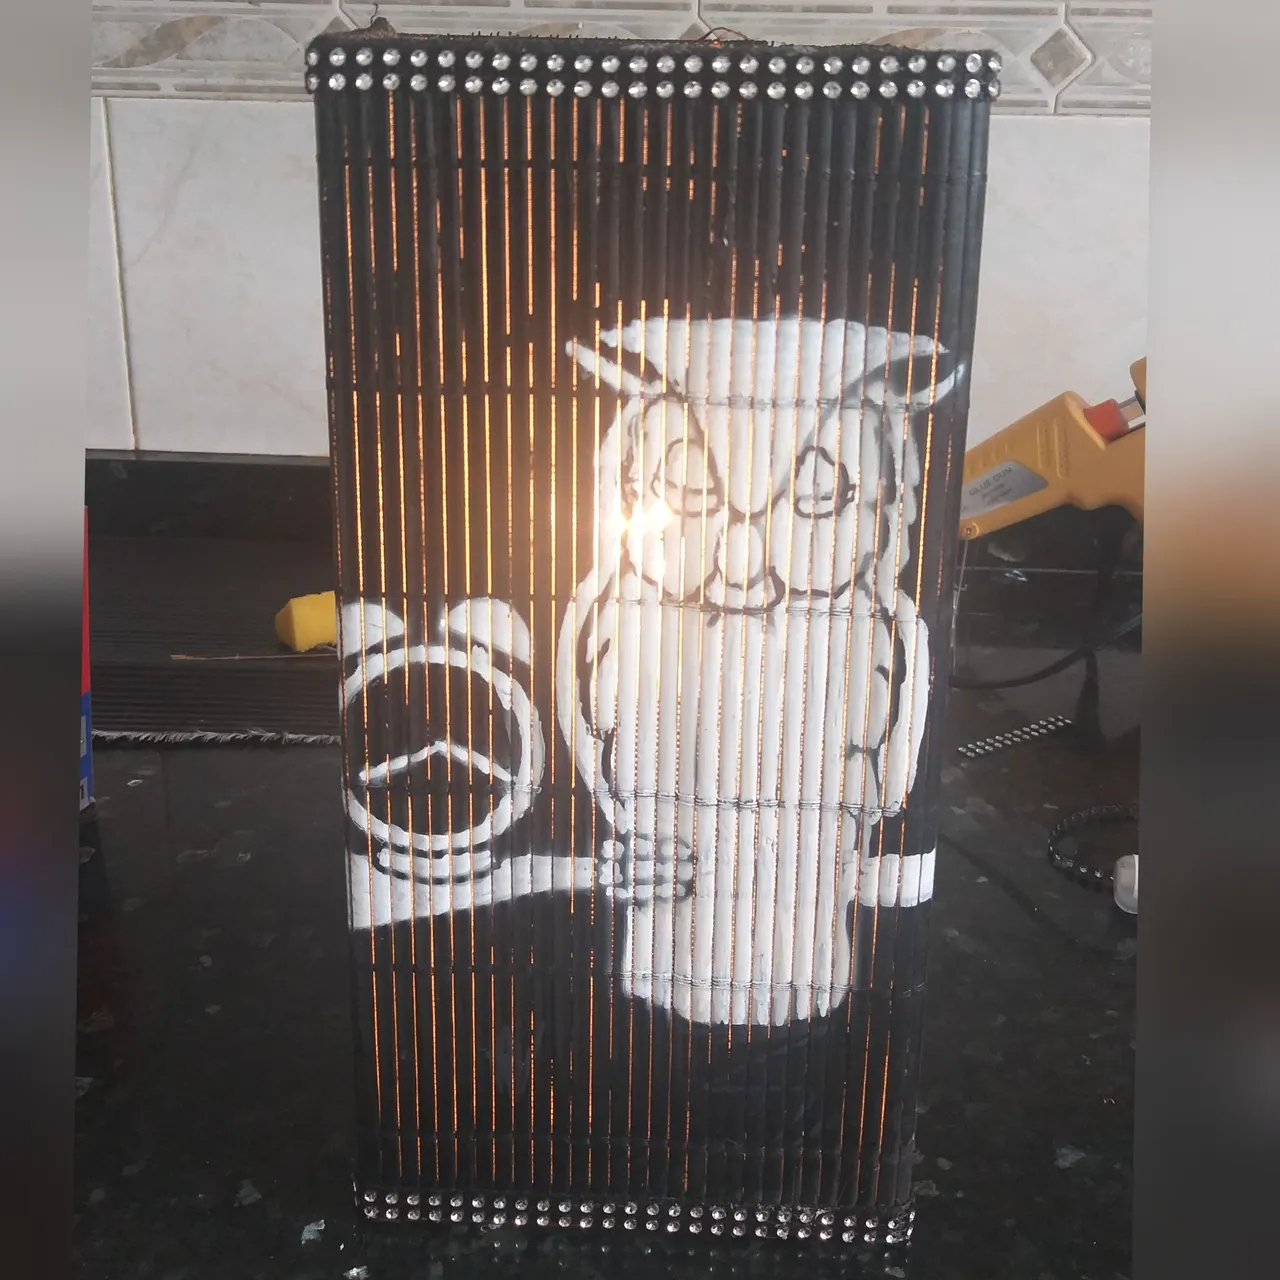
1👣. Lo primero que vamos hacer es limpiar con un paño húmedo el polvo y sucio de los individuales y dejar secar.Luego de estar limpio los individuales colocar papel periódico o de revista en el lugar donde vaya a pintar los individuales; en este caso los pinté en el piso de la cocina porque estaba lloviendo😋 y luego abrí la puerta. Acá utilicé pintura es spray de color negro, batimos el pote durante 2 minutos y luego aplicamos. Después dejamos secar por 20 minutos.

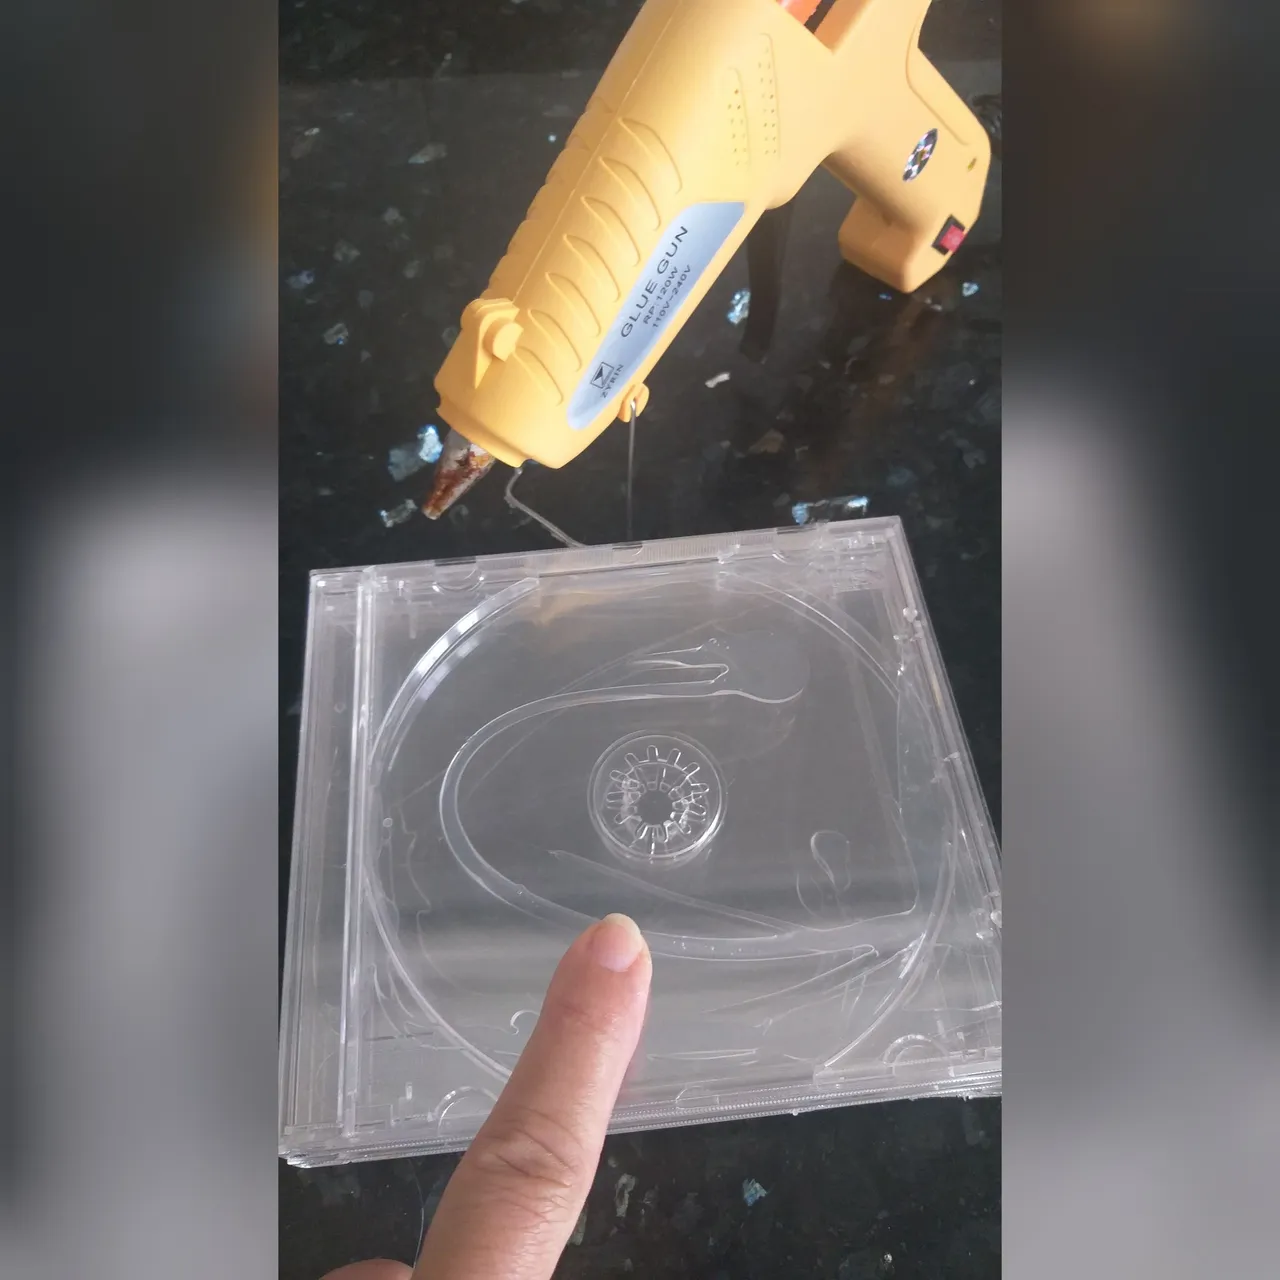
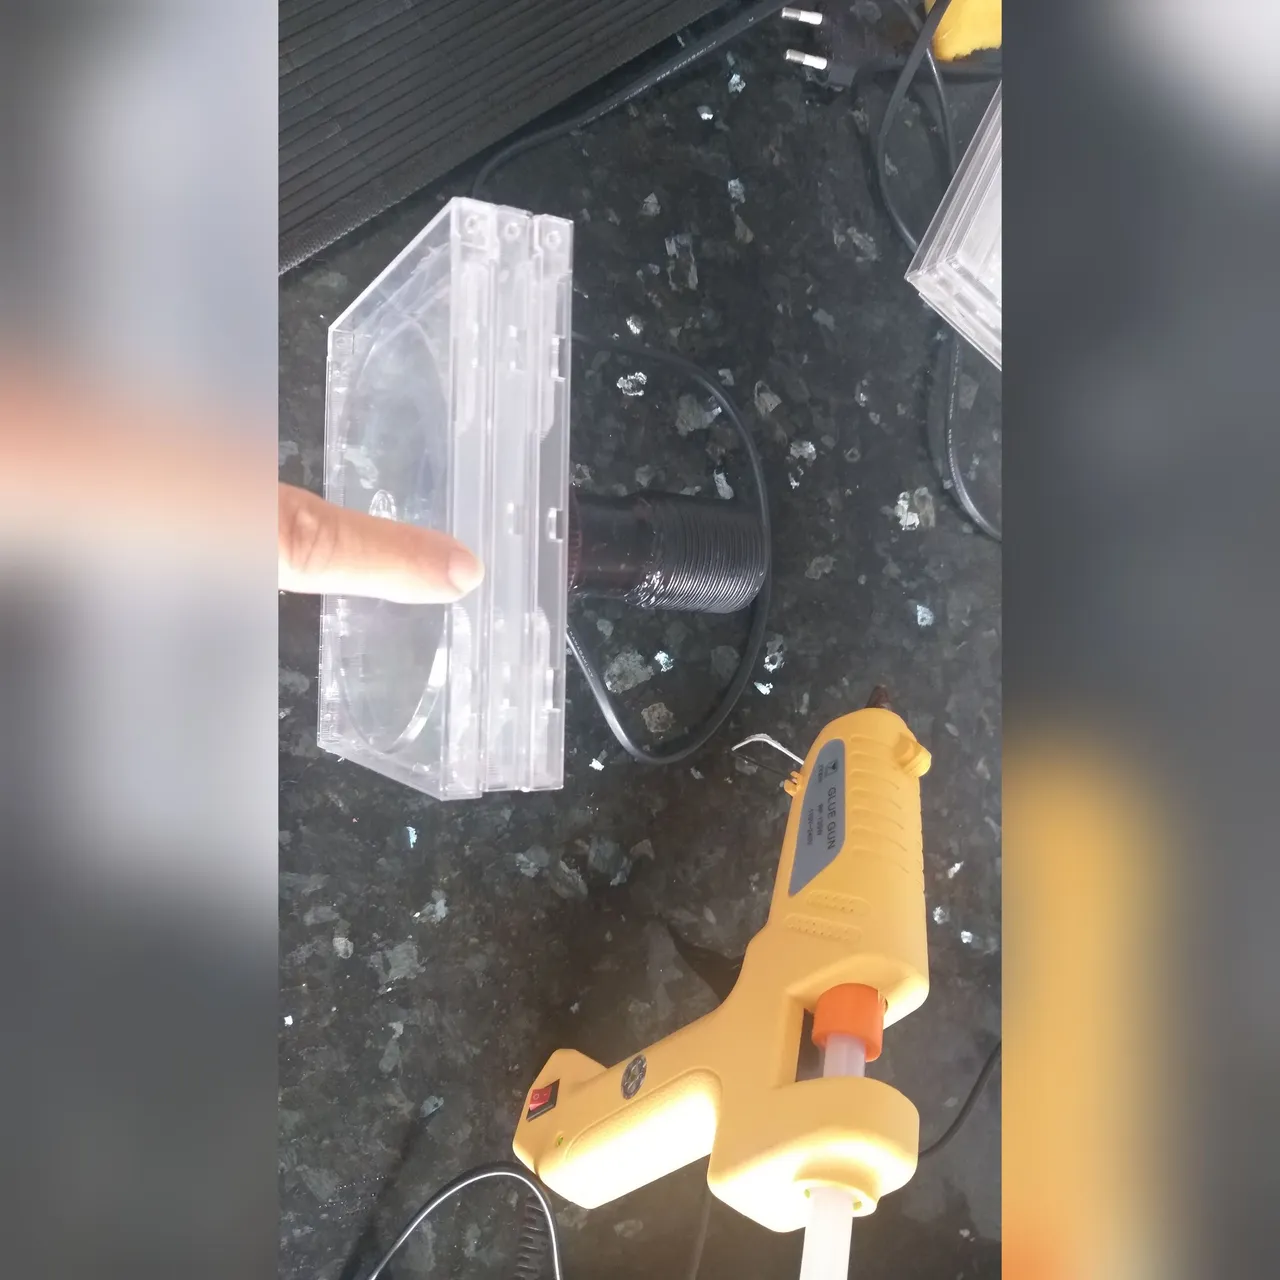
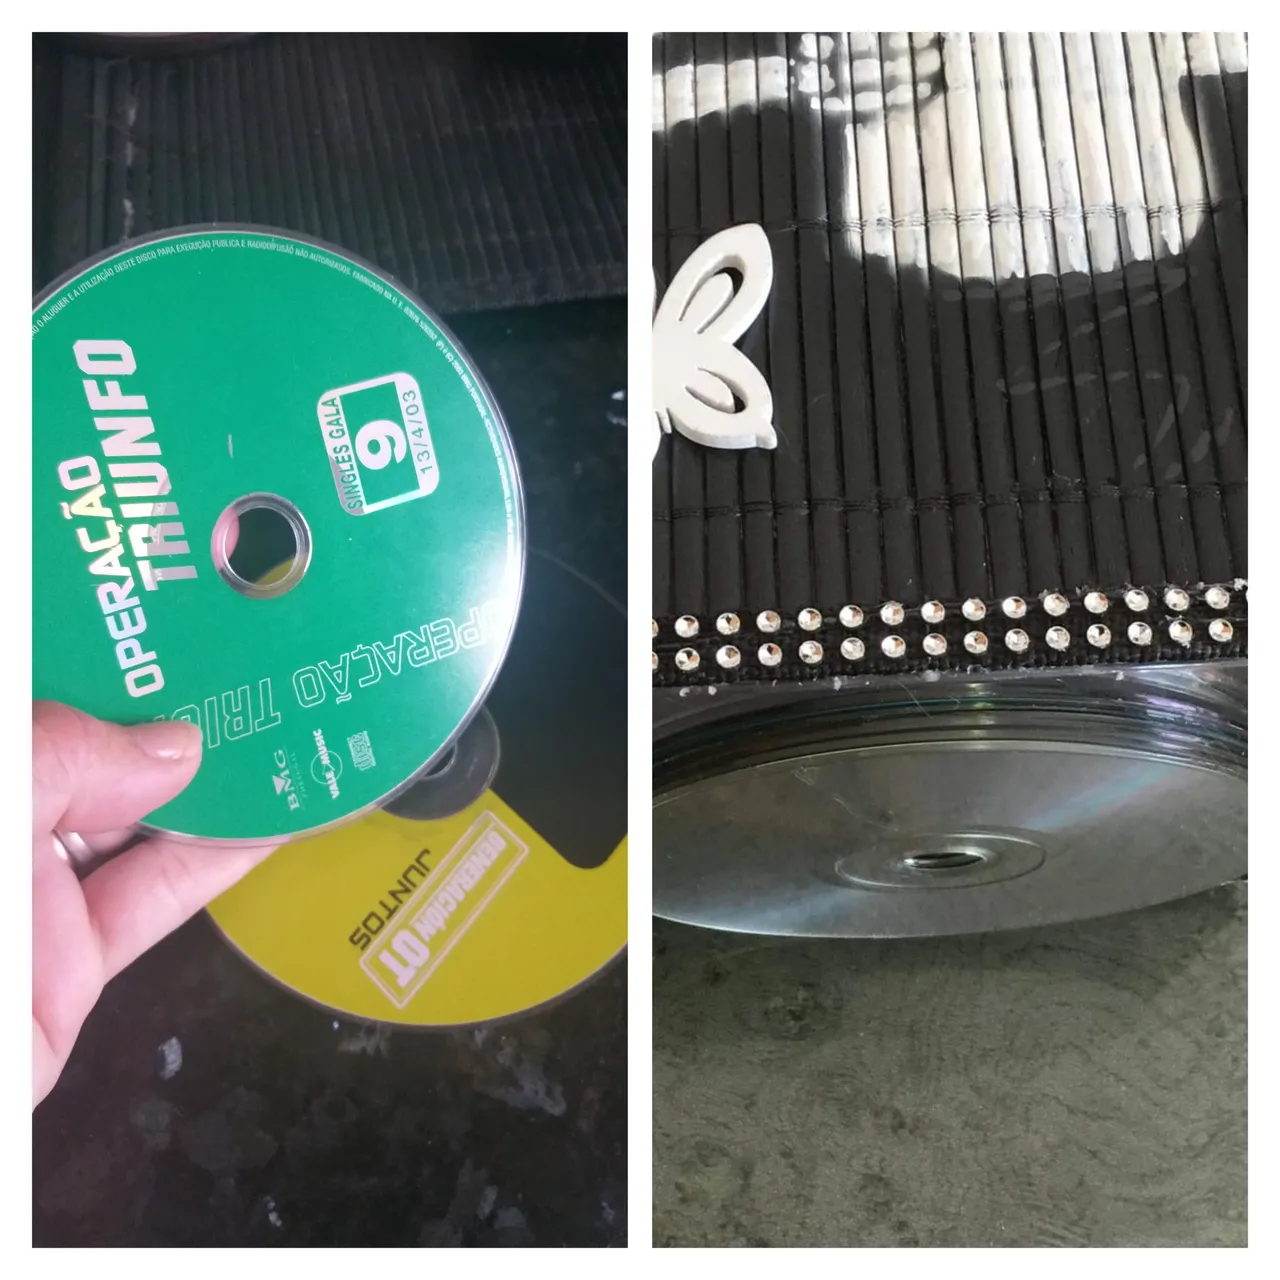
2👣. Luego que tengamos los tres individuales pintados; procedemos a preparar la base de las lámparas que serían los estuches o carátulas de los CD, quitándole los anuncios que tienen las carátulas.
3👣. En éste paso pegamos tres carátulas una encima de la otra con la pistola de silicona caliente hacemos dos pares; recuerden quevamos a realizar dos lámparas.
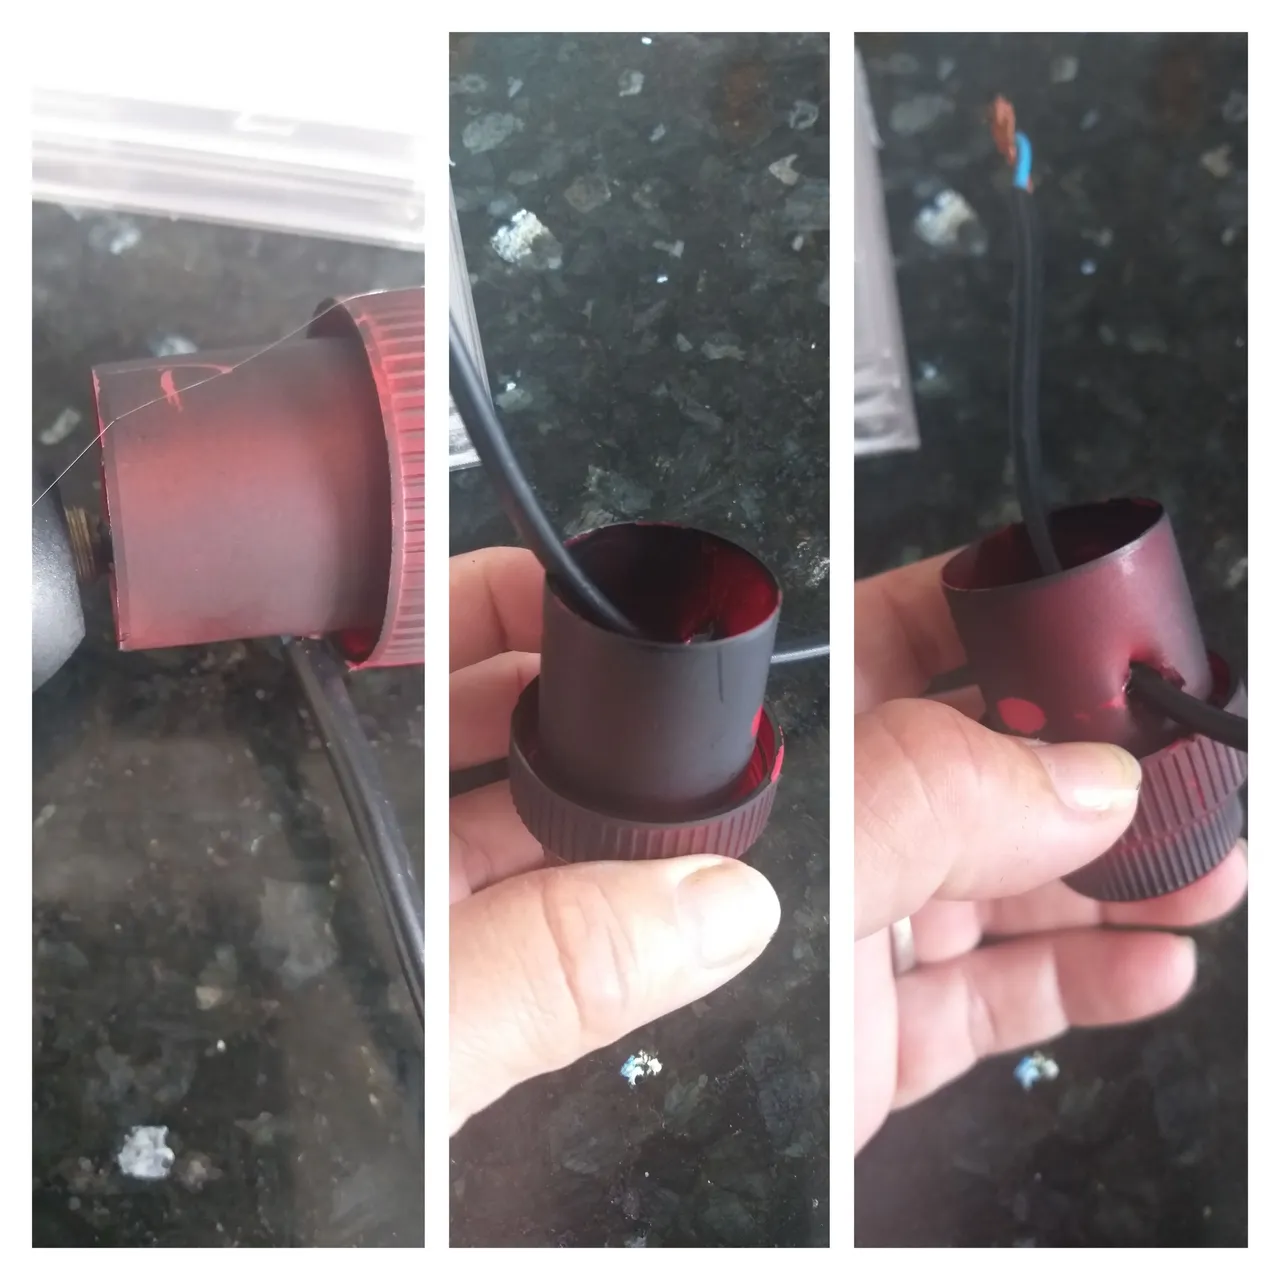
4👣. Con la pintura spray de color negro pintamos las dos tapas de suavizante. Aprovechar cuando se pinten los individuales para pintar las dos tapas.

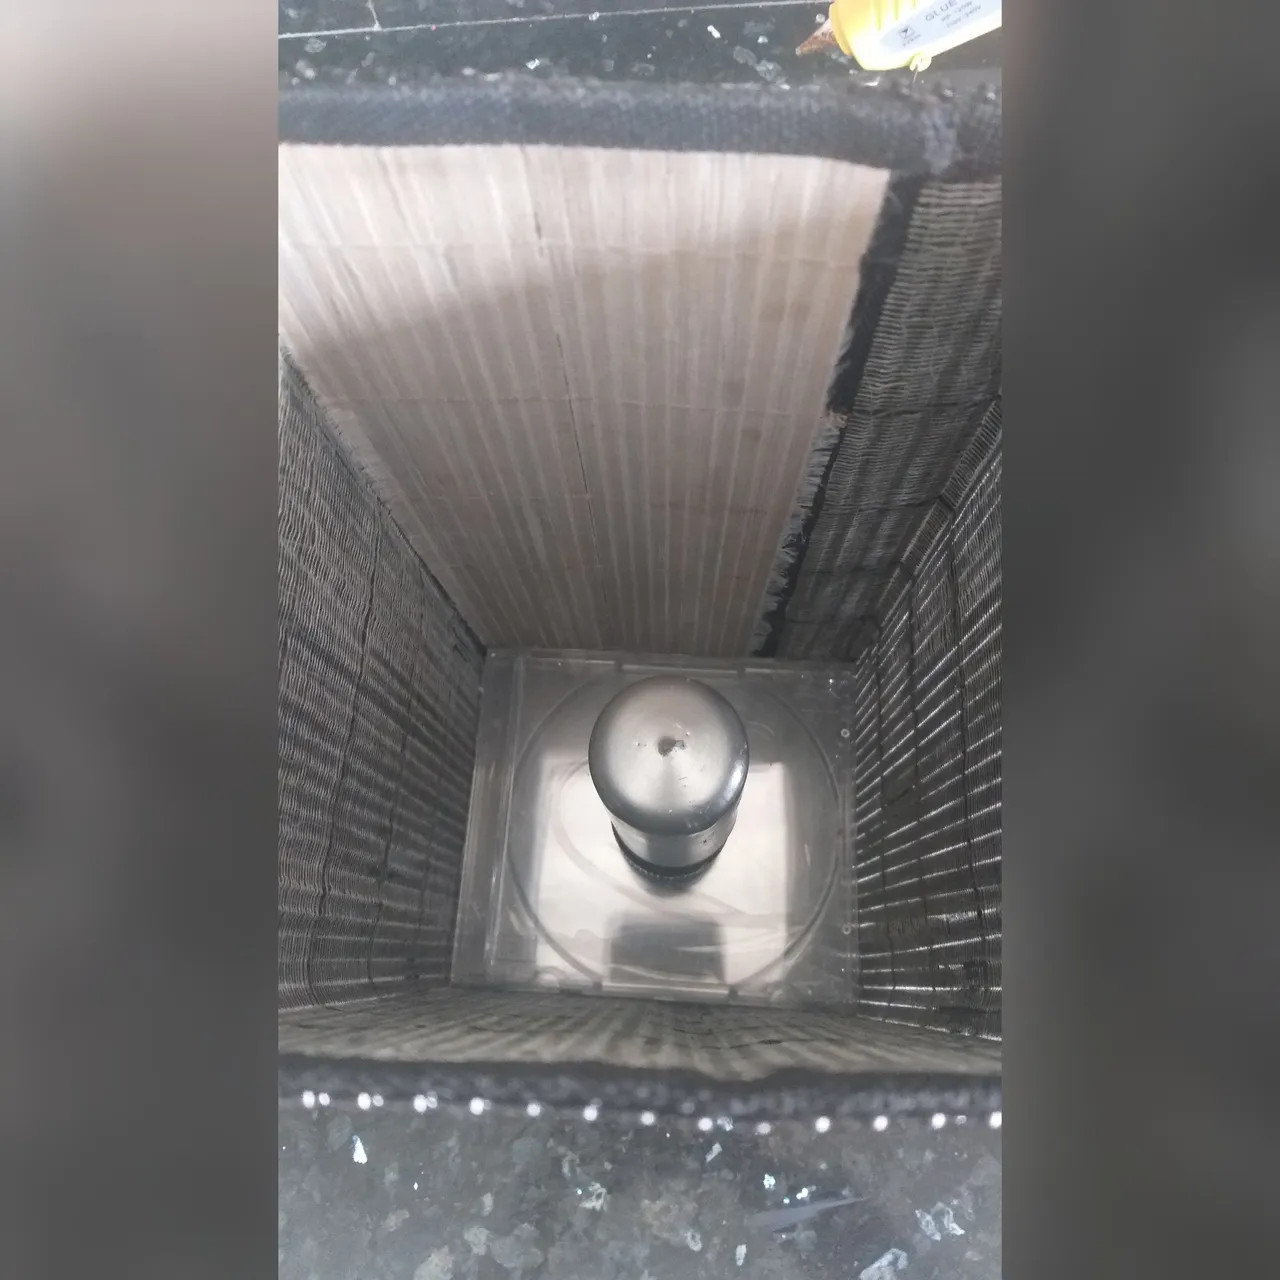
5👣. Luego le hacemos dos orificios a las tapas por un lado con el cuchillo y pintamos luego que esté secas las tapas introducimos el cable, enchufe y socate para poner el bombillo.
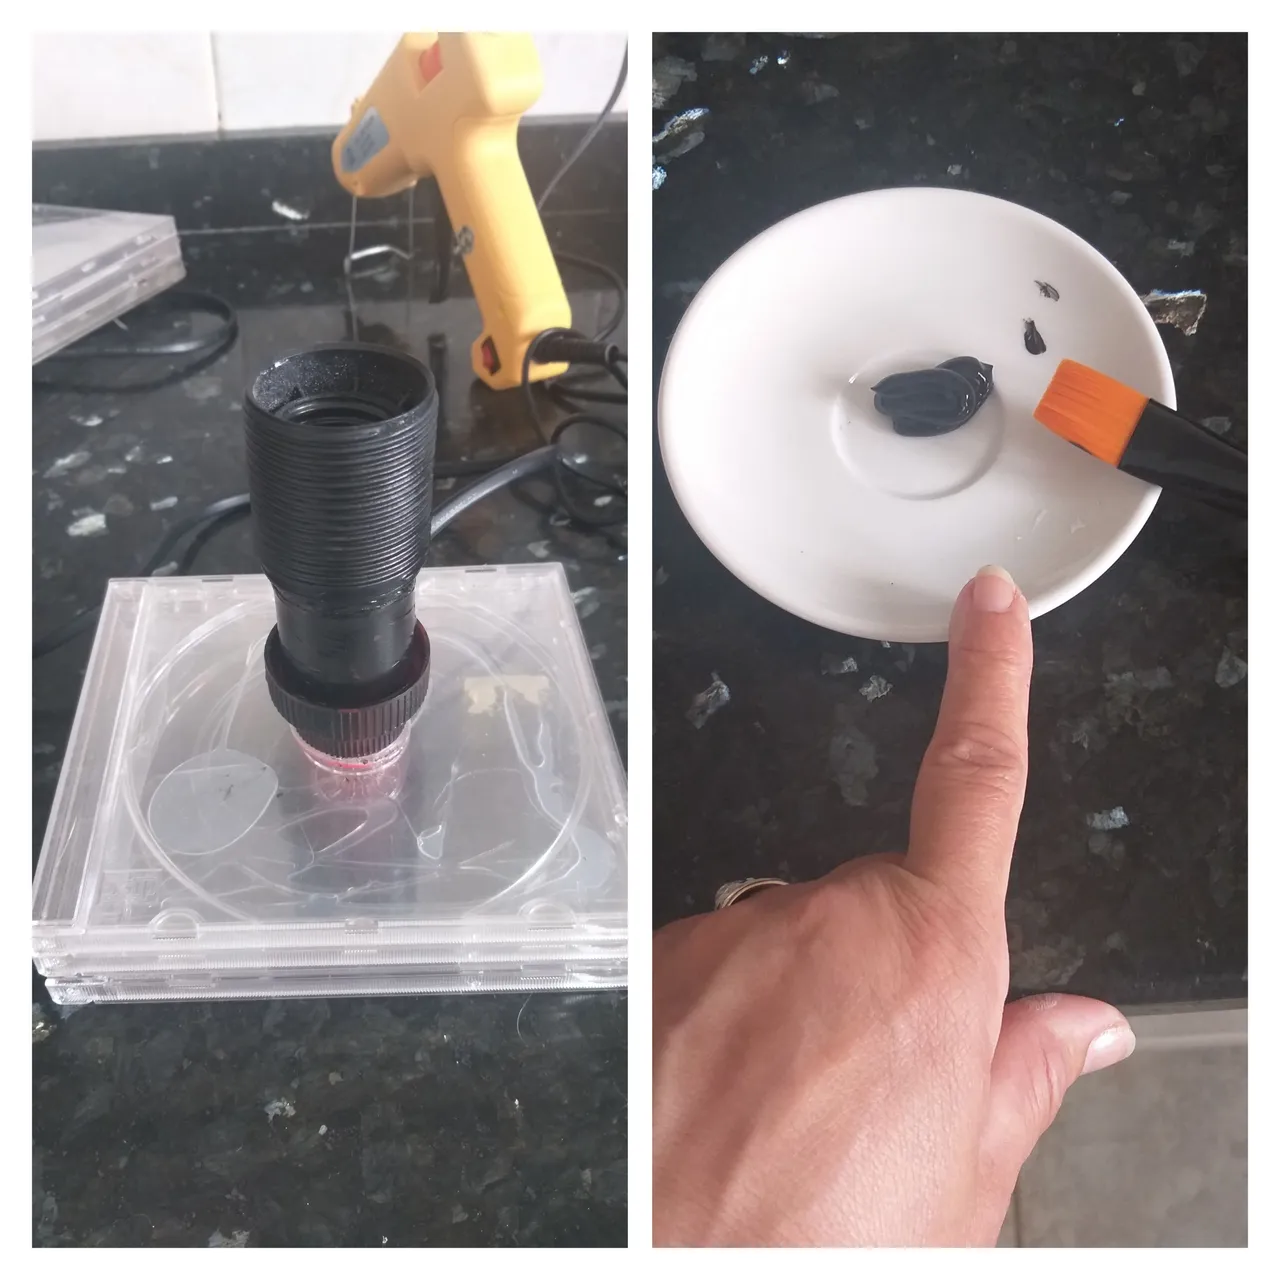
6👣. En este paso pegamos las tapas en el medio de las carátulas (base) y luego con pintura acrílica de color negro y un pincel terminamos de pintar bien las tapas.
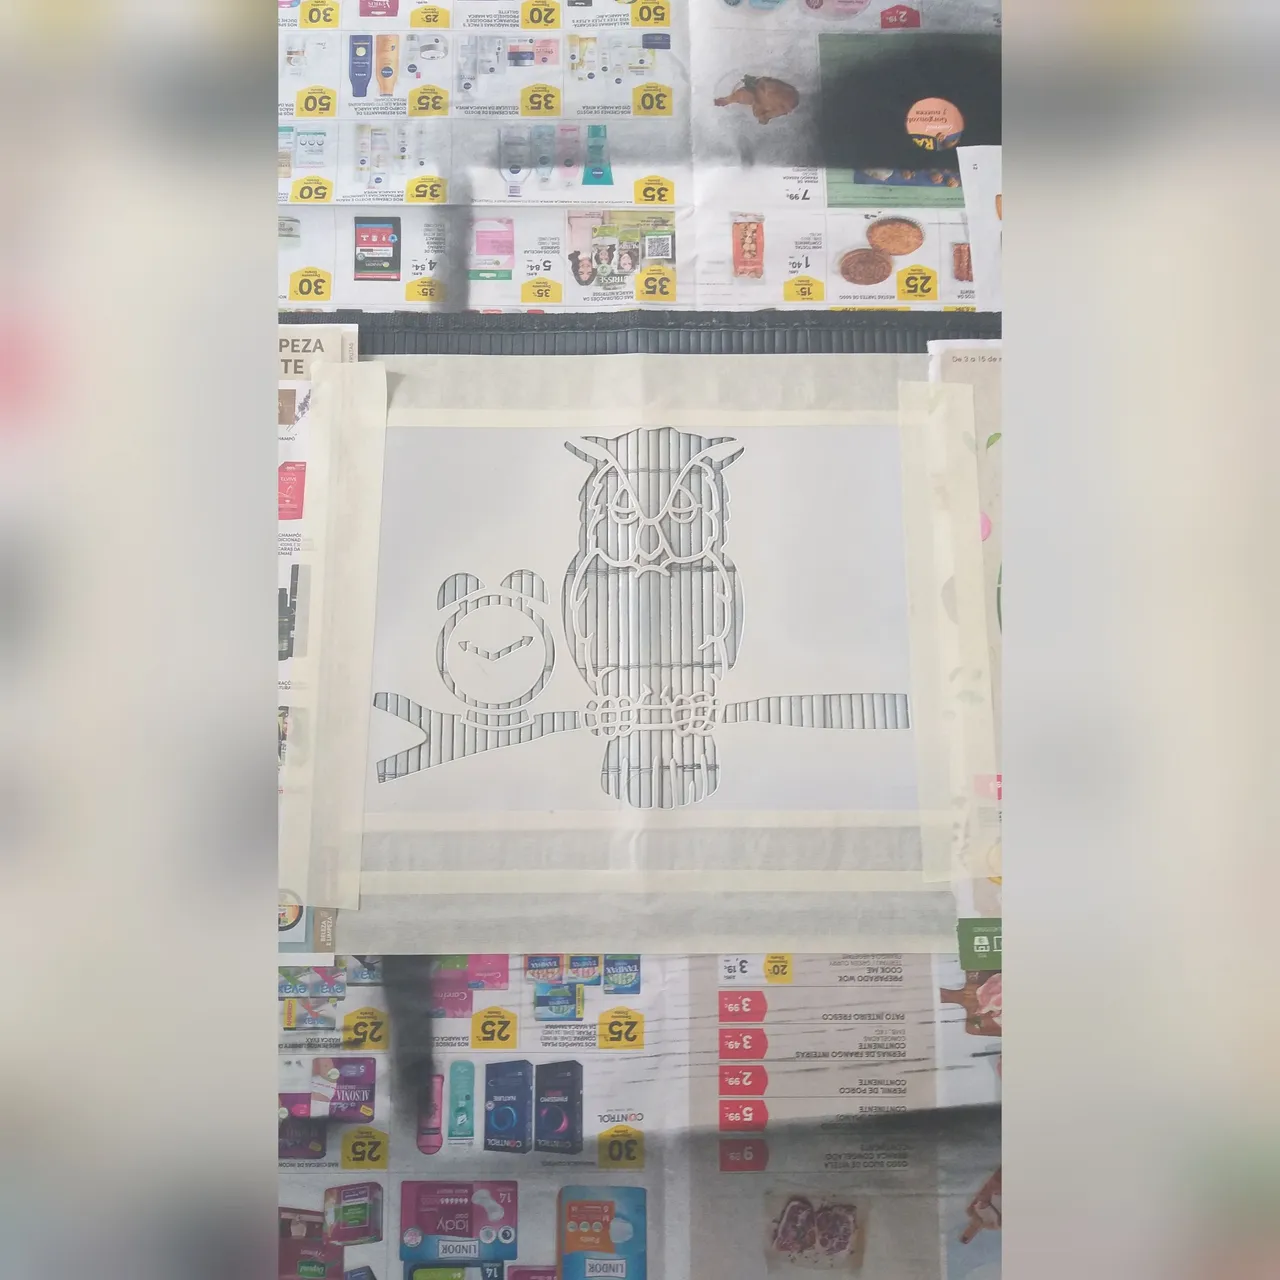
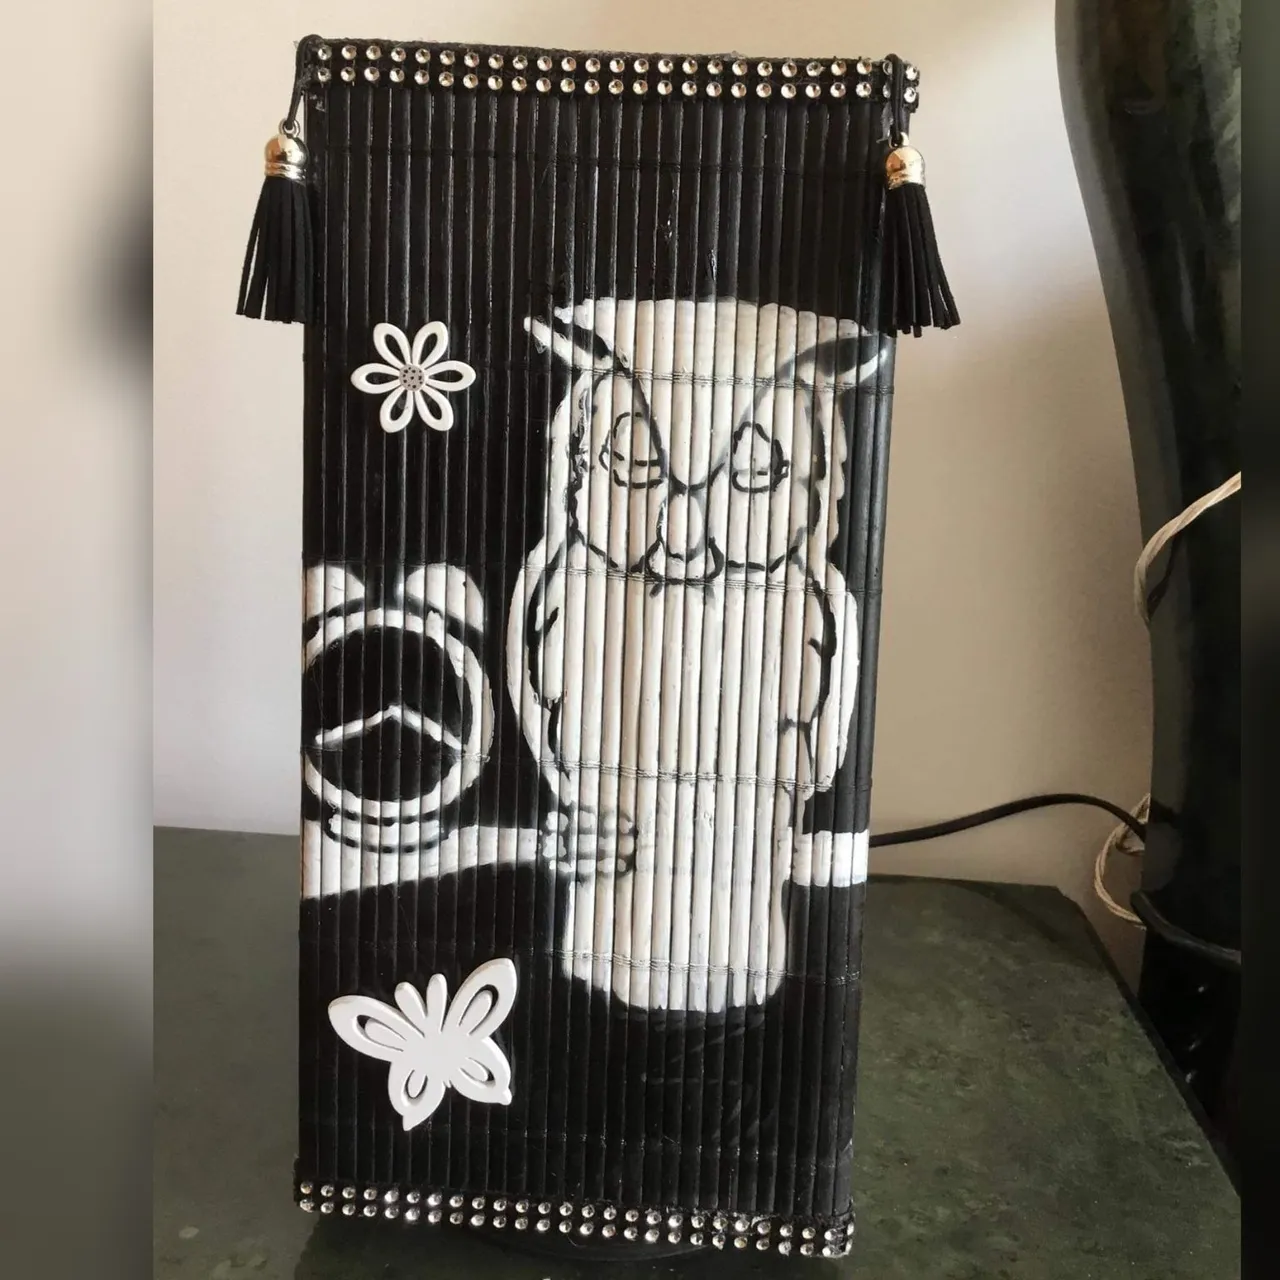
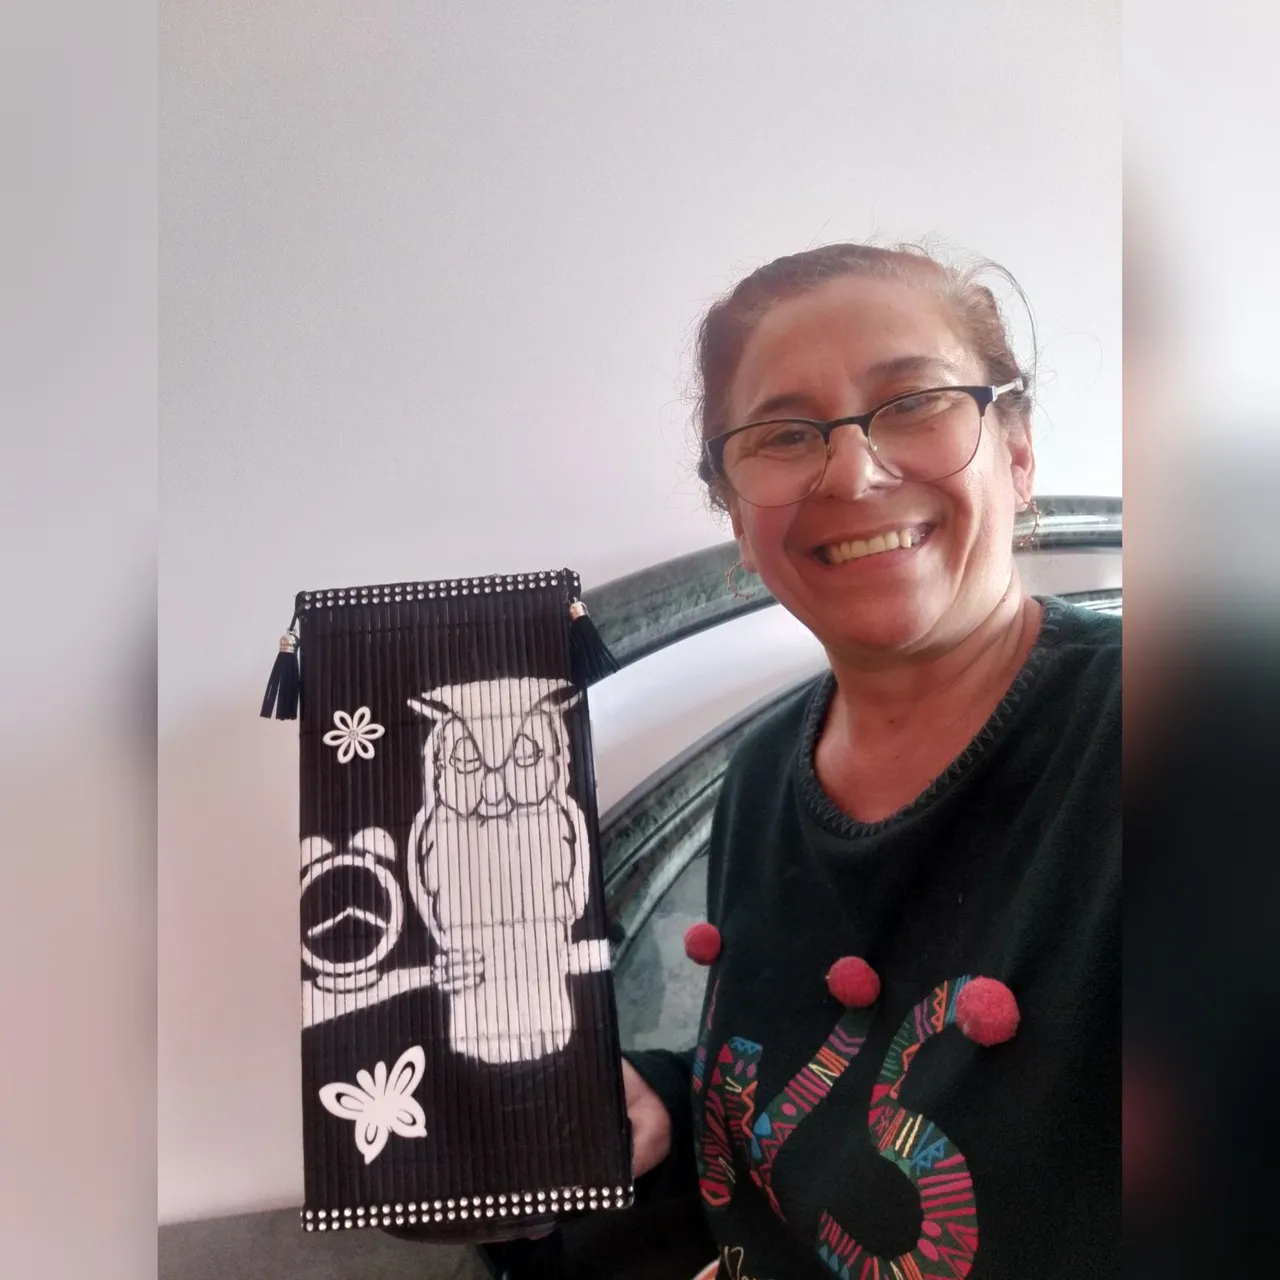
7👣. Con una plantilla que tenía guardada de un buho subido en un tronco y un reloj al lado me pareció expectacular transferirlo a los individuales. Con tirro fijamos la plantilla a los individuales y pintamos con pintura acrílica o en spray de color blanco y dejamos secar y después retiramos los tirros.
8👣. Vamos a colocar pegamento caliente por todo alrededor de las carátulas y pegamos con cuidado un individual por toda la orilla de la última carátula.Así hacemos con las dos esterillas(individuales). Y como falta un pedazo lo anexamos con el otro individual, cortamos con la tijera el pedazo que nos hace falta y por último pegar.
9👣. Después que estén ambos individuales pegados. Recuerden colocar el cable por la parte de abajo y luego pegar la esterilla o individual y pegar con silicona caliente las uniones de los individuales uno al otro. Después vamos a pegar la cinta con piedras por toda las dos orillas la de arriba y la de abajo. En este caso se coloco sólo dos líneas de cinta de pedrería que recortamos con la tijera.
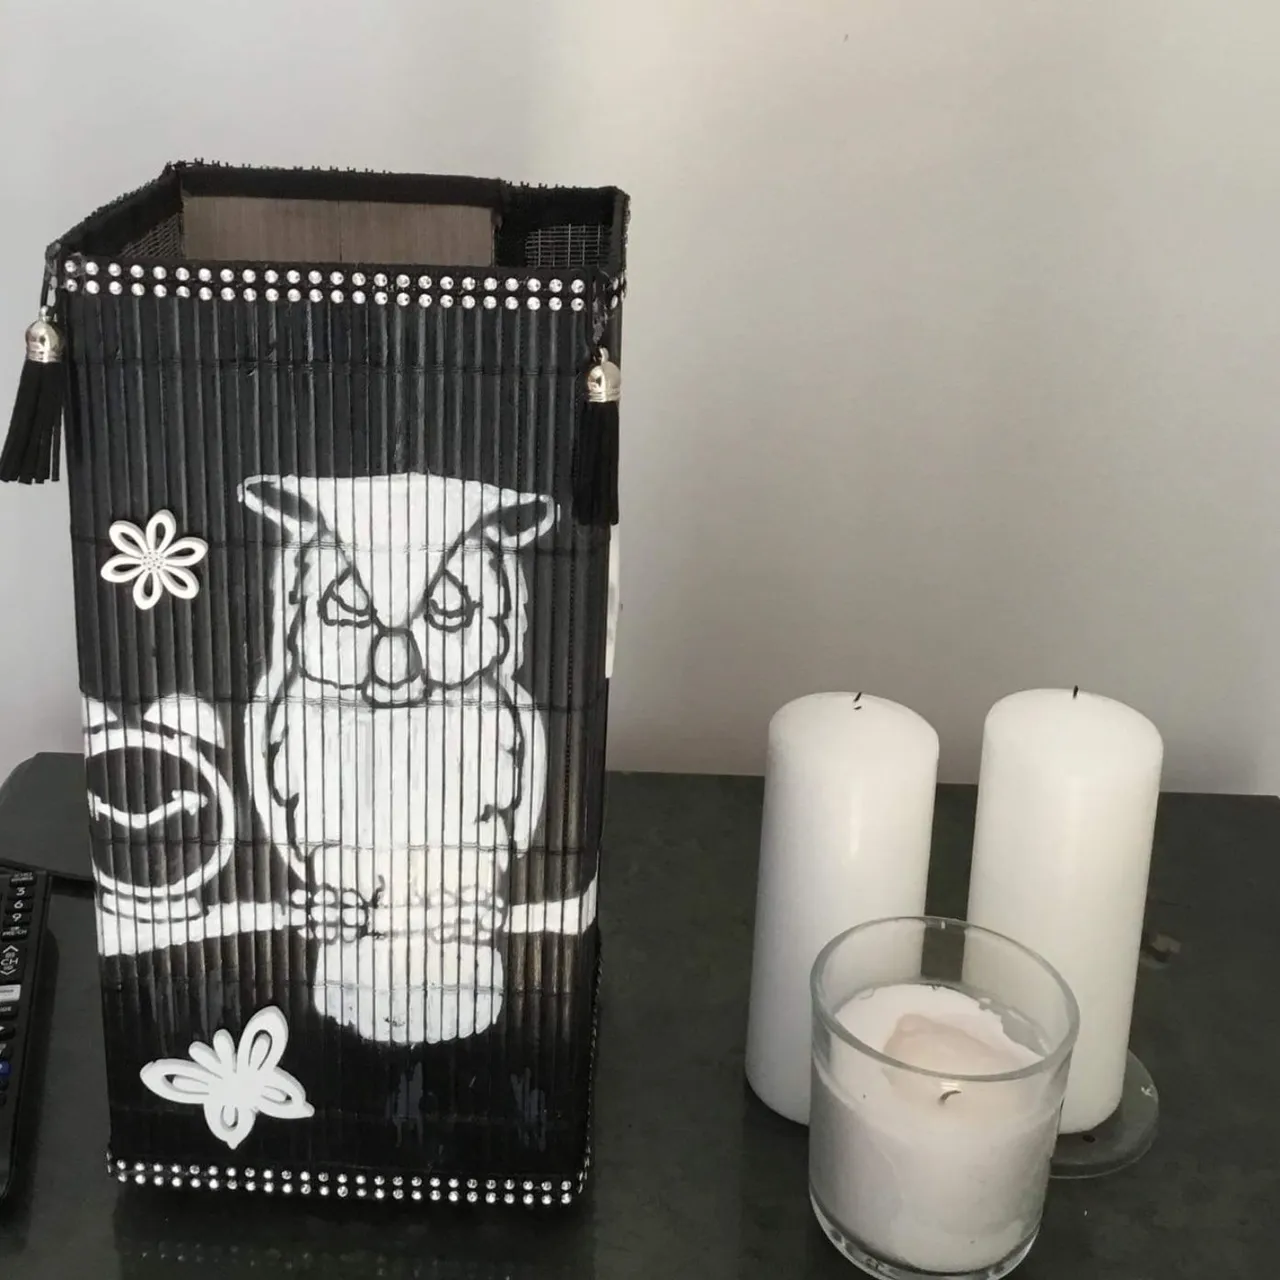
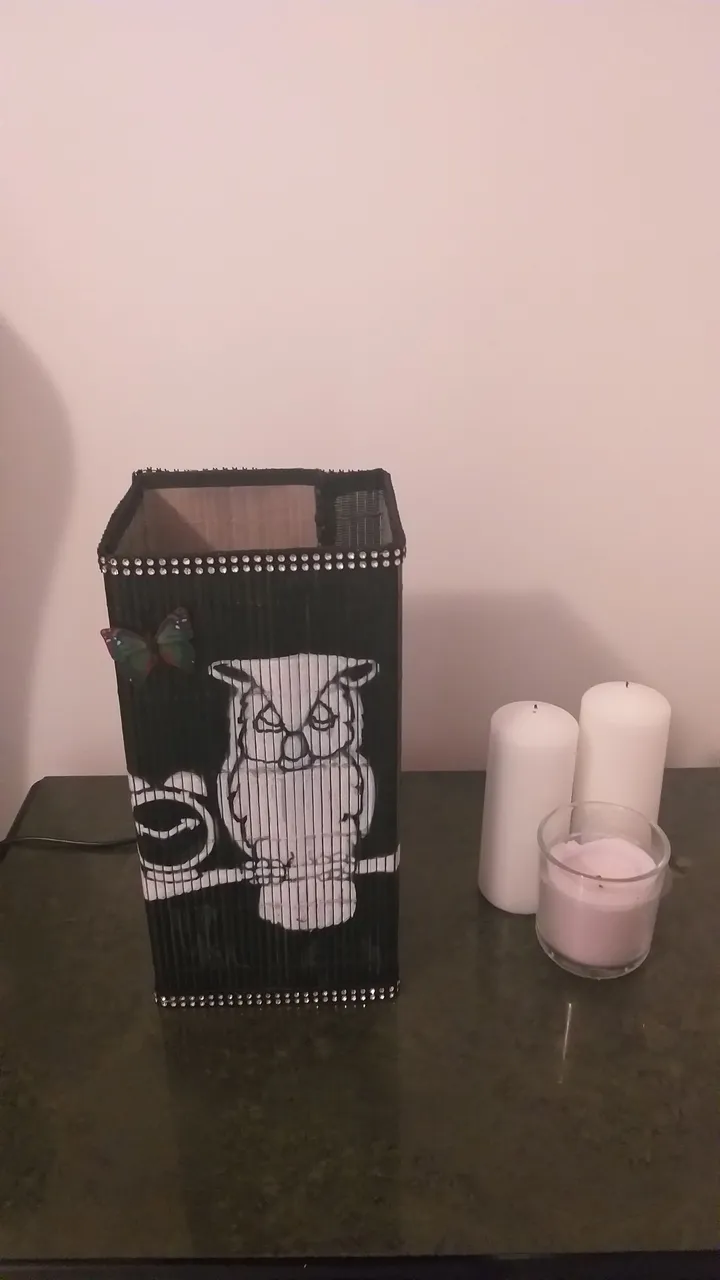
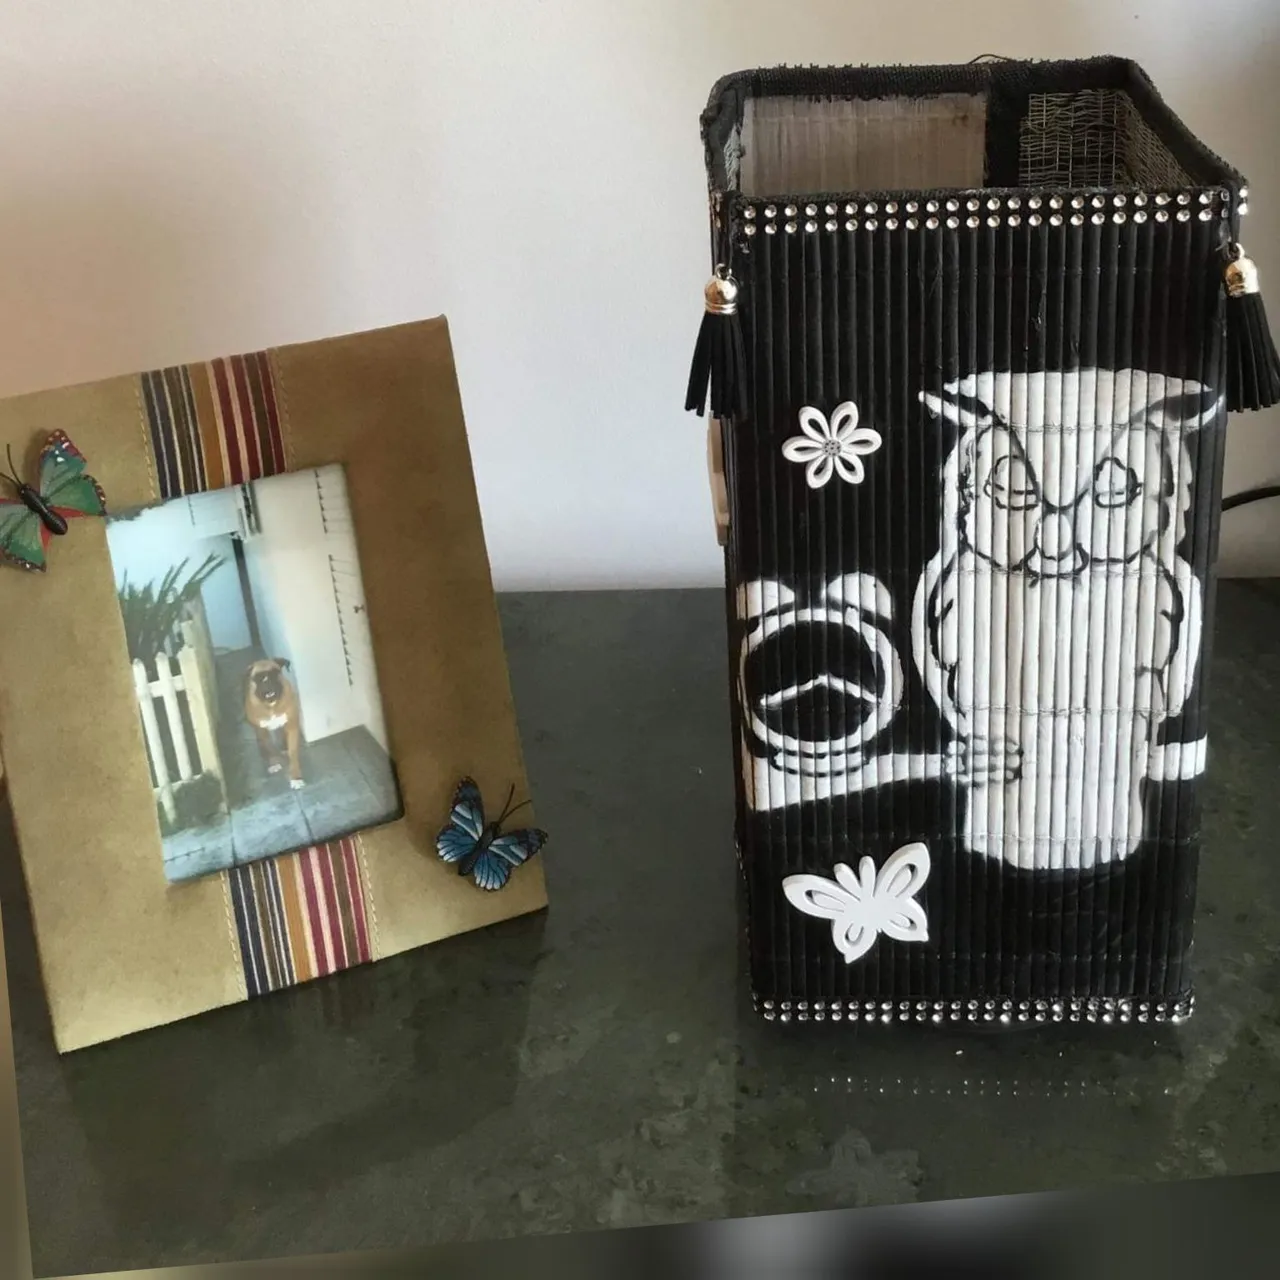
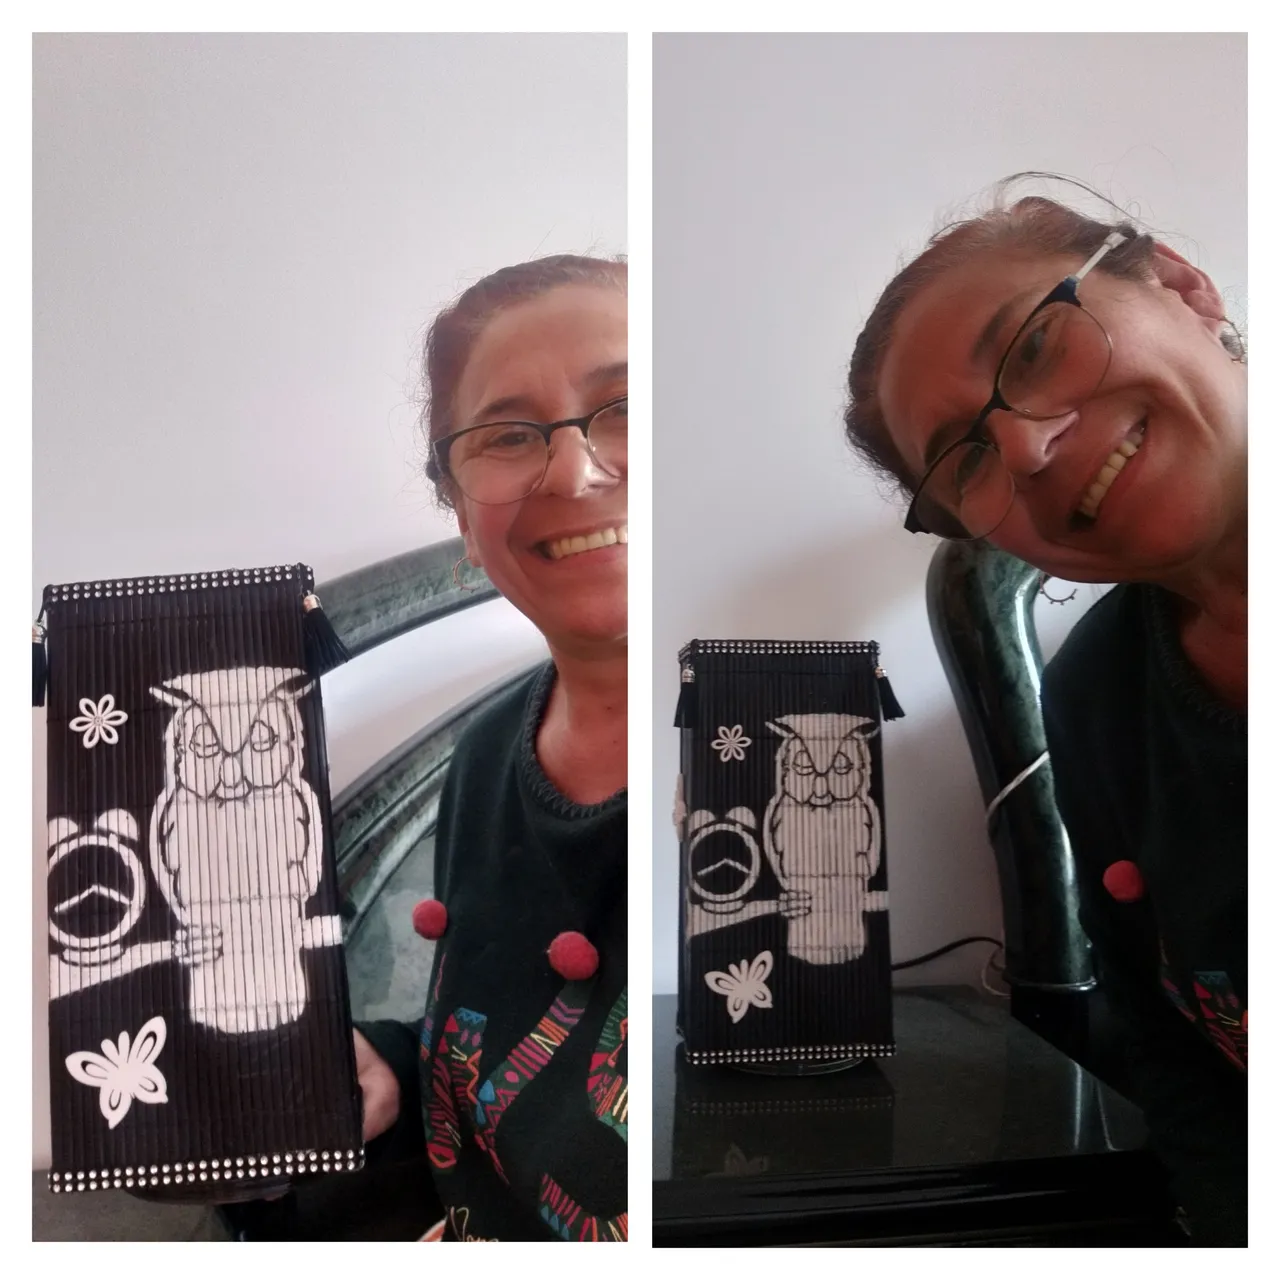
10👣. Por último decoramos al gusto; acá se decoró con unas mariposas y flores blancas, que queden muy bien con el buho y después le pegamos unas cuerdas de cortina pequeñas en las dos esquinas del frente.
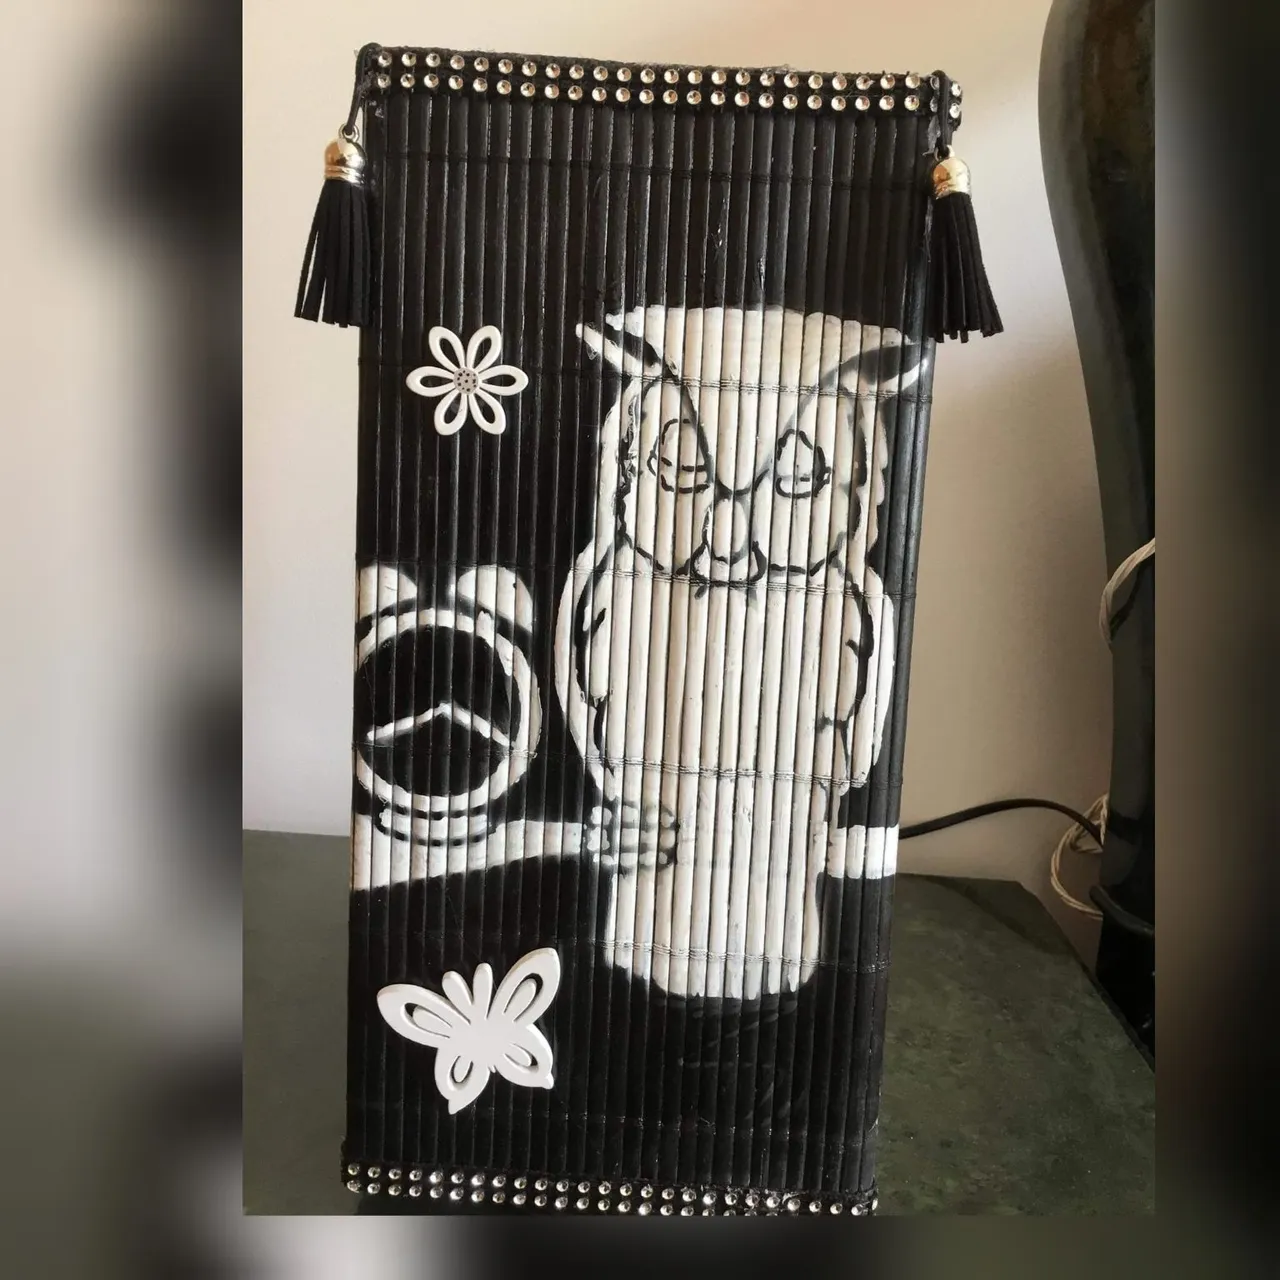
11👣. Enroscar el bombillas y encender la lámpara y listo dos lámparas echas con individuales viejos, ahora le coloqué dos bombillas de color amarillas pero les recomiendo colocar blancas se ven mucho mejor y se ahorran electricidad.
12👣. También de colocar bombillas pueden dejar las tapas de suavizante y colocar velas que para una fiesta o reunión queda excelente para decorar.
13👣. Si quieren darle altura peguen varios CD rallados y pegar por debajo en las carátulas. Darle la altura que gusten.
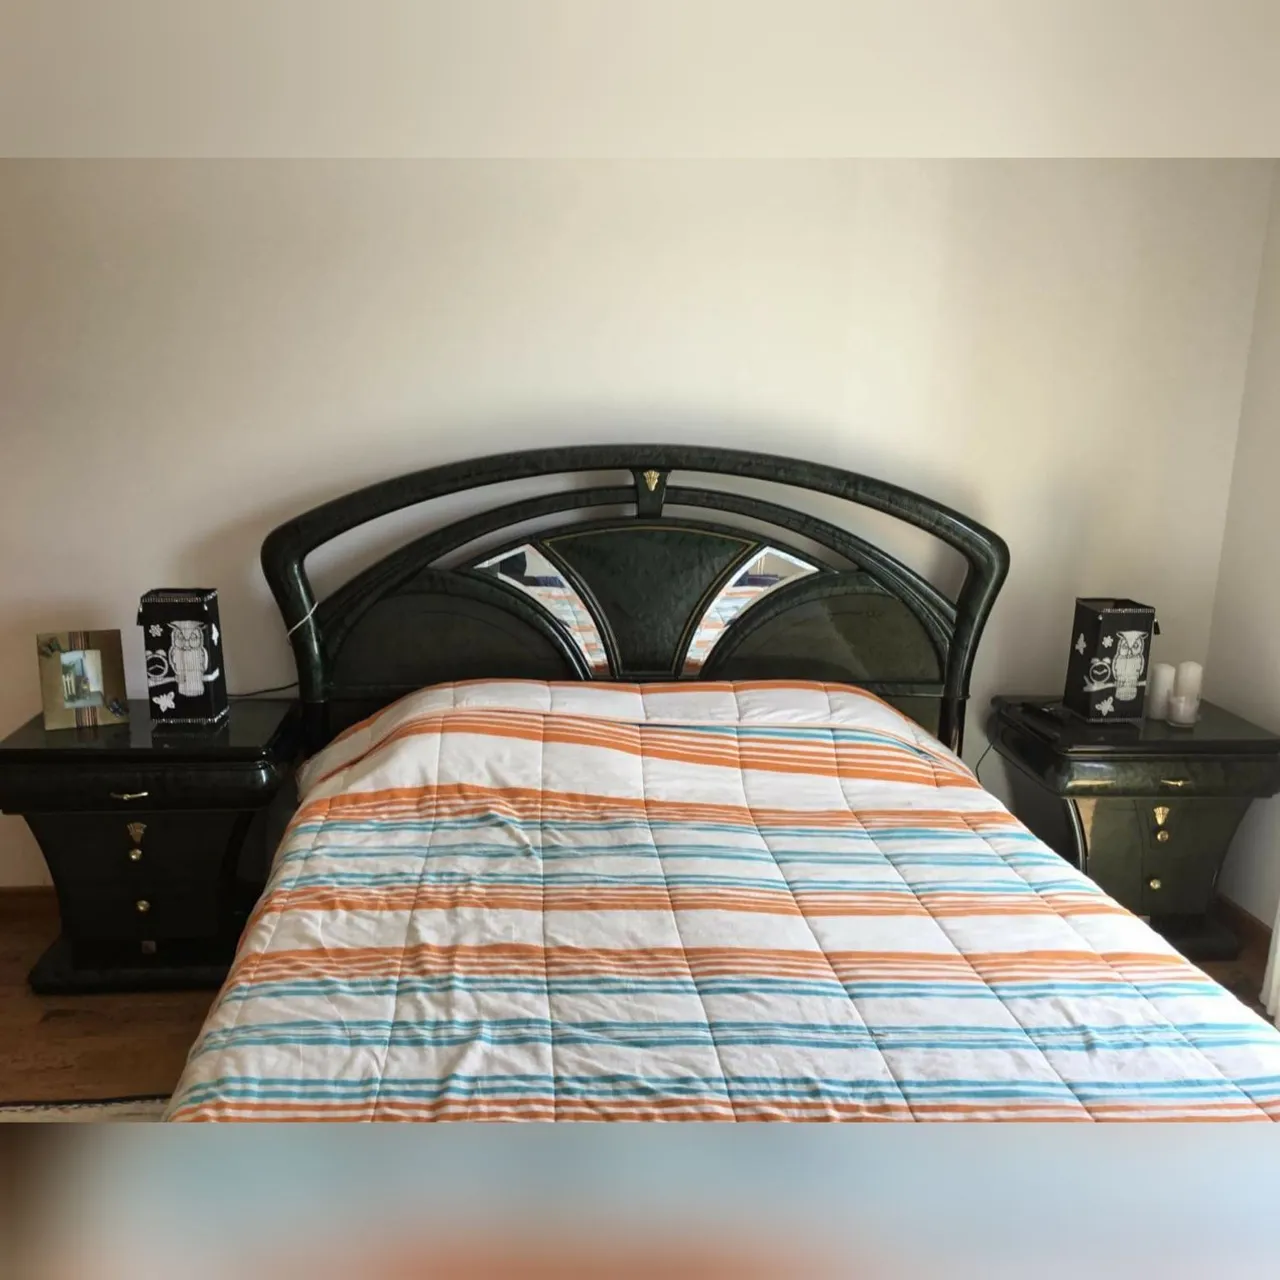
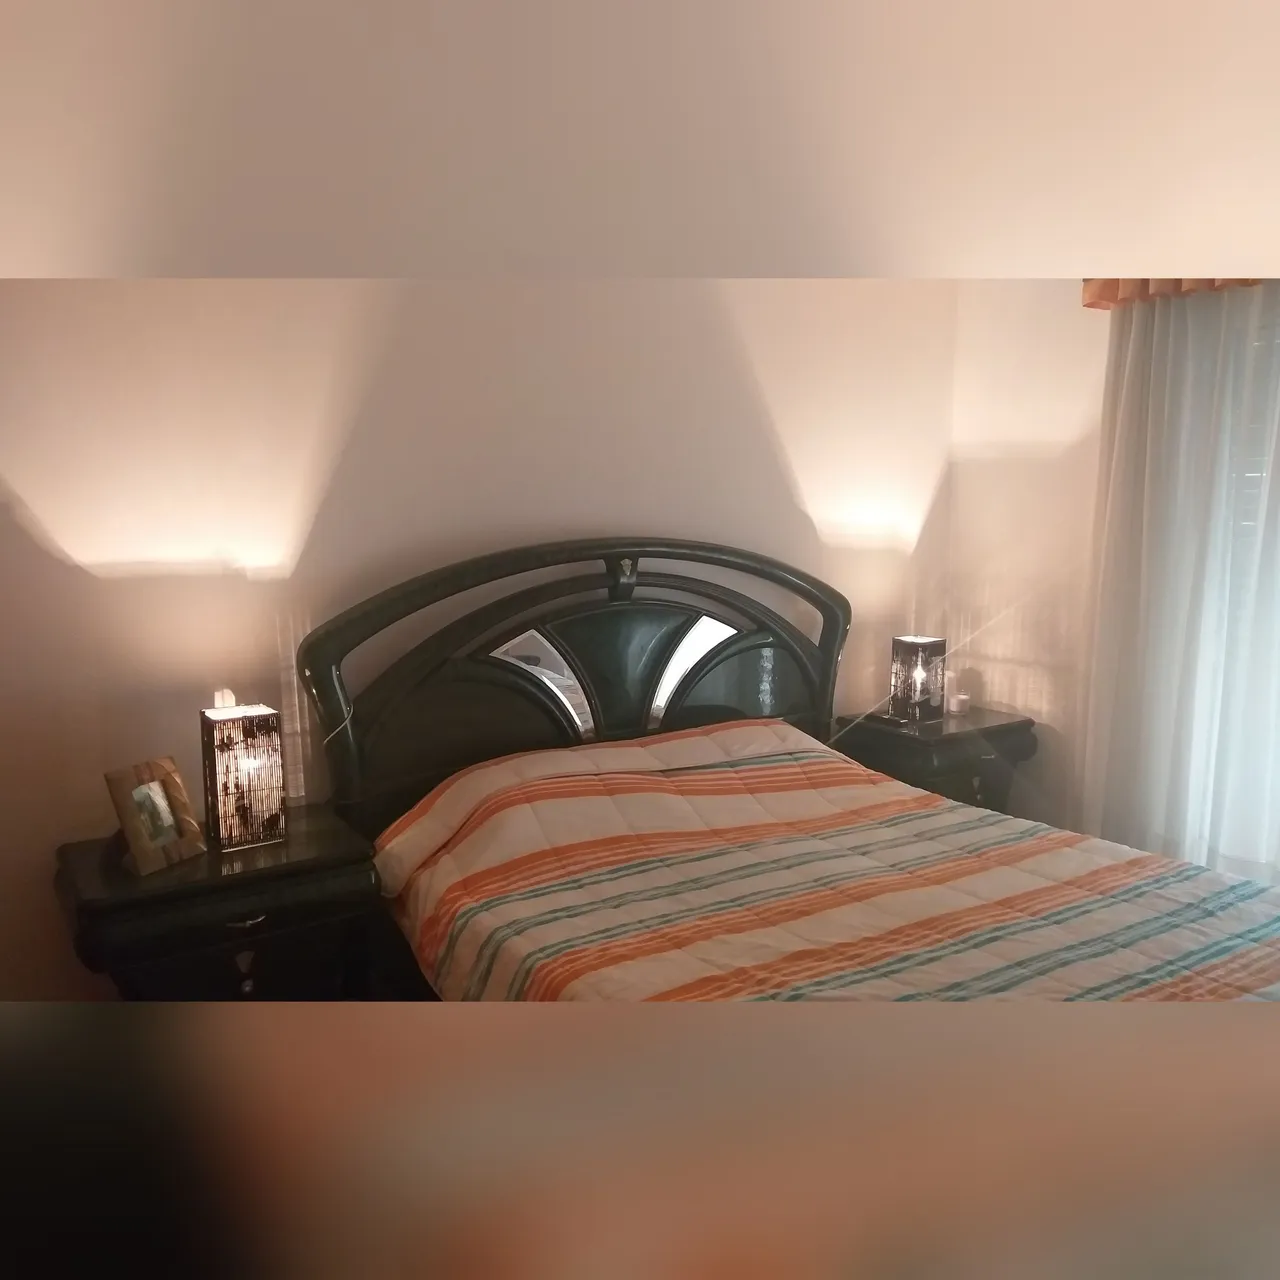
El cuarto de las visitas no tenían lámpara las mesas de los laterales y éstas lámparas quedaron muy bien allí; ya que el juego de cuarto es de color negro con un verde oscuro.
Vieron amigos como podemos darle otra oportunidad a objetos viejos que tenemos en casa y lo vamos a tirar a la basura. Espero que le haya gustado este tutorial y le sirva de concejo para hacer sus lámparas para sus mesas de noche y para decorar una fiesta o reunión, la cual la podemos decorar colocándole el motivo de la fiesta y unos velones. Aprovecho en agradecer a todos aquellos que leen mi publicaciones y dejan hermosos comentarios y un apoyo con un me gusta. Dios los bendiga
Las fotos son tomadas con mi teléfono móvil Samsung Galaxy A6 y organizadas con la aplicación GridArt.
English
Good morning friends from different communities of colmeias, receive a saudação; I hope you have a great weekend with your family.
This week is not my long day, I started to clean the kitchen cabinets and I found some American games that were broken because I used my things to play outside, because I have rugs with bad fabric and it happened to me 🤔🧐 🤯💡 like to give-lhe um new use. I thought about doing some header abajures😉 and I also thought about using CDs and layers of CDs and layers of amaciante. Então come with me that these luminaries are faceis de fazer.
The materials to use to make these beautiful lamps are:
Three individual mats
Scissor
Glue gun and hot glue sticks
6 CD covers or scratched CDs
2 softener caps
Damp kitchen cloth
Acrylic paint of the color of your choice or spray paint of the color black and white
Brush
A knife * Gunny or construction tape
Old newspapers or magazines
Two cables with plug and
sockets of lightAccessories to decorate, in this case I used ribbon with rhinestones and a template that I already had at home and other accessories.
Steps to follow:
1👣. The first thing we are going to do is clean the dust and dirt off the individual pieces with a damp cloth and let them dry. After the individual pieces are clean, place newspaper or magazine paper in the place where you are going to paint the individual pieces; in this case I painted them on the kitchen floor because it was raining😋 and then I opened the door. Here I used black spray paint, we beat the pot for 2 minutes and then we applied. Then we let it dry for 20 minutes.
2👣. After we have the three singles painted; we proceed to prepare the base of the lamps that would be the cases or covers of the CDs, removing the advertisements that the covers have.
3👣. In this step we glue three covers one on top of the other with the hot glue gun we make two pairs; remember that we are going to make two lamps.
4👣. With the black spray paint we paint the two softener caps. Take advantage when the individual ones are painted to paint the two tops.
5👣. Then we make two holes in the lids on one side with the knife and paint after the lids are dry, insert the cable, plug and socket to put the light bulb.
6👣. In this step we glue the covers in the middle of the covers (base) and then with black acrylic paint and a brush we finish painting the covers well.
7👣. With a template that I had saved of an owl perched on a trunk and a clock next to it, it seemed spectacular to me to transfer it to the individual ones. With shot we fix the template to the individual pieces and paint with white acrylic or spray paint and let dry and then remove the shots.
8👣. We are going to place hot glue all around the covers and carefully glue an individual along the edge of the last cover. This is how we do with the two mats (individuals). And since a piece is missing, we attach it to the other individual piece, cut the piece that we need with scissors and finally glue it.
9👣. After both singles are glued. Remember to place the cable at the bottom and then stick the mat or individual and glue the joints of the individual ones to each other with hot silicone. Then we are going to stick the tape with stones all over the two edges, the one above and the one below. In this case, only two lines of rhinestone tape were placed, which we cut with scissors.
10👣. Finally we decorate to taste; here it was decorated with some butterflies and white flowers, which go very well with the owl and then we glued some small curtain cords to the two front corners.
11👣. Screw in the bulbs and turn on the lamp and ready two lamps made with old placemats, now I put two yellow bulbs but I recommend putting white ones they look much better and save electricity.
12👣. They can also place light bulbs, leave the softener caps and place candles that for a party or meeting is excellent to decorate.
13👣. If you want to give it height, paste several grated CDs and paste below on the covers. Give it the height you like.
The visitors' room did not have a lamp, the side tables and these lamps were very good there; since the fourth set is black with a dark green.
Friends saw how we can give another chance to old objects that we have at home and we are going to throw them away. I hope you liked this tutorial and it serves as advice to make your lamps for your night tables and to decorate a party or meeting, which we can decorate by placing the reason for the party and some candles. I take this opportunity to thank all those who read my publications and leave beautiful comments and support with a like. God bless you
The photos are taken with my Samsung Galaxy A6 mobile phone and organized with the GridArt application.