
The other day I asked if you If you would play Hive Minecraft and I got a lot of responses that they would.
I have been doing some preparation while I am stuck in the house with Covid and will be launching Hive Minecraft really soon. This will be a heavily modded Minecraft server with millions of things to do, and not a Vanilla Minecraft experience. This means you can do things like explore space, build nuclear reactors, build complete villages to have NPCs mine on your behalf.
It also means, there will be some minimum hardware requires to be able to participate. At least initially, I have some plans I will be mentioning shortly that might be interesting to some.
You will need a modern CPU, a decent but not cutting edge GPU, and at least 8GB of ram. 16GB is ideal, but you can achieve a good experience with only 8GB.
Prior to launch, if you are interested in participating, I recommend following this guide to get everything up and running and test to make sure you are good to go. Launch is coming really soon. I've been testing with @raymondspeaks to make sure the experience isn't too difficult to get up and running and connected and can run on reasonable hardware.
Prepare for Hive Minecraft
PC Requirements
Before doing anything, make sure you have a good CPU and decent GPU and at least 8 GB of ram. While better CPU and GPU will offer a better experience, anything in the last 4-5 years will likely be more than sufficient, ram is the most critical.
Minecraft License
You will need is a Minecraft Java Edition license and a suitable PC.
You can buy a Minecraft license here $26.95.
You will need a Microsoft account to purchase a license, while you still can play with Mojang (Minecraft) accounts if you already have a license, you will receive a free Cape if you migrate to a Microsoft account.
Install Java
Even if you already have Java installed, I recommend installing the latest OpenJava Long Term Support Edition.
You can find it here.
Make sure you have version 11 and "HotSpot" selected, which should be the default with that link.
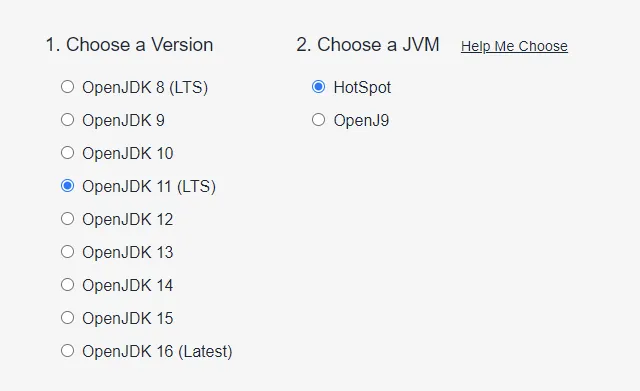
Then select the installer or binaries below for the JDK edition.
IMPORTANT: Make sure you scroll down to August 2021 release, the latest release has problems with the latest modPack.
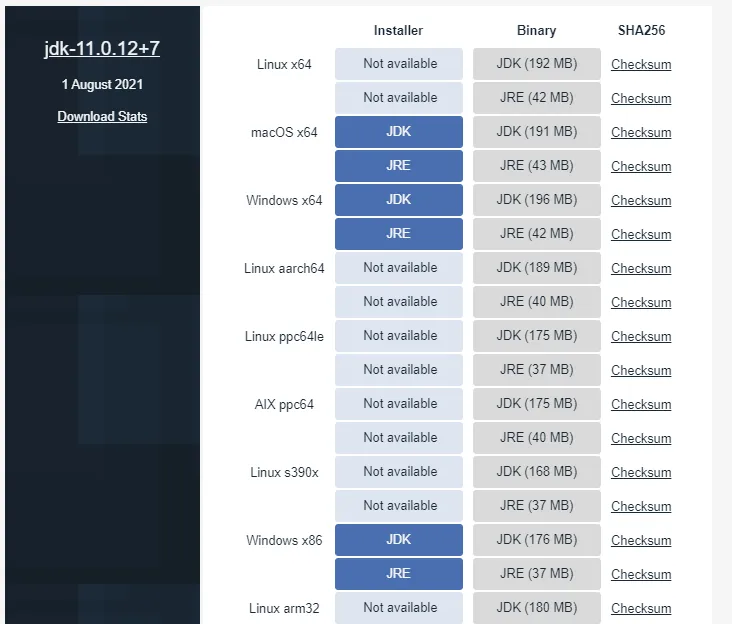
On Windows, it is as simple as downloading JRE and installing. You can also use binaries, I store them in the same folder as MultiMC under a folder called Java.
Minecraft Launcher
There are three suitable Minecraft launchers, but I recommend using MultiMC, it will provide the best experience and performance.
You can find MultiMC here
A lot of the configuration will happen in MultiMC and will persist through when switching to different Minecraft Modpacks, so let's get this configured properly.
After downloading MultiMC, you will want to put it somewhere you will be able to access easily. There is no installer and it will just sit somewhere on the file system. All ModPacks you install will sit in this folder, so if your main drive isn't a good choice, don't use your desktop.
MultiMC supports Windows, Mac, and Linux. You will however have issues if you use an M1 Mac as it isn't supported at this time for modded Minecraft.
Once you have extracted MultiMC somewhere you have plenty of space, run the MultiMC executable.
Select the OpenJava 11 JDK for your Java version and ignore the memory question for now.
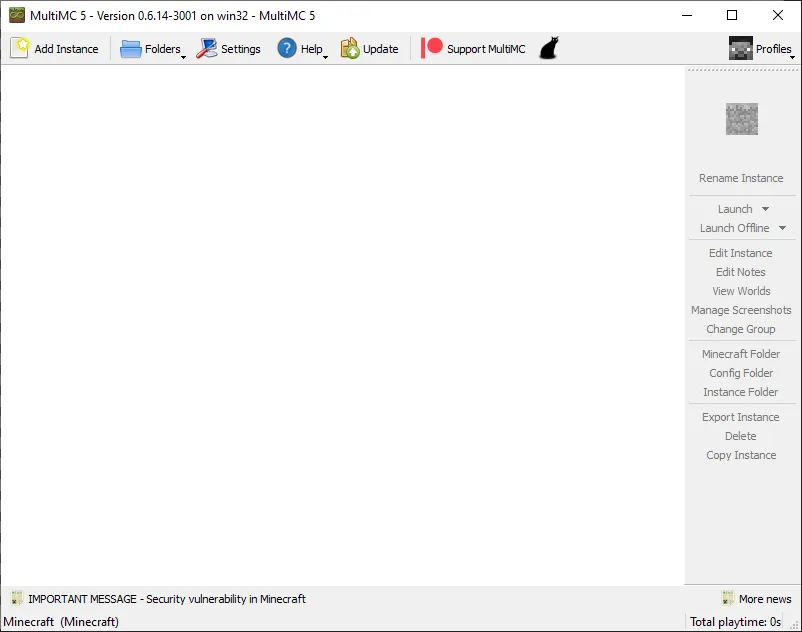
You should see something like this:
There are three things we are going to want to do.
- Configure Java defaults
- Configure Minecraft Account
- Install Modpack
Let's setup the Minecraft defaults. Click on "Settings" and then Java.
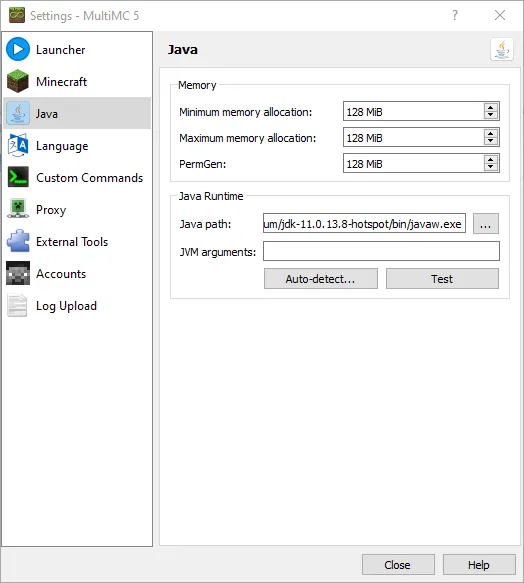
Here we want to change the min/max memory allocations and set the default Java arguments.
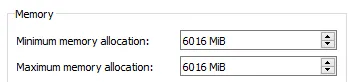
If you have 8GB of ram, I would recommend setting the min/max to 6GB.
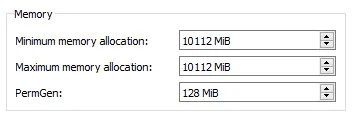
If you have 16GB of ram, I would recommend setting the min/max to 10GB.
In the JVM Arguments box, copy the following to ensure you have optimial Java options.
-XX:+UseG1GC -XX:+ParallelRefProcEnabled -XX:MaxGCPauseMillis=200 -XX:+UnlockExperimentalVMOptions -XX:+DisableExplicitGC -XX:+AlwaysPreTouch -XX:G1NewSizePercent=30 -XX:G1MaxNewSizePercent=40 -XX:G1HeapRegionSize=32M -XX:G1ReservePercent=20 -XX:G1HeapWastePercent=5 -XX:G1MixedGCCountTarget=4 -XX:InitiatingHeapOccupancyPercent=15 -XX:G1MixedGCLiveThresholdPercent=90 -XX:G1RSetUpdatingPauseTimePercent=5 -XX:SurvivorRatio=32 -XX:+PerfDisableSharedMem -XX:MaxTenuringThreshold=1 -Dusing.aikars.flags=https://mcflags.emc.gs -Daikars.new.flags=true
Finally, hit test and make sure you get a successful result to make sure everything looks good.
Click on Accounts and add your Microsoft/Mojang account for Minecraft. If you do not have one, you will need a Minecraft license to continue.
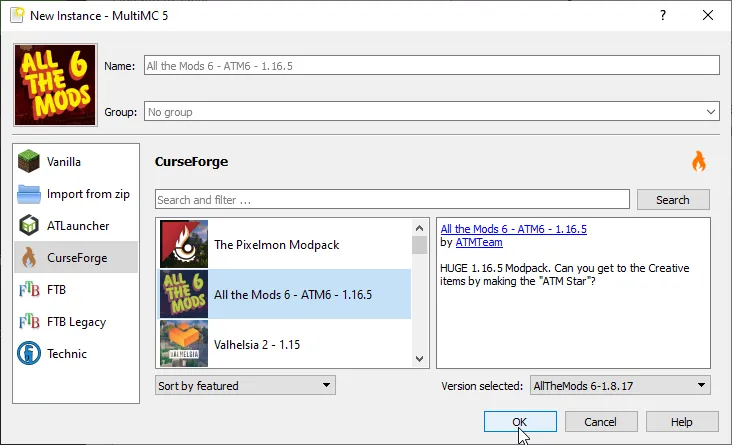
Finally you want to click Add Instance to install a modpack. We will be using the latest All the Mods 6 (ATM6 1.16.5) which you can find under CurseForge.
Click that, and hit ok.
It will take a little bit to download all the mods and configure the instance.
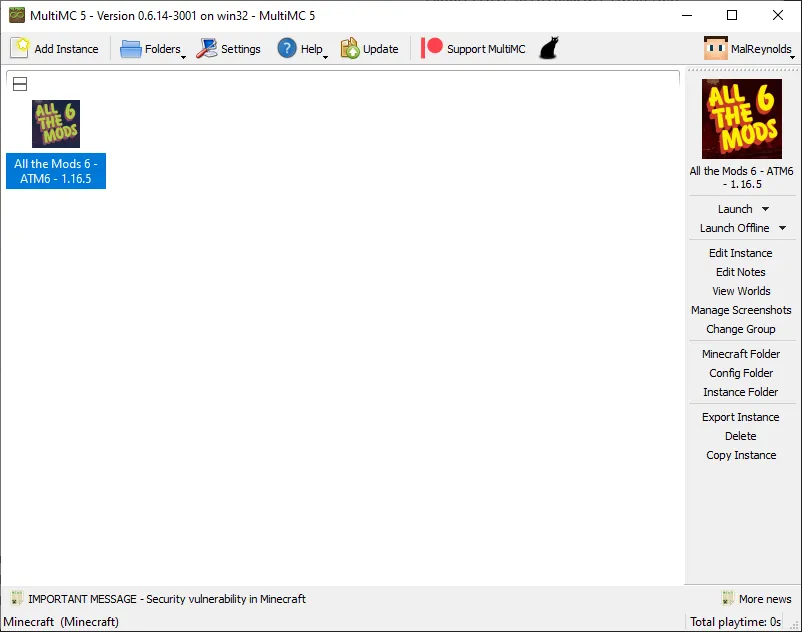
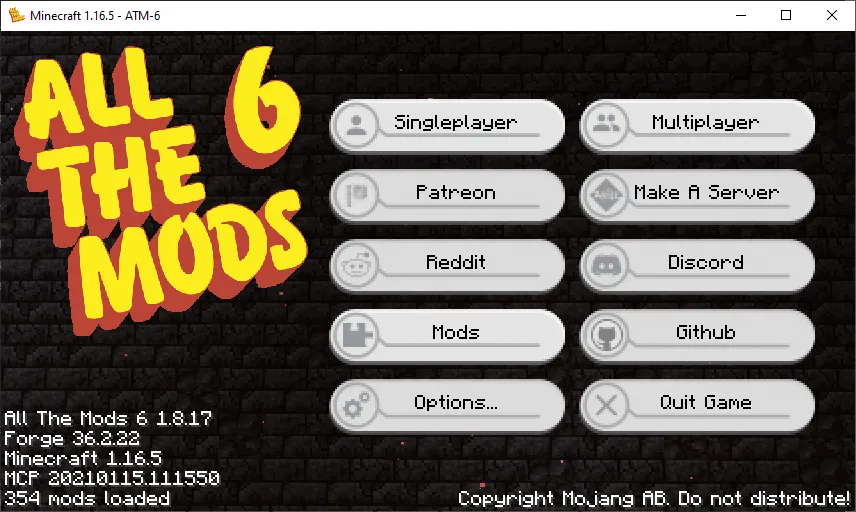
Once done, you should see this.
Just double click on the icon and wait for it to finish loading. You won't see anything popup for a few minutes, so don't click "Kill" right off. You can click edit instance to watch the Minecraft log to make sure it is still moving forward, it will be slow though, be patient.
You can The first load will be slower than normal, but the loading process is always going to be slow for such a large modpack.
Once loaded, you can start a single player world and play around for a little while and make sure everything runs well, if so, you should be able to enjoy Hive Minecraft once it launches. Server information will be provided in a future post when it is ready to launch.
You should see this if all goes well.
Don't forget to join Blockhead Games Discord where you will be able to chat with other players on the server and the community.