Hola, les enseñaré parte de los pasos que uso para realizar mis dijes de joyería, en este caso será una herradura con un caballo; pieza que va dirigida a las personas que son aficionadas al hipismo o que sencillamente les gusten los caballos o practique alguna actividad que tengan que ver con estos. Esta publicación, a pesar de que no es un paso a paso porque es complejo mostrar y explicar todo, si podrás ver la evolución de la pieza hasta que está terminada, pero aun así explicaré algunas partes claves y su por qué.
Para empezar le nombraré algunos de los materiales y herramientas que se necesitan:
🔹 Impresión o dibujo de la pieza
🔹 Lámina de latón de 0.5 mm de espesor, es lo que utilice, también se puede utilizar cobre, plata o alpaca; sobre el espesor lo pueden variar de 0.5mm a 1 mm.
🔹 Argolla de cobre. El hilo de aproximado de 1 mm de espesor.
🔹 Lijas 3M número de grano 240, 360 y 400.
🔹 Dremel con eje flexible, el dremel es necesario para abrir los huecos y en mi caso para lijar y pulir.
🔹 Mecha o broca para abrir hueco, yo usé de 0.75 mm.
🔹 Mopa de algodón para pulir.
🔹 Cera para pulir metales, yo empleé una verde que suele venir con el dremel.
🔹 Arco de segueta para joyería.
🔹 Pelos de segueta número 0/3.
🔹 Dado de embutir
🔹 Pega en barra o pega blanca.
🔹 Portalijas.
🔹 Astillero de madera para joyería o tabla con abertura de v, para poder trabajar con la lámina y el corte con la segueta.
PASOS
1 DISEÑO
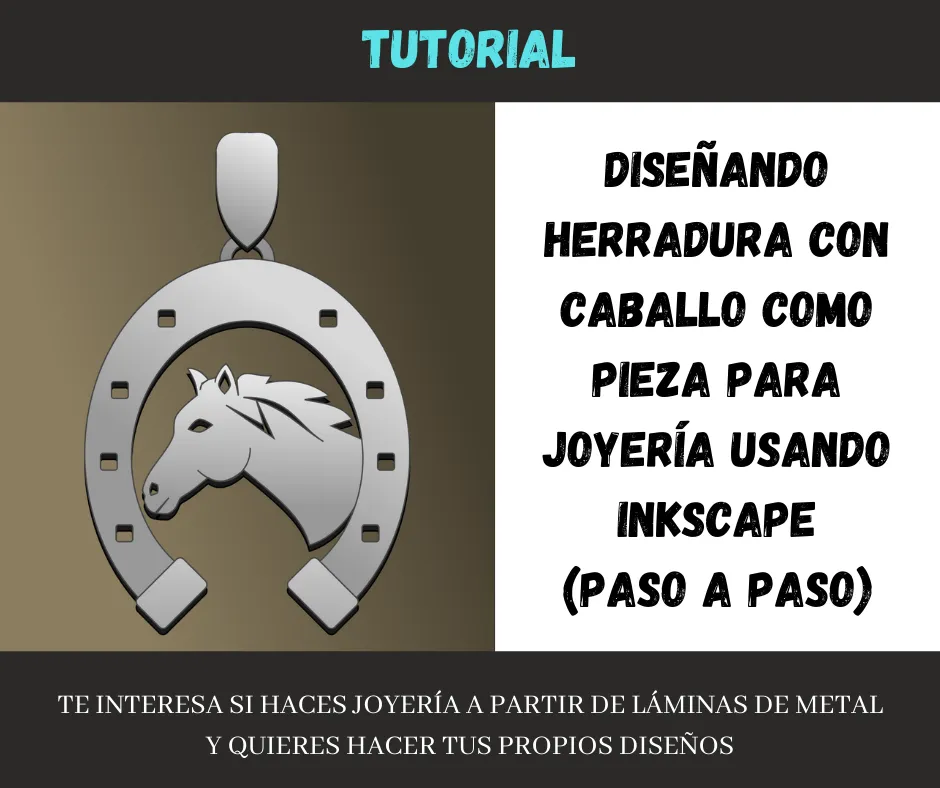
En este caso, yo elaboré el diseño como regularmente lo hago desde la computadora usando Inkscape, en la publicación del enlace te explico un poco:
@m16uellop/disenando-herradura-con-caballo-como-pieza-de-joyeria-con-inkscape-tutorial-paso-a-paso-hive-111516
Pero no hay inconveniente que lo hagas a mano sobre un papel, utilizando un lapiz... También si quieres puedes utilizar el programa de diseño de tu preferencia, pero un consejo es que trates de tener las líneas bien definidas y delgadas para que puedas guiarte bien en el corte.
2 PEGAR DISEÑO EN LA LAMINA
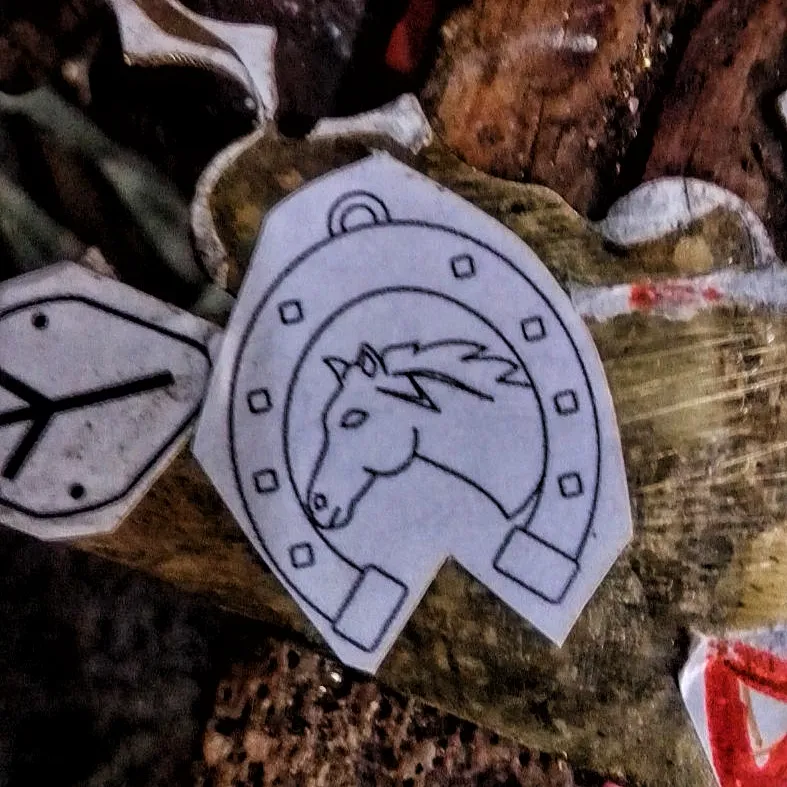
Una vez impreso en papel el dije, recorte y pegue en la lámina de bronce, previamente lijada con lija 220 para que se adhiera bien, use pega de barra que es la que acostumbro a usar, pero pega blanca también sirve, con esta última pega debes dejar que seque un poco antes de poner el diseño, para que se fije bien.
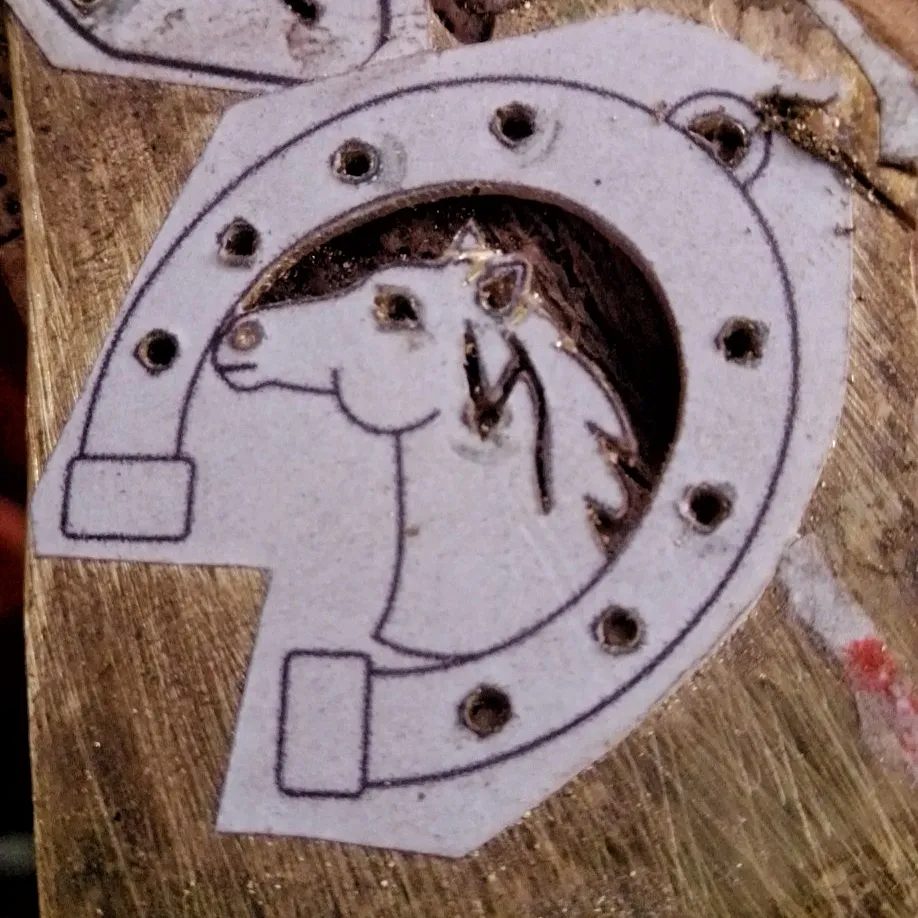
3 ABRIR HUECOS INTERNOS

Con la mecha para abrir hueco de 0;7 mm, perforó todos los espacios internos por dónde voy a hacer los cortes con la segueta. Nota que en la nariz no llegue a perforar completo, pensé que así la nariz se vería más sutil.
4 CORTAR ESPACIOS INTERNOS
Para que la pieza se pueda trabajar con mejor soporte y facilidad, siempre primero se cortan todos los espacios internos de la figura con el arco de segueta para joyería, utilizando el pelo 0/2, los cortes deben hacerse con cuidado y paciencia para no estropear la pieza.
5 CORTAR SILUETA
Luego se corta la silueta o la parte externa, igualmente con cuidado y siguiendo la línea.
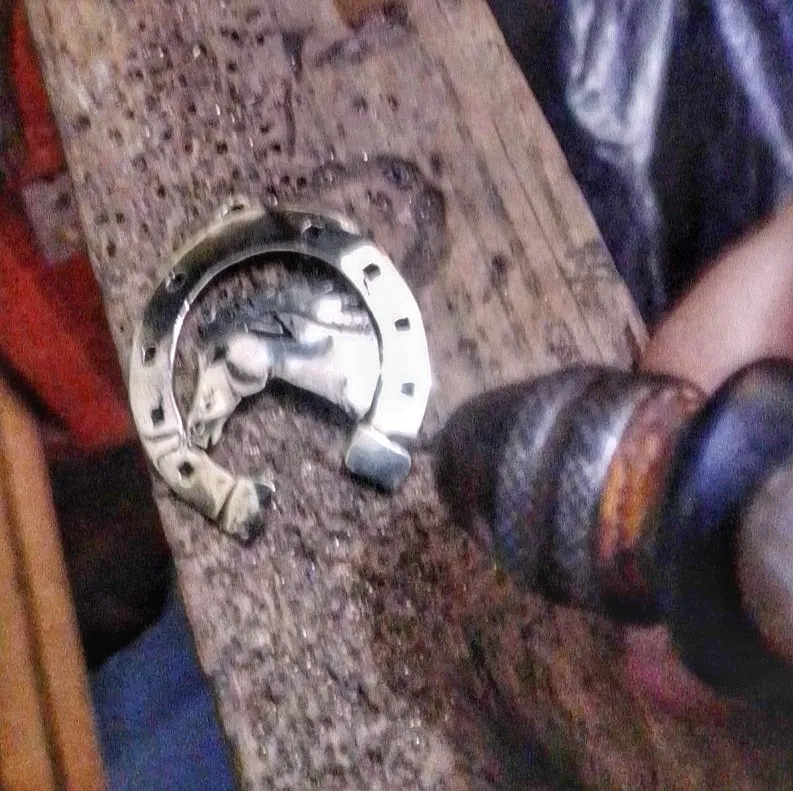
6 TRABAJAR DETALLES + LIJADO
Así se ve después de haber quitado el papel con el dibujo, cómo ven aún hay detalles que mejorar, por lo que toca con la segueta poco a poco ir corrigiendo las partes hasta que estemos convencidos de que se acerca a lo que queremos.
También si notan la oreja hay una raya, está la hice con la segueta inclinándola para hacer un corte superficial y simular una linea.
Después, aunque se me pasó tomarle foto, se debe pasar las lijas sobre la pieza en este orden de número 220, 360 y 400, es decir de grano más grueso hasta el más fino, esto se puede hacer a mano o con el Dremel usando un portalija.
7 EMBUTIR
Para darle ese acabado curvo a la superficie que tanto me gusta, es necesario utilizar el dado de embutir y con el embutidor o con un martillo de bola golpear. Este procedimiento también le da más resistencia o fortaleza a la pieza.
8 DETALLES DEL ACABADO
Así queda después de haber sido pulido, ya sea con el Dremel o el motor de banco, empleando la cera de pulir y la mopa respectiva.
Para los partes de abajo de la herradura quería darle un toque especial, así que con una mecha rota que le saque punta empecé a rallar, con esta misma punta dibuje líneas para darle detalles a la melena del caballo.
Después de esto, coloque una argolla por dónde pasará el cordón o la cadena.
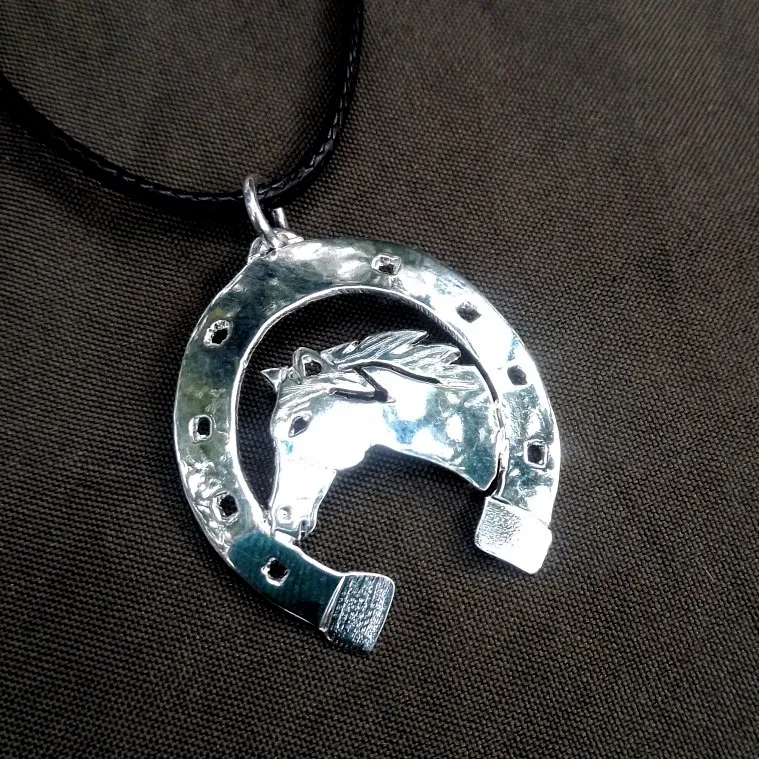
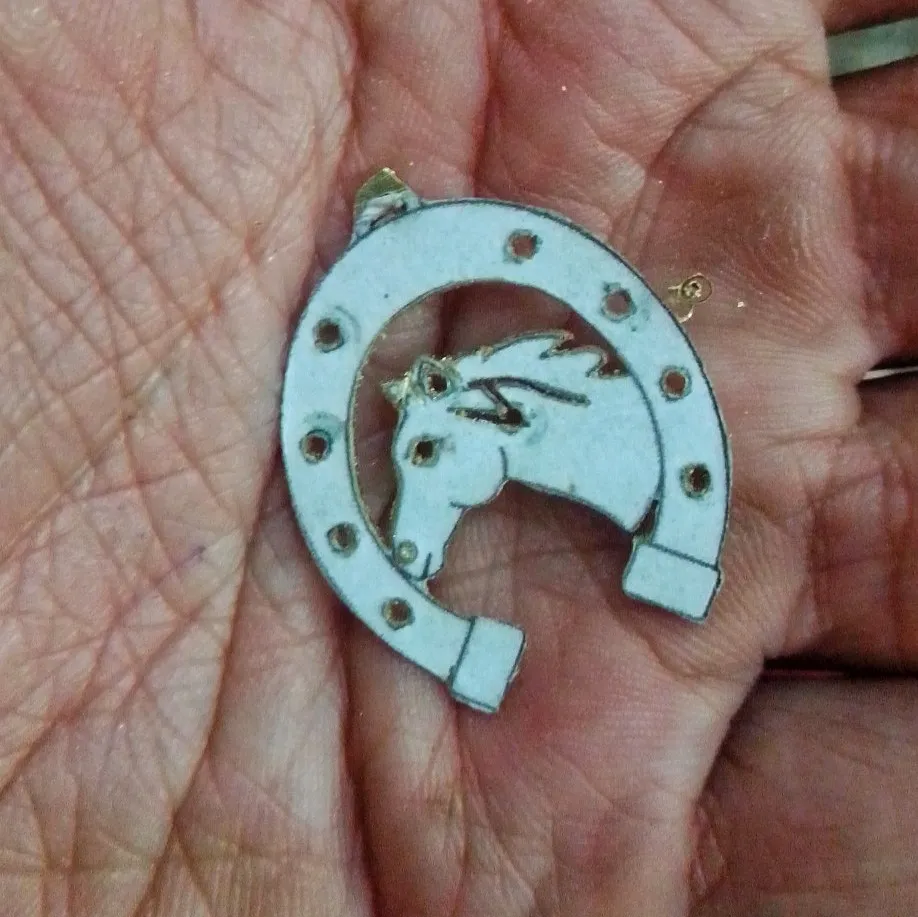
9 RESULTADO FINAL
Como la pieza es de latón, este metal es un poco caprichoso y cambia de color, puede perder brillo con el sudor o sencillamente a la gente le gusta un acabado de plata, así que lo mande a bañar en plata y en la foto puedes ver el resultado final.
Espero amigos que les haya gustado la pieza y como fue elaborada, incluso espero que hayan podido aprender algo, pronto publicaré más procesos de las piezas que elaboro.
Si quieren conocer más de mi trabajo me pueden visitar en mi Instagram:
ENGLISH (translated)
Hello, I will show you part of the steps I use to make my jewelry charms, in this case it will be a horseshoe with a horse; piece that is aimed at people who are fond of horse riding or simply like horses or practice any activity that has to do with these. This publication, although it is not a step by step because it is complex to show and explain everything, if you can see the evolution of the piece until it is finished, but still explain some key parts and why.
To start I will name you some of the materials and tools needed:
🔹 Printing or drawing the part.
🔹 Brass sheet 0.5mm thick, is what you use, you can also use copper, silver or nickel silver; on the thickness you can vary it from 0.5mm to 1mm.
🔹 Copper ring. The wire is approximately 1 mm thick.
🔹 3M sandpaper grit number 240, 360 and 400.
🔹 Dremel with flexible shaft, the dremel is necessary to open the holes and in my case for sanding and polishing.
🔹 Bit or drill bit to open hole, I used 0.75 mm.
🔹 Cotton polishing mop.
🔹 Metal polishing wax, I used a green one that usually comes with the dremel.
🔹 Jewelry saw arc.
🔹 Number 0/3 serrated hairs.
🔹 Mortising die.
🔹 Glue stick or white glue.
🔹 Sockets.
🔹 Wooden jewelry yard or board with v-opening, so you can work with the blade and the cut with the saw.
STEPS.
1 DESIGN
In this case, I made the design as I usually do from the computer using Inkscape, in the publication of the link I explain a little bit:
@m16uellop/disenando-herradura-con-caballo-como-pieza-de-joineria-con-inkscape-tutorial-step-by-step-hive-111516
But there is no problem if you do it by hand on a piece of paper, using a pencil... Also if you want you can use the design program of your choice, but a tip is to try to have the lines well defined and thin so you can guide you well in the cut.
2 PASTE DESIGN ON THE LAMINATE
Once the pendant is printed on paper, cut it out and glue it on the bronze sheet, previously sanded with 220 grit sandpaper so that it adheres well, use glue stick which is the one I usually use, but white glue also works, with this last glue you must let it dry a little before putting the design, so that it is well fixed.
3 OPEN INTERNAL HOLES
With the 0;7 mm hole cutter, I pierce all the internal spaces where I am going to make the cuts with the cutter. Note that on the nose I didn't drill all the way through, I thought it would make the nose look more subtle.
4 CUT INTERNAL SPACES
So that the piece can be worked with better support and ease, always first cut all the internal spaces of the figure with the jeweler's arc saw, using the 0/2 hair, the cuts must be made with care and patience so as not to spoil the piece.
5 CUT SILHOUETTE
Then cut the silhouette or the external part, also carefully and following the line.
6 WORK DETAILS + SANDING
This is how it looks after having removed the paper with the drawing, as you can see there are still details to improve, so it's time to correct the parts little by little with the saw until we are convinced that it is close to what we want.
Also if you notice the ear there is a stripe, I made it with the saw inclining it to make a superficial cut and simulate a line.
Then, although I forgot to take a picture, you must pass the sandpaper on the piece in this order of number 220, 360 and 400, that is to say from coarser to finer grain, this can be done by hand or with the Dremel using a sandpaper holder.
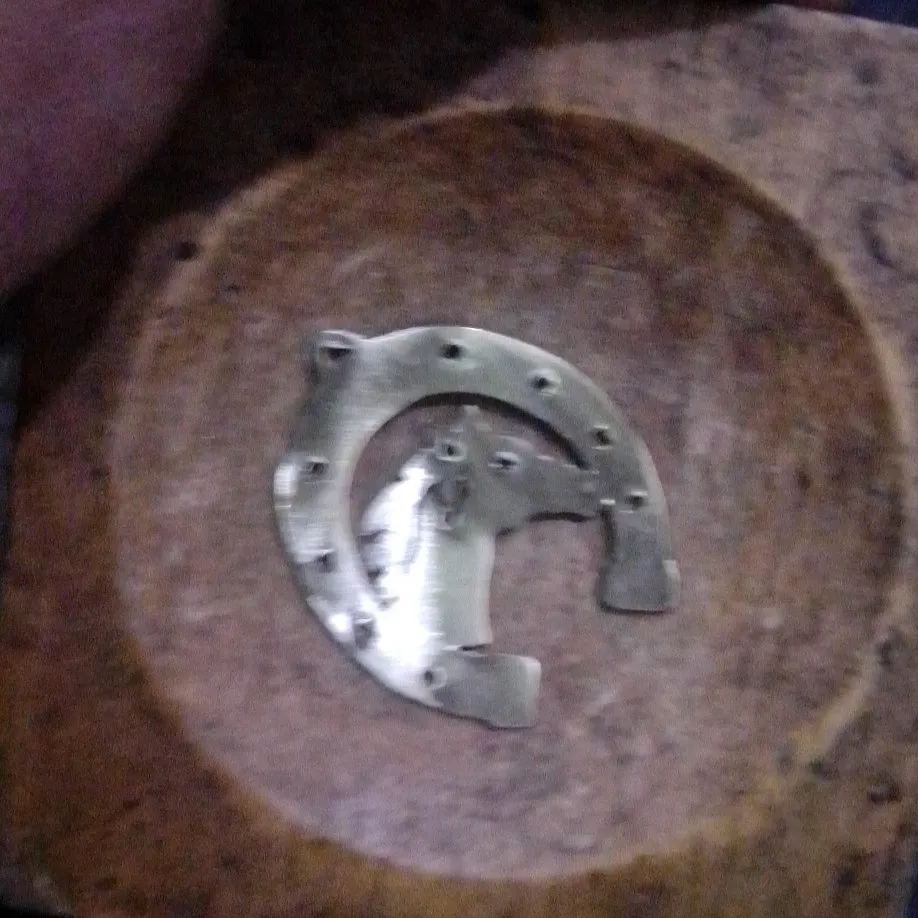
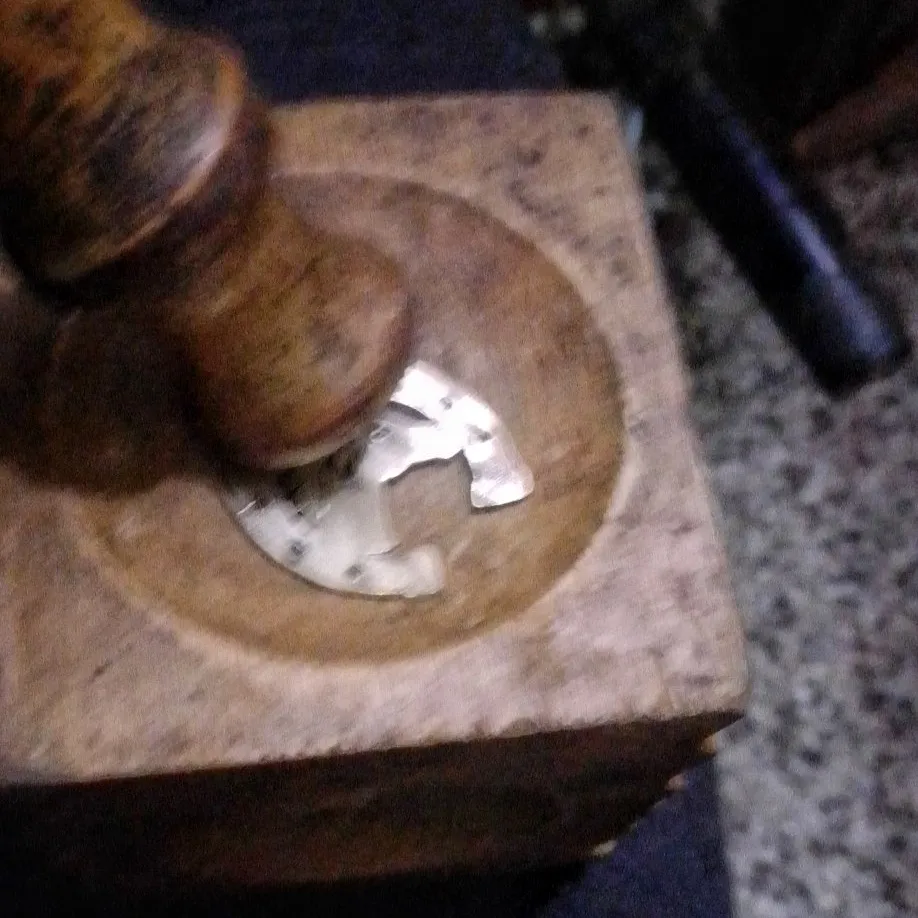
7 CURVING SURFACE
To give that curved finish to the surface that I like so much, it is necessary to use the embossing die and with the embosser or with a ball peen hammer to hit it. This procedure also gives more resistance or strength to the piece.
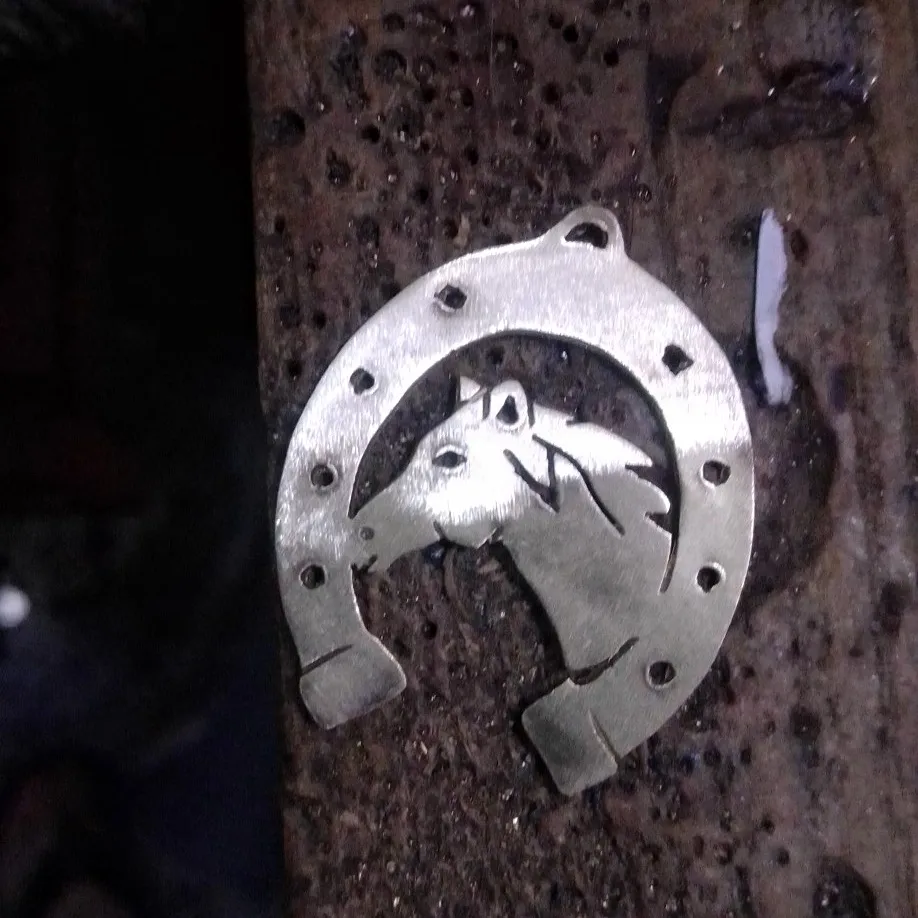
8 FINISHING DETAILS
This is how it looks after being polished, either with the Dremel or the bench motor, using the polishing wax and the respective mop.
For the lower parts of the horseshoe I wanted to give it a special touch, so with a broken bit I started to grate it, with this same bit I drew lines to give details to the horse's mane.
After this, place a ring where the cord or chain will go through.
9 FINAL RESULT
As the piece is made of brass, this metal is a bit capricious and changes color, it can lose shine with sweat or simply people like a silver finish, so I had it silver plated and in the picture you can see the final result.
I hope friends that you liked the piece and how it was made, I even hope you could learn something, soon I will publish more processes of the pieces I make.
If you want to know more about my work you can visit me on my Instagram:
Translated with www.DeepL.com/Translator (free version)